Home Blog Page 487

MomentCam apk 2.4.4 – Download Here

0
MomentCam apk 2.4.4 – Download Here

If you love photography then Moment Cam is the best option for you. MomentCam comes back with the powerful animation tool. Go for a quick selfie to see your own animation emoticons. You will be shocked with MomentCam’s revolutionary innovation. MomentCam is the first camera in the world interpreting pictures into cartoons. You want to see self at the Moment World, download MomentCam and let it surprise you. Every time you try, you meet another self, with humor, charm or just a life in your dream. Come to have to fun with MomentCam, it will make your life different.

MomentCam

Statement from MomentCam: Our app is a safe, clean and non-advertisement app. Our team is a group of young Chinese artists and computer developers with a dream and big heart to bring happiness and fun to all the people in the world. We sincerely thank you for trying our app and provide us thousands of comments. Life is beautiful and we will continue to create more fun for you!

What’s New In MomentCam:

1、We can take group “photo” now! Invite your buddies to have fun together.
2、FREE daily romantic designs to record your memory of love.
3、Hundreds of group designs in upgrade version. Take chance with your family MomentCam!
Download and Install MomentCam apk:
Step1: Download MomentCam apk on your device.
Step2: Now goto downloads folder on your device and tap on the MomentCam apk file.
Step3: Now select the package installer and tap ok.
Wait for few seconds you installation will be complete the you can enjoy MomentCam on you Android device.

Install Android 4.4.2 KitKat on Samsung Galaxy Ace using CM 11

1
Install Android 4.4.2 KitKat on Samsung Galaxy Ace using CM 11

Samsung’s low end and pretty old Android device Galaxy Ace stopped at Android 2.3 Ginger Bread, the software updates may have stopped but the device is still widely being used all over the world as it is one of the very earlier Android runners. As long as we have the awesome developers present around, we may not think of and end to the tweaks made with the devices. Something similar is here for the Galaxy Ace owners today. We’ve found a great and working CyanogenMod 11 based Android 4.4.2 KitKat custom ROM for Galaxy Ace. Yes, KitKat for Galaxy Ace. I’m sure that after reading it, you won’t be able to wait that much, so let’s move forward.

The only thing you need to keep in mind before you head towards installation guide is, although this is a stable custom ROM and there are less chances of bugs, but still we highly recommend you to proceed if you’re familiar with custom ROM flashing and if you actually know what you’re doing. We do not recommend non-familiar people to flash custom ROMs as long as they are good with flashing and tweaking.Galaxy Ace

Here are some instructions that you must follow in order to get this ROM installed.

      1. This ROM is only for Samsung Galaxy ACE S5830. Do not try this on any other device, please check your device’s model inSettings > About Device > Model.
      2. Your device must have a custom recovery installed. Follow our full guide here to install CWM.
      3. Your device’s battery should be charged at least over 60%. This is highly recommended in order to prevent any power issues during the flashing process.
      4. Backup everything as flashing this firmware will wipe your phone completely.
      5. Make sure that you backup your important media content, ContactsCall Logs & Messages. This is highly recommended just in case something goes wrong and you need to reset your phone.
      6. If you already have rooted your device, use Titanium Backup to back up all your important apps + system data. Also if you are using a custom recovery, it is recommended that you backup your current system using that first. [Just for the sake of safety.]
      7. Make an EFS backup of your phone before you flash this ROM.
      8. You need enough confidence to flash this ROM.
      9. Alright! Go ahead and flash the custom firmware, follow this guide to the letter.

Disclaimer: The methods involved in flashing custom roms and rooting your phone are highly custom and may result in bricking your device, and has nothing to do with Google orthe device manufacturer that is SAMSUNG in our case. Also rooting your device will void its warranty and you will be no longer eligible for any kind of free device services by the manufacturers/warranty providers. In case of any mishap we may not be held responsible. Follow these instructions to the letter to avoid any mishap or bricking. Make sure that whatever you do, you are doing it at your own responsibility.

Make sure that you read all the instructions carefully, let’s move forward to the 2nd page for ROM flashing guide.

Pages: Page 1 > Page 2

Root Samsung Galaxy S4 LTE I9505 Running Android 4.3 XXUEML9 Jelly Bean[Guide]

0
Root Samsung Galaxy S4 LTE I9505 Running Android 4.3 XXUEML9 Jelly Bean[Guide]

Before going any further, Follow the link to update your Galaxy S4 I9505 to XXUEML9 Android 4.3 Jelly Bean:

Update Galaxy S4 LTE I9505 To Android 4.3 XXUEML9 Jelly Bean Official Firmware[Guide]

Now that you have Updated your device to Android 4.3 Jelly Bean and as per rule of installing Official Firmware, your device will loose its root access. The only way to get it back, is by rooting it again. Rooting allows you to get full control over your device, Stock apps and mods are good, but installing Custom Mods gives you better support and great battery life, you might need to delete some Stock apps from the device, a non-rooted device can’t do that, but a rooted one has the power to remove stock apps too.

samsung-galaxy-s-4-i9500-black-mist

If you are familiar with Odin and it’s working, then this tutorial might not be difficult for you. Otherwise read the whole tutorial first before trying it on your device. In this Article, we will show you How To Root Samsung Galaxy S4 LTE I9505 Running Android 4.3 XXUEML9 Jelly Bean.But before we begin, Make sure that:

  1. That you have a Well Charged Battery, 60%-80% is better.
  2. Back-Up all your important ContactsCall Logs & Messages.It is highly recommended in case of any mishap or data loss to back up all your important data.
  3. Back-Up your Mobiles EFS DataHow To Restore and Back-Up EFS Data On Samsung Galaxy Devices.
  4. Check your device model, Go To Setting > About and Make sure that it is GT-I9505.
  5. Do-not try it on Galaxy S4 I9500.

Disclaimer: 

The methods involved in flashing custom roms and rooting your phone is highly custom and may result in bricking your device,and has nothing to do with Google or the device manufacturers which is Samsung in our case. In case of any mishap we may not be held responsible. Follow these instructions to the letter to avoid any mishap or bricking. Make sure that whatever you do, you are doing it at your own responsibility.

Warning:

Rooting an Android device Voids Manufacturers Warranty, this Rooting method for Galaxy S4 LTE I9505 is tested and Found Working. If you don’t follow the Procedure as we instructed, You only are responsible for your device. We won’t be liable if any damage occurs to your device and/or its components.

All done and good, let’s head towards the Next page to See, How you can Root Samsung Galaxy S4 I9505.

Pages: Page 1 | Page 2

Download Java JDK 7 Offline Installer For Windows 7/8/XP.

0
Download Java JDK 7 Offline Installer For Windows 7/8/XP.

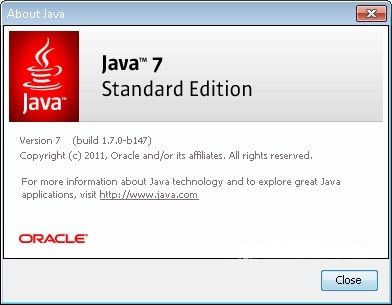
Java is the most popular and most used Programming language, developed and manage by the same Oracle Organization. It is needed to be installed and run on Mobile or PC, if you want to use its compatible applications. If you are looking for an offline installer of Java, then you have arrived at the best place. We will provide you the best source to download Java Offline installer. It is totally free and installation is trouble free.

Java-JDK-Offline-Installer

List Of features Of Java JDK 7 Offline Installer:

  • String in switch statement
  • Improvements in exception handling
  • Diamond operator
  • New byte-codes are introduced
  • Number specification in binary form is simplified
  • Try with resource
  • Underscore in literals
  • Strings can be used in switch statements
  • Use of underscore in numbers is allowed
  • Multi catch feature
  • Final rethrow feature
  • Multi core ready API
  • Other languages are also supported well
  • Automatic type conversion
  • Improved management of multi threads statements
  • More flexible than before
  • Watch services
  • Xrender Pipeline
  • Improved support for Translucent and shaped Windows
  • Language support improvements
  • New networking features
  • UI improvements
  • Performance improvements
  • Security bugs fixed

Download-Java-JDK-Offline-Installer-Latest-Version (1)

Download Java JDK Offline Installer [Latest Version].

As I mentioned above, that i will give you the best source to download Java Offline installer, Download the One for your Operating System and Install it like any normal Application and Enjoy.

Sony Ericsson PC Suite Free Download For Windows 8/7/XP.

2
Sony Ericsson PC Suite Free Download For Windows 8/7/XP.

Now a days, PC Suite is one of the most important things when it comes to transferring Data between Smartphone and PC. Despite that today Smartphones offers Mass Storage, yet it is better to transfer data using PC Suite, apart from Data transferring it also updates your device software and make and restore back-up of all your data. Sony’s Users experienced difficulty while connecting their device with PC. That is why we will show you how to download and install Sony PC Suite, so all the Sony users can easily connect their device with PC. This software is free and available at Official Website.

Install-Sony-Ericsson-PC-Suite-Easily1

Necessary Requirements:

  • Processor with clock speed 500 MHz or above
  • PC with RAM of 256 MB or above
  • HDD (Hard disk drive) free space of 1.5 GB
  • Screen resolution of 800 x 600 pixels Super VGA or higher resolution monitor
  • Download Sony Ericsson PC Suite.

Install Sony Ericsson PC Suite.

  • If you have already installed the Sony Ericsson PC Suite, uninstall it to install this updated one.
  • Download it from Official Site.
  • Double Click the .exe file to run the process.
  • If there is any Message regarding the update of Current version, Click Yes, but it will require to restart the PC.

screen-shot-mobile-phone1

  • That is it, now all you need to do is to Connect your device with PC and see whether it works or not.

Download .Net Framework 4.5 Offline Installer For Windows 7/8/Vista.

1
Download .Net Framework 4.5 Offline Installer For Windows 7/8/Vista.

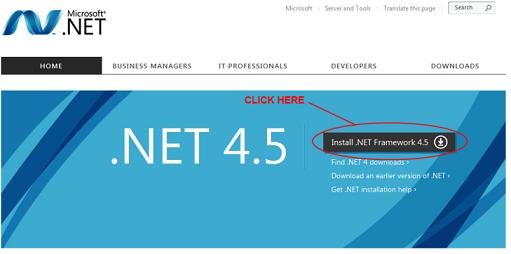
While on my way to search the Web for new things, I came across something very common but weird and unusual, users were actually asking for Offline installer of .Net Framework 4.5, because when they try to update the .Net Framework, they receive an error saying the .Net Framework 4.5 cannot be installed, Please contact your Administrator. While there are applications who demands nothing less than .Net Framework 4.5, those who can’t able to install it are in deep trouble. So, a little bit more search helped me in finding the solution of this problem. One thing that i hate is the people out there don’t search official sites much, they mostly rely on third party and thus can’t able to make things right on time. If you are having problems with installing .Net Framework 4.5, here is the complete guide to install .Net Framework 4.5 using an offline installer on Windows 7/8/Vista.

Microsoft-.net-framework-4.5-standalone

Necessary Requirements:

Download and Install .Net Framework 4.5.

  1. Download the .Net Framework 4.5 from the above links.
  2. Now insert the Disc of Windows in CD/DVD ROM or if you are using USB insert it.
  3. Once the Windows pick up the CD/DVD/USB, Open Command prompt.
  4. Type in the Following Command: Dism /online / enable-feature /featurename:NetFx3 /All /Source:F:\sources\sxs /LimitAccess
  5. Here F means the drive which is CD/DVD or USB Drive.
  6. Now there are Two possibilities, after applying this command, either the set-up will run on it’s own and .Net Framework 4.5 will be installed on your Windows. Or if this didn’t happen, Manually install the .Net Framework 4.5 from the installer using the downloaded file.

install-and-download-.net-framework

I hope this will help you in installing .Net Framework 4.5 in your Windows, if you have any problem ,feel free to comment below.

Fix Blue Screen Error in Windows 7 Using Hotfix.

0
Fix Blue Screen Error in Windows 7 Using Hotfix.

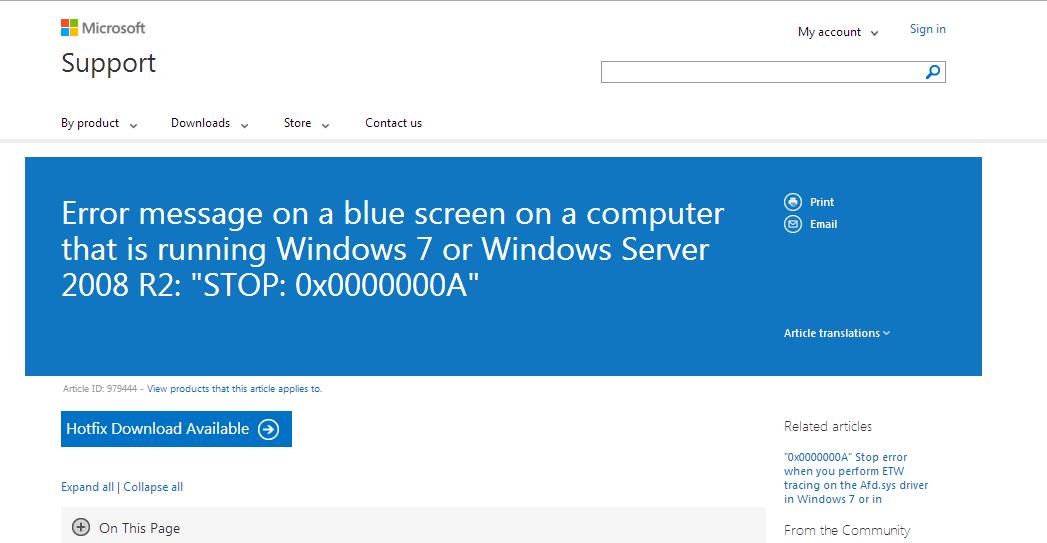
I am pretty sure that most of people out there have witnessed Blue Screen Error, now most of those who recently purchased a high end Computer, or the one who are using Windows 8, they might have probably not witnessing this error anymore. But running Windows 7 on an Average PC can still cause this error. Today we will show you how to fix it. For this problem, Microsoft has given the official update of Hotfix, which can solve this issue. Here is how you can download and install Hotfix.

Blue-Screen-error-Windows-71

Fix Blue Screen Error Using Hotfix.

  • Open your browser and Follow the Link:
  1. Go to Microsoft support.
  • Locate the Download Hotfix available option and click it.

Screenshot_1

  • In the next window, type your E-Mail and Security code and Click Request Hotfix.

Screenshot_2

  • You will receive the Confirmation Message in your E-Mail.
  • After that you can easily get the update of Hotfix and Solve the Blue Screen Error.

Now that was a Standard method released by Microsoft, but there are some other ways that can solve this issue.

1. Scanning for Malware:

Virus and Malwares can cause the Blue Screen error as they consume not only Space but also interrupts the performance. All you need to do is to download any Anti-Virus/Malware Remover Program and Let it scan your Computer.

2. Security Updates:

Microsoft release the Security Patches via Windows update every month, regularly updating these patches can increase the PC Performance and stop the Blue Screen error.

3. Fix Hard-Drive Errors:

This problem can also be caused by Hardware malfunction, your hard disk can play an important role in this thing. What you need to do is to Open My Computer > Right Click any drive and Select Properties. Form Properties, select Tools tab and Click Check Now.

These are some important tips that can help you solving the Blue Screen Error, if you have nay problem, feel free to comment us.

Install Official Android 4.3 10.4.B.0.569 Firmware on Xperia Z C6602

0
Install Official Android 4.3 10.4.B.0.569 Firmware on Xperia Z C6602

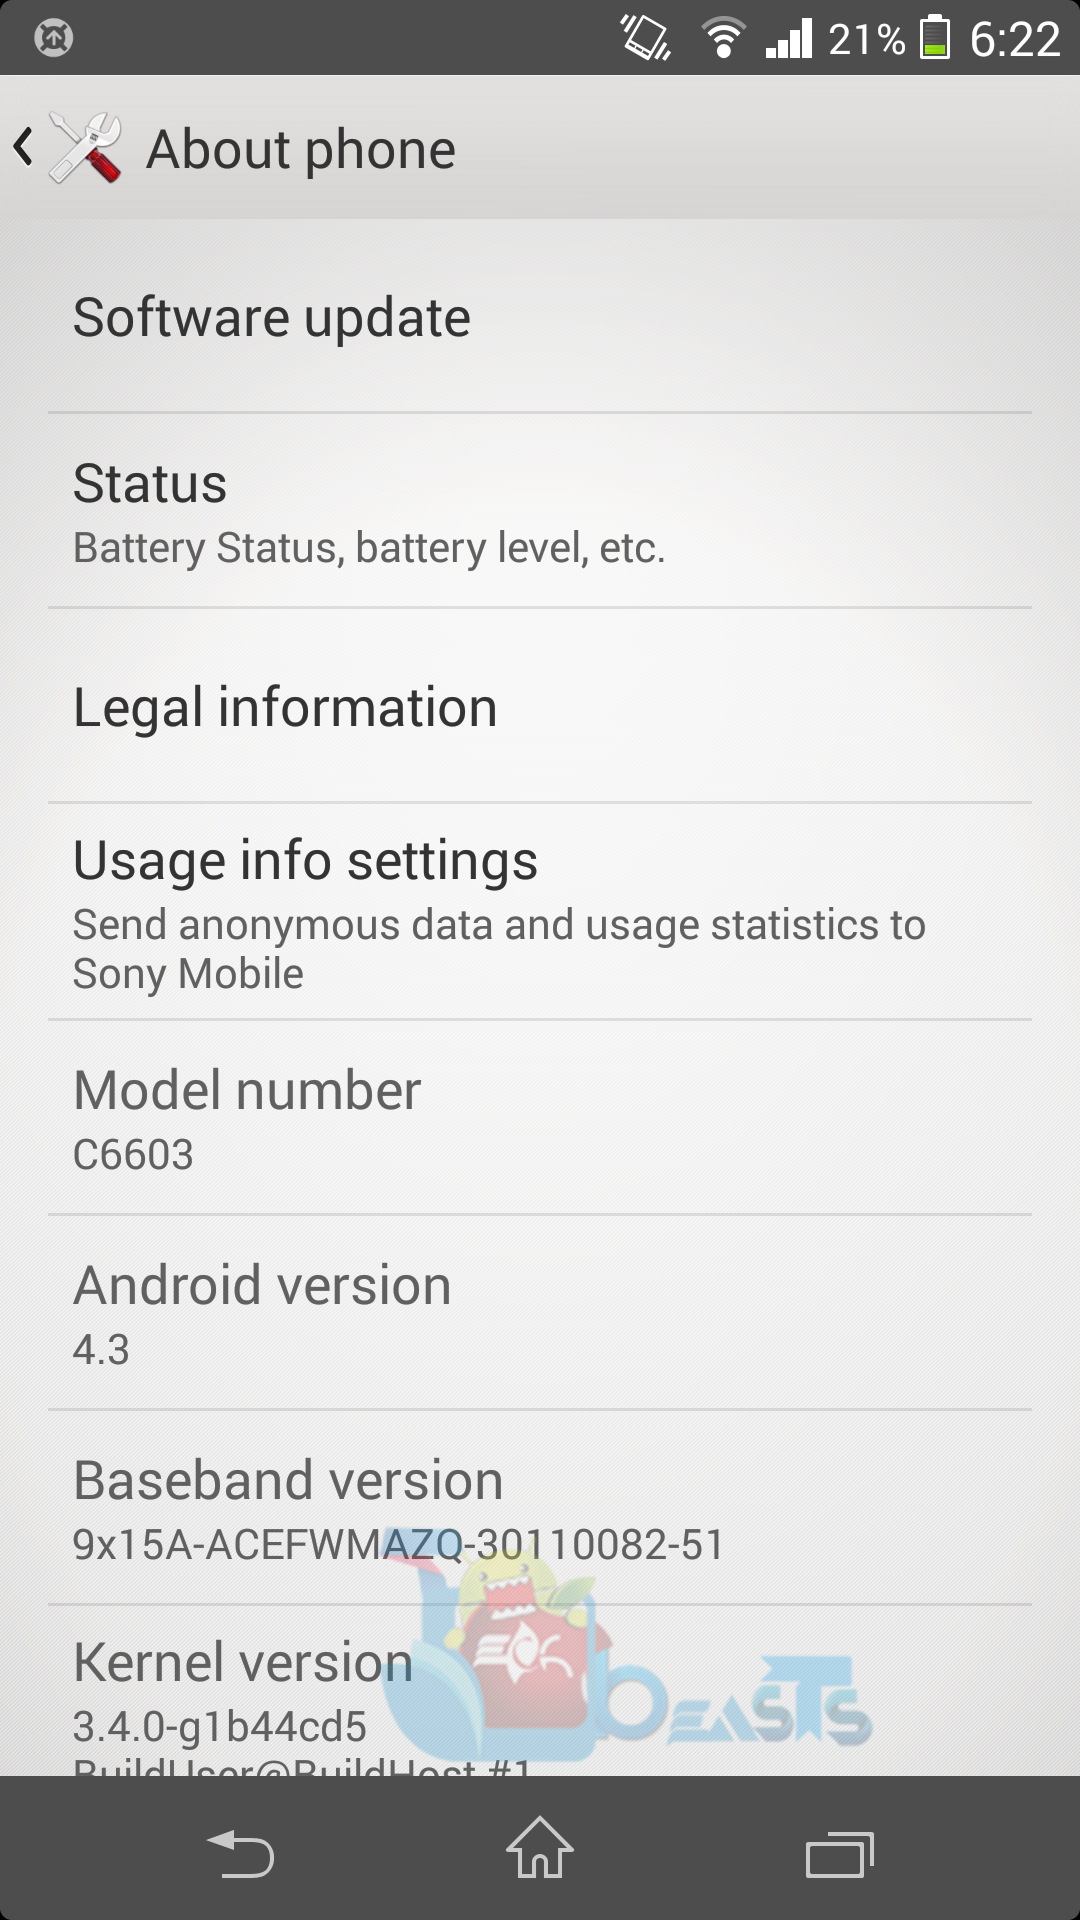
Screenshot_1Sony recently updated it’s Xperia Z lineup to Android 4.3 as it promised. The new update packed up performance enhancements, bug fixes and atop of these Sony changed the Camera UI of Xperia Z to that of the Xperia Z1 and some other minor changes were seen as well. Earlier, we posted methods and firmware links for Xperia Z C6603 and postponed the update’s post for C6602 on our site as there was no firmware available for the device specifically. I managed to get my hands on the official firmware for Xperia Z C6602, download it and then upload on a faster server in order to make it easier for you guys. So, in the following post I’ve embed the firmware download link and also explained how to install this Android 4.3 Jelly Bean 10.4.B.0.569 firmware on your Sony Xperia Z C6602.

Before you move forward, I highly recommend you to check the OTA update or check it through Sony PC Companion and try updating your device. In case you are unable to update through both these, you may head towards the method I explained below and install the firmware manually on your Xperia C6602.


Here are some important instructions and  pre-requisites:

      1. This guide is only for Sony Xperia Z C6602. Please check your device model first in Settings > About Device > Model.
      2. You must have installed Sony Flashtool – Get the full guide here. Also Install drivers using Flashtool > Drivers > Flashtool-drivers > Flashtool, Xperia Z, Fastboot, select all these and install.
      3. Your phone’s battery must be charged at least over 60%. This is highly recommended in order to prevent any power issues during the process.
      4. Make sure that you backup your media content,contactscall logs and text messages.  This is important and recommended so that in case you decide to wipe your phone during the flashing process, you can get all of your data back using the backup.
      5. Enable USB debugging mode on your device. To do so, tap settings>developer options>USB debugging. If you can’t find developer options in settings, then tap settings > about device and tap “Build Number” for 7 times and you’ll get em’ activated under settings.
      6. To flash this firmware, you do not need to root your device, you do not need to unlock the bootloader. All you need is, your device must be the one mentioned and must be running on Android 4.2.2 Jelly Bean or Android 4.1.2 Jelly Bean.
      7. Download the firmware file properly.
      8. Use the OEM data cable to connect your phone to your PC. Using any other data cable might cause connection problems.
      9. Alright! Follow this guide to the letter in order to prevent any mishap.

How to Install Android 4.3 Jelly Bean 10.4.B.0.569 on Xperia Z C6602:

    1. Before moving forward, please make sure that you’ve read the pre requisites and ensure that you are set to go ahead.
      1. Download the latest firmware Android 4.3 Jelly Bean 10.4.B.0.569 FTF file.
      2. Copy the file and paste in Flashtool>Firmwares folder.
      3. Open Flashtool.exe now.
      4. Hit the small lightening button on the top left corner and select Flashmode.
      5. Select the FTF firmware file that you placed in the Firmware folder. 
      6. From the right side, select what do you want to wipe. Data, cache and apps log, all wipes are recommended, however, you may select if you don’t want.
      7. Click on OK, and it will start preparing the firmware for flashing. This may take a little while to load.
      8. As soon as the firmware is loaded, it will prompt you to attach the phone by turning it off and keeping the back key press.
      9. For Xperia ZVolume Down key will do the job of back key, just turn off your phone, keep the Volume Down key pressedand plug in the data cable.
      10. As soon as the phone is detected in Flashmode, the firmware will start flashing, Do not leave the Volume Down key until the process is complete.
      11. As soon as you see “Flashing ended or Finished Flashing” leave the Volume Down key, plug the cable out and reboot.
      12. That’s All! Congrats! You’ve installed latest Android 4.3 Jelly Bean on your Xperia Z C6602. Enjoy
      1. Xperia Z 4 (7)Xperia Z 4 (6)Xperia Z 4 (5)Xperia Z 4 (4)Xperia Z 4 (3)Xperia Z 4 (1)Xperia Z 4 (2)

That’s All! In case you got any queries/suggestions or face any difficulties regarding this post, please feel free to stop by the comment box below and drop us your message. We will respond as quick as we can.

Download Android 4.4.2 KitKat for Galaxy Note 3

2
Download Android 4.4.2 KitKat for Galaxy Note 3

In Our Last Post, we told you that Samsung has released the Firmware of Android 4.4.2 Kit-Kat for Galaxy Note 3 SM-N900. We have seen leaked Firmware of Android 4.4 Kit-Kat for Galaxy S4 too, but Samsung is making official rollouts now. So, don’t misjudge it just because it has leaked word in it. The Benchmark result of Galaxy S4 and Galaxy Note 3 has improved after updating them to Android 4.4 Kit-Kat. After hearing the News that Samsung has released Android 4.4 Kit-Kat for Exynos Note 3, everyone who owns it must have gotten pretty excited to get their hands on it and try it on their device, before anyone else could. But hear me out before updating it.Screenshot_2014-01-20-22-02-05

The Android 4.4.2 Brings Minor changes in terms of UI/Looks, the only noticeable change is the White Status Bar icons been given a good boost after the latest update and Benchmark scores has also increase. Along with that, As I mentioned above, the Performance has been improved, to add more to it, Samsung has implemented Camera button on the lockscreen. Checkout our post to know more about this update.

The Software Roll-out has begun and it will reach your country as Soon as Possible, but if your device is Carrier Locked, then it will take more time, because the updates should be improved first then it will be released by Samsung then released by Carrier. Furthermore, If you want to know, that you have received the update or not. Go to Settings > About > Software update. If it still don’t work, Change the Date to next day and then Try it, if it is still a failure, then your region is still in line for the update.era Shortcut directly on Lock-Screen for Quick Access, Lock-Screen has been improved the delay sometimes in Lock-Screen has removed, last but non least, Album Art shows up in Full-Screen while playing Music. In Landscape mode, Samsung Keyboard has been improved which makes Gesture typing easy and much Faster. Core Android 4.4.2 KitKat Changes Include: Wireless Printing, New Emojs Support, Choice Between Stock Messages App and Hangouts SMS and more.

Just in case you’re looking for the download link, or you’re unable to download the latest firmware from Terrafile or wherever it is uploaded, you may not worry as our purpose was to provide you a fast download link for Android 4.4.2 KitKat XXUDNA6 firmware for Galaxy Note 3 SM-N900 in this post. So what are you waiting for? Go ahead and download the firmware.

Download: Google Drive Link

Also checkout:  Install Android 4.4.2 KitKat XXUDNA6 Firmware on Galaxy Note 3 SM-N900

You may want to root as well, so checkout:  How to Root Galaxy Note 3 SM-N900 running Android 4.4.2 KitKat

How to Root Galaxy Note 3 SM-N900 running Android 4.4.2 KitKat

2
How to Root Galaxy Note 3 SM-N900 running Android 4.4.2 KitKat

Have you just updated your Galaxy Note 3 SM-N900 to Android 4.4.2 KitKat and looking for a method to root it? Well, you’re on the right place at the moment. We will root the Galaxy Note 3 SM-N900 running on the latest Android 4.4.2 KitKat firmware in the following post. All you got to do is to move a little forward with us and keep patience.

While some of you might be new to rooting and flashing a custom recovery and may also not be familiar what these things actually do and why you should root your device and get a custom recovery as well, so to make the things more clear, let’s first go through a brief description of both the things.Samsung-Galaxy-Note-3-front-back.jpg-640x488

Rooting your phone gives you complete access over all the data which is apparently locked by the manufacturers. This includes removal of the factory restrictions and making changes to the internal system and the operating system. Gaining the root access gives you the privileges to install various applications to enhance the performance of your device, allows you to remove the built-in applications/programs, helps you to upgrade the battery life of your device & install the apps which require the root access for the proper functionality and modify your device in so many other ways e.g using mods and custom roms. By installing custom recovery, you can flash custom roms in the phone easily. Custom recovery also let’s you backup your current rom and restore it in case of any mishap. There is a laundry list of things you can do after having your device rooted and installed the custom recovery, now once you’re rooted and have installed custom recovery, go ahead and enjoy it on your phone. Here’s our collection of 10 Best Root Apps.


Here are some instructions that you must follow in order to gain root access on your Galaxy Note 3 Exynos SM-N900:

      1. This guide is only for Galaxy Note 3 Exynos SM-N900. Do not try this on any other device, please check your device’s model number in Settings > General > About Device.
      2. Your phone’s battery must be charged at least over 60%. This is highly recommended in order to prevent any power issues during the flashing process.
      3. ake sure that you backup your important media content, ContactsCall Logs Messages. This is highly recommended just in case something goes wrong and you need to reset your phone.
      4. Use only OEM data cable to establish connection between your phone and PC. Turn off your Anti Virus and Firewall to prevent any connection issues. Also enable USB debugging mode on your phone if you face connection issues.
      5. Your device must be running Android 4.4.2 KitKat.
      6. Alright! Go ahead, follow this guide to the letter.

Disclaimer: The methods involved in flashing custom roms and rooting your phone is highly custom and may result in bricking your device, and has nothing to do with Google or the device manufacturer that is SAMSUNG in our case. Also rooting your device will void its warranty and you will be no longer eligible for any kind of free device services by the manufacturers/warranty providers. In case of any mishap we may not be held responsible. Follow these instructions to the letter to avoid any mishap or bricking. Make sure that whatever you do, you are doing it at your own responsibility.

Make sure that you read all the instructions above carefully and let’s move forward to the rooting guide.

Root Galaxy Note 3 Running Android 4.4.2 – Method 1:

Files you need to download: 

  1. Download and extract Odin PC – Get it here
  2. Download and Samsung USB Drivers – Get here
  3. Download & Unzip Cf Auto Root Package file once on your desktop

How to Root now:

    • Put your GN3 SM-N900  in download mode by pressing and holding Volume Down + Home + Power key at the same time, you should get a screen showing a warning and asking to continue, press Volume Up to continue.
    • Now your phone should be in downloading mode. Connect your phone to your PC.
    • As soon as Odin detects your phone the ID:COM box will turn light blue.
    • Click on the PDA tab and select the CF-autoroot file that you extracted above.
    • Your Odin screen should look like exactly as shown below.
  • odin_explained
    • Click Start and the root process should start showing you a process bar in the first box above ID:COM.
    • The process is quite fast and will finish in a few seconds, as soon as it ends, your phone will restart and you’ll see the CF Auto root installing SuperSu on your phone.
    • Congratulations you have your Samsung Galaxy Note 3 SM-N900 rooted now!

How to check if the device is properly rooted or not?

      • To do so, goto Google Play Store.
      • Fine “Root Checker and install it.
      • Open Root Checker.
      • Tap “Verify Root”.
      • It will ask you for SuperSu rights, tap “Grant”.
      • It should show you Root Access Verified Now!
      • That’s All! 1560688_10202529514651766_2061540064_n

In case this method to root your Note 3 didn’t work for you, head towards the method 2 on the 2nd page.

Pages: Page 1 > Page 2

Install Android 4.4.2 KitKat XXUDNA6 Firmware on Galaxy Note 3 SM-N900

Install Android 4.4.2 KitKat XXUDNA6 Firmware on Galaxy Note 3 SM-N900

As promised and planned, Samsung has started updating it’s latest phablet Galaxy Note 3’s Exynos variant to the latest and greatest version of Android, the Android 4.4.2 KitKat. The update has hit Russian(SER) region first of all through Samsung Kies and OTA, while Samsung will be cooking up the update for other regions and sending through KIES or OTA as well but this will take usual time.

The new update packs up performance enhancements, stability, bug fixes. Along with these, there are minor UI changes including the new white icons in the notification bar showing off Android 4.4.2 KitKat, a  move from Samsung’s old Gingerbread style green icons in the notification bar. Samsung has also given an option in the settings to switch between launchers, users can also choose whether they want to use Hangouts or Messaging app for SMS/MMS purposes. Rest of the changes can be tasted upon flashing this firmware. As off now, Samsung hasn’t implemented ART in Android 4.4.2 KitKat as it’s being said that ART is not yet compatible with TouchWiz, but it’s always better to wait in Samsung’s case as Samsung has always brought up the best and stable software to it’s users. We may see it in future builds of Android 4.4 KitKat.

So, to update your Galaxy Note 3 SM-N900 to this firmware, first of all connect your device to your PC and check for updates using Samsung KIES. The second option is to check for OTA update, to do so, goto Settings > General > About Device > Check for Software Updates. If you end up finding no update through both these and you’re can’t keep patience until Samsung rolls it for your region, you may use the method we’re going to have a look below. This manual method will help you to get KitKat for your Galaxy Note 3 SM-N900.

Here are the firmware details:

      • Model: SM-N900
      • Region: SER (Russia)
      • OS:  4.4.2 KitKat
      • Version: N900XXUDNA6
      • Build Date: 14.01.2014
      • Changelist: 376474

Here are some important pre-cautions and pre-requisites that you must keep in mind before you start flashing this firmware on your Galaxy Note 3 SM-N900.

      1. This firmware is only for Galaxy Note 3 SM-N900. Do not try this on any other device, check your device’s model in Settings > General > About Device.
      2. Your device’s battery should be charged at least over 60%. This is highly recommended in order to prevent any power issues during the flashing process.
      3. Make sure that you backup your important media content, ContactsCall Logs & Messages. This is highly recommended just in case something goes wrong and you need to reset your phone.
      4. Use only OEM data cable to establish connection between your phone and PC. Turn off your Anti Virus and Firewall to prevent any connection issues. Also enable USB debugging mode on your phone if you face connection issues.
      5. If you already have rooted your device, use Titanium Backup to back up all your important apps + system data. Also if you are using a custom recovery, it is recommended that you backup your current system using that first. [Just for the sake of safety.]
      6. Using TWRP Recovery, please make an EFS backup before you flash this ROM.
      7. For the best performance results, it is always recommend to wipe cache and factory data before installing official firmware. This is not necessary but may be one in order to make the phone work at its best.
      8. Alright! Go ahead and flash the firmware, follow this guide to the letter.

Make sure that you read everything explained above carefully. Also, make sure that you’re doing it at your own risk, in case of any mishap we may not be held responsible.

Alright, let’s move forward to the 2nd page for flashing this ROM:

Pages: Page 1 > Page 2

How to Root and Install CWM Recovery on Samsung Galaxy Tab 3 7.0 SM-T211

How to Root and Install CWM Recovery on Samsung Galaxy Tab 3 7.0 SM-T211

Another variant of Samsung Galaxy Tab 3 7.0 is SM-T211. This device is same as that of SM-T210 and T210R, the only difference is 3G connectivity, that means you can insert a SIM card in Galaxy Tab 3 SM-T211. Other specs of this device include a 7.0 inches display as mentioned, 1.2 GHz dual core CPU, 3.15 MP camera at the back and 1.3 MP on the front. 8 GB internal storage is there to store your files, you can also expand storage using a microSD card. A massive 4000 mAh battery is placed under the hood. In case you don’t know, Galaxy Tab 3 is Samsung’s 3rd generation Tablet series, a successor to Galaxy Tab 2.

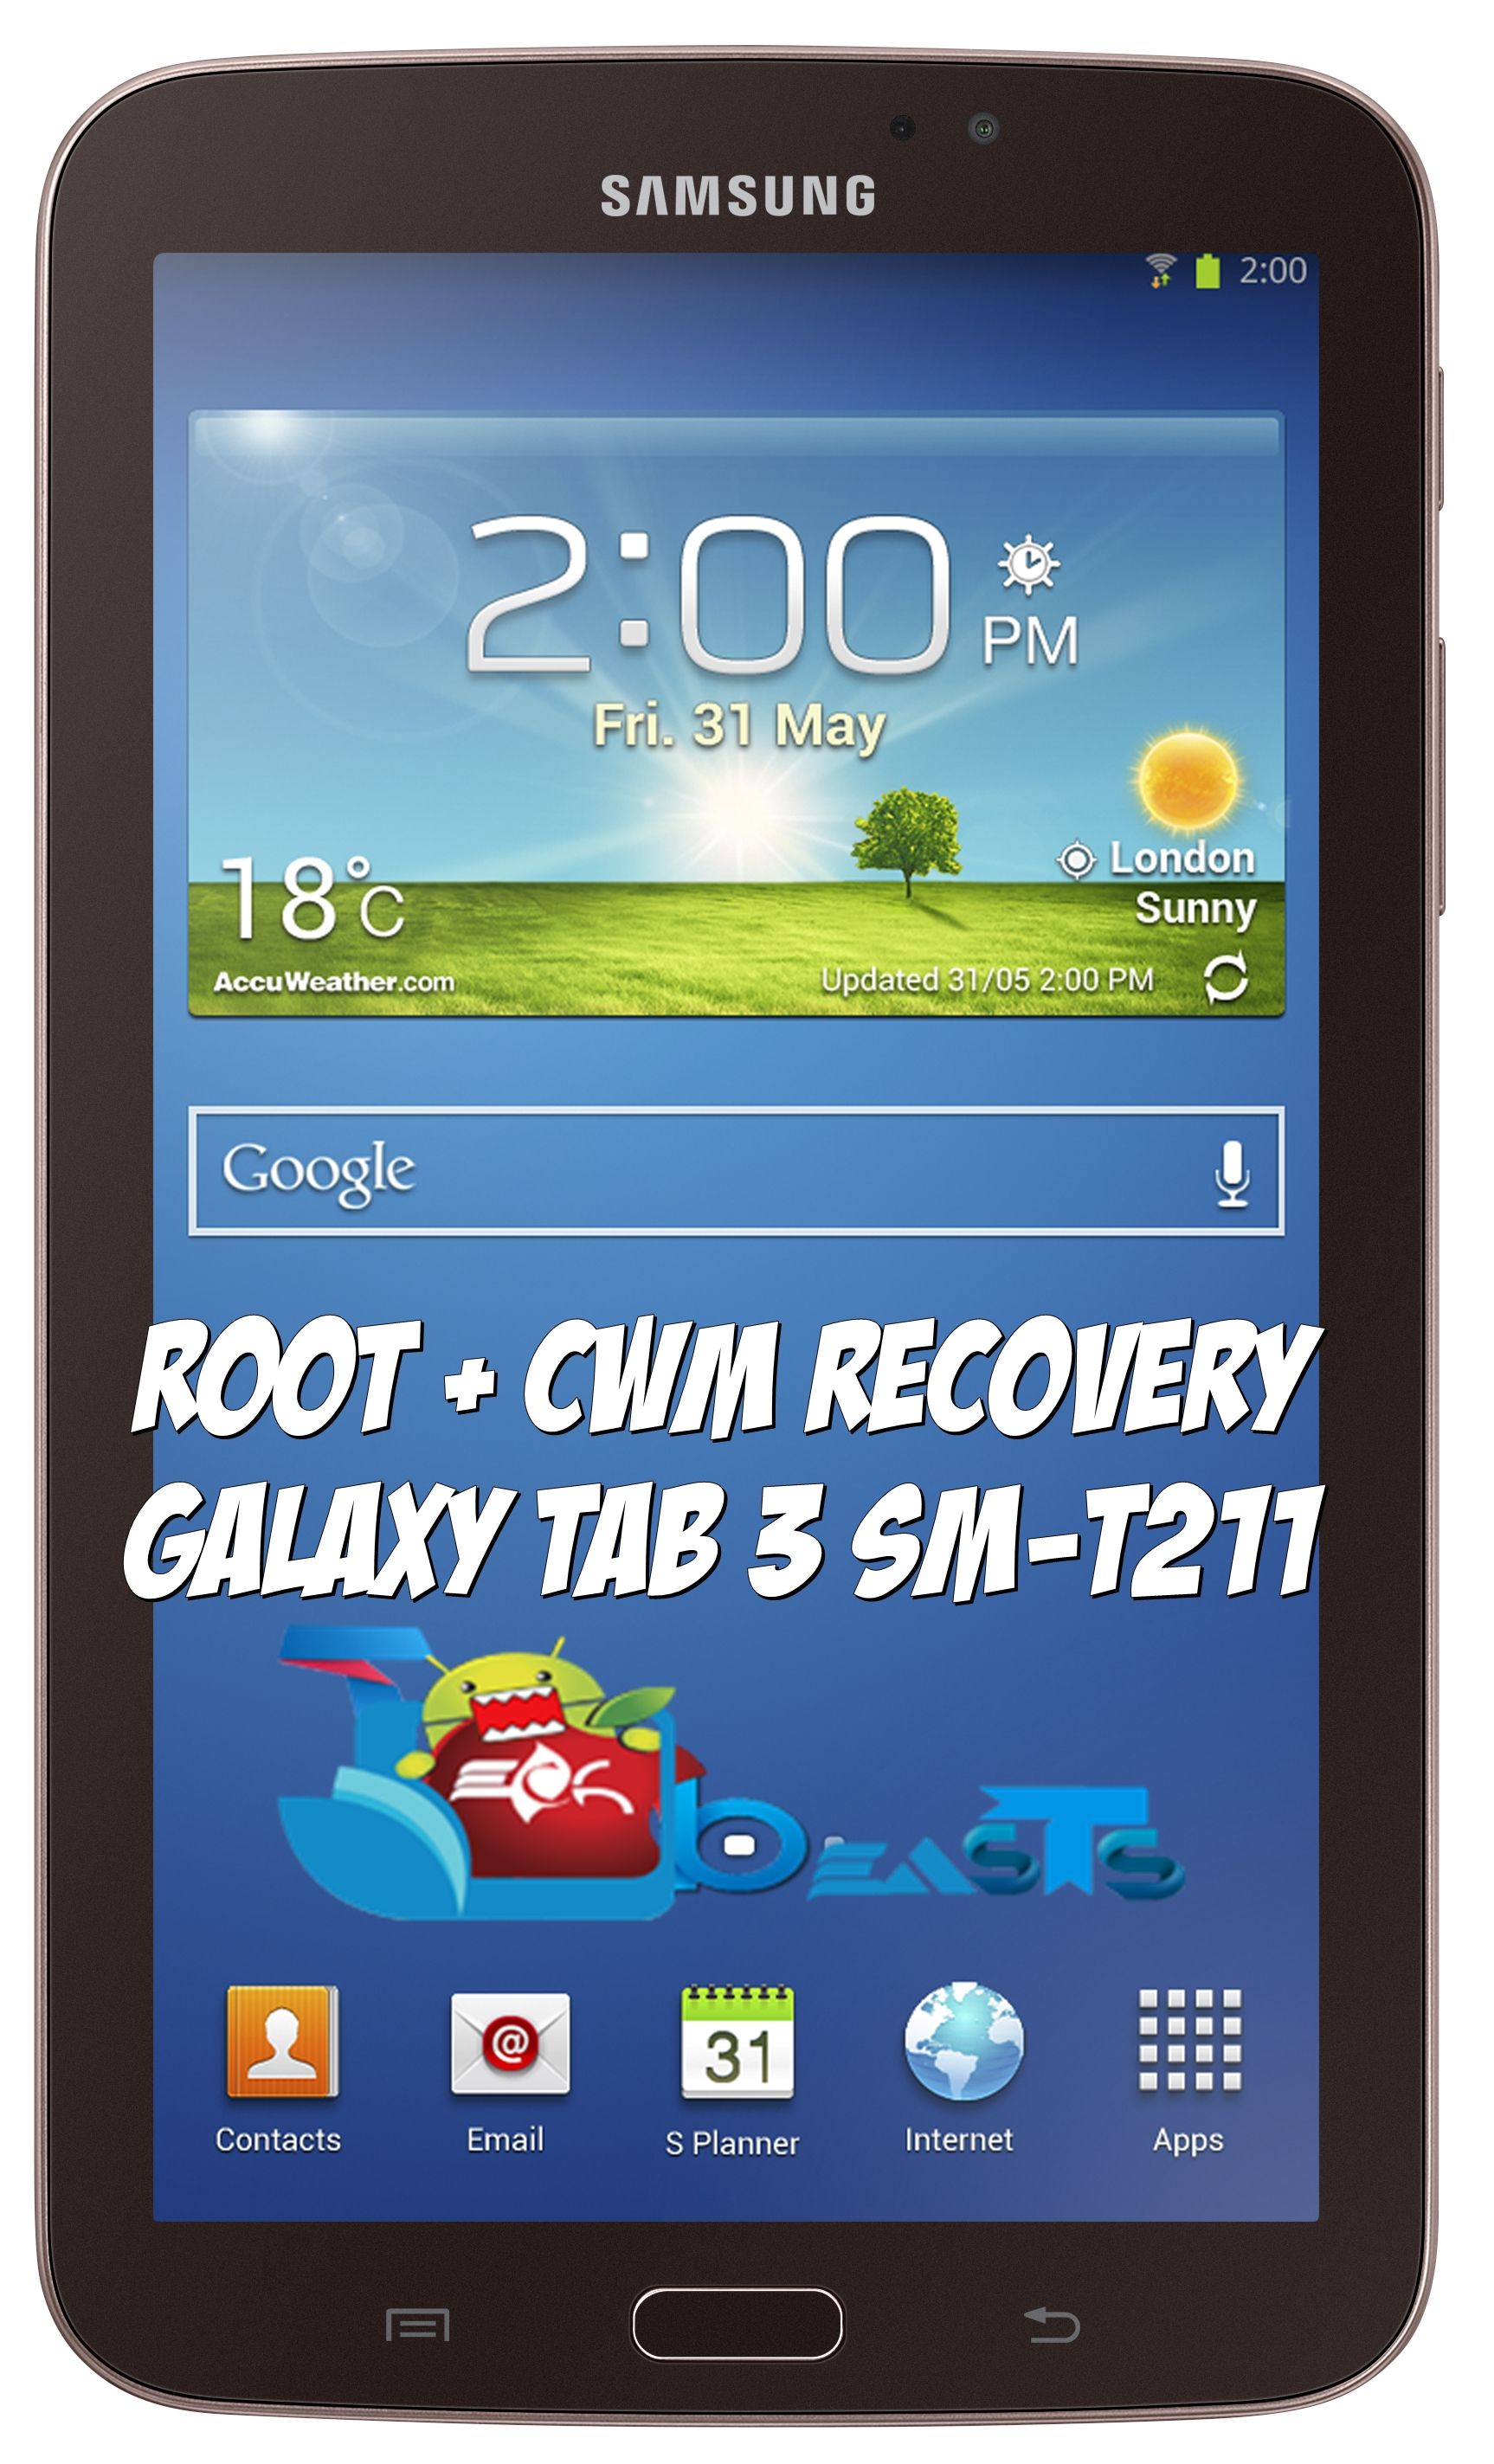
Let’s get back to the topic. Do you own a Galaxy Tab 3 7.0 SM-T211? and looking for a way to root your device and install a custom recovery as well? Well, if so, then you have found the right place, and are on the right spot at the moment. In the following post we are going to have a look on a method that will help you to install a custom recovery that is CWM [ClockworkMod] in our case and also let you root your device easily. All you got to do, is to move a little forward with us.GALAXY TAB 3 7.0 GOLD BROWN

I’m assuming that some of you might be the first timers, and not familiar with what is rooting and what is custom recovery and why you should get both the things on your device, so, to make the things more clear, let’s go through a brief description of root and custom recovery.

Rooting your phone gives you complete access over all the data which is apparently locked by the manufacturers. This includes removal of the factory restrictions and making changes to the internal system and the operating system. Gaining the root access gives you the privileges to install various applications to enhance the performance of your device, allows you to remove the built-in applications/programs, helps you to upgrade the battery life of your device & install the apps which require the root access for the proper functionality and modify your device in so many other ways e.g using mods and custom roms. By installing custom recovery, you can flash custom roms in the phone easily. Custom recovery also let’s you backup your current rom and restore it in case of any mishap. There is a laundry list of things you can do after having your device rooted and installed the custom recovery, now once you’re rooted and have installed custom recovery, go ahead and enjoy it on your phone. Here’s our collection of 10 Best Root Apps.

Here are some pre-requisites and some pre-cautions that you must follow before you head towards the installation guide:

      1. This guide is only for Galaxy Tab 3 7.0 SM-T211. Do not try this on any other device, please check your device’s model number in Settings > General > About Device.
      2. Your phone’s battery must be charged at least over 60%. This is highly recommended in order to prevent any power issues during the flashing process.
      3. Make sure that you backup your important media content, ContactsCall Logs & Messages. This is highly recommended just in case something goes wrong and you need to reset your phone.
      4. Use only on OEM data cable to connect your Galaxy Tab to your PC.
      5. Turn off your Anti-virus, Firewall and other security programs to avoid connection interruption.
      6. Use a stable connection/device. Your laptop must have enough battery charged to perform this method, in case you’re using a desktop PC make sure that you’re not on a risk of power loss during the flashing process.
      7. Follow this guide carefully. Do not go ahead if you don’t know what you’re going to do.

Disclaimer: The methods involved in flashing custom roms and rooting your phone is highly custom and may result in bricking your device, and has nothing to do with Google or the device manufacturer that is SAMSUNG in our case. Also rooting your device will void its warranty and you will be no longer eligible for any kind of free device services by the manufacturers/warranty providers. In case of any mishap we may not be held responsible. Follow these instructions to the letter to avoid any mishap or bricking. Make sure that whatever you do, you are doing it at your own responsibility.

Files you need to download / install:

  1. Download and extract Odin PC – Get it here
  2. Download and Install Samsung USB Drivers – Get here
  3. Download the CWM 6 for your Galaxy Tab SM-T211

How to Install CWM 6 on Samsung Galaxy Tab:

      1. Download the file for your variant carefully.
      2. Open Odin3.exe.
      3. Put your phone in download mode, to do so, turn it off completely. Now turn it on by pressing and holding Volume Down + Home Button + Power Key, you should see a warning now, press Volume Up to continue.
      4. In case the download mode method doesn’t work for your device, try one of the methods from this guide.
      5. Connect your phone to your PC.
      6. The ID:COM box in Odin should turn blue now, that means your phone is connected properly in download mode.
      7. Click the PDA tab in Odin and select the downloaded Recovery.tar.zip file and let it load. Your Odin should look exactly as shown below, make sure that no extra options are selected.
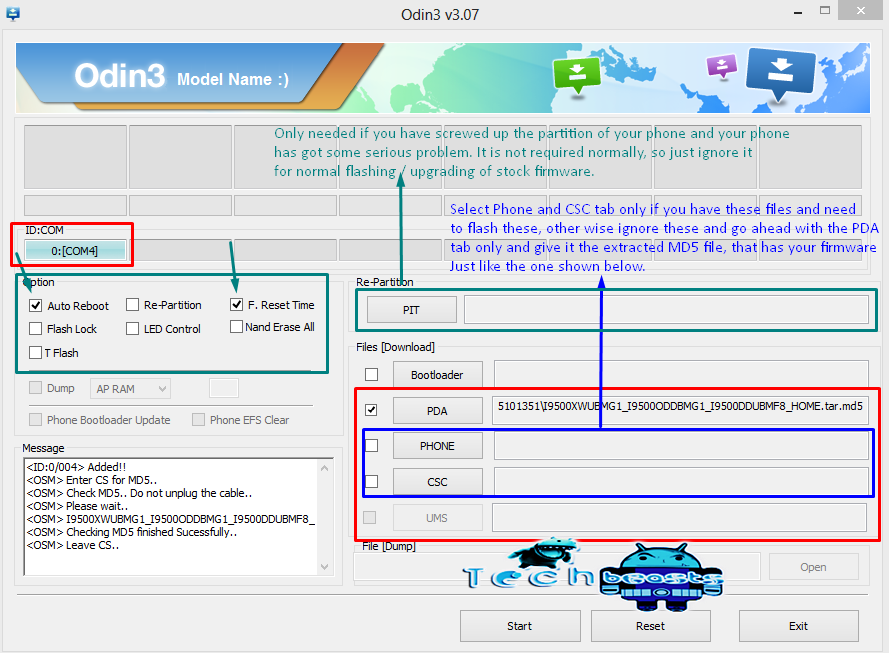
      8. odin_explained
      9. Hit start now and sit back, it will take a few seconds to flash the recovery and your device will reboot.
      10. Press and hold Volume Up + Home Button + Power Key to access the CWM Recovery  that you just installed.
      11. You can backup your current ROM and do a lot of other things using the options in CWM Recovery..
      12. That’s All.

How to Root:

      1. You must have installed CWM Recovery using the guide above.
      2. Download android-armeabi-universal-root-signed.zip file and copy it to the internal storage of your device.
      3. Boot into CWM Recovery  or TWRP Recovery now. To do so, turn off your device completely. Now turn it while pressing and holding Volume Up + Home Button + Power Key. In case this method doesn’t work for your device, try one of the methods explained in this guide.
      4. In CWM select “Install Zip>Chooe Zip from SD Card > Android-armeabi-universal-root.zip > Yes”.
      5. Wait for the flashing to complete.
      6. Reboot your Galaxy Tab.
      7. Find SuperSu in App Drawer.
      8. Phewwwww! You’re rooted now.

That’s All! We hope that you found this guide of much help. In case you got any queries or face any difficulties regarding this guide, don’t hesitate to stop by the comment box below and leave us your message. We will try our best to help you out. Thanks All.

Credit: gr8nole