Home Blog Page 470

Super Stickman Golf 2 V2.1.0.3 – Download Here

0
Super Stickman Golf 2 V2.1.0.3 – Download Here

The game of Riches, Golf has made its way to Android, there are many apps related to Golf available at Google Play Store. But this one is categorized in Editors Choice. Super Stickman Golf 2 has been rated as the top Golf app as it provide the real life experience and stated as Polished to near perfection. The best thing in this game is its Gameplay, 20 Dynamic Golf courses with a lot of obstacles, portals, magnets and many other things are merged to give users the best time of ever in any game. Multi-Player game mode gives you a chance to play with your friends and with people all around the world. You can challenge random people or participate in a Tournament or search for a name and directly challenge them.You can download this app From Google Play store, but we are hearing a lot of people having problem with Google Play Store, so we are providing the link of Apk File of Super Stickman Golf 2.

Screenshot_2

Before We go any further, let’s look at the Features of Super Stickman Golf 2:

  • Online Multiplayer
  • 180 Challenging Holes
  • 53 Achievements
  • 28 Hats
  • 10 Golfers
  • NEW Powerups
  • Dynamic Courses

How To Install Super Stickman Golf 2 Apk.

Pre-Requirements:

  1. Allows your device to Install from Unknown Sources. Go to Settings > Security and Tap Unknown Source.
  2. Download Super Stickman Golf 2 Apk: LINK

Screenshot_3

How To Install Super Stickman Golf 2 Apk.

  1. Download the Above file.
  2. Connect your Device with PC.
  3. Copy the Apk file to your device.
  4. Disconnect the Device.
  5. Install the Apk like normal and Run the app Online the First Time.
  6. While installing, if ask for any Installation Process, Choose “Package Installer and if there is a Pop-Up Choose Decline”

If you Have any problems, Feel free to comment in the comment section below

Tinder For PC- Download Here

0
Tinder For PC- Download Here

Tinder is an Application that allows you to talk to strangers and make them your friends, the basic idea of this Application is to chat other people with idea of dating. The operation of this app is quite simple, the app will star with a question about your gender, Male or Female, then it will ask about your interest and of course users shows interest in their opposite side. You can show whether you are interested in a person or not, tapping the X button or sliding the photo to left means that you have no interest in that person. By tapping the Heart button or sliding the Photo to right means that you are interested in that person. If you show interest in a person and other does the same you will be given a chat room to start the conversation. This application also features Matchmaker, in which you can present two of your friends, and they can talk with each other without sharing any personal information.This game is available for Both Android and iOS and now you can play in on PC too. Just Follow our Guide and All is Well. But remember this is not an official release for PC, it is just being run on PC using a Third Party Emulator.

Tinder

Before We go any further, Let’s Look at the Features of Tinder:

  • Easy to use
  • Simple to create a profile
  • Adds photos and data from Facebook
  • Popular among users
  • Intelligent System

How to Download and Install Tinder on PC:

  1. You need an Android emulator to run this game on your Windows PC or MAC. We recommend using Bluestacks. Use our guide to install it on your PC.
  2. After downloading and installing Bluestacks,Open it
  3. Download Apk Of Tinder, Double click the Apk File and Bluestacks will install it automatically
  4. Open BlueStacks now > All Apps > Tinder
  5. The game will start now, follow the on screen instructions.
  6. Follow the initial screen,  you’ll be able to play it.
  7. Tap the screen by clicking inside the game frame.
  8. Enjoy the Blind Dating.
  9. Don’t forget to let us know about your high score.
  10. That’s All!

Best Android Photo Collage Apps – All Time

3
Best Android Photo Collage Apps – All Time

Everybody goes to college and love ! Ok not every one. College memories are best ever can have in her/his life. Everybody wants to save them, make collection of it. What if you have an app that can make your selected pics to collage photo? Yes we have such kinds of Apps in Android play store that can help you make Collage photos. Today i have collected the best Android Photo Collage Apps of all time.

KD Collage Free:

KDCOMBO_copy_424x318


KD Collage – new application to create wonderful collages from your photos. The application includes about 90 collage templates and over 80 background options. Added photo can be moved, rotated and zoomed in/out. You can also add a text with different fonts and styles. Completed collages can be saved in HD to SD memory card or in Favorites for further editing.

Photo Grid – Collage Maker:

PhotoGridCOMBO_424x318 (1)


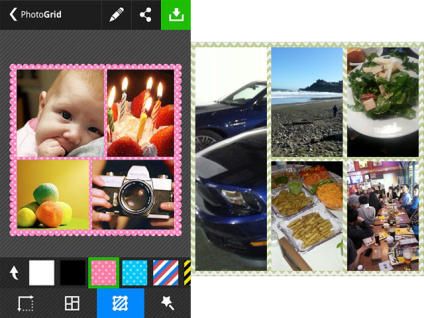
Photo Grid is free and makes sharing pics and collages easy. Instantly and easily create collages, wallpaper and photo albums. Edit pictures in our photo lab and share on Instagram and other places with Photo Grid. This collage maker is incredibly easy to use, try it and see for yourself. Video maker using images turns PhotoGrid into the best slideshow video maker.

Pic Collage:

piccollagecombo_424x318


Pic Collage allows you to create amazing collages using your photos, stickers, text and frames. Once you’re done, share it to Pic Collage, Facebook, Twitter, Instagram and also also email it! Perfect for keeping memories 🙂

Photo Collage Maker:

Photo Collage Maker


Select a few photos and instantly get an awesome photo collage (a grid of photos).Incredibly easy to use, yet highly powerful and has many options to customize and make it personal.

Pic Stitch Collage Maker:

Pic Stitch Collage Maker

An easy to use application which enables you to make collages with your wonderful photos. Integrated with powerful image editor and more than 50 templates in different aspect ratios (1:1 for square collage, 4:3, 3:4, 3:2), you can be super creative in creating collages.


Top 7 Photo Editor Android App [ 2014 ]

0
Top 7 Photo Editor Android App [ 2014 ]

Photo editing is worth time pass hobby i love to do and its very vast field. Even we are getting Apps in smartphones and it helps alot, although we don’t have much option on editing. But now developer are working on it to improve features and add more options  for editing. I have collected Top 7 Android Photo Editor Android App of 2014.

BeFunky Photo Editor – Tablets

Crazy but true: One of the most popular photo editors just got even better. BeFunky now allows you to stack an UNLIMITED number of effects and edits, AND undo them! And even though YOU control the amount of each edit you make and YOU control how many are added, it’s still one of the easiest photo editors out there to use.

BeFunky-screenshot


Cupslice Photo Editor

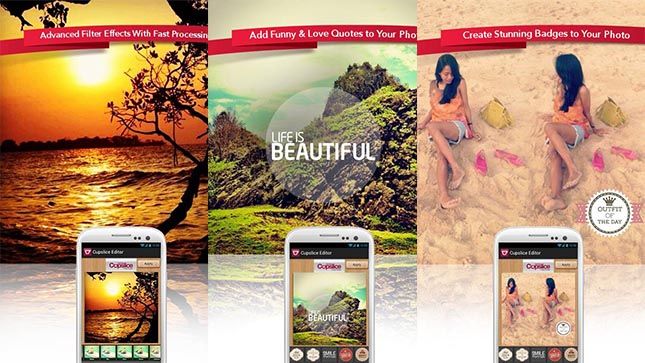
Discover our innovative and fast photo processing technology, became great artist of photo that you capture on your daily life. Cupslice is the place to beautify & touch up the photos right at your fingertips. Powerful photo processing make your photo become stunning!

Cupslice-screenshot


Pho.to Lab

Enhance your photos with over 620 beautiful frames, effects, filters or montages! Pho.to Lab PRO is an easy, quick and fun photo editor. You don’t need to be a Photoshop ninja to make any photo funny and any portrait beautiful. Just pick a filter, frame or montage to use, then choose which image to process, and that’s it! Pho.to Lab PRO will do all the hard work to let you sit back, relax and get all the honor.

pho-dot-to-screenshot


Photo Editor by Aviary

Aviary is a powerful photo editor which we created because we wanted a quick and easy way to edit our photos on the go with no fuss. We’ve included all the tools you need, in a super intuitive interface so you can get right to editing.

Photo-Editor-by-Aviary-screenshot


Photo Editor Pro

Photo Editor Pro is a powerful editor with many amazing effects. A very comprehensive photo editor and pretty much everything you could ever want to do on your phone. There are so many effects, stickers and features to apply to your photos.

Photo-Editor-Pro-screenshot


Photo Effects Pro

Photo Effects Pro (Enjoy Photo) is a easy and fun way to enhance your personal photos. It makes your photos beautiful with easy and powerful editing tools. Lots of filters and effects, easy to use, share via Facebook, Twitter and many more. It takes no time at all to make good photos look great.

Photo-Effects-Pro-screenshot


Photoshop Touch for phone

Bring the fun and creative possibilities of Adobe® Photoshop® software to your phone with Adobe Photoshop Touch for phone.

Transform your images with core Photoshop features. Combine images, apply professional effects, and share results with friends and family through Facebook and Twitter — all from the convenience of your phone. Enjoy most of the same features as the tablet version:

Photoshop-Touch-screenshot

How To Restore Your Unresponsive iPad/iPhone

0
How To Restore Your Unresponsive iPad/iPhone

There are many times when users complain that they now have an iPhone that does not respond no matter what you have done. The reason can be anything, a bad Jailbreak or even after a successful Jailbreak, after installing a Tweak. The scenario goes like this, you restart your device, either it stuck on the Apple Logo or on the Lock-Screen and nothing works except the buttons. In that cases most of the users thinks that their device is dead or bricked and now it is time to Purchase a new one. The solution is quite easy but there is a little risk in it too, you might loose all your data if you haven’t made a recent back-up of all your data, good news is that it works most of the time.

itunes-iphone-setup-summary

First Turn Off Your Unresponsive Device:

  1. Hold Down the Power button and Home Button at the Same time and Keep Holding them
  2. The Screen will turn black and you will see the Apple Logo, keep holding the buttons.
  3. Once the Screen goes completely black, wait for a few seconds and then let go of the buttons.

Now Turn On Your Device

  1. Now Hold the Power Button and if you see the Home-Screen then all is well.
  2. If you happen to get stuck on Apple Logo, repeat the above section till you see the home-screen.

Put Your Device In DFU Mode

  1. Connect your device with PC.
  2. Hold Down the Power button and Home Button at the Same time until you see Screen go from Apple Logo to Black, then let go of power button but keep holding the home button until iTunes detect your device in Recovery Mode.

Flash The Stock Firmware via iTunes

  1. In iTunes, Click Restore.
  2. When the device restarts and all is done, select the recent back-up you just made, when prompted to restore your Back-up

How To Root Your Android Device With Kingo Method(One Click Tool)

0
How To Root Your Android Device With Kingo Method(One Click Tool)

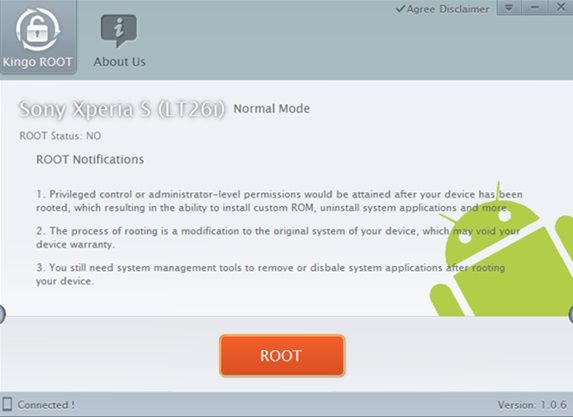
Rooting allows you to get full control over your device, Stock apps and mods are good, but installing Custom Mods gives you better support and great battery life, you might need to delete some Stock apps from the device, a non-rooted device can’t do that, but a rooted one has the power to remove stock apps too.There are probably thousands of rooting methods available for Android devices, some are specifically design for specific devices, some are for more than one device, some are only for flagship devices, Like Framaroot. It allows you to root your device without any flashing process. It will automatically root your device but as usual it is not for every device. Then there is this Kingo Method, a little draw back is that it is only available for Windows devices but on the other side it can root more devices than Framaroot with just one click.

Root-Android-Smartphone

In this Article, we will show you How To Root Any Android device with Kingo Method. But before we begin, Make sure that:

  1. Back-Up all your important ContactsCall Logs & Messages.It is highly recommended in case of any mishap or data loss to back up all your important data.
  2. Back-Up your Mobiles EFS Data.  How To Restore and Back-Up EFS Data On Samsung Galaxy Devices
  3. Check your device model, Go To Setting > Developer Options and Enable USB Debugging mode.
  4. Bootloader Must Be Unlocked:  Follow Unlock Bootloader Of HTC Smartphones

Warning:

Rooting an Android device Voids Manufacturers Warranty, this Rooting method is tested and Found Working. If you don’t follow the Procedure as we instructed, You only are responsible for your device. We won’t be liable if any damage occurs to your device and/or its components.

How To Root Your device Using Kingo

  1. Download Kingo.
  2. Double Click the .exe file and Install it.
  3. Click Next and wait for the drivers to Be installed.
  4. Once done, unplug your device as prompted.
  5. Plug-in the device as said on screen.
  6. Click Always Allow, and Click OK on your device when prompted
  7. Click Root button and wait for it to root your device.
  8. Once done, your device will reboot and all is done

What is White Screen of Death , How to Fix it ?

1
What is White Screen of Death , How to Fix it ?

We have seen Blue Screen of Death on our Windows systems and Laptops and we know that means we have serious hardware or Software issue with our system. Today we will be discussing about ( WSOD ) White Screen Of Death its a condition same like Blue Screen error on systems. But ( WSOD ) most often refers to Apple devices like iPhone, iPad and iPod touch the main cause of white screen death is a hardware issue , broken device, attempted operating system fails and updating ios fails. When ever users face white screen death issue their device screen goes white or white with Apple logo in center of it.

BRAIWyXCYAApLwM.jpg-large-640x423

Steps to Fix White Screen of Death:

Following are the Steps that you have to follow if you face White Screen of Death on your iPhone, iPad, iPod Touch and iPod nano.

  • Put Your device in DFU Mode ( Press Power button for 5 sec – then Home + Power together for 10 sec ) connect your device with iTunes there you will see iPhone in recovery mode select restore iPhone.
  • When your device is restored then goto setting and reset factory setting. When your device is rebooted again goto settings -> general -> Reset -> Reset Network setting.
  • If none of this is working then downgrade your device, To do so you have to download the firmware according to saved shsh blobs.
  • When ever you see white screen you do hard reset by holding power and home button for 30-40 seconds until you’ll see Apple logo.

How to Fix a White Screen on an iPod:

Following are the steps to fix White Screen on an iPod. Please carefully follow all the steps in order to get the desired results.

  • First thing you should do is that try to hard reset your iPod by Holding Home+Power Button for alt-least 30-40 Seconds until Apple logo appears on the screen.
  • If hard reset is not worked for you then you have only other option left is that connect your iPod with iTunes and ” Restore iPod “. Hopefully this will work.
  • Unfortunately none this work then you have to take your iPod to Apple service center.

How To Fix iOS 7 Battery Draining Issue

0
How To Fix iOS 7 Battery Draining Issue

I am Android user but i do use iPhone because i am gadgets lover. I have heard from many people about the battery draining issue in iOS 7 never noticed on my side but for past few days i am using iPhone as a primary device, not that i have changed my mind actually i am waiting to get my hands on Samsung Galaxy s5. Now back on topic when i start using iPhone i come to know that my battery is not giving expected time that i got in iOS 6. So i started working on it how to over come this problem and indeed i found many useful method to share that will help you over come on Battery Draining Issue on iOS 7.
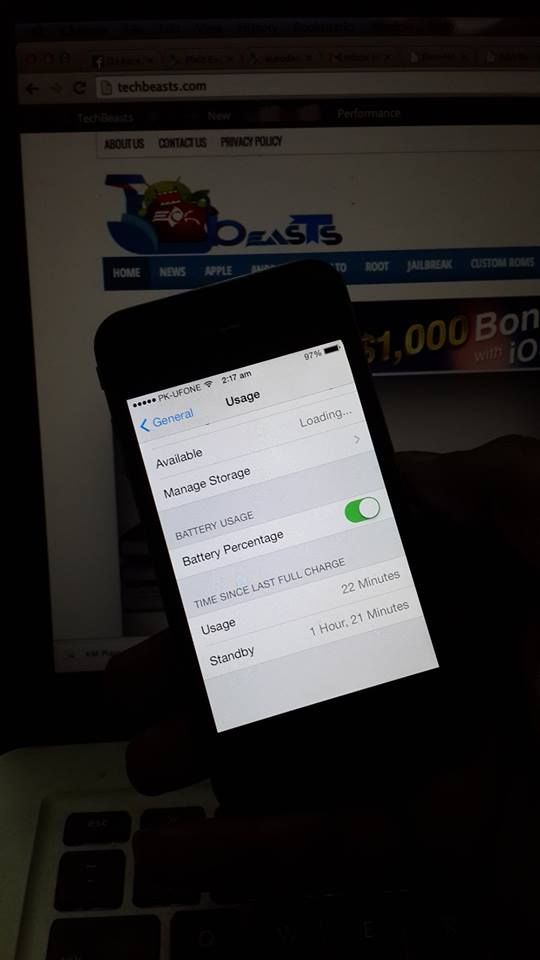
ios 7 Battery Draining Issue


When ever are using smartphone there are many process running at same time that can cause Battery Draining like HD displays, wireless connectivity, Facebook and many other apps. I am not saying that stop using these apps, but we have to watch for few things that will help us. Recently Apple released iOS 7.1, comes with many bug fixed but not all. Now lets start the steps that will help you prevent Battery draining Issue.

How To Fix iOS 7 Battery Draining Issue:

Most of us don’t know about the feature Background App Refresh. This feature allow apps to refresh content when on Wi-Fi or cellular, or use location services, in the background. Turning off apps may help preserve battery life.

  • Head to Settings > General > Background App Refresh > Turn OFF the apps you don’t want to refresh their content.

ios 7 battery draining issue apps


Turn-Off Location-Tracking Apps:

Apps like Facebook, Twitter, Google and iOS camera are tracking your location at all times. It seems a little thing and most of us want that option to be on but for real location tracking apps infects iPhone battery life. So disable this option (Settings > Privacy > Location Services) or if you want to stop some specific apps you can disable them.
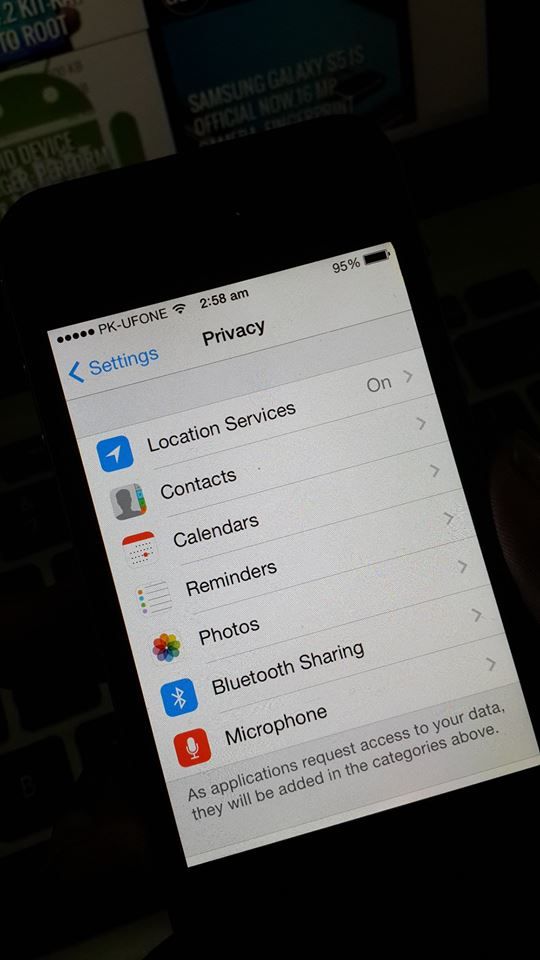
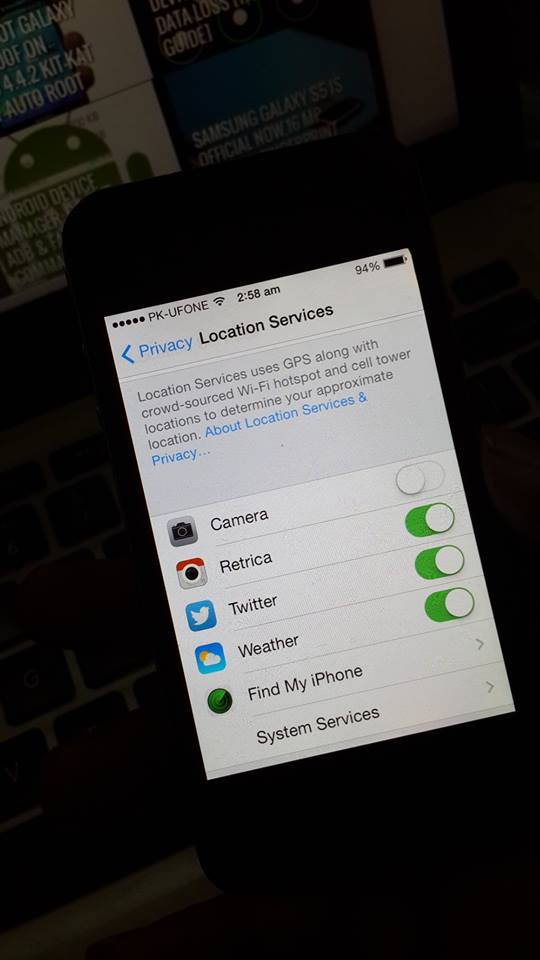
ios 7 battery issueios 7 battery draining fast

Turn Off Bluetooth:

People might not consider turning off bluetooth will help to preserve battery draining issue, but actually it helps when ever you update your device or restore your device bluetooth automatically turns itself on. When you have other devices around then bluetooth try to connect with them and it really suck the life out of your battery.

Parallax:

In iOS 7 Apple have added many new features like new animations and a parallax feature, which helps wallpapers to move behinds apps it looks nice but this features kill your battery life more faster. Turn it off by going to Settings > General > Accessibility and click Reduce Motion to “on.”

reduce motion

Automatic Updating:

I find this is most battery sucking option in iOS it allows apps to automatically update when ever the new version comes in play store. So Turn off Automatic Updating to preserve your battery life.  To disable it Settings > iTunes and Apple Store and uncheck the Updates option.

Turn Off AirDrop:

Air Drop is no doubt the coolest feature i like in iOS 7 you can transfer files with other device on same network. But if you are not using it then kindly turn it off because it play major role to draining your battery quickly.

Turn Down the Brightness:

This is main thing i think everybody knows who uses smartphone. It would be best that you select auto brightness option and if you think that its not helping then turn down more brightness.

Spotlight:

Spotlight its Apple new feature that you can search from any screen now no doubt its a cool thing you don’t have to go back on main screen then swipe right to get the search option. Now search from any screen you want. Spotlight kill you battery timing because when its turn on it’s continually indexing new data so turn it off. Settings > General > Spotlight Search and disable.
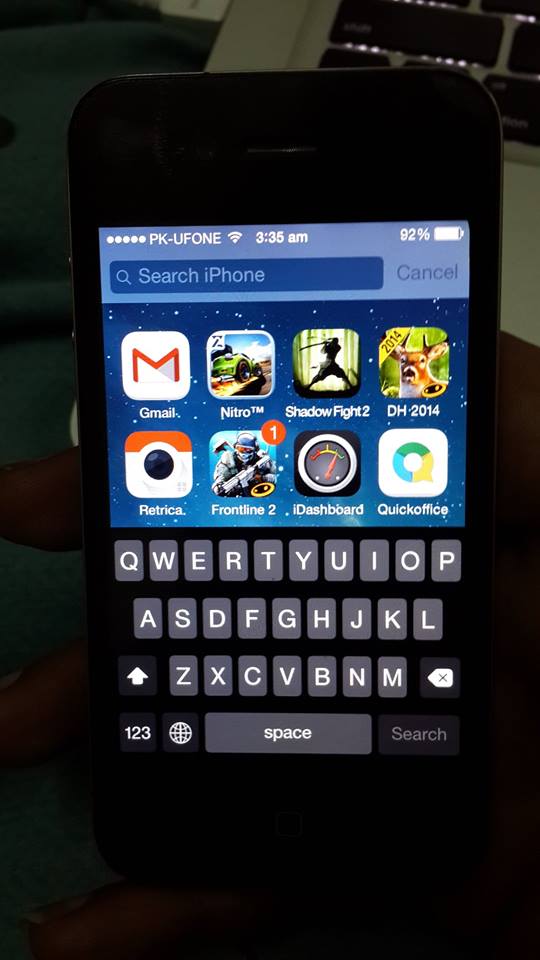
spotlight

If this helps you out do tell me in comments 🙂 !

Images: Techbeasts

The 10 Best iOS 7 Themes for iPad, iPad 2, iPad mini and iPad Air

0
The 10 Best iOS 7 Themes for iPad, iPad 2, iPad mini and iPad Air

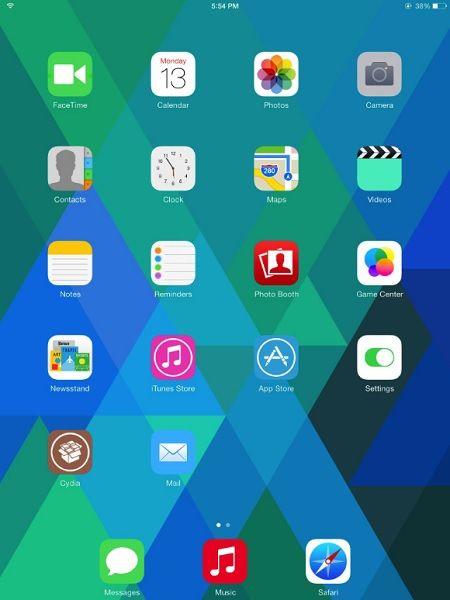
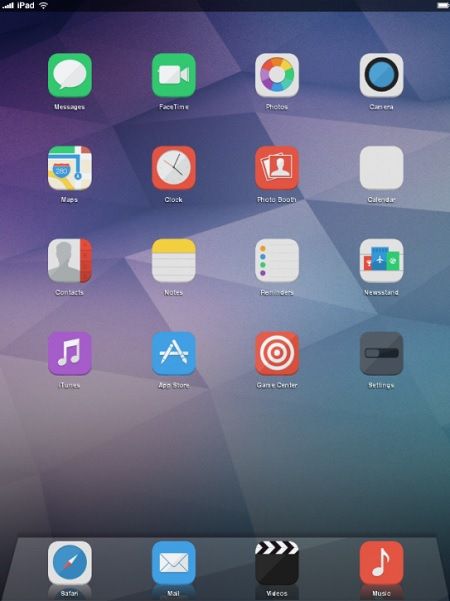
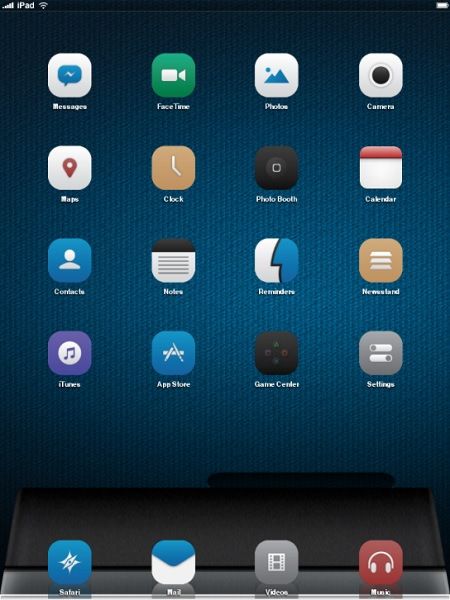
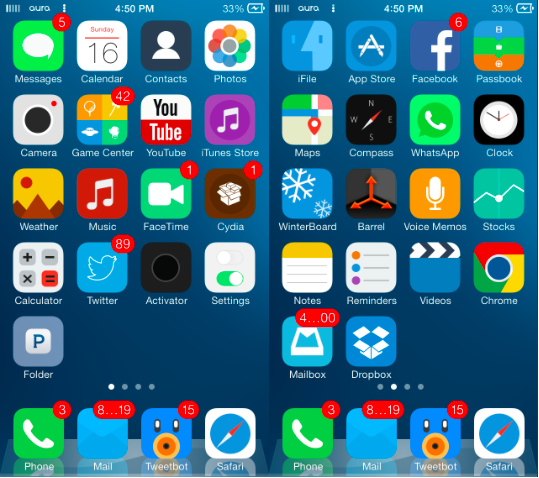
Few minutes back i have posted the 8 Best iOS 7 Themes for iPhone, now i am giving you the The 10 Best iOS 7 Themes for iPad, iPad 2, iPad mini and iPad Air. These themes are superb looking and colourful, you must try all of these themes on your iPad these themes will change the whole look of your iPad. There are thousands of themes out there but not all are worthy but these themes are.

Note:  To install these themes you have to jailbreak your iPad because these themes are available in Cydia. If you haven’t jailbreak your iPad yet then you can use our Jailbreak guide. [ Here ]

Following Themes are also for iPhone so you can also use these themes on iPhone and iPod Touch.

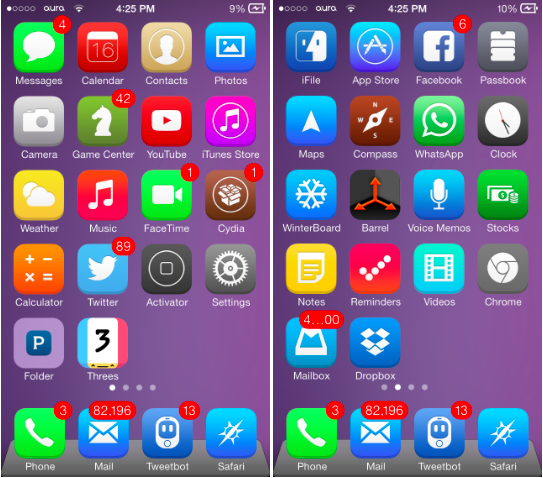
Aura

Aura


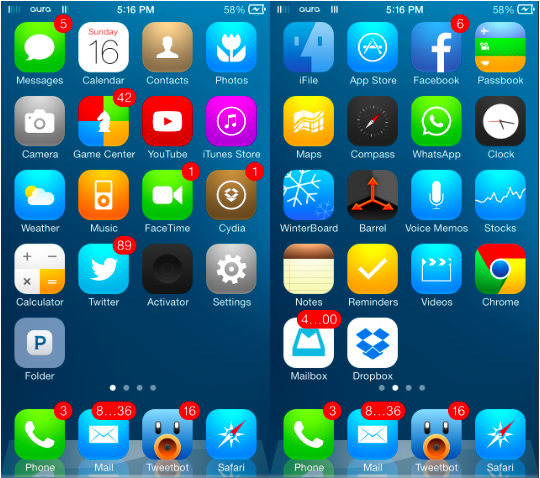
0bscure 7


0bscure-7


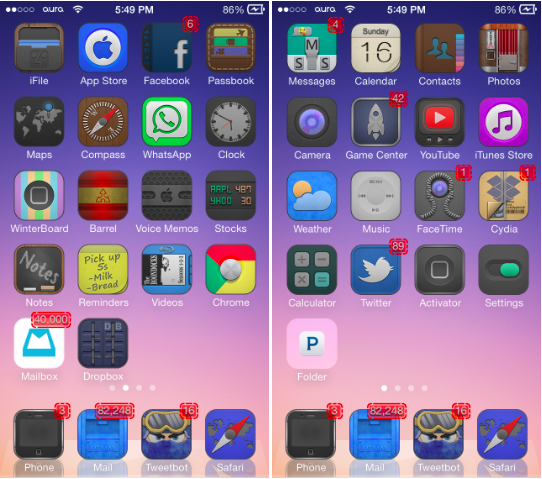
Solstice

Solstice1


Flat7

Flat71


Ayecon

Ayecon-iPhone-2


Redes7gn for iPad

Redes7gn-for-iPad-


iOS 8 Infinity iPad Theme

iOS-8-Infinity-theme


DNA Theme iPad

DNA-Theme-iPad


Ghost theme for iPad

Ghost-for-iPad-theme


The 8 Best iOS 7 Themes for iPhone – Download Here

0
The 8 Best iOS 7 Themes for iPhone – Download Here

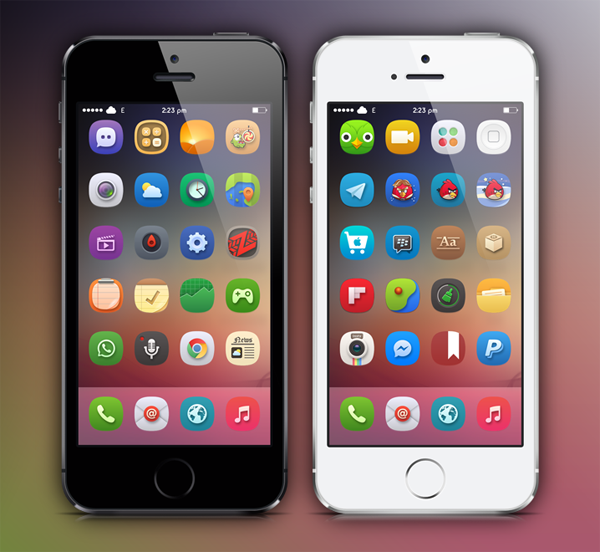
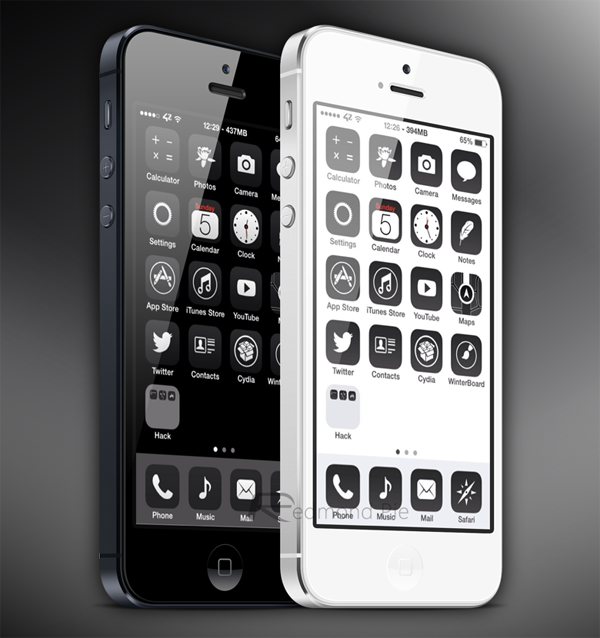
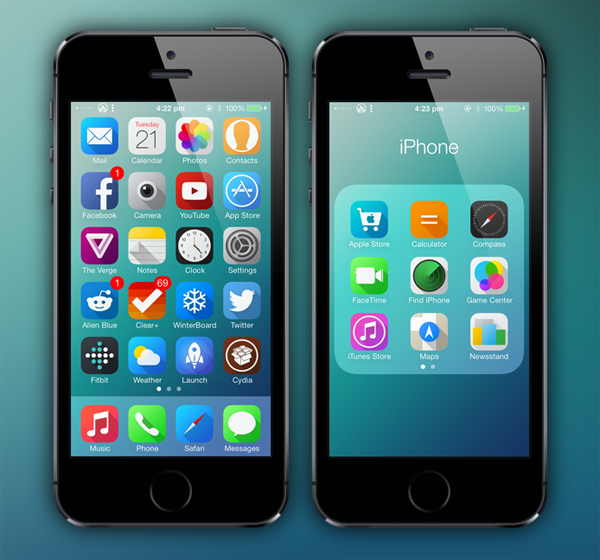
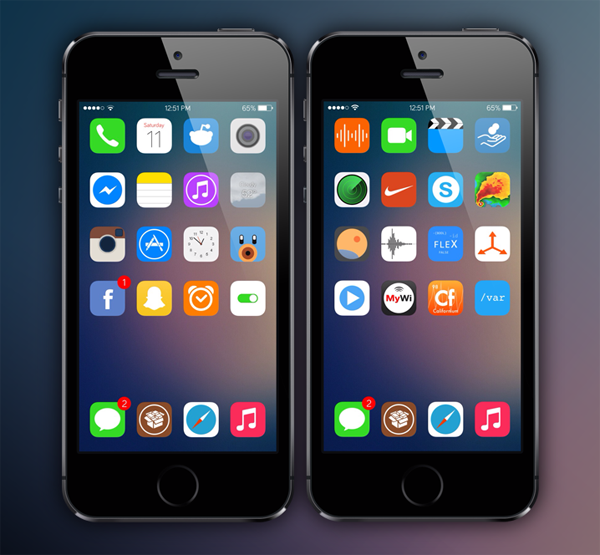
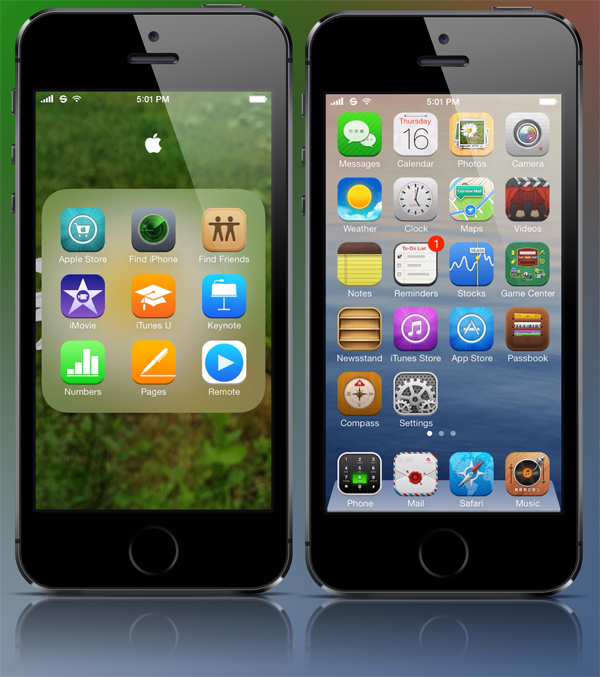
Today i am not giving any HD Wallpapers for Android or iPhone. Its time for Themes and not for Android phone they had so much of them its time for iPhone. I have collected the 8 best iOS 7 Themes for iPhone. When it comes to iPhone we cannot customise they way do on Android Phones. On customisation department Apple is far far away form Android so that’s why today for iPhone user’s i have collected best themes.

Note:  To install these themes you have to jailbreak your iPhone because these themes are available in Cydia. If you haven’t jailbreak your iPhone yet then you can use our Jailbreak guide. [ Here ]

Enkelt Neue – $2.99

ios 7 themes 1

ios 7 themes 2

iRa – $2.00

ios 7 themes 3

UltraFlat for iOS 7 – Free

ios 7 themes 4

Radiance for iOS 7 – Free

ios 7 themes 5

Mojo for iOS 7 – Free

ios 7 themes 6

3 4 All – Free

ios 7 themes 7

TOAST – $2.50

ios 7 themes 8


You can also use our guide to Jailbreak your iPhone devices which are running the latest iOS 7.1, use the link below to Jailbreak iOS 7.1.


Download HTC M8 Stock Wallpapers

0
Download HTC M8 Stock Wallpapers

HTC recently unveiled it’s latest flagship and the successor of it’s HTC One named as HTC M8 also known as the All New HTC One. HTC has successfully produced world’s most beautiful smartphone once again and it’s features and specs probably outdate the devices of other manufacturers. One of the unique features found on the device is it’s duo camera at the back, besides that HTC has used a 5 MP shooter on the front of M8. Atop of these cameras HTC has plugged in a beautiful 5.0 inches Super LCD 3 display with 441 ppi that is also a Full HD display.

To add charm to the device’s display, HTC has loaded it with a number of wallpapers. These wallpapers look absolutely magnificent and anyone would love to get these on their devices. If you’re one of those looking for the stock wallpapers of HTC M8, we have em’ all right here for you. To save these wallpapers to your PC, go ahead, pick up your favorite, right click on the image and then click “Save image as” or else you may head towards the all in one download link and download all these wallpapers packed up in one file.

HTC-One-M8-wallpaper-02-1024x910 HTC-One-M8-wallpaper-03-1024x910 HTC-One-M8-wallpaper-04-1024x910 HTC-One-M8-wallpaper-05-1024x910HTC-One-M8-wallpaper-01-1024x910HTC-One-M8-wallpaper-11-1024x910

HTC-One-M8-wallpaper-09-1024x910 HTC-One-M8-wallpaper-08-1024x910HTC-One-M8-wallpaper-07-1024x910HTC-One-M8-wallpaper-06-1024x910

HTC-One-M8-wallpaper-18-1024x910HTC-One-M8-wallpaper-16-1024x910HTC-One-M8-wallpaper-12-1024x910HTC-One-M8-wallpaper-13-1024x910HTC-One-M8-wallpaper-14-1024x910

Download All HTC One M8 Stock Wallpapers

How to Set these wallpapers on your Android device:

      1. Copy your desired wallpapers to your Android device’s storage.
      2. Now open your phone’s gallery.
      3. Locate your desired wallpaper from the folder you placed in.
      4. Press the options key and tap “Set as”.
      5. Now set it as your homescreen or lockscreen or select any other options you want.
      6. That’s all!

Update Samsung Galaxy S2 GT-I9100 to Android 4.4.2 KitKat with SlimKAT ROM

0
Update Samsung Galaxy S2 GT-I9100 to Android 4.4.2 KitKat with SlimKAT ROM

SlimKAT ROM is a very popular and one of the best custom ROMs available for so many Android devices around. XDA senior member FusionJack has brought the users unofficial SlimKAT ROM for Samsung’s break-through device, the Galaxy S2. SlimKAT ROM, more precisely known as SlimROM  and SlimSaber ROM for the Galaxy S2 is based on Android 4.4.2 KitKat and is compiled up using SaberMod toolchain that is same as that of the official Slim ROM.

Probably all of you know that Samsung has stopped Galaxy S2’s official updates at Android 4.1.2 that means the device owners are no longer able to taste any further version of Android. While some of you’re worried because of this drawback, SlimKAT ROM might be able to save your device a life. You can easily update your device to this nice custom ROM and experience Android 4.4.2 KitKat unofficially. Although SlimKAT is a very smooth and stable custom ROM loaded with tons of features but it may kept in mind that after all it’s a custom ROM and it may contain bugs. It is highly recommended not to install a custom operating system until and unless you’re not familiar with it and you’re not good at tweaking your device. You may proceed only if you’ve are an Android power user and are familiar with custom ROMs. In the following post we’ll be going through the ROM features and the step by step guide to install it successfully on the Galaxy S2 GT-I9100. All you got to do, is to move forward and read the instructions carefully.

SlimSaber

Here are the features of SlimSaber (SlimKAT) ROM Android 4.4.2 KitKat for Galaxy S2:

SlimSaber (SlimKat) ROM

    • 20131216 | Package Installer: Show current & new version of the app – while installing the apk manually.
    • 20131219 | Double tap gesture on the status bar to turn off the screen
    • 20131222 | SlimCenter: Now you can check SlimSaber updates through SlimCenter. You’ll be redirected to goo.im i9100 folder.
    • 20131225 | Chamber of Secrets: The settings is hidden, but you can active the hidden setting. Wait for announcement from SlimBean team regarding this feature. It looks like for advanced user only. Read more info here.
    • Path: First go to developer options – scroll to the bottom list and tap on empty space. Then add widget to home screen called slim shortcut
    • 20131229 | Option to use volume keys to control media volume anytime: The volume keys control the Media volume rather than the Ringer hence removing the issue of accidentally changing the Ringer volume.
    • Path: Settings – Sound – Advanced options – Tick on Media control
    • 20131230 | Advanced storage settings: switch external storage.
    • Path: Settings – Storage – Menu – Advanced storage settings
    • 20131230 | Temporary integrated performance settings using omnirom’s performance control into advanced settings. If you use performance control app, better deinstall it before flashing this build.
    • Path: Settings – Advanced options – Performance
    • 20140105 | Swap volume buttons when the screen is rotated by 90 or 180 degrees.
    • Path: Settings – Display – Rotation – Swap volume buttons
    • 20140108 | Quick Settings – let’s welcome Location Tile to 4.4. See here for explanation.
    • 20140111 | Flip to Mute/Reject Call.
    • Path: Phone app – Menu – Settings – Flip Action. Also while you are in that screen, you can tick on “Incoming call in background” (Android 4.4 feature or Slim team?)
    • 20140111 | Mobile Network Battery Saver Mode. More info here.
    • Path: Settings -> More -> Mobile Networks -> Battery saving mode
    • 20140111 | Add LongClick SwitchButton. More info here and here
    • 20140111 | Sleep Screen Shortcut: Looks like Slim shortcut 1×1 widget with “Go to sleep” function.
    • 20140111 | Minimum Vibration Duration: For example set the vibration intensity when pressing the menu key or pattern lock screen.
    • Path: Settings – Sound – Minimum vibration duration
    • 20140113 | Call Log: Separate All tab into Incoming and Outgoing tabs
    • 20140113 | Custom Tiles for Quick Settings tiles
    • 20140115 | Listanimation Views and Interpolator: more info here – Point [2] @GNUDroid.
    • Path: Settings – Display – ListView Animation/Interpolator
    • 20141018 | Torch – Glowpad Torch: Double-tap and hold the slider to start torch.
    • Path: Settings – Security – Slider targets and shortcuts – Tick on slider torch
    • 20141018 | Pimp up Notification: Hide Labels.
    • Path: Settings – Interface – Notification – Hide notification labels
    • 20141018 | Add Advanced reboot. If your advanced reboot gone, re-enable in Settings – Security – Advanced reboot
    • 20141018 | My Phone Number: This adds back the option to set the device phone number, just for fun probably.
    • Path: Go to phone app – menu – settings – Additional settings – My phone number and enter your phone number. Then go to Settings – About phone – Status – My Phone Number and enjoy!
    • 20141018 | Settings: Add support for ADB over network.
    • Path: Settings – Developer options – ADB over network. Read the warning!
    • 20140120 | Smart PulldownPath: Settings – Interface – Notification – Smart pulldown
    • 20140120 | Quick Settings: Quick CollapsePath: Settings – Interface – Notification – Quick Collapse
    • 20140120 | Always show battery on KeyguardPath: Settings – Security – Battery status
    • 20140120 | Expandable Volume OverlayPath: Settings – Sound – Volume panel style.
    • 20140120 | Favorite Contact Tile for Quick Settings tiles
    • 20140125 | Feature: Slims Hardware Key RebindingPath: Settings – Navigation – Hardware Button.
    • 20140125 | Make menu unlock configurable. Path: Settings – Security. It is disabled by default.
    • 20140125 | Feature: Custom Carrier LabelPath: Settings – Interface – Notification – Custom carrier label
    • 20140127 | Clear All Apps button added in Recent Panel. Path: Settings – Interface – Recent apps panel Removed from build 201403014
    • 20140127 | Fixed external storage not mounting under UMS mode with upstream update
    • 20140127 | Pimp-up Media Tile: After enabling the “Music” tile in QS screen, you can double tap on it while playing the music to start a sleep timer for the currently playing media. More info here
    • 20140127 | Added DashClock as default lock screen clock widget. To bring back the stock lock screen clock, simply remove the DashClock app via SlimSizer from SlimCenter [thanks to @JavaScout for the info]. Read fushionjack’s additional info here. Removed from build 20140129 
    • 20140201 | Added network stats to status bar: After enabling this, you will see the upload and download speed of your data/internet in the status bar. More info here @Rachid.Ala
    • Path: Settings – Interface – Status bar – Network speed
    • 20140201 | Clear All Apps button (Improvement): Added long press to clear caches. You’ll be prompted with supersuper. That’s normal. Removed from build 20140304
    • 20140201 | Configurable overflow menu button: Forcing the overflow menu button is a feature of Android 4.4. However with this option now you can completely enable or disable the overflow menu on screen key.
    • Path: Settings – Navigation – Hardware buttons – Show overflow menu button
    • 20140202 | AOKP custom system animations: Now you can set lots of custom animations for various parts of the UI.
    • Path: Settings – Display – Custom system animations
    • 20140202 | Super advanced Custom Toggle: More info here
    • 20140203 | Allow holders of WRITE_MEDIA_STORAGE to write to secondary external storage. More info here
    • 20140207 | Fix corrupted charging animation when the phone is switched off and the charger is plugged in and some changes related to the charger like.
    • 20140207 | Home button to unlock device: More info here.
    • Path: Settings – Security
    • 20140207 | Dynamic data usage: Change the data usage cycle to daily, weekly or monthly.
    • Path: Settings – Data usage – Tap on data usage cycle list – scroll all the way down and choose custom cycle
    • 20140207 | Added OmniSwitch: Details about the feature here. Other related infos here.
    • Path: Open the OmniSwitch app from the app drawer and enable it and then configure them as per your requirement Removed from build 20140304
    • 20140210 | SlimPIE: Based on CM’s PIE, inspired by PA’s PIE with a light touch of Slim. More info here.
    • Path: Settings – Navigation – SlimPIE
    • 20140210 | Open source google dialer: More info here. Try searching for “pizza” in the phone app. If you do not find any nearby pizza restaurant phone number, try enabling location first.
    • 20140210 | OmniSwitch as default recents: Now you can make OmniSwitch as your default recent app menu when you press the recent button combo.
    • Path: Settings – Interface – Recents app panel Removed from build 20140304
    • 20140210 | Home button answers call: Adds ability to answer call with hardware HOME button.
    • Path: Settings – Accessibility – Home button answers call
    • 20140210 | Add Download Speeds and ETA in notification. Works for downloads notification, Play Store downloads, etc..
    • 20140213 | Recents RAM barPath: Settings – Interface – Recents app panel Removed from build 20140304
    • 20140217 | SDCard: direct I/O file access fix. A brand new update from AOSP concerning sdcard
    • 20140221 | Wakelock Blocker: This is will show you list of wakelocks which can be blocked from happening. Use with caution.
    • Path: Settings – Advanced options – Wakelock blocker Temporarily removed from build 20140304
    • 20140221 | Add battery level around unlock ring: You can see this only when “slide” lock screen is set.
    • Path: Settings – Security – Battery level around unlock ring
    • 20140221 | Enable Lockscreen orientationPath: Settings – Security – Allow screen rotation
    • 20140224 | Notification Reminders: Click notification header to set a reminder. Long-click to dismiss current.
    • Path: Settings – Interface – Notification & QS Drawer – Notification reminder

Pre-Installation Instructions:

  1. This ROM is only for Samsung Galaxy S II GT-I9100. Do not try this on any other device, please check your device’s model in Settings > About Device > Model.
  2. Your device must have a custom recovery installed, in case you’re missing it you may Follow our full guide here to install CWM.
  3. Your device’s battery should be charged at least over 60%. This is highly recommended in order to prevent any power issues during the flashing process.
  4. Make sure that you backup your important media content, ContactsCall Logs & Messages. This is highly recommended just in case something goes wrong and you need to reset your phone.
  5. If you already have rooted your device, use Titanium Backup to back up all your important apps + system data. Also if you are using a custom recovery, it is recommended that you backup your current system using that first. [Just for the sake of safety]. Here’s our full Nandroid Backup guide.
  6. You will have to go through Data Wipes during installation of this ROM, so make sure that you have backed up all the mentioned data.
  7. Make an EFS backup of your phone before you flash this ROM.
  8. You need enough confidence to flash this ROM.
  9. Alright! Go ahead and flash the custom firmware, follow this guide to the letter.

Disclaimer: The methods involved in flashing custom roms and rooting your phone are highly custom and may result in bricking your device, and has nothing to do with Google or the device manufacturer that is SAMSUNG in our case. Also rooting your device will void its warranty and you will be no longer eligible for any kind of free device services by the manufacturers/warranty providers. In case of any mishap we may not be held responsible. Follow these instructions to the letter to avoid any mishap or bricking. Make sure that whatever you do, you are doing it at your own responsibility.

How to Install SlimSaber Android 4.4.2 KitKat on  Samsung Galaxy S2:

  • Download SlimSaber  Android 4.4.2 KitKat ROM .zip file.
  • Download Google Gapps for Android 4.4.2 KitKat .zip file.
  • Connect your phone to your PC now.
  • Copy both the .zip files to the storage of your phone.
  • Now disconnect your phone and turn it off complete.
  • Boot into CWM recovery now, in order to do so, turn it on by pressing and holding Volume Up + Home Button + Power Key. You should see the recovery mode in a while.
  • Now in CWM recovery, wipe cache, factory data reset and advanced options > dalvik cache.
  • After wiping all these three, select “Install” option.
  • Now select “Install > Choose Zip from SD card > Select SlimSaber ROM.zip file > Yes”.
  • This will flash the ROM in your phone.
  • Once again in CWM select “Install > Choose zip from SD card > Gapps.zip file > Yes”.
  • This will flash Gapps in your phone.
  • Reboot your device.
  • You should see the SlimSaber (SlimKAT) ROM running on your device in a while.
  • That’s all!

First boot may take up to 10 minutes, you may not worry if it’s taking that much long. In case it’s taking too long, you may boot into CWM recovery and wipe cache and dalvik cache and reboot your device as it may fix the issue. In case your device is having issues, you may return to your old system using the Nandroid backup or follow our guide here to install stock firmware.

In case you got any issues or you face any difficulties regarding this post, please feel free to stop by the comment box below and let us know. We will get back to you as soon as possible. Thank you all.

Also checkout: