Home Blog Page 441

How To Root Sony Xperia Z2 D6503 17.1.1.A.0.438 Firmware [Locked Bootloader]

0
How To Root Sony Xperia Z2 D6503 17.1.1.A.0.438 Firmware [Locked Bootloader]

Sony has rolled out a new update based on the build number 17.1.1.A.0.438 for its latest flagship device, the Xperia Z2. The new update fixes some minor bugs and is based on Android 4.4.2 KitKat. As always, the update is on a slow roll out at the moment not all the users have received this.

So, just in case you’re one of the lucky people to receive this update and you’re now enjoying this on your device, you may want to add a little charm to it by gaining the root access. In case you didn’t come across any method to root your device running the .438 firmware, you may stop worrying about it now as you’ve spotted the right place. We are going to root the Xperia Z2 D6503 running the latest 17.1.1.A.0.438 firmware without touching the bootloader of your device. All you need is, you need to follow this guide being careful and get it done without any hiccups here an there.224201415010PM_635_sony_xperia_z2

Here are the early preparations:

      1. This guide is only for Sony Xperia Z2. The device must be running on the latest Android 4.4.2 KitKat firmware based on the build number 17.1.1.A.0.438.
      2. Make sure that your phone’s battery is charged at least over 60%. This is highly recommended in order to prevent any power issues during the rooting process.
      3. USB debugging mode must be enabled on your device. To do so, go to Settings > Developer Options > USB debugging mode > Enable. In case you can’t find the developer options, then go to Settings > About Device > Tap Build Number for 7 Times to enable the developer options.
      4. Use only on OEM data cable to establish connection between your PC and your Phone.
      5. Allow “Unknown Sources” on your phone. To do so,  go to Settings > Security > Unknown Sources > Tick.

How to Root:

      1. Download the EasyRoot Tool V7.zip file
      2. Extract the file to get the install.bat file.
      3. Connect your Xperia Z2 D6503 to your PC now.
      4. Run the install.bat file.
      5. Follow the on-screen instructions now and get it done.
      6. That’s All! You’re rooted now.

How to install busybox now?

      1. Go to Google Play Store on your phone.
      2. Search for “Busybox Installter”.
      3. Once you find it, install it.
      4. Run the Busybox installer and proceed with the installation.
      5. That’s all!

How to check if the device is properly rooted or not?

      1. To do so, go to Google Play Store on your Xperia Z2.
      2. Find Root Checker” and install it.
      3. Open Root Checker.
      4. Tap “Verify Root”.
      5. It will ask you for SuperSu rights, tap “Grant”.
      6. It should show you Root Access Verified Now!
      7. That’s All!

1560688_10202529514651766_2061540064_n


What to do once you’re rooted?

Rooting your phone gives you complete access over all the data which is apparently locked by the manufacturers. This includes removal of the factory restrictions and making changes to the internal system and the operating system. Gaining the root access gives you the privileges to install various applications to enhance the performance of your device, allows you to remove the built-in applications/programs, helps you to upgrade the battery life of your device & install the apps which require the root access for the proper functionality and modify your device in so many other ways e.g using mods and flashing custom recoveries and custom ROMs. Here’s our collection of 10 Best Root Apps.

Root Credits: zxz0O0


Top 5 Sketching Apps for Android Phones

0
Top 5 Sketching Apps for Android Phones

Art is so diverse that resides in our hearts in one way or the other. Since childhood doodling and sketching has been our all time favorite. A creative activity, helping us display our thoughts on a piece of paper not only to enjoy, but as a pass time favorite hobby.

From beginners to people who do not even know anything related to sketching and designing can also enjoy it, whereas the best part is that, you really don’t need to rush to the stationary shop to get a sketch book and even a brush or a pencil. Android is full of such apps which we can be used for this purpose specifically. The best and most suitable sketching app can be judged by seeing the user interface of the app and the features it provides. Here are some of the best Android sketching apps that we will be discussing, from the Android market.

Doodledroid- Paint and Sketch

Doodledroid - paint and sketch

Doodledroid is a diverse sketching app which is available with full version, with no advertisement pop-ups and no in-app purchases. In short, every feature is there for your use. The app is best suited for both Tablets and smartphones. You can use six different tools including Brush, Pencil, Crayon, Eraser, Pen and Smudge. It supports landscape mode as well portrait, also full featured color palette to play with all your favorite colors. You can use pinch to pan or zoom to add details to your artwork. The app is diverse and very easy to use.

Also See: top 5 mileage apps for iPhone

Sketch Master 

Sketch Master

With several sketching tools and features, Sketch Master falls into the professional sketching application category. The app has a simple user interface with smart features. The app includes 7 brush tools with smooth brush strokes and text addition. A very important feature is Layers i.e. you can work on several layers; duplicate, merge, reorder as well as work with Layer visibility and opacity. You can swipe slide the palettes which are professionally arranged. You can also share your beautiful artwork with your friends on social media sites or save it on the SD card.

Sketch n Go

Sketch 'n' go

Sketch n Go is a sketching application with simple user interface which allows you to use more than 10 different types of pencils and brushes. The app has introduced amazing tools and undo feature which is helpful in creating a superb sketch. Moreover, you also have the option to work with colors as well. You can save the sketches on your SD card or Dropbox as well share them with friends through Facebook, Picasa and email.

Sketcher

sketcher

Sketcher lies in the top 5 sketching apps in the android market. It comes up with 12 types of brushes and eraser. You can use the Undo and Redo option multiple times until you get the best artwork you have imagined. You also have the pan and zoom feature to add details along with color palette with transparency. The canvas size is also adjustable. You can use different modes for your artwork including normal, color background and blueprint, etc. The share feature is also available in the app. 

Also See: top 5 running apps for Android and iPhone

Sketchbook Express

SketchBook Express

Sketchbook Express is another awesome sketching app with a bold user interface. You can make an artwork with every possible color you can imagine. You can work with 15 types of brushes including floodfill. The app makes you work with 2500% zoom in feature. Moreover, you can use up to 3 layers to work on also enabling import of layers from gallery and camera. The layer can be merged, toggled and the opacity can be controlled on each layer. Other features include 4 different draw styles, adding text and dynamic symmetric drawing. Once your artwork is ready you can save it as well as directly share it on Facebook or deviantART.

Install Android 4.4.4 KitKat on Galaxy S3 Mini I8190/N/L with Carbon ROM

Install Android 4.4.4 KitKat on Galaxy S3 Mini I8190/N/L with Carbon ROM

Samsung’s very first Mini device, the S3 Mini is a widely used and one of the best budget Android devices available around the world, but Samsung hasn’t been much serious on the software end and has stopped the device’s updates on Android 4.1.2 Jelly Bean. Samsung might have forgotten the device, but the great developers haven’t yet. There’s a number of custom ROMs available that can help you to update your Galaxy S3 Mini to the latest Android OS, but sometimes the best is yet to come.

Google has recently rolled out Android 4.4.4 KitKat and is currently updating its Nexus devices, on the other hand Sony has started updating its Xperia devices to the latest KitKat firmware as well, this may disappoint the Galaxy S3 Mini users who cannot expect any further updates from Samsung, but XDA Developer NovaFusion seems to wipe these clouds of disappointment as he has brought up the famous Carbon ROM based on Android 4.4.4 KitKat for the Galaxy S3 Mini. Although its a custom ROM, but its stable and maybe kept for everyday use on your Mini S3. Before you start wondering how you can get this custom ROM running on your Android device, you may scroll down and find out the complete guide to install Android 4.4.4 KitKat on Galaxy S3 Mini GT-I8190/N/L using Carbon custom ROM. To get it done successfully, you need to follow the instructions carefully.GALAXY_SIII_mini_Product_Image4.jpg_610x406

Here are the early preparations:

      1. This ROM is only for Samsung Galaxy S3 Mini GT-I8190/N/L. Do not try this on any other device, please check your device’s model in Settings > About Device > Model.
      2. Your device must have a custom recovery installed, in case you’re missing it you may Follow our full guide here to install TWRP.
      3. Your device’s battery should be charged at least over 60%. This is highly recommended in order to prevent any power issues during the flashing process.
      4. Make sure that you backup your important media content, ContactsCall Logs & Messages. This is highly recommended just in case something goes wrong and you need to reset your phone.
      5. If you already have rooted your device, use Titanium Backup to back up all your important apps + system data. Also if you are using a custom recovery, it is recommended that you backup your current system using that first. [Just for the sake of safety]. Here’s our full Nandroid Backup guide.
      6. You will have to go through Data Wipes during installation of this ROM, so make sure that you have backed up all the mentioned data.
      7. Make an EFS backup of your phone before you flash this ROM.
      8. You need enough confidence to flash this ROM.
      9. Alright! Go ahead and flash the custom firmware, follow this guide to the letter.

Disclaimer: The methods involved in flashing custom roms and rooting your phone are highly custom and may result in bricking your device, and has nothing to do with Google or the device manufacturer that is SAMSUNG in our case. Also rooting your device will void its warranty and you will be no longer eligible for any kind of free device services by the manufacturers/warranty providers. In case of any mishap we may not be held responsible. Follow these instructions to the letter to avoid any mishap or bricking. Make sure that whatever you do, you are doing it at your own responsibility.

How To Install Android 4.4.4 KitKat On Samsung Galaxy S3 Mini Using Carbon ROM:

      1. Download carbon4.4_golden.nova.20140628.zip file.
      2. Download Gapps.zip file for CM 11.
      3. Connect your phone to your PC now.
      4. Copy the both the .zip files to the storage of your phone.
      5. Now disconnect your phone and turn it off complete.
      6. Boot into TWRP recovery now, in order to do so, turn it on by pressing and holding Volume Up + Home Button + Power Key. You should see the recovery mode in a while.
      7. Now in TWRP  recovery, wipe cache, factory data reset and advanced options > dalvik cache.
      8. After wiping all these three, select “Install” option.
      9. Now select “Install > Choose Zip from SD card > Select  carbon4.4_golden.nova.20140628.zip file > Yes”.
      10. This will flash the ROM in your phone, once done get back to the main menu in recovery.
      11. Now once again select “Install > Choose Zip from SD card > Select Gapps.zip file > Yes”
      12. This will flash the Gapps in your phone.
      13. Reboot your device.
      14. You should see the Android 4.4.4 KitKat Carbon ROM running on your device in a while.
      15. That’s all!

First boot may take up to 10 minutes, you may not worry if it’s taking that much long. In case it’s taking too long, you may boot into TWRP recovery and wipe cache and dalvik cache and reboot your device as it may fix the issue. In case your device is having issues, you may return to your old system using the Nandroid backup or follow our guide here to install stock firmware.

In case you got any issues or you face any difficulties regarding this post, please feel free to stop by the comment box below and let us know. We will get back to you as soon as possible. Thank you all.

Install Android 4.4.4 KitKat On Samsung Galaxy S3 Mini I8190/N/L Using CyanogenMod 11

Install Android 4.4.4 KitKat On Samsung Galaxy S3 Mini I8190/N/L Using CyanogenMod 11

Galaxy S3 Mini is currently running on Android 4.1.2 Jelly Bean, and it doesn’t seem that Samsung is in a mood to update this device to any further version of Android. While Samsung has stuck this device on 4.1.2 Jelly Bean, Google has rolled out Android 4.4.4 KitKat and started updating its Nexus devices to this latest and greatest version of Android.  Galaxy S3 Mini users might be disappointed on this, but the disappointment isn’t meant to last long as the developers are always there to bring up something that can give the Android devices a new life.

XDA Senior Member New Maclaw has once again brought up the latest firmware, Android 4.4.4 KitKat for the Galaxy S3 Mini based on the famous custom ROM CyanogenMod 11. The firmware is stable and maybe kept for everyday’s use on your device. This seems quite a good chance to get your Galaxy S3 Mini KitKat treatment as CyanogenMod has always remained the users’s choice. As you move forward, you will find a comprehensive guide that will help you to install this Android 4.4.4 KitKat on your Galaxy S3 Mini using the CyanogenMod 11 Custom ROM. You just need to make sure that you follow all the instructions carefully in order to get it done successfully.

Update: Install Android 5.0.2 Lollipop On Your Galaxy S3 Mini With CyanogenMod 12 Custom ROM


GALAXY_SIII_mini_Product_Image4.jpg_610x406


Here are the early preparations:

  1. This ROM is only for Samsung Galaxy S3 Mini GT-I8190/N/L. Do not try this on any other device, please check your device’s model in Settings > About Device > Model.
  2. Your device must have a custom recovery installed, in case you’re missing it you may Follow our full guide here to install TWRP.
  3. Your device’s battery should be charged at least over 60%. This is highly recommended in order to prevent any power issues during the flashing process.
  4. Make sure that you backup your important media content, ContactsCall Logs Messages. This is highly recommended just in case something goes wrong and you need to reset your phone.
  5. If you already have rooted your device, use Titanium Backup to back up all your important apps + system data. Also if you are using a custom recovery, it is recommended that you backup your current system using that first. [Just for the sake of safety]. Here’s our full Nandroid Backup guide.
  6. You will have to go through Data Wipes during installation of this ROM, so make sure that you have backed up all the mentioned data.
  7. Make an EFS backup of your phone before you flash this ROM.
  8. You need enough confidence to flash this ROM.
  9. Alright! Go ahead and flash the custom firmware, follow this guide to the letter.

Disclaimer: The methods involved in flashing custom roms and rooting your phone are highly custom and may result in bricking your device, and has nothing to do with Google or the device manufacturer that is SAMSUNG in our case. Also rooting your device will void its warranty and you will be no longer eligible for any kind of free device services by the manufacturers/warranty providers. In case of any mishap we may not be held responsible. Follow these instructions to the letter to avoid any mishap or bricking. Make sure that whatever you do, you are doing it at your own responsibility.

How To Install Android 4.4.4 KitKat On Samsung Galaxy S3 Mini Using CM 11 Custom ROM:

      1. Download cm11.0_golden.nova.20140628.zip file.
      2. Download Gapps.zip file for CM 11.
      3. Connect your phone to your PC now.
      4. Copy the both the .zip files to the storage of your phone.
      5. Now disconnect your phone and turn it off complete.
      6. Boot into TWRP recovery now, in order to do so, turn it on by pressing and holding Volume Up + Home Button + Power Key. You should see the recovery mode in a while.
      7. Now in TWRP  recovery, wipe cache, factory data reset and advanced options > dalvik cache.
      8. After wiping all these three, select “Install” option.
      9. Now select “Install > Choose Zip from SD card > Select cm1..0_golden.nova.20140628.zip file > Yes”.
      10. This will flash the ROM in your phone, once done get back to the main menu in recovery.
      11. Now once again select “Install > Choose Zip from SD card > Select Gapps.zip file > Yes”
      12. This will flash the Gapps in your phone.
      13. Reboot your device.
      14. You should see the Android 4.4.4 KitKat ROM running on your device in a while.
      15. That’s all!

First boot may take up to 10 minutes, you may not worry if it’s taking that much long. In case it’s taking too long, you may boot into TWRP recovery and wipe cache and dalvik cache and reboot your device as it may fix the issue. In case your device is having issues, you may return to your old system using the Nandroid backup or follow our guide here to install stock firmware.

In case you got any issues or you face any difficulties regarding this post, please feel free to stop by the comment box below and let us know. We will get back to you as soon as possible. Thank you all.

Hide WhatsApp photos from gallery [ How To ]

0
Hide WhatsApp photos from gallery [ How To ]

WhatsApp is a social media app, which connects us with our friends and family, also enables us to share photos and videos of our life’s precious moments with one another. Some of these photos reflect memories that we strictly like to keep to ourselves. Unfortunately, all the media files shared on WhatsApp are shown as a folder in our smartphone’s gallery and there is no option to save it as private. We have came across with an easy method to hide the WhatsApp pictures from phone’s gallery, so that they are are no more accessible to other people using your phone.

Also See: Whatsapp for pc Hide WhatsApp photos from gallery

Hide WhatsApp photos from gallery [ How To ]

Hide WhatsApp photos from gallery 1 Hide WhatsApp photos from gallery 3 Hide WhatsApp photos from gallery guide

  • Firstly, you will need a file manager app installed in your phone. If you do not have any already, you can install it now. Some of the good file manager apps are ES File Explorer, Total Commander and Astro.
  • Launch the file explorer app to get started.
  • Secondly, open your WhatsApp media folder which is most likely to reside in your phone’s gallery or SD card.
  • An option is available to make a new folder within the WhatsApp folder. You can do it by tapping on the + sign on the bottom of the screen and create a new ‘File’.
  • While creating this new file, you have to make sure to name it as nomedia and hit OK.
  • Here is when the magic begins. Once you have created the new file named as .nomeida, go back to phone’s Gallery. You will notice that you are no longer able to see your WhatsApp media folder there.
  • Do not get paranoid to see all your photos shared on WhatsApp disappear right infront of your eyes. You can still view the same folder but at a different location which I will explain.
  • To view your WhatsApp folder, go to the file manager app and you will be able to view the folder there.
  • This whole process can be reversed as well. If you want the WhatsApp folder back in your gallery, follow these steps.
  • In order to reverse the whole hide thing, you need to delete the .nomedia file that you had created before. The file will not be visible at the place you created i.e. the WhatsApp folder. It is stored as a hidden file.
  • Go to the File manager app and click on the blue icon on the top left of the screen to see the menu.  Scroll down the main menu and look for ‘Hidden files’ option. Turn the hidden files Off.
  • After doing this you will be able to see the .nomedia file again in the WhatsApp folder. Simply delete that file and your WhatsApp media folder will re-appear in your phone’s gallery.

The process might look a little difficult while reading but once you try doing it yourself, you will find it way to easier. Just follow all the steps and you will be able to keep your private media files shared by your WhatsApp circle limited to yourself.

Update Xperia Z1 Compact D5503 To Official 14.4.A.0.108 Android 4.4.4 KitKat Firmware

9
Update Xperia Z1 Compact D5503 To Official 14.4.A.0.108 Android 4.4.4 KitKat Firmware

Sony just started updating its mainstream devices to the the 8 days old version of Android, the Android 4.4.4 KitKat. The new update packs up a number of performance enhancements, bug fixes. New and improved camera application experience, Google apps have been improved and Sony’s apps have received an update as well to work even better. The update is currently being rolled out to users in specific countries. As off now, this update has been confirmed for Sony Xperia Z1, Z Ultra and Xperia Z1 Compact. Just in case you own Xperia Z1 Compact and you’re looking for a way to update your device manually as the official update may take quite a long time to reach you through OTA or through Sony PC Companion, you’ve spotted the right place.Z1 Compact Latest Software

As you scroll down this post, you will find a comprehensive guide that will help you to update your Sony Xperia Z1 Compact D5503 to latest and greatest version of Android, Android 4.4.4 KitKat based on the build number 14.4.A.0.108 using Sony Flashtool. You must follow the guide being careful in order to get it done successfully.

Early Preparations:

      1. As mentioned, this firmware is only for Xperia Z1 Compact D5503. Do not try this on any other phone, that may result in bricking your device. Check your device’s model number in Settings > About device.
      2. You must have installed Sony Flashtool. Find the full guide here.
      3. After installing Sony Flashtool, open the Flashtool folder from the drive where you installed it.
      4. Now open Flashtool>Drivers>Flashtool-drivers.exe and install the Flashtool, Fastboot & Xperia Z1 Compact drivers from the list. [Important]
      5. Your phone must be charged at least over 60%. This is highly recommended in order to prevent any power issues during the flashing process.
      6. Enable USB debugging mode on your device. To do so, tap settings>developer options>USB debugging. If you can’t find developer options in settings, then tap settings > about device and tap “Build Number” for 7 times and you’ll get em’ activated under settings.
      7. Make sure that you back up all your important media content,  contactscall logs and text messages. This is highly recommended and important in case something goes wrong during the flashing process or in case you select the data wipe option before flashing. You can easily restore whenever you need.
      8. To flash this firmware, you do not need to root your device, you do not need to unlock the bootloader. All you need is, your device must be the one mentioned and must be running on Android 4.2.2 or 4.3 Jelly Bean.
      9. Download the firmware file properly.
      10. Use the OEM data cable to connect your phone to your PC. Using any other data cable might cause connection problems.
      11. This firmware can be flashed on Xperia Z1 Compact in any region/any country.
      12. Alright! Follow this guide to the letter in order to prevent any mishap.

Here’s how you can update your Xperia Z1 Compact D5503 to official 14.4.A.0.108 Android 4.4.4 KitKat firmware:

      1. Before moving forward, please make sure that you’ve read the pre requisites and ensure that you are set to go ahead.
      2. Download the latest firmware Android 4.4.4 KitKat 14.4.A.0.108 FTF file. [Generic]
      3. Copy the file and paste in Flashtool>Firmwares folder.
      4. Open Flashtool.exe now.
      5. Hit the small lightening button on the top left corner and select Flashmode.
      6. Select the FTF firmware file that you placed in the Firmware folder.
      7. From the right side, select what do you want to wipe. Data, cache and apps log, all wipes are recommended, perhaps you may select if you don’t want.
      8. Click on OK, and it will start preparing the firmware for flashing. This may take a little while to load.
      9. As soon as the firmware is loaded, it will prompt you to attach the phone by turning it off and keeping the back key press.
      10. For Xperia Z1 Compact, Volume Down key will do the job of back key, just turn off your phone, keep the Volume Down key pressed and plug in the data cable.
      11. As soon as the phone is detected in Flashmode, the firmware will start flashing, Do not leave the Volume Down key until the process is complete.
      12. As soon as you see “Flashing ended or Finished Flashing” leave the Volume Down key, plug the cable out and reboot.
      13. That’s All! Congrats! You’ve installed latest Android 4.4.4 kitkat on your Xperia Z1 Compact D5503. Enjoy

In case you got any queries or face any problems regarding this guide, please feel free to stop by the comment box below and let us know. We will get back to you as soon as possible. Thanks all!

How To Update Sony Xperia Z1 C6903 to Official Android 4.4.4 KitKat 14.4.A.0.108 Firmware

26
How To Update Sony Xperia Z1 C6903 to Official Android 4.4.4 KitKat 14.4.A.0.108 Firmware

Sony seems to take the lead once again in terms of software updates as it has just started rolling out the latest and greatest version of Android to its former flagship device, the Xperia Z1. The new firmware is based on Android 4.4.4 KitKat with the build number 14.4.A.0.108 build number. There’s a number of bug fixes, performance enhancements, latest security updates in Android from Google, Sony’s apps have been updated as well. Improvements have been made with all of the Google apps as well. The update is currently being rolled out for C6903 owners in specific countries.

As always, this update will take some time while it hits the devices all around the world through Sony PC Companion or through OTA updates. For the Android enthusiasts, who can’t wait to get this latest Android 4.4.4 update on their Xperia Z1, we’ve the following guide that will help you to update your Sony Xperia Z1 C6903 to official Android 4.4.4 KitKat firmware based on the build number 14.4.A.0.108. All you need is, you need to follow this guide being careful and get your device this latest stock firmware.

Xperia Z1 4.4.4

Early Preparations:

      1. As mentioned, this firmware is only for Xperia Z1 C6903. Do not try this on any other phone, that may result in bricking your device. Check your device’s model number in Settings > About device.
      2. You must have installed Sony Flashtool. Find the full guide here.
      3. After installing Sony Flashtool, open the Flashtool folder from the drive where you installed it.
      4. Now open Flashtool>Drivers>Flashtool-drivers.exe and install the Flashtool, Fastboot & Xperia Z1 drivers from the list. [Important]
      5. Your phone must be charged at least over 60%. This is highly recommended in order to prevent any power issues during the flashing process.
      6. Enable USB debugging mode on your device. To do so, tap settings>developer options>USB debugging. If you can’t find developer options in settings, then tap settings > about device and tap “Build Number” for 7 times and you’ll get em’ activated under settings.
      7. Make sure that you back up all your important media content,  contactscall logs and text messages. This is highly recommended and important in case something goes wrong during the flashing process or in case you select the data wipe option before flashing. You can easily restore whenever you need.
      8. To flash this firmware, you do not need to root your device, you do not need to unlock the bootloader. All you need is, your device must be the one mentioned and must be running on Android 4.2.2 or 4.3 Jelly Bean.
      9. Download the firmware file properly.
      10. Use the OEM data cable to connect your phone to your PC. Using any other data cable might cause connection problems.
      11. This firmware can be flashed on Xperia Z1 in any region/any country.
      12. Alright! Follow this guide to the letter in order to prevent any mishap.

Update Sony Xperia Z1 C6903 to Official Android 4.4.4 KitKat 14.4.A.0.108 Firmware:

      1. Before moving forward, please make sure that you’ve read the pre requisites and ensure that you are set to go ahead.
      2. Download the latest firmware Android 4.4.4 KitKat 14.4.A.0.108 FTF file. [Generic]
      3. Copy the file and paste in Flashtool>Firmwares folder.
      4. Open Flashtool.exe now.
      5. Hit the small lightening button on the top left corner and select Flashmode.
      6. Select the FTF firmware file that you placed in the Firmware folder.
      7. From the right side, select what do you want to wipe. Data, cache and apps log, all wipes are recommended, perhaps you may select if you don’t want.
      8. Click on OK, and it will start preparing the firmware for flashing. This may take a little while to load.
      9. As soon as the firmware is loaded, it will prompt you to attach the phone by turning it off and keeping the back key press.
      10. For Xperia Z1, Volume Down key will do the job of back key, just turn off your phone, keep the Volume Down key pressed and plug in the data cable.
      11. As soon as the phone is detected in Flashmode, the firmware will start flashing, Do not leave the Volume Down key until the process is complete.
      12. As soon as you see “Flashing ended or Finished Flashing” leave the Volume Down key, plug the cable out and reboot.
      13. That’s All! Congrats! You’ve installed latest Android 4.4.4 kitkat on your Xperia Z1 C6903. Enjoy

In case you got any queries or face any problems regarding this guide, please feel free to stop by the comment box below and let us know. We will get back to you as soon as possible. Thanks all!

Root Nexus 7 2012 Running Android 4.4.4 Kit-Kat Factory Image

0
Root Nexus 7 2012 Running Android 4.4.4 Kit-Kat Factory Image

If you have followed our previous tutorial of Nexus 7 being updated to Android 4.4.4 Kit-Kat, then you must have guessed already as we have mentioned it a lot of times before, that flashing the official/Factory Image/Firmware, your device will loose its root access and everything will be turned back to Stock. So, no matter how much of customization you have done to your device, which Custom recovery you were using before, all will be transformed back to the Stock version of firmware, even if the update is the smallest one in terms of size and changes. And only thing left is to root your device again, use any method possible and what suits you best, we will be using the golden method of Flashing the Custom Recovery first and then Root the device using that Recovery.

Root-Android1

Here are a little something to consider before rooting:

  1. Your Device must be running Android 4.4.4 Kit-Kat, How Follow: Link
  2. Back-Up all your important ContactsCall Logs & Messages. It is highly recommended in case of any mishap or data loss to back up all your important data.
  3. Back-Up your Mobiles EFS Data. 
  4. Check your device model, Go To Setting > About and Make sure that it is Nexus 7 (grouper)
  5. Do not try it on Nexus 7  2013 , Nexus 4 or Nexus 5.
  6. Bootloader Must Be Unlocked.
  7. Enable USB Debugging Mode
  8. Download USB Driver For Nexus Devices: Link

Also See: Install Android 4.4.4 Kit-Kat On Nexus 5

Also See: Root Nexus 5 Running Android 4.4.4 Kit-Kat

Also See: Install Android 4.4.4 Kit-Kat On Nexus 7 2013

Also See: Root Nexus 7 2013 Running Android 4.4.4 Kit-Kat

Disclaimer:

The methods involved in flashing custom ROMs and rooting your phone is highly custom which may result in bricking of your device, and has nothing to do with Google or the device manufacturers . In case of any mishap we may not be held responsible. Follow these instructions to the letter to avoid any mishap or bricking. Make sure that whatever you do, you are doing it at your own responsibility.

Downloads Required:

CWM Recovery + Super SU

Installation Process:

  1. Download Super SU to the root of your SDcard.
  2. Download the CWM Recovery Image and paste it in the Fastboot folder.
  3. Turn Off your Device.
  4. Now go to Bootloader/Fastboot mode, Press and hold Power + Volume Down Buttons till you see some text on-screen.
  5. Now Open Command prompt in Fastboot Folder.  How? Hold Shift Key and Right Click anywhere in the Fastboot folder.
  6. Connect your Device with PC.
  7. Now Type fastboot flash recovery recovery.img to flash the CWM Recovery on your device.
  8. Type fastboot reboot, to reboot your device.
  9. After a proper reboot, your device will be running CWM Recovery.
  10. Turn Off your Device again.
  11. Now go to Bootloader/Fastboot mode, Press and hold Power + Volume Down Buttons till you see some text on-screen.
  12. Choose Recovery From Bootloader.
  13. Navigate to ‘Install zip from SDcard’ another windows will open in front of you.
  14. Select ‘choose zip from sd card’ from the Options.
  15. Select the Super SU.zip file and confirm the installation on next screen.
  16. Once the Installation is Over, Select +++++Go Back+++++.
  17. Select “Reboot System Now“,
  18. After the Reboot, check Super SU app in drawer or use any root checker app to verify root access.

Top 5 Mileage Tracking Apps for Smartphones

0
Top 5 Mileage Tracking Apps for Smartphones

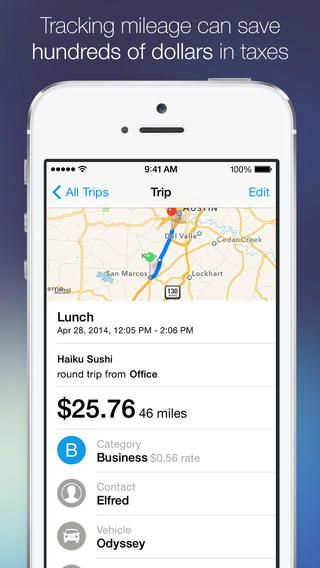
When the matter comes to claiming your expenses at work or your taxes and to do so, what you actually need, is to have a written proof. Well, as we all have our phones always with us wherever we go and can be the best way to track down our mileage and expenses whenever needed. Here is a good news for all of you, the app store is full of Mileage tracking apps and we have brought you some of the best mileage tracking apps so far.

Mileage_Log_on_the_App_Store_on_iTunes

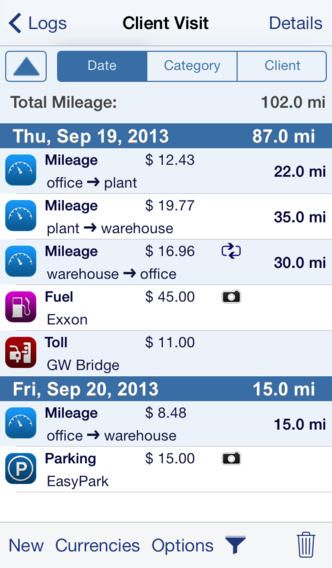
Mileage Log+

Mileage Log+

This is one of the best mileage trackers’ app found in the App Store. It will provide you with Business, Charity and Medical miles in standard IRS rates. This popular app was previously knows as Trip Cubby. You can see all of your trips including your paid and unpaid trips. The app will also show your mileage records and expenses list in the form of neatly organized graphs to keep a record.

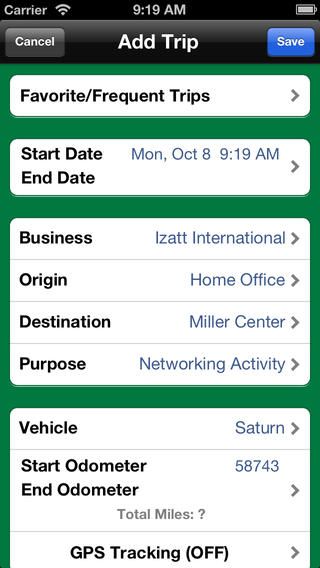
MileTracker

MileTracker

Another easy to use and very reliable app for mileage tracking is MileTracker. The app includes features like easy data tracking by filter, Personal and Business entries. The app will also provide live Mileage tracking by tracking your every move using GPS. Moreover, it will also update your driving expenses like fuel cost, tolls and parking expenses. You can have a backup of all your data records on iCloud, Dropbox and your computer as well.

MileBug

MileBug

MileBug is considered to be the number 1 finance app in U.S and the best mileage tracking app as well. The app is able to track your mileage and expenses. It provides you with complete GPS tracking and the facility to backup data as well on iCloud or computer and you can even email the data record. The app tracks your tax, deductible mileage and runs on iPhone, iPod touch and iPad.

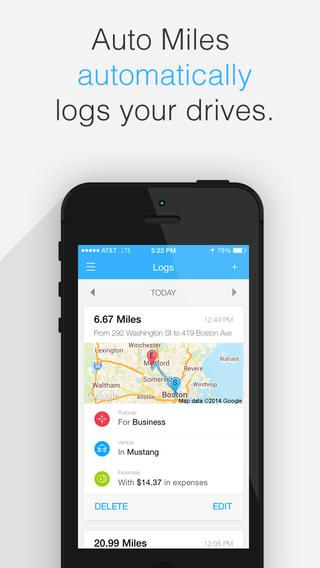
AutoMiles

AutoMiles

AutoMiles is an excellent mileage tracker with so many features and very easy to use app. The app is able to track your miles while you are driving. It has the ability to responsibly update the data for each of your trip. You can delete the unnecessary trip log by one swipe. Once the data is updated, it can be uploaded on the spreadsheets to be viewed by your accountant. Moreover, the log of first 100 miles can be obtained for free.

Klicks

Klicks

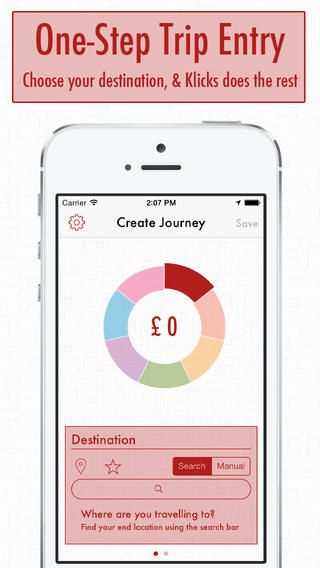
Klicks lets you update your mileage record by one-step trip entry. You only have to choose your destination and the app will do the rest of the job. Moreover, the app can totally be customized and you can check any aspect of the trip, anytime you want to. You can set up the custom trip categories, deduction rates, etc. and even also give suggestions for the trip. The app also creates a backup of the data and has the ability to export it in the form of spreadsheets.

How To Get Android L On Google Nexus 5 or Nexus 7 Right Now

0
How To Get Android L On Google Nexus 5 or Nexus 7 Right Now

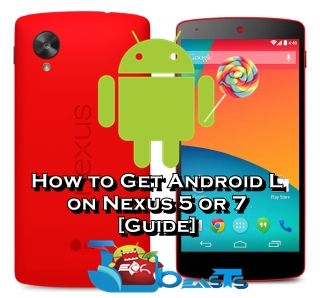
At Google’s I/O developer’s conference 2014, Google shown off its upcoming and the latest and greatest version of Android, the Android L. The name isn’t known yet, however Google believes in bringing up the best OS for Android devices  so far. There’s quite a lot stuff, that is going to make its way to the Android with Android L for the very first time. The Android L UI, as stated by Google is the Material design, that let’s the users interact with the elements on their Android device just like they do so with the real objects. Android L also promises new and improved notifications, great battery life, speed and security remains atop.

As off now, Google has just shown off the OS, the complete name and the complete list of features isn’t known so far, however, to calm down the Android enthusiasts, Google has released a beta version of the Android L that you may download and install on your Nexus 5 or Nexus 7 devices and taste the preview of Android L. If you own of these devices and you’re looking to give your device a whole new look, you may follow this guide we’ve explained below in order to get Android L on your Google Nexus 5 or Nexus 7 right now. Red_Nexus_5-578-80

Before you move ahead, you need to keep in mind what Google states about its Android L.

The Android preview system image is not a stable release, and may contain errors and defects that can result in damage to your computer systems, devices, and data. The preview Android system image is not subject to the same testing as the factory OS and can cause your phone and installed services and applications to stop working.

But that isn’t really a thing to worry about, when you know that you can return to your device’s previous OS anytime by following the instructions properly. So, you just need enough confident to move forward and flash the Android L on your Nexus device.


Here are the pre-installation instructions:

    1. This guide is only for Google Nexus 5 and Nexus 7. Do not try this on any other device, please check your device’s model in Settings > About Device > Model.
    2. You must have installed Google USB drivers. Get here.
    3. You must have installed Android ADB and Fastboot Drivers. Follow our Quick Guide here.
    4. You must have installed 7 zip, in order to extract the necessary files.
    5. Enable USB debugging mode on your Nexus device. If you haven’t done this already, go to Settings > About Device > Tap the build number for 7 times and you will get the developer options enabled, no go to Settings > Developer Options > USB debugging > Enable.
    6. Your device’s battery should be charged at least over 60%. This is highly recommended in order to prevent any power issues during the flashing process.
    7. Make sure that you backup your important media content, ContactsCall Logs & Messages. This is highly recommended just in case something goes wrong and you need to reset your phone.
    8. If you already have rooted your device, use Titanium Backup to back up all your important apps + system data. Also if you are using a custom recovery, it is recommended that you backup your current system using that first. [Just for the sake of safety]. Here’s our full Nandroid Backup guide.
    9. You will have to go through Data Wipes during installation of this ROM, so make sure that you have backed up all the mentioned data.
    10. Alright! Go ahead and flash the custom firmware, follow this guide to the letter.

How to Install Android L on Google Nexus 5 and Nexus 7:

  1. Download Android L image for your device:
      1. Nexus 5
      2. Nexus 7
  2. Unzip the files twice. e.g. there’s a .tar file and there’s a .tgz file inside that, you will need to extract both in order to get the .img file according to your device.
  3. Once you’ve got the .img file, copy it to the Minimal ADB and Fastboot folder, that’s probably here C:\Program Files (x86)\Minimal ADB and Fastboot
  4. Now connect your Nexus device to your PC in fastboot mode. In order to do so, power it off and connect it to your PC. Now turn it on by pressing and holding Volume Up and Volume Down  + Power Key.
  5. If this doesn’t work for you, simply open the Minimal ADB and Fastboot.exe file that should be on your desktop and type:

    adb reboot bootloader

  6. Once the device is in bootloader, checkout if the bootloader is unlocked or not. In case the state says “Locked” you need to unlock it first by typing:

    fastboot oem unlock

  7. It should now ask you whether you want to unlock the bootloader or not. You can switch between the Yes or No options by using Volume Up and Down Keys and make a selection using Power Key.
  8. Unlocking will wipe your device, so make sure that you’ve already backed up everything as mentioned in the pre-installation instructions.
  9. Once the bootloader is unlocked, you’re set to flash Android L on your Nexus device.
  10. To do so, push this command in the Minimal ADB and Fastboot Command Interace:

    flash all

  11. This will being the flashing process and you will have the Android L installed on your Nexus device in a while.
  12. You can lock the bootloader again by booting up your device in the bootloader mode and issuing the command:

    fastboot oem lock

  13. Locking the bootloader won’t cause any harm, but unlocking it again will wipe the device once again, so lock it if you wish so.
  14. That’s all with the Android L installation! Good Luck

How to uninstall Android L and return to the stock Android on your Nexus:

Just in case you don’t like the Android L and you want to get back your stock Android on your Nexus device now, you may follow these steps.

  1. Download the stock firmware image file from Google’s official page carefully for your Nexus 5 or Nexus 7.
  2. Delete the Android L image file from the Minimal ADB and Fastboot folder, and copy the newly downloaded .img file there now.
  3. Connect your device in fastboot mode to your PC, open the Minimal ADB and Fastboot Command Interface and type: flash all
  4. This will restore the stock Android on your Nexus.
  5. That’s all!

If you’ve installed Android L on your Nexus device, let us know about your experience. Just in case you’re stuck with anything regarding this post, feel free to reach us through the comment box below. We will get back to you as soon as possible. Thank You!

Fix bootloop issue after jailbreaking with Pangu

0
Fix bootloop issue after jailbreaking with Pangu

A few days back, we got a good news that iOS 7.1.1 has been jailbroken by a Chinese developer with the help a tool named Pangu, you can Jailbreak iOS 7.1.1& 7.1 by our guide. But after jailbreaking your device many people have reported that their device stuck on bootloop whenever they restarted their device. Seems that Pangu iOS 7.1 – iOS 7.1.1 jailbreak is the main reason of this bug. 

pangu-jailbreak

Also See: fix iPhone keeps restarting issue

Well after finding a working solution, we were in shock to see how can this even work but it works. Check out the solution posted by a reddit user, he writes.

I have an iPhone 4 and i did jailbreak with Pangu. I have bootloop everytimes I try to restart my phone. I KNOW THIS SOUND CRAZY, but it seems like a bug caused by light sensor. If your phone is in the dark you will get stuck in the bootloop. If you point a flashlight above the light sensor, boot goes well. This also works if you get stuck on “Pangu welcome screen”.

Well no doubt it sounds crazy but you can atleast give it a try. I have seen many comments from other user’s and they are saying this method works. You can check in the following video.

You can Jailbreak your devices on iOS 7.1.1 and 7.1 by Pangu also we have other guides on iPhone general issues please do check them.

Root Nexus 4 Running Android 4.4.4 Kit-Kat Official Image

Root Nexus 4 Running Android 4.4.4 Kit-Kat Official Image

Android 4.4.4 Kit-Kat is being released for all the Nexus devices and recently Nexus 4 as well, if you have followed our tutorial, that was related to the update for the latest version of Android. Many of you have rooted and installed custom Recovery on your Nexus 4 and since the recent update was an Official one, your device must have lost its root access and any custom recovery installed, and even you’ll want to turn back to the Stock recovery. All that is left now is to Flash the custom recovery again. It is quite simple, all you need is to get the specific recovery file and Super SU.zip file and flash them accordingly. If you have no idea what I am talking about, follow the rest of the guide and see what’s all that about.Root-Android1

Here are a little something to consider before rooting:

  1. Your Device must be running Android 4.4.4 Kit-Kat, How Follow: Link
  2. Back-Up all your important ContactsCall Logs & Messages. It is highly recommended in case of any mishap or data loss to back up all your important data.
  3. Back-Up your Mobiles EFS Data. 
  4. Check your device model, Go To Setting > About and Make sure that it is Nexus 4 (Mako)
  5. Do not try it on Nexus 7 or Nexus 5.
  6. Bootloader Must Be Unlocked.
  7. Enable USB Debugging Mode
  8. Download USB Driver For Nexus Devices: Link

Also See: Install Android 4.4.4 Kit-Kat On Nexus 5

Also See: Root Nexus 5 Running Android 4.4.4 Kit-Kat

Also See: Install Android 4.4.4 Kit-Kat On Nexus 7

Also See: Root Nexus 7 Running Android 4.4.4 Kit-Kat

Disclaimer:

The methods involved in flashing custom ROMs and rooting your phone is highly custom which may result in bricking of your device, and has nothing to do with Google or the device manufacturers . In case of any mishap we may not be held responsible. Follow these instructions to the letter to avoid any mishap or bricking. Make sure that whatever you do, you are doing it at your own responsibility

Downloads Required:

CWM Recovery + Super SU

Installation Process:

  1. Download Super SU to the root of your SDcard.
  2. Download the CWM Recovery Image and paste it in the Fastboot folder
  3. Turn Off your Device
  4. Now go to Bootloader/Fastboot mode, Press and hold Power + Volume Down Buttons till you see some text on-screen
  5. Now Open Command prompt in Fastboot Folder.  How? Hold Shift Key and Right Click anywhere in the Fastboot folder.
  6. Connect your Device with PC.
  7. Now Type fastboot flash recovery recovery.img to flash the CWM Recovery on your device
  8. Type fastboot reboot, to reboot your device
  9. After a proper reboot, your device will be running CWM Recovery
  10. Turn Off your Device again
  11. Now go to Bootloader/Fastboot mode, Press and hold Power + Volume Down Buttons till you see some text on-screen
  12. Choose Recovery From Bootloader
  13. Navigate to ‘Install zip from SDcard’ another windows will open in front of you.
  14. Select ‘choose zip from sd card’ from the Options.
  15. Select the Super SU.zip file and confirm the installation on next screen.
  16. Once the Installation is Over, Select +++++Go Back+++++.
  17. Select “Reboot System Now“,
  18. After the Reboot, check Super SU app in drawer or use any root checker app to verify root access.