Home Blog Page 333

Microsoft .NET Framework Offline Installer [ Direct Download ]

0
Microsoft .NET Framework Offline Installer [ Direct Download ]

Microsoft NET Framework Offline Installer: Many of you might have come across an error while running a specific softwares on your computer. The error states that you need to install Microsoft .NET Framework on your computer for the software to work.

Installing Microsoft .NET Framework is not a big of a problem. However, many people face problems while installing it. In this article, we will explain what is .NET Framework with all its functionalities as well as the direct download links for .NET Framework Offline Installer.

Microsoft NET Framework Offline Installer

What is Microsoft .NET Framework?:

Microsoft .NET Framework is basically a software framework and it is crucial for installing software on windows that are developed within. Net framework.

This framework creates the suitable environment and adjusting the runtime requirements for the .NET software.

Versions of Windows that Support .NET Framework:

Windows NT, 98, Me, 2000, Windows XP, Vista, Windows 7, Windows 8 are able to support .NET Framework and you can also install .NET Framework on Windows Server 2003, 2008, 2012 and later.

Microsoft NET Framework Offline Installer:

Let’s first have a look at the list of all the versions of .NET Framework. Some of these versions come pre-installed for different versions of Windows operating system they were developed for. You can also get these versions from the Microsoft’s website. Following are the all Microsoft .NET Framework Offline Installer version. Along with that, the direct download links for all the versions of .NET Framework currently available.

NET Framework 1.0:

NET Framework 1.1 pre-installed in Windows Server 2003:

NET Framework 2.0 pre-installed in Windows Server 2003, 2003 R2, 2008 SP2 and 2008 R2 SP1 Download Links:

NET Framework 3.0 pre-installed in Windows Vista and Server 2008 SP2 and 2008 R2 SP1 Download Link:

  • Web Installer:

NET Framework 3.5 pre-installed in Windows 7 and Server 2008 R2 SP1 Download Link:

Offline Installer:

NET Framework 4.0:

Offline Installer:

NET Framework 4.5 pre-installed in Windows 8 and Server 2012:

  • NET Framework 4.5.1 pre-installed in Windows 8.1 and Server 2012 R2
  • Download Link:
  • Web Installer:

NET Framework 4.5.2:

NET Framework 4.6:

You can download different versions of .NET Framework through the links given above and will no longer be witnessing failure while running any installed software on your

Samsung Galaxy S7, Galaxy S7 Edge: Official Images and Promo Videos

0
Samsung Galaxy S7, Galaxy S7 Edge: Official Images and Promo Videos

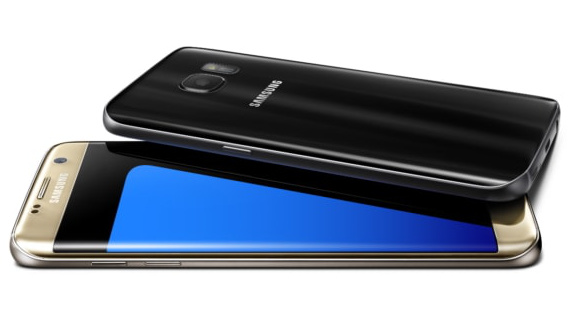
Samsung announced the Galaxy S7 and Galaxy S7 Edge today at its unpacked event which took place at MWC, 2016 held in Barcelona, Spain. Both these phones sport bigger batteries, new features, and capabilities.

Samsung has published a bunch of official images and promo videos of both these devices and we have them all here.

Samsung Galaxy S7:

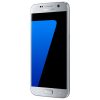
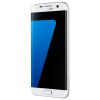
Galaxy-S7-and-S7-edge-official-press-shots (3)

  • Display: 5.1-inch 2560 x 1440 pixels ~576 ppi.
  • Hardware: Snapdragon 820 or Exynos 8890, 4 GB RAM, 32 GB internal storage, microSD card slot.
  • Software: Android 6.0 Marshmallow atop of TouchWiz UI.
  • Camera: Primary 12 MP, Secondary 8 MP.
  • Battery: 3000 mAH
  • Water and dust resistant.

Galaxy S7 Edge:

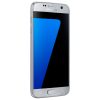
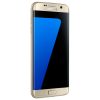
Galaxy-S7-and-S7-edge-official-press-shots (4)

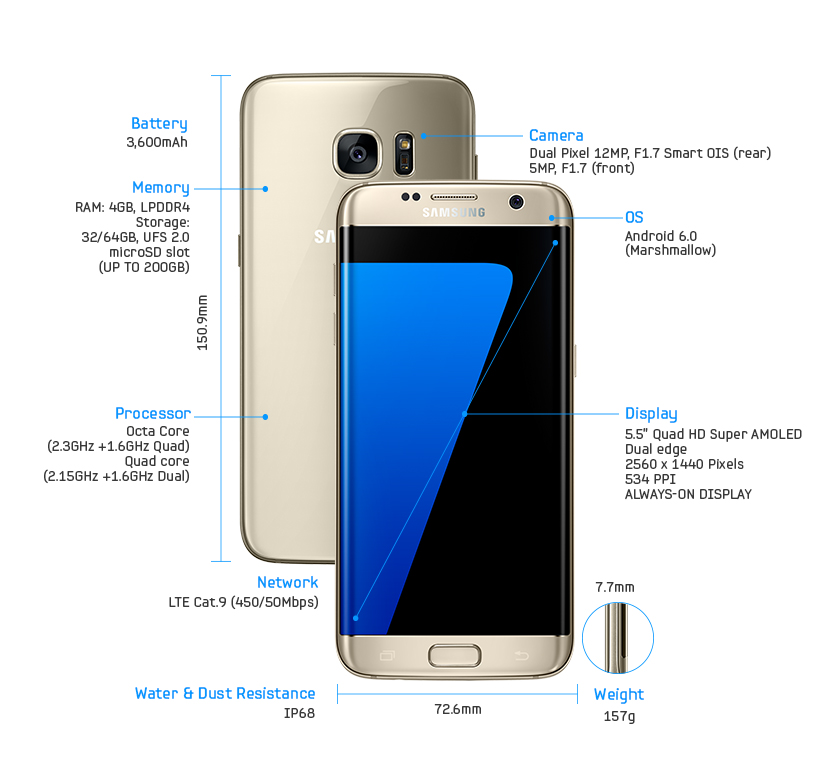
  • Display: 5.5-inch 2560 x 1440 pixels ~576 ppi.
  • Hardware: Snapdragon 820 or Exynos 8890, 4 GB RAM, 32 GB internal storage, microSD card slot.
  • Software: Android 6.0 Marshmallow atop of TouchWiz UI.
  • Camera: Primary 12 MP, Secondary 8 MP.
  • Battery: 3600 mAH
  • Water and dust resistant.

Clash of flagships: Samsung Galaxy vs LG G5 Specs Comparison

0
Clash of flagships: Samsung Galaxy vs LG G5 Specs Comparison

Samsung and LG both are done launching their latest flagships for the year 2016. LG launched the LG G5 earlier today and Samsung’s announcement of the Galaxy S7 came out just after a few hours of the LG G5.

S7 Edge vs Galaxy S7

LG G5:

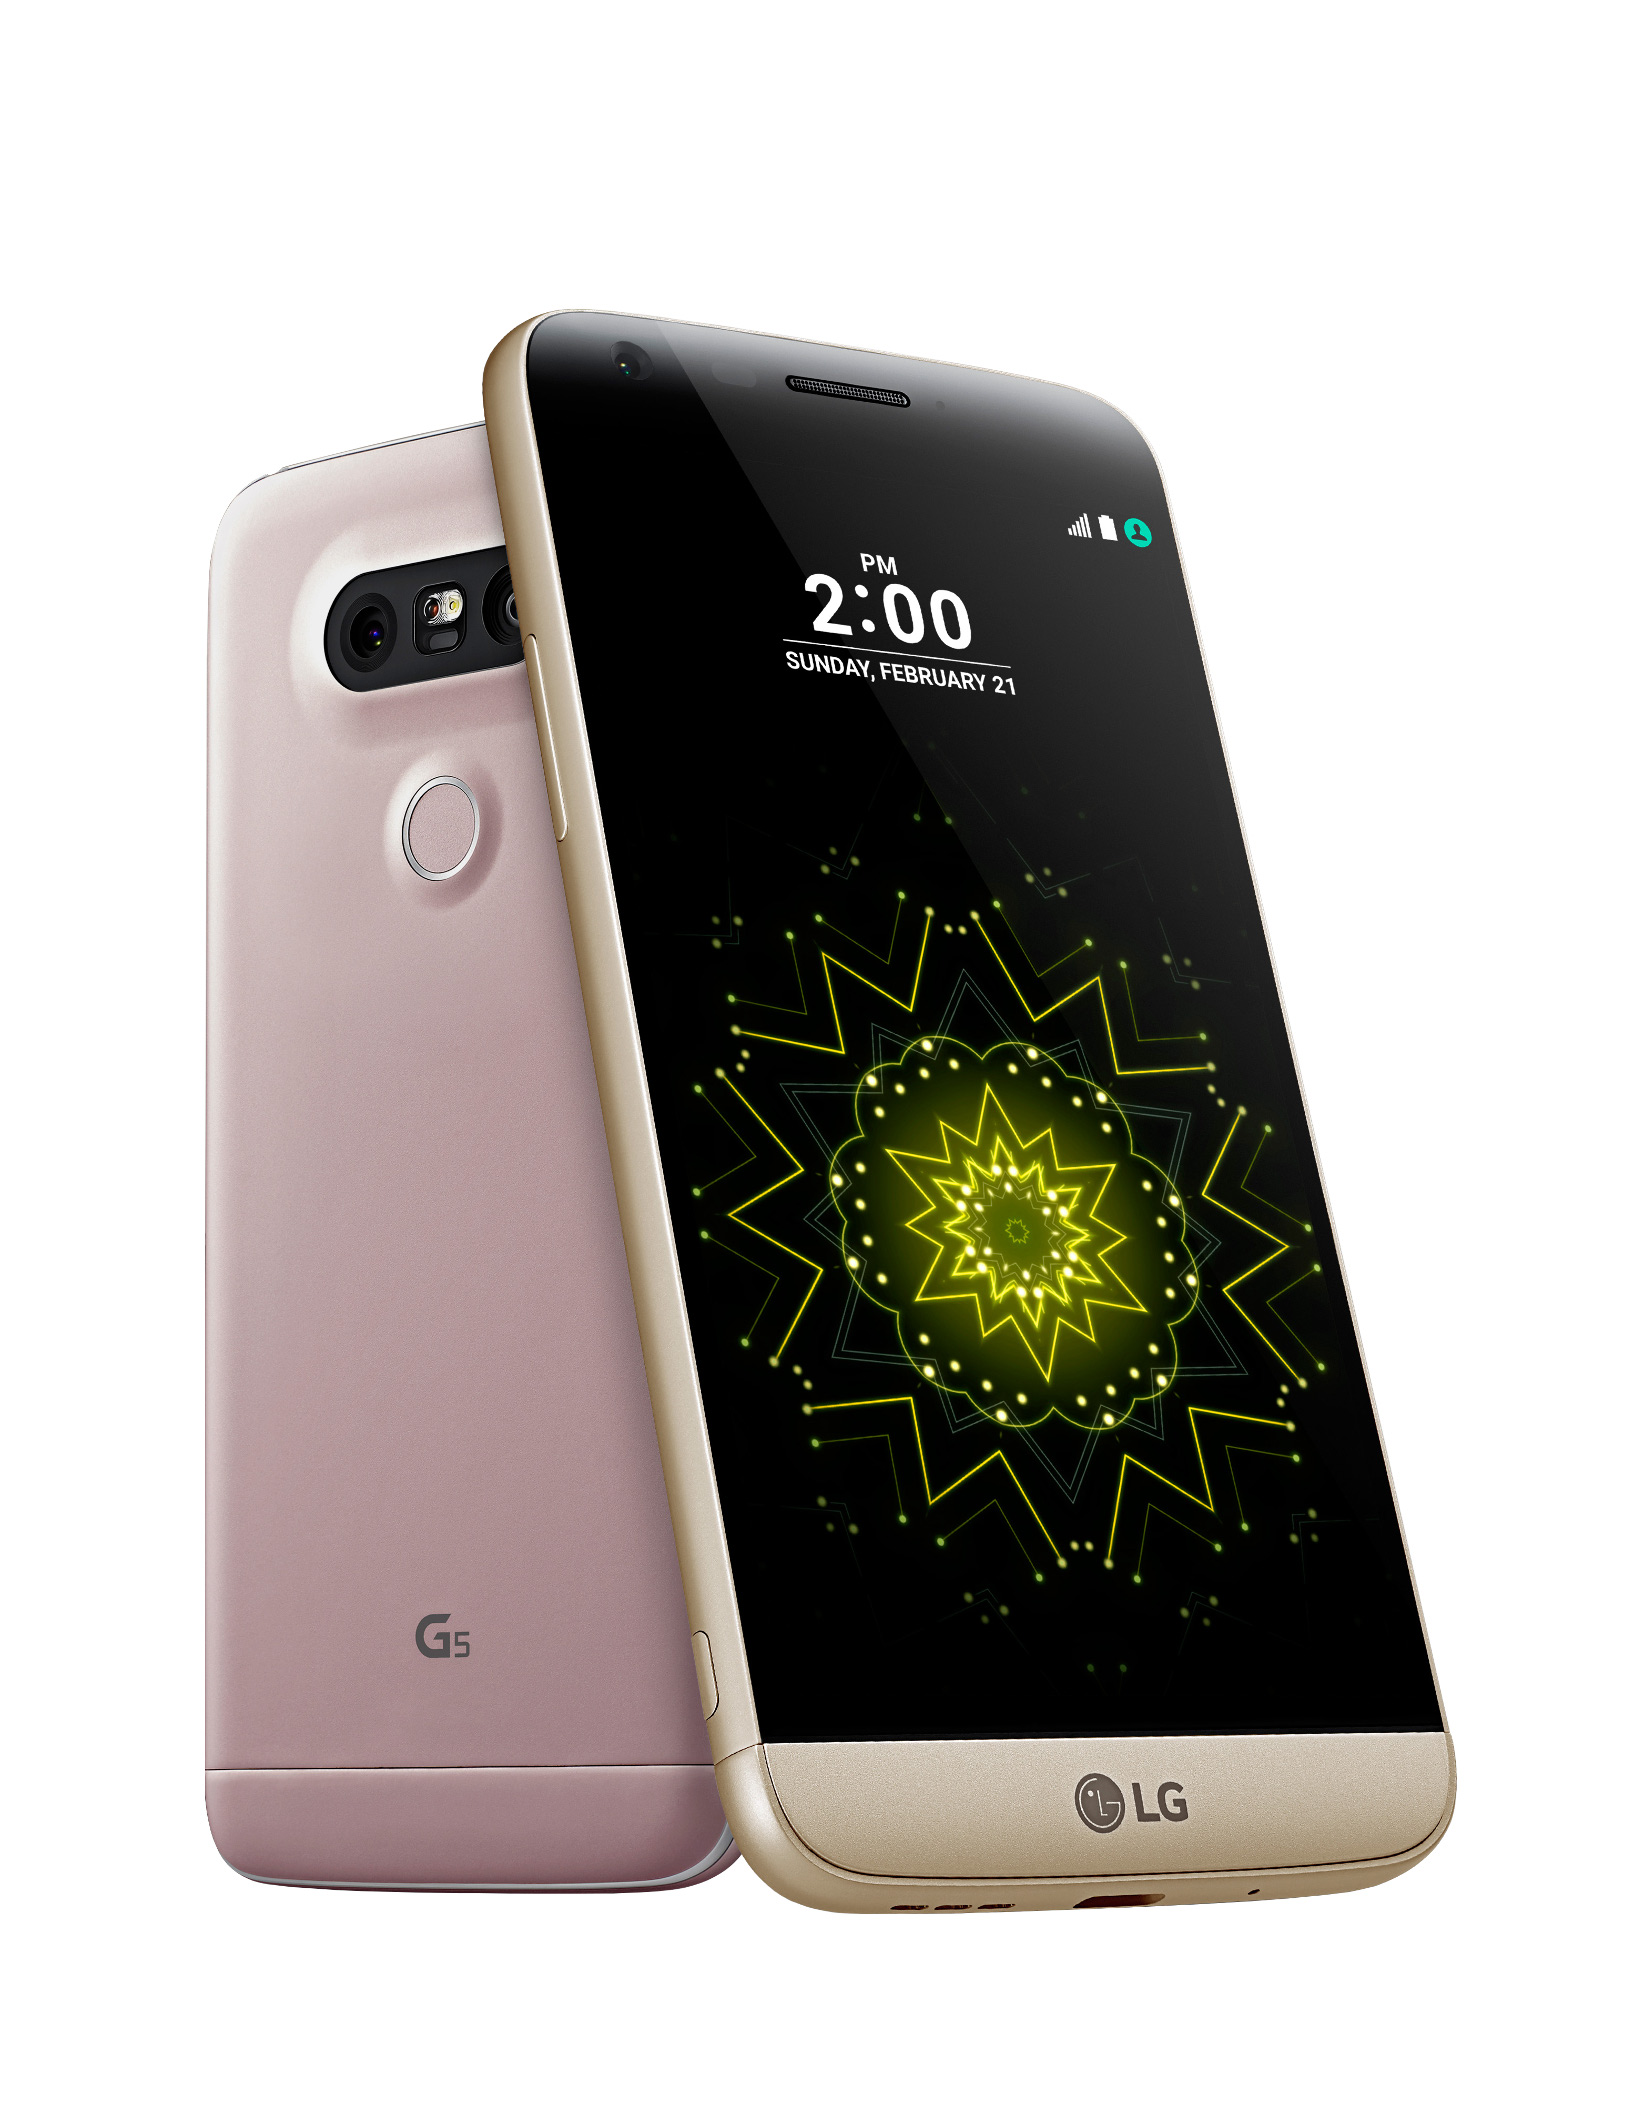
The LG has managed to bring a unique and innovative device in the form of the G5. LG G5 sports quite many features that we have never seen on any other smartphone before. G5 sports a modular design which helps it to host a slide-out battery compartment accompanied by a microSD card slot. The G5 pack’s mighty specifications inside a metallic build.

S7 Edge vs Galaxy S7

Samsung Galaxy S7 Edge vs Galaxy S7 vs LG G5 Specs Comparison:

Samsung Galaxy S7 and S7 Edge, which was a victim of massive leaks leading the device to no surprises. Both of these devices are pretty much the same as that of the Galaxy S6 and S6 Edge.

Galaxy S7 and S7 Edge are powered up with top-notch specifications and like the G5, these devices do not offer a removable battery but do offer a microSD card slot. Galaxy S7 and S7 Edge both are water resistant, which is another plus point for both these devices.

To give our users a better idea about these devices, we’ve put together a specification comparison of the Galaxy S7, Galaxy S7 Edge and LG G5.

SpecsTypeGalaxy S7 EdgeGalaxy S7LG G5
BodyDimensions5.94 x 2.86 x 0.30 inches (150.9 x 72.6 x 7.7 mm)
- IP68 certified - dust proof and water resistant over 1.5 meter and 30 minutes
5.61 x 2.74 x 0.31 inches (142.4 x 69.6 x 7.9 mm)
- IP68 certified - dust proof and water resistant over 1.5 meter and 30 minutes
149.4 x 73.9 x 7.7 mm (5.88 x 2.91 x 0.30 in)
Weight157g 152 g159 g (5.61 oz)
DisplayTypeSuper AMOLEDSuper AMOLEDIPS LCD capacitive touchscreen, 16M colors
Size5.5 inches (~81.72 % screen-to-body ratio)5.1 inches (~70.63 % screen-to-body ratio)5.3 inches (~70.1% screen-to-body ratio)
Resolution1440 x 2560 pixels (~515 ppi pixels density)1440 x 2560 pixels (~576 ppi pixel density)1440 x 2560 pixels (~554 ppi pixel density)
ProtectionCorning Gorilla Glass 5 back panel
Corning Gorilla Glass 5 back panel
Corning Gorilla Glass 4
PlatformOSAndroid 6.0.1 Marshmallow - TouchWiz UIAndroid 6.0.1 Marshmallow - TouchWiz UIAndroid 6.0.1 Marshmallow - LG Optimus UX 5.0 UI
ChipsetQualcomm MSM8996 Snapdragon 820
Exynos 8890 Octa
Qualcomm MSM8996 Snapdragon 820
Exynos 8890 Octa
Qualcomm MSM8996 Snapdragon 820
GPUAdreno 530
Mali-T880 MP12
Adreno 530
Mali-T880 MP12
Adreno 530
MemoryExternal SDYesYesYes
RAM4 GB4 GB4 GB
Internal Storage32/64 GB32/64 GB32 GB
CameraPrimary12 MP, f/1.7, phase detection autofocus, OIS, dual-LED (dual tone) flash12 MP, f/1.7, phase detection autofocus, OIS, dual-LED (dual tone) flash16 MP (f/1.8) + 8 MP (f/2.4), laser autofocus, OIS, LED flash
Secondary5 MP, f/1.7, dual video call, Auto HDR
5 MP, f/1.7, dual video call, Auto HDR
8 MP, 1080p@30fps
Features1/2.6' sensor size, 1 µm pixel size, geo-tagging, touch focus, face detection, Auto HDR, panorama
1/2.6' sensor size, 1 µm pixel size, geo-tagging, touch focus, face detection, Auto HDR, panorama
Geo-tagging, touch focus, face/smile detection, panorama, HDR
Video2160p@30fps, 1080p@60fps, 720p@120fps, HDR, dual-video rec.
2160p@30fps, 1080p@60fps, 720p@120fps, HDR, dual-video rec.
2160p@30fps, 1080p@60fps, HDR, stereo sound rec.
CommunicationWLANWi-Fi 802.11 a/b/g/n/ac, dual-band, Wi-Fi Direct, hotspot
Wi-Fi 802.11 a/b/g/n/ac, dual-band, Wi-Fi Direct, hotspot
Wi-Fi 802.11 a/b/g/n/ac, dual-band, Wi-Fi Direct, DLNA, hotspot
Bluetoothv4.2, A2DP, LE, apt-X
v4.2, A2DP, LE, apt-X
GPSYes, with A-GPS, GLONASS, BDS
Yes, with A-GPS, GLONASS, BDS
NFCYesYesYes
Infrared PortYesYesYes
RadioNoNoNo
USBmicroUSB v2.0, USB Host
microUSB v2.0, USB Host
v3.0, Type-C 1.0 reversible connector
Features Fast battery charging: 83% in 30 min (Quick Charge 3.0)
- Wireless charging (Qi/PMA) - market dependent
- ANT+ support
- S-Voice natural language commands and dictation
- OneDrive (115 GB cloud storage)
- Active noise cancellation with dedicated mic
- MP4/DivX/XviD/WMV/H.264 player
- MP3/WAV/WMA/eAAC+/FLAC player
- Photo/video editor
- Document editor
Fast battery charging: 83% in 30 min (Quick Charge 3.0)
- Wireless charging (Qi/PMA) - market dependent
- ANT+ support
- S-Voice natural language commands and dictation
- OneDrive (115 GB cloud storage)
- Active noise cancellation with dedicated mic
- MP4/DivX/XviD/WMV/H.264 player
- MP3/WAV/WMA/eAAC+/FLAC player
- Photo/video editor
- Document editor
Fast battery charging: 83% in 30 min (Quick Charge 3.0)
- Optional Wireless Charging (Qi-enabled)
- Active noise cancellation with dedicated mic
- MP4/DviX/XviD/H.264/WMV player
- MP3/WAV/FLAC/eAAC+/WMA player
- Photo/video editor
- Document editor
BatteryCapacity3600 mAh3000 mAhRemovable Li-Ion 2800 mAh battery
ColoursBlack, Gray, White, Gold
Black, Gray, White, Gold
Silver, Titan, Gold, Pink


How To block ads in Chrome, Internet Explorer,Firefox/Opera

0
How To block ads in Chrome, Internet Explorer,Firefox/Opera

Here is the guide to block ads in Firefox, Internet Explorer, Chrome, and Opera on Windows. If you are using one of these browsers, you must have noticed some random popups appearing on your screen.

While we tend to concentrate on what we are supposed to be doing on the internet, these ads are a constant distraction. These ads can be quite annoying and you must have wished to block ads in Firefox, Internet Explorer, Chrome, and Opera on Windows.

It is not a very complicated matter and with a few simple steps, you will be able to block ads in Firefox, Internet Explorer, Chrome, and Opera on Windows.

Overview:

How to block ads in Firefox, Internet Explorer, Chrome, and Opera on Windows. Read on to know how you can get rid and block ads on different web browsers if you are working on Windows XP, Windows Vista, 7&8, Mac OS X, and Linux users.

Let’s start with the methods that can help you block ads irrespective of the browser you are working on. The first two methods mentioned below are effective in blocking ads in any browser or software. Also in instant messengers and other such programs.

Block ads in Chrome, Internet Explorer, Firefox/Opera:

block ads in chrome-internet explorer-firefox-opera

AdFender:

AdFender is a blessing in disguise. The fact that it can work with multiple browsers is because instead of installing as a browser extension, it actually gets installed as a program on Windows. That is why you can use it to block ads in Firefox, Internet Explorer, Chrome, and Opera on Windows and elsewhere. Simply download and install AdFender on your computer through the link below.

Download AdFender for Chrome.

HostsMan:

Although, HostsMan is not a dedicated ad-blocking program, however, you can still use it to block ads in Firefox, Internet Explorer, Chrome, and Opera on Windows. Here is how this will work. Being a Windows host files’ modifier, you can use it to block ads on any browser or program.

Read more: How to Block Popup Ads on Android Devices

Download HostsMan.

Besides these two methods, here are some other methods you can use to block ads in Firefox, Internet Explorer, Chrome, and Opera on Windows.

How to Block Ads on Firefox:

To Block Ads on Firefox is one of the easiest. Firefox supports extensions and add-ons so you can simply download AdBlock Plus. This extension includes a number of settings and filters to select which ads you want to block on Firefox. If you do not want to go through the hassle, you can simply select ‘Easy List’ and leave it for the extension to take care of annoying ad pop-ups.

Adblock Plus
Price: Free

How to Block Ads on Internet Explorer:

Method I:

Good news is that AdBlock Plus has also been made available for Internet Explorer. So, you can use the same extension for Internet Explorer, download it and block ads conveniently.

Method II:

Another way to prevent ad popups is to opt for private browsing. Here is how this will work; you will need to import an XML file to Internet Explorer’s private browsing content filter. This XML file is derived from the list of ads to be blocked in AdBlock Plus.

Read more: Download AdAway v2.9.1 Apk – Best Ad Blocker for Android

Download the XML file from here:

  1. Once you have downloaded the file, unzip it.
  2. Now navigate to Internet Explorer> Safety> InPrivate Filtering Settings> Advanced Settings.
  3. Now, click on Import and select the unzipped XML file and click OK. That’s all.
  4. Now, you will be able to block ads on Internet Explorer. Also, make sure to enable ‘Private Filtering; to block ads even if you are not using InPrivate Browsing.
  5. Go to Safety> InPrivate Filtering and select Enable.

Note: If you want to prevent yourself from the hassle to manually turn InPrivate Filtering on each time you work on Internet Explorer, you can permanently turn it on through the following simple hack

  • Run Regedit.
  • Now go to
  • HKEY_CURRENT_USER\Software\Microsoft\InternetExplorer\Safety\PrivacIE
  • Now, Right click and click on ‘New’> DWORD
  • Name this new key as ‘Start Mode’
  • Now, right click on this new key and select ‘Modify’. Here, enter ‘1’ as the Value Data and select Hexadecimal as Base. Click Ok.
  • That’s all.

Method III:

You can use Simple Adblock which is a plugin much similar to AdBlock Plus. Although, you will not be able customize lists or block individual ads yet, Simple Adblock includes a number of filters that can help block ads on Internet Explorer. The free version can block upto 200 ad requests per day while you can also get Pro and Enterprise edition as well. When you install Simple Adblock, its icon will appear at the bottom bar on Internet Explorer.

How to Block Ads on Chrome:

Method I:

Download AdBlock Plus and block unwanted ad pop-ups while working on Chrome.

Method II:

Another method to block ads on Chrome is through AdBlock for Chrome. This extension effectively starts blocking ads as soon as you install and activate it. Adblock uses ad block lists from Adblock Plus and Adblock Plus Easy List which means that there is no need to customize lists or choose any filters.

A useful added feature is that the extension lets users to delete a site from the list and prevent it from being blocked. You can do this by pressing Ctrl+Shift+L while navigating to the specific website. Moreover, if you want to block a website that you are surfing, simply press Ctrl+Shift+K.

How to Block Ads on Opera:

Opera does not offer as many features to block ads and similar to Internet Explorer, blocking ads on Opera is a complicated process but not impossible. Previously, the two conventional methods being used to block ads were through built-in content blocker and block flash ads add on.Now that Opera has included extensions in the browser, ad blocking add ons are available. Some reliable ones are mentioned below.

AdBlock Plus:

Adblock Plus
Price: Free

As mentioned earlier, the effective ad blocking extension that was previously available for Firefox has now been made available for Opera as well.

Opera Adblock:

This is an extremely convenient and effective method to block ads. The extensive is specifically created fro Opera and as soon as you install and enable it, it is good to work. The extension will automatically block ads, tracking websites as well as Facebook, Flash and other buttons randomly placed on the websites. Opera Adblock also offers a number of options. You can go to ‘Preferences’ and edit lists, add or delete websites from the blocklist. Also, you can add a button to the address bar that will directly enable Adblock and disable it likewise.

These were all the possible and reliable ways to block ads in Firefox, Internet Explorer, Chrome, and Opera on Windows.

Now you can enjoy surfing the web and working online without being interrupted by unwanted ad pop-ups and buttons.

Just be sure to download the extensions and programs from a reliable trusted and trusted source and avoid installing the extension from unreliable sources.

Install Android 6.0.1 Marshmallow on Galaxy Tab 2 10.1 P5100/P5110/P5113 via CyanogenMod 13

30
Install Android 6.0.1 Marshmallow on Galaxy Tab 2 10.1 P5100/P5110/P5113 via CyanogenMod 13

Galaxy Tab 2 10.1 has joined the lucky league of Android 6.0.1 Marshmallow. This hasn’t been done officially, but the developers who are always keen to bring a new life to such old devices have once again made this possible.

You can now easily update your Galaxy Tab 2 10.1 P5100, P5110 and P5113 to Android 6.0.1 Marshmallow using CyanogenMod 13 custom ROM.

The ROM comes from XDA recognized contributor Android-Andi. At the time of writing this post, this ROM is in early development stages, but most of the mainstream features are found to be working quite well. You can flash this ROM on your tablet using the instructions attached below.

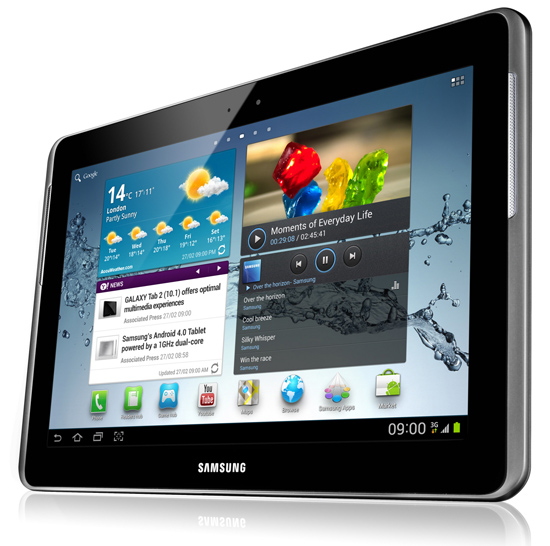
Before heading towards the installation instructions, we will have a flashback at the Galaxy Tab 2 10.1 and also CyanogenMod.samsGALAXYtab2_10_

Overview:

Galaxy Tab 2 10.1 was launched back in May, 2012. It flaunts a 10.1-inch display with 800 x 1280 pixels resolution. Samsung planted a 3.15 MP camera at this tablet’s back and a VGA camera for secondary video calling. Under the hood a T1 OMAP 4430 SoC is placed accompanied by a RAM of 1 GB.

Galaxy Tab 2 10.1 ran on Android 4.0.3 Ice Cream Sandwich out of the box and was later updated to Android 4.1 Jelly Bean. That’s where its official software updates came to an end.

Galaxy Tab 2 10.1 was updated to Android 4.3 Jelly Bean, Android 4.4 KitKat and also Android 5.0 Lollipop by means of CyanogenMod custom ROMs. Now, the latest CyanogenMod 13 is also available for this device. CyanogenMod, without any doubts, has remained the top choice for Android power users.

CyanogenMod 13:

The CyanogenMod 13 is based on Android 6.0.1 Marshmallow and has already made its way to quite many Android devices. It’s time for us to flash this latest ROM on our beloved Galaxy Tab 2 10.1. Before flashing, be reminded that this ROM isn’t meant to be kept as a daily driver. You may only proceed if you’re an Android power user. Newbies should follow this guide being very careful to avoid any kind of mishaps during the flashing/installation process.

Precautions:

  1. This ROM is intended for Galaxy Tab 2 10.1 P5100, P5110 and P5113. Do not try flashing this ROM on any other device otherwise, you will result in bricking it. Check your device’s model number under settings > about device.
  2. Charge your tablet up to 50% to avoid any power issues during the flashing process.
  3. Flash a custom recovery (TWRP) on your Galaxy Tab 2 10.1 P5100, P5110, and P5113.
  4. Backup everything including your important contacts, call logs and text messages.
  5. Don’t forget to create a Nandroid backup. This is highly recommended so that you can revert back to your previous system in case of a mishap.
  6. Backup EFS partition to avoid EFS corruption later on.
  7. Follow the instructions to the letter.

DISCLAIMER: FLASHING CUSTOM ROMS VOIDS THE WARRANTY OF A DEVICE AND ITS NOT RECOMMENDED OFFICIALLY. WHILE YOU’RE GOING TO DO THIS, MAKE SURE THAT YOU’RE DOING THIS AT YOUR OWN RISK. IN CASE OF A MISHAP TECHBEASTS, SAMSUNG OR THE DEVICE MANUFACTURERS MAY NOT BE HELD RESPONSIBLE.

Install TWRP Recovery on your Galaxy Tab 2 10.1

Required downloads

  1. Open Odin3 V3.10.6.exe that you extracted on your PC.
  2. Put your Galaxy Tab 2 10.1  in download mode now. To do so, turn it off completely. Now turn it on by pressing and holding Volume Down + Home + Power Key. Once your tablet boots up, press the Volume Up key to continue.
  3. Connect your tablet to your PC now. The ID:COM box in the top-left corner of Odin3 should turn blue. This indicates that your tablet is connected properly.
  4. Now click the “AP” tab in Odin and select the twrp recovery.tar.md5 file that you downloaded. It will take a second or two for Odin3 to load this file.
  5. Make sure that your Odin3 looks like this. The only option ticked should be F. Reset Time.

Odin 3.10.6 Explained_Techbeasts

  1. Now you’re all set to flash the recovery. Just click the start button in Odin3 and sit back.
  2. Once the process box above ID: COM box shows a green light and flashing process is finished, disconnect your device.
  3. Now turn off your device properly as we are going to boot into recovery mode. You can turn it off by keeping the power key pressed for a while. 
  4. Now turn it on by pressing and holding Volume Up + Home + Power Key. This will boot your device in recovery mode. It should be TWRP recovery that you just installed.
  5. Once done, reboot your device into the system using the reboot option in TWRP recovery.

Install Android 6.0.1 Marshmallow on Galaxy Tab 2:

  1. Download latest CyanogenMod 13.zip file according to your device
    1. -> CyanogenMod 13 Android 6.0.1.zip file for P5100
    2. -> CyanogenMod 13 Android 6.0.1.zip file for P5110
    3. -> CyanogenMod 13 Android 6.0.1.zip file for P5113
  2. Download Gapps.zip file for Android 6.0.1 Marshmallow.
  3. Download gapps-lpmm-google-keyboard-20160108-2-signed.zip file.
  4. Connect your tablet to your PC now.
  5. Copy all .zip files to the storage of your tablet.
  6. Now disconnect your tablet and turn it off completely.
  7. Boot into TWRP recovery now, in order to do so, turn it on by pressing and holding Volume Up + Home Button + Power Key. You should see the recovery mode in a while.
  8. Now in TWRP  recovery, wipe cache, factory data reset and advanced options > dalvik cache.
  9. After wiping all these three, select the “Install” option.
  10. Now select “Install Zip >  Select cm-13.0…….zip file > Yes”.
  11. This will flash the ROM in your tablet, once done get back to the main menu in recovery.
  12. Now once again select “Install > Select Gapps.zip file > Yes”
  13. Once again, get back to the main menu in recovery, select “Install > select gapps-lpmm-google-keyboard-xxxxx.zip file > swipe finger to flash it.
  14. After flashing all the files in the order mentioned above, reboot your device.
  15. You should see the Android 6.0.1 Marshmallow CyanogenMod 13.0 running on your device in a while.
  16. That’s all!

In order to enable root access on this ROM, go to settings > about device > tap the build number 7 times. This will enable developer options on in settings. Now open developer options and enable root.

First boot may take up to 10 minutes, you may not worry if it’s taking that much longer. In case it’s taking too long, you may boot into TWRP recovery and wipe cache and dalvik cache and reboot your device as it may fix the issue. In case your device is having issues, you may return to your old system using the Nandroid backup or follow our guide here to install stock firmware.

Got any queries? Reach us out through the comment box below.

Update Galaxy Tab 2 7.0 P3110/P3113 to Android 6.0.1 Marshmallow via CyanogenMod 13

14
Update Galaxy Tab 2 7.0 P3110/P3113 to Android 6.0.1 Marshmallow via CyanogenMod 13

Update Galaxy Tab 2 7.0 P3110/P3113 to Android 6.0.1 Marshmallow via CyanogenMod 13:

Galaxy Tab 2 7.0 P3110/P3113 can now run Android 6.0.1 Marshmallow via CyanogenMod 11 custom ROM. Galaxy Tab 2 7.0’s official software life ended on Android 4.2.2 Jelly Bean. The device hasn’t seen any traces of any higher version of Android for last few years now.

Samsung won’t be updating this device to any further version of Android because of the hardware limits. Just in case you still own this device, it may be the time for you to take it out of the drawer and wipe the dust off from this device to give it a whole new life by means of this new CyanogenMod 13.0 custom ROM based on Android 6.0.1 Marshmallow.

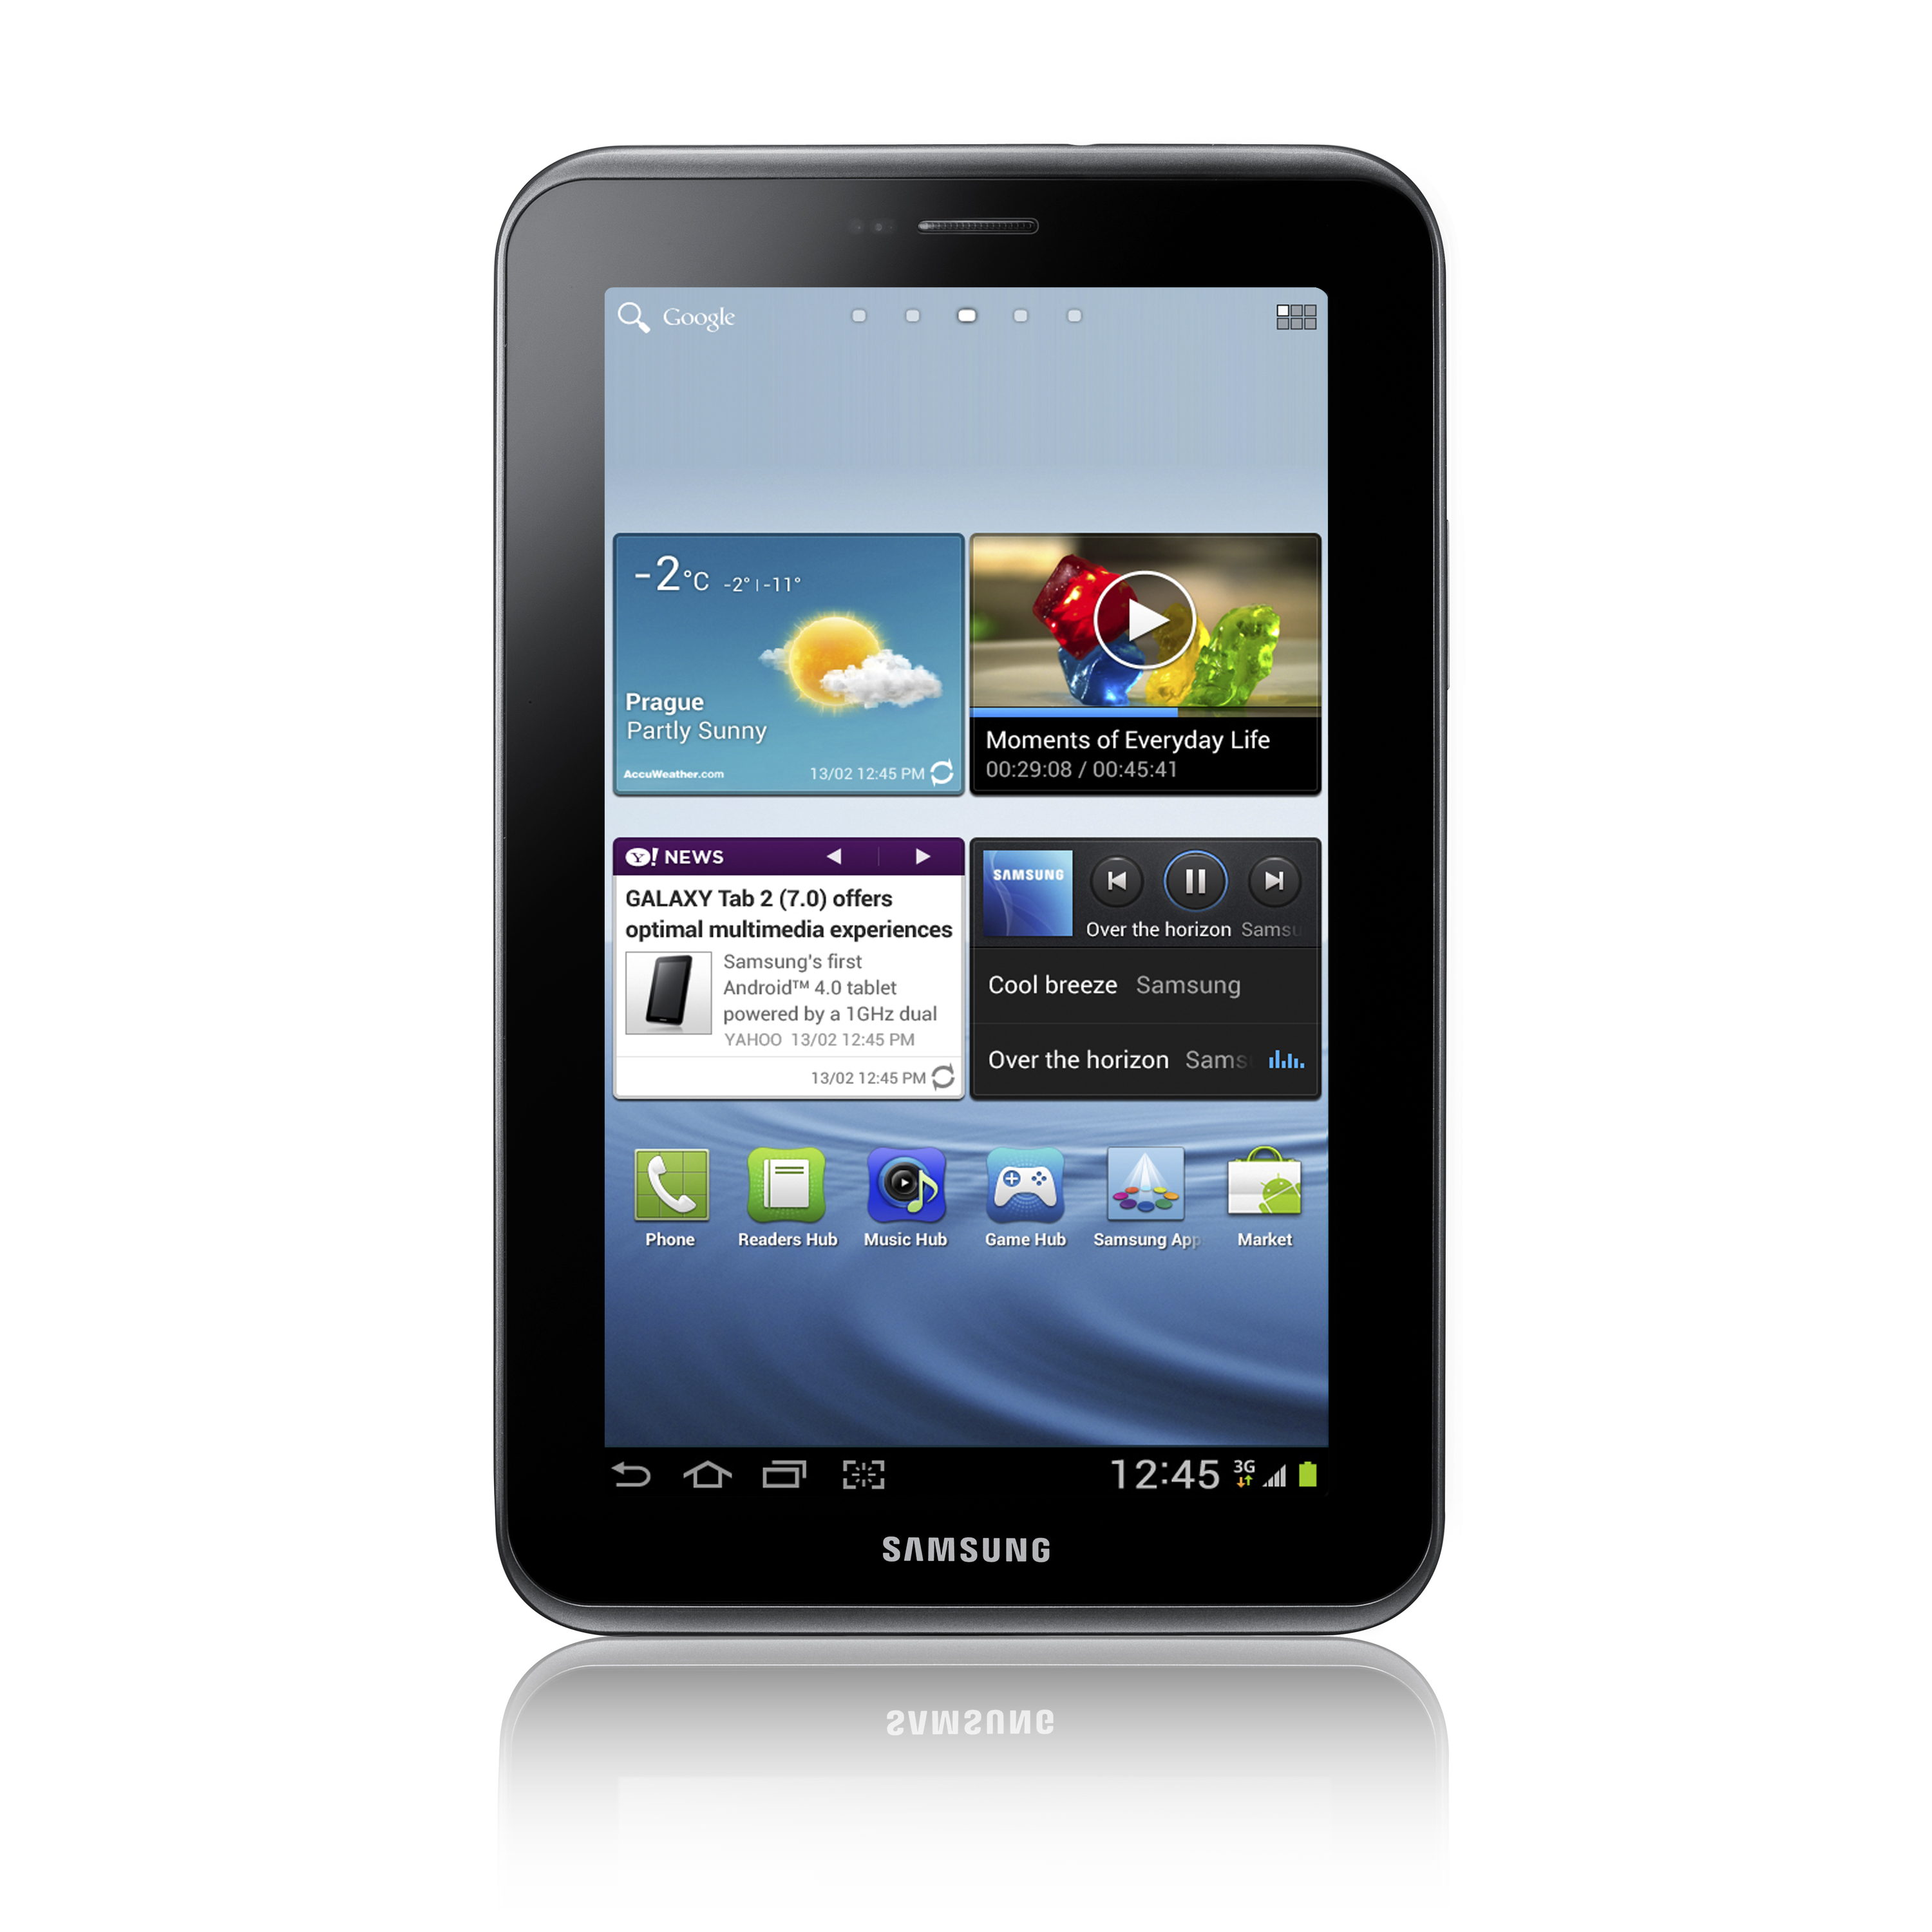
Galaxy Tab 2 7.0 P3110/P3113 to Android 6.0.1

Overview:

The Android 6.0.1 Marshmallow CyanogenMod 13 custom ROM is the result of hard work of XDA recognized contributor Android-Andi. We already posted the guide to flash Android 6.0.1 Marshmallow CyanogenMod 13 custom ROM on Galaxy Tab 2 7.0 P3100. Now is the time for P3110 and P3113.

The ROM is found to be working pretty well, but it still is in early development stages and isn’t meant to be kept as a daily driver. You may only proceed if you’re an Android power user. We recommend the newbies to follow this guide being extra careful.

CyanogenMod:

For those who do not know about CyanogenMod; CyanogenMod is the most popular and most widely used aftermarket distribution of Android OS. CyanogenMod is always the reason behind adding new life to the legacy devices which have been forgotten by their manufacturers.

Using CyanogenMod, you can unofficially upgrade your device to the latest available version of Android. CyanogenMod’s latest version is CyanogenMod 13 which is based on Android 6.0.1 Marshmallow. CyanogenMod 13 has already made its way to a plethora of Android devices. For now, our focus on CyanogenMod 13 is for our beloved Galaxy Tab 2 7.0 P3110 and P3113.

Precautions:

  1. This ROM is intended for Galaxy Tab 2 7.0 P3110 and P3113. Do not try flashing this ROM on any other device otherwise, you will result in bricking it. Check your device’s model number under settings > about the device.
  2. Charge your tablet up to 50% to avoid any power issues during the flashing process.
  3. Flash a custom recovery on your Galaxy Tab 2 7.0 P3110 and P3113.
  4. Backup everything including your important contacts, call logs and text messages.
  5. Don’t forget to create a Nandroid backup. This is highly recommended so that you can revert back to your previous system in case of a mishap.
  6. Backup EFS partition to avoid EFS corruption later on.
  7. Follow the instructions to the letter.

DISCLAIMER: FLASHING CUSTOM ROMS VOIDS THE WARRANTY OF A DEVICE AND ITS NOT RECOMMENDED OFFICIALLY. WHILE YOU’RE GOING TO DO THIS, MAKE SURE THAT YOU’RE DOING THIS AT YOUR OWN RISK. IN CASE OF A MISHAP TECHBEASTS, SAMSUNG OR THE DEVICE MANUFACTURERS MAY NOT BE HELD RESPONSIBLE.

Update Galaxy Tab 2 7.0 P3110/P3113 to Android 6.0.1 Marshmallow

  1. Download latest CyanogenMod 13.zip file according to your device
    1. CyanogenMod 13 Android 6.0.1.zip file for P3110
    2. CyanogenMod 13 Android 6.0.1.zip file for P3113
  2. Also, download the following .zip files.
    1. p3100-closed-source-sensor.zip
    2. p3110-closed-source-sensor.zip
  3. Download Gapps.zip file for Android 6.0.1 Marshmallow.
  4. Connect your tab to your PC now.
  5. Copy all .zip files to the storage of your tablet.
  6. Now disconnect your tablet and turn it off completely.
  7. Boot into TWRP recovery now, in order to do so, turn it on by pressing and holding Volume Up + Home Button + Power Key. You should see the recovery mode in a while.
  8. Now in TWRP  recovery, wipe cache, factory data reset and advanced options > dalvik cache.
  9. After wiping all these three, select the “Install” option.
  10. Now select “Install Zip >  Select cm-13.0…….zip file > Yes”.
  11. This will flash the ROM in your tablet, once done get back to the main menu in recovery.
  12. Now once again select “Install > Select p31xx-closed-source-sensor.zip file > swipe finger to flash it.”
  13. Now once again select “Install > Select Gapps.zip file > swipe finger to flash it.”
  14. This will flash the Gapps and some fixes in your tablet.
  15. Reboot your device.
  16. You should see the Android 6.0.1 Marshmallow CyanogenMod 13.0 running on your device in a while.
  17. That’s all!

In order to enable root access on this ROM, go to settings > about device > tap the build number 7 times. This will enable developer options on in settings. Now open developer options and enable root.

First boot may take up to 10 minutes, you may not worry if it’s taking that much longer. In case it’s taking too long, you may boot into TWRP recovery and wipe cache and dalvik cache and reboot your device as it may fix the issue. In case your device is having issues, you may return to your old system using the Nandroid backup or follow our guide here to install stock firmware.

Got any queries? Reach us out through the comment box below.

How to always use Google.com / stop redirecting to local country Google

0
How to always use Google.com / stop redirecting to local country Google

Heed the instruction below and learn how to always use Google.com and stop redirecting to local country Google.

This might not excite you but there are many users who want to use Google.com, instead of their country extensions.

When it comes to searching on online web Google.com provides the best results, but cause of some privacy reason whenever you open Google it redirects you to your country specific Google extension.

So in order to avoid this let’s start the tutorial on How to always use Google.com.

use Google.com

How to always use Google.com on Chrome:

  • Open Chrome on your PC/Mac.
  • Click on the 3 line icon located at your top right corner, select settings from the list.

use-google-com-stop-redirecting

  • Now click on Manage Search engines, on the next page you’ll see all the default and other search engines lists.

use-google-com-stop-redirecting

  • In default search engine tab click on Google and add this URL (google.com/ncr). 

use-google-com-stop-redirecting

  • Now Click on done and you are good to go.

Google.com on Safari:

  • Open Safari on your PC/Mac.
  • Now Click on the search bar.

use-google-com-stop-redirecting

use-google-com-stop-redirecting


  • You are all good to now you’ll be browsing Google.com. Whenever you want to use Google.com instead of your country Google Extension.

use-google-com-stop-redirecting

How to use Google.com on Android:

  • First, open Chrome on your Android device.

use-google-com-stop-redirecting

  • Now click on 3 dots located at the of the page.

use-google-com-stop-redirecting

  • Click on the settings form the list.
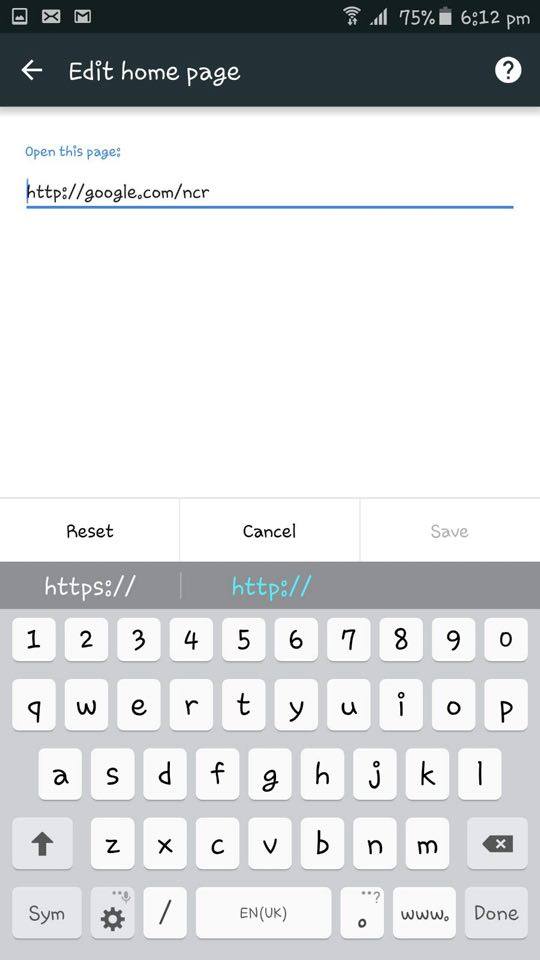
  • Tap on the Homepage.

use-google-com-stop-redirecting

  • Tap on Open this page.
  • Now add the URL ( Google.com/ncr ) and Tap on save.

use-google-com-stop-redirecting

All Done.

Update Galaxy Note 5 N920C To Android 6.0.1 Marshmallow XXU2BPB6 Firmware

0
Update Galaxy Note 5 N920C To Android 6.0.1 Marshmallow XXU2BPB6 Firmware

Update Galaxy Note 5 N920C To Android 6.0.1 Marshmallow XXU2BPB6 Firmware:

Samsung finally broke the barrier of its silence and started rolling out the long-awaited Marshmallow update for the Galaxy Note 5. As a start, Samsung updated the only N920C variant of the Galaxy Note 5 to Android 6.0.1 Marshmallow. The update is live for the users in Cambodia through OTA and Samsung Smart Switch.

Android 6.0.1 Marshmallow for the Galaxy Note 5 N920C carries the build number N920CXXU2BPB6. The update carries tons of new features and enhancements. Samsung has changed the notification panel and the status bar for this firmware. You will find white toggles instead of the traditional green or bluish toggles now. The device now supports doze mode as well alongside the Google Now on tap. Galaxy Note 5 has seen a performance and battery boost with this latest update.

Galaxy Note 5 N920C To Android 6.0.1

Overview:

As usual, the update is on a rollout for select regions only. We believe that Samsung will soon roll out the Android 6.0.1 Marshmallow update for other variants and other regions anytime soon now. Just in case you own the Galaxy Note 5 N920C outside Cambodia and you are willing to update your device right away, we might have got a treat for you.

The succeeding guide illustrates how you can update Galaxy Note 5 N920C to official Android 6.0.1 Marshmallow XXU2BPB6 firmware using Samsung’s flashtool Odin3. Let’s go through some quick prerequisites and then flash this firmware.

Early Preparations:

1. This guide is only for Samsung Galaxy Note 5 N920C

Make sure that your device is exactly as mentioned above. To check out what device you have, go to Settings > More/General > About Device or Settings > About Device and match the model number. Be careful about the device model number, flashing a file on a device not listed here might result in bricking it up. In that case, we may not be held responsible.

2. The battery should be charged at least 60%!

Your device’s battery should not be weak. In case your device goes dead during the flashing process, your device may get soft bricked and you might be in need of flashing stock firmware and that will ultimately result in wiping up your data as well. So, make sure that you charge your device before you start the flashing process.

3. Use the OEM data cable to establish a connection!

Always use the original data cable to establish a connection between your Android device and your computer/laptop. Using ordinary data cables might interrupt the flashing process, so to avoid any mishap, you need to meet this requirement as well.

4. Backup everything!

Just to be on the safe side, you may consider backing up each and everything from your Android device. This is highly recommended so that in case anything goes wrong, you still have the access to all of your data and you can restore it immediately.

Also, the clean install is always recommended, that means you will probably have to wipe your device to install the new firmware. So, you may backup everything as listed below.

5. Install Samsung USB drivers

In order to be able to establish a connection between your PC and your, you need to have the Samsung USB drivers installed on your PC. You can find all Android USB drivers here on our site.

6. Turn off Samsung Kies and other softwares while using Odin3!

Make sure that you turn off Samsung Kies while using Odin3 flashtool. Samsung Kies will interrupt Odin3 and will result in causing errors and may not let you flash your desired firmware. Also, make sure that you turn off any antivirus software you’ve installed and also disable firewall to avoid any connection and flashing issues.

Required Downloads & Installations:

  1. Download and extract Odin3 v3.10.6.
  2. Download and extract firmware file to get the .tar.md5 file.

Firmware Details:

  • Model: SM-N920C-
  • Version: Android 6.0.1 Marshmallow
  • Changelist: 7037264
  • PDA: N920CXXU2BPB6
  • CSC: N920COLB2BPB6
  • Build Date: February 15, 2016.

Flash Official Android 6.0.1 Marshmallow on Galaxy Note 5 N920C

  1. Make sure that you read the instructions listed above carefully and you’re all set to go ahead now.
  2. Wipe your device complete in order to attain a neat installation. You may boot into the recovery mode and perform a factory data reset.
  3. Open Odin3.exe.
  4. Put your Galaxy Note 5 in download mode. To do so, turn it off and wait for 10 seconds. Turn it on by pressing and holding Volume Down + Home Button + Power Key simultaneously, You should see a warning, press Volume Up to continue. In case this method doesn’t work for you, try one from this guide.
  5. Connect your device to your PC.
  6. As soon as Odin detects your phone, the ID:COM box should turn blue.  Make sure that you’ve installed Samsung USB drivers before connecting.
  7. For Odin 3.09 or 3.10.6 hit the AP tab. Select the firmware.tar.md5 or firmware.tar, that you downloaded and extracted above.
  8. If you’re using Odin 3.07, you will select “PDA” tab instead of the AP tab, rest of the options remain untouched.
  9. Make sure that the options selected in your Odin are exactly as shown in the pic.

Odin 3.10.6 Explained_Techbeasts

  1. Hit start and wait till the firmware flashing is complete, The flashing process box will turn green upon successful flashing.
  2. Once the flashing process has been completed successfully, disconnect your device and reboot it manually.
  3. Once the device boots up, check out the new firmware now.
  4. Your device will be running on official Android 6.0.1 Marshmallow firmware.
  5. Once updated to stock, do not try to downgrade, or else you will result in messing up EFS partition of your device.
  6. That’s all!

Got any queries? Make sure that you drop em’ in the comment box below. Good Luck!

How To Fix Camera App and Lib for CM/All AOSP ROMs

2
How To Fix Camera App and Lib for CM/All AOSP ROMs

Following are the instruction on how to Fix Camera App and Lib for CM/All AOSP ROMs. From last few weeks, I’ve seen many users reporting that they are facing camera crashing issue on their devices running on CM 11-12/All AOSP ROM.

We did some research and found some potential workarounds to fix Camera App and Lib issue. I’ve prepared a step by step guide. Follow all the instruction carefully.

Fix Camera App and Lib

Requirements:

  • CM_Fixed_Camera_for_CM_All_AOSP_roms_by_RohanAJoshi_V5.0.zip
  • Omni_Fixed_Camera_for_OmniRom_by_RohanAJoshi_V5.0.zip

Features:

1. Most causes of “Can’t Connect Camera” error are resolved, For me, no more can’t connect camera error whatever I do.
2. Included Snapshot while video recording.
3. Fixed: Video recording focus issues.
4. Fixed: Sometimes shutter gets disabled, no matter how hard we bash it.
5. Fixed: Sometimes Pictures comes blurry ever after correct focus.
6. Most of the front camera issues are fixed.
7. More those I did not remember.

Bugs :

  • Stock Camera app does not refocus after 1st shot in Continuous Picture Mode, Use any 3rd party app I mentioned previously for Continuous Picture Mode.
  • Set focus to Auto in default camera settings.
  • Snapshot while video recording only working nice till 480p size, in 720p and 1080p snapshots stops after few shots and camera becomes unstable.
  •  Face detection is broken.

How To Fix Camera App and Lib for CM/All AOSP Roms:

Step#1: Copy the downloaded files in your phone root directory, Turn off your device.

Step#2: Turn on your device while pressing Volume Up+Power+home button, to boot your device in recovery mode.

Step#3: Now Tap on the Install zip file.

Step#4: Use volume button to find the files you have downloaded in the first step.

Step#5: Go back to the main menu and Wipe cache and dalvik.

Step#6: Now al you have to do is Reboot your phone normally.

After flashing this mod, if still you are facing “Can’t connect camera” issue try the following Apk.

SMASH Monsters City Rampage for Pc Download

0
SMASH Monsters City Rampage for Pc Download

Following are the instruction on how to install SMASH Monsters City Rampage for Pc using third-party emulators. SMASH Monsters City Rampage is a Role-Playing game, introduced for both iOS and Android devices. As we know that there is no such Pc version for Android games and apps, so we have to use emulators like BlueStacks and Andy. In the following guide we will tell you all the possible method to install SMASH Monsters City Rampage for PC Windows and Mac. Before moving on to the tutorial first let me give you an overview on SMASH Monsters City Rampage.

SMASH Monsters City Rampage for PC

SMASH Monsters City Rampage is role playing game as I have mentioned above, the concept of the game is simple, you have to create giant master in your lab and unleash them on rival cities. ” Conquer the world alone, or create a FACTION of friends for the sheer love of crushing stuff! Get out there, and let the DESTRUCTION BEGIN! “. Following are the main features of SMASH Monsters City Rampage.

SMASH Monsters City Rampage Features:

● Lead your monster army to victory in a massively multiplayer PvP world!
● Tons of monsters to collect, level-up, and evolve, plus tons of power-ups, special abilities, and more!
● Build and fortify your city with impenetrable defenses to fend off rival SMASH agents!
● Defeat powerful SMASH bosses as you conquer the world in Campaign mode.
● Chat and strategize with other players in real-time, and form Factions with your friends!

Also See:

How To Install SMASH Monsters City Rampage For PC or MAC Using BlackStacks

Method 1:

  1. Install Bluestacks on your PC or MAC.
  2. Download SMASH Monsters City Rampage Apk on your PC.
  3. Make sure that you have installed Bluestacks. Double-click the downloaded SMASH Monsters City Rampage Apk to install it.
  4. The APK will be installed through Bluestacks, once the notification pop-ups determining the installation completion, open Bluestacks.
  5. Now click on My Apps and then click on SMASH Monsters City Rampage.
  6. The application will open up. Now follow on-screen instructions to SMASH Monsters City Rampage.

Method 2:

  1. Install Bluestacks on your PC or MAC.
  2. Open Bluestacks and setup your Google Play Store account.
  3. Now open Google Play Store and search for “SMASH Monsters City Rampage“.
  4. Once found, install SMASH Monsters City Rampage.
  5. Now click on My Apps and then click on SMASH Monsters City Rampage.
  6. The game will open up. Now follow on-screen instructions to Play SMASH Monsters City Rampage.

How To Install SMASH Monsters City Rampage For PC or MAC Using Andy OS

  1. Download and install Andy OS on your Windows PC or MAC.
  2. Once downloaded, open Andy OS.
  3. Setup Google Play Account on it.
  4. Now open Apps > Google Play Store and search for “SMASH Monsters City Rampage“.
  5. Install SMASH Monsters City Rampage and wait for it to finish the installation.
  6. Once done, open “Uncategorized” portion in Andy and click on SMASH Monsters City Rampage to play it.
  7. That’s all.

How To Fix Unfortunately WeChat Has Stopped on Android

0
How To Fix Unfortunately WeChat Has Stopped on Android

Following are the instruction on how to fix Unfortunately WeChat Has Stopped on Android error. The most popular error on Android is Unfortunately App has stopped, every one us has faced this error. We have provided solution of many popular apps like Facebook, Messenger, SnapChat , WhatsApp and more. Today I’ll guide you how to fix unfortunately WeChat has stopped error on your Android devices.

fix unfortunately wechat has stopped

Also SeeHow To Fix “Unfortunately messaging has stopped” Error

Read MoreHow To Fix Unfortunately WhatsApp Has Stopped on Android

How To Fix “Unfortunately WeChat has stopped” Error

Before going any further you must see our ultimate guide on how to Fix ‘Unfortunately app has stopped’ errors.

Step#1: Open Settings on your Android device.

Step#2: Now tap on More tab.

Step#3: Tap on Application Manager form the list.

Step#4: Now select All Application by swipe to left.

Step#5: There you’ll see all your installed apps, Tap on WeChat.

Step#6: Now all you have to do tap on Clear Cache and Clear data.

Step#7: Now goto home screen and restart your device.

All Done ….

Fix Unfortunately App Has Stopped [ Video Tutorial ]

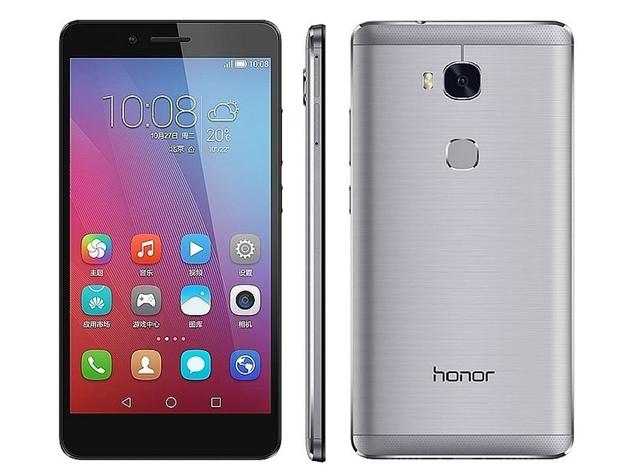
How to Root and Install TWRP Recovery on Huawei Honor 5X KIW-L24

2
How to Root and Install TWRP Recovery on Huawei Honor 5X KIW-L24

Rooting is the ultimate and the final step towards the beginning of the customization of the Android devices. However, rooting also have its own prerequisite, procedures and without completing them, you can’t do anything. This procedure might take time to be completed, but in the end you’ll get the root access along with almost everything you need to flash custom mods and tweaks on your device. After the great success of Huawei Nexus 6P and Mate8, Huawei has offered another budget segment for all the Android lovers, who wants performance and looks but still can’t afford a high-end device, with 2GB of RAM 16GB of internal storage can be extended up-to 128GB via MicroSD, Octa Core Snapdragon processor, 13MP of rear camera and a 3000 mAh battery, this device can show some serious performance.

How to Root and Install TWRP Recovery on Huawei Honor 5X KIW-L24

Although, Stock ROMs are not that good when it comes to performance, however, to unleash the beast for real, one has to make sure that the device must be used to its maximum potential and thanks to restrictions on Stock ROMs, one can live life peacefully but without any fun at all. The following process is of 3 steps, Unlocking Bootloader, flashing the TWRP recovery and Flashing the SuperSU.Let’s go through the early preparations and the begin flashing the TWRP Recovery on Huawei Honor 5X KIW-L24 to Root it.

Precautions

  1. This ROM is intended for Huawei Honor 5X KIW-L24. Do not try flashing this ROM on any other device otherwise you will result in bricking it. Check your device’s model number under settings > about device.
  2. Make Sure that USB Debugging is enable, go-to Settings > Developers Option and Tick the USB debugging.
  3. Make sure that Fastbboot/ADB is configured on PC. How? How to Install Android Adb & Fastboot Drivers on Your Windows PC [Guide].
  4. Charge your phone up to 50% to avoid any power issues during the flashing process.
  5. Backup everything including your important contacts, call logs and text messages.
  6. Don’t forget to create a Nandroid backup. This is highly recommended so that you can revert back to your previous system in case of a mishap.
  7. Follow the instructions to the letter.

How To Unlock Bootloader:

  • Visit the Link to Make an Huawei ID
  • Visit the Link and Log-in there and fill the needed details.
  • Open your phone and in Dial-up type * # * # 1357946 # * # * and get the Product identification code.
  • Connect your device with PC and open command prompt in fastboot folder.
  • Type: adb reboot bootloader
  • Once in bootloader type: fastboot oem unlock ************** (put the unlock code instead of *)
  • This will wipe your data, so make sure you created the back-up before proceeding.
  • Boot up your phone and let it start.

How To Flash TWRP Recovery:

  • Download and Copy the TWRP recovery image to the fastboot folder and rename it to recovery
  • Turn off your phone and open Bootloader/Fastboot mode. How? Press and hold Volume Down + Power button until you see some text on screen.
  • Now Open Command prompt in Fastboot Folder, How? Hold Shift Key and Right Click anywhere in the Fastboot folder.
  • Now type in the following command: fastboot flash recovery recovery.img Press Enter.
  • Then type in the following command: fastboot reboot.
  • After the reboot, take out the battery and wait for at least 10 seconds.

How To Root Huawei Honor 5X KIW-L24:

  • First of all, make sure that you’ve installed latest TWRP recovery from the link we attached above.
  • Make sure that you’ve created a Nandroid backup as well.
  • Download latest SuperSU.zip file and copy it to the root of your sd card.
  • Now boot your phone in to TWRP recovery.
  • Now once again, get back to the main menu in TWRP recovery.
  • Tap / select Install Zip >Supersu.zip file and swap the slider to start Installation.
  • Once done, Go back to the Main Screen.
  • Reboot device into system now.
  • That’s all. You are done.