Home Blog Page 315

Download CSR Racing 2 APK for Android

0
Download CSR Racing 2 APK for Android


CSR Racing has just welcome its successor named as CSR Racing 2. In case you’ve no idea about CSR Racing, you would like to know that CSR Racing game is one of the best (if not the best) racing games of all the times. CSR Racing’s concept is quite simple. It offers great visuals and a cool gameplay and the fact that makes it a little more cool is that its not a memory hungry game like the Asphalt or Real Racing series. CSR Racing 2 is here to entertain the CSR Racing fans and take the game to a next level. NaturalMotionGames have launched this game in collaboration with Zynga who is already behind quite many popular Android games like Farmville Harvest and Crazy Cake Swap.

CSR Racing 2 offers a realistic experience. You’re all set to live life of a car geek and a racer. CSR 2 brings over 50 supercars from popular manufacturers. CSR Racing 2  offers multiple modes. You can begin your career as a racer and then compete in different challenges to earn a suitable amount of money to unlock/purchase new cars, modify y0ur car, customise its aesthetics and also upgrade its performance. Collect as many cars as you can in the garage so that you’re prepared for any kind of race. Are you ready to become the best racer of town? Let’s check it out in this game.CSR Racing 2 for pc

CSR Racing 2 has been released for Android world-wide now. You can install this game for free from the Google Play Store. Just in case the game isn’t appearing at your end or for some reason you cannot access the Play Store, you will need the APK file of CSR Racing 2. We have managed to pull the CSR Racing 2 APK for Android and linked it here alongside the installation instructions. Get yourself to the download and installation instructions now to begin playing CSR Racing 2 on your Android handheld.

CSR Racing 2 APK and How to Install

  1. Download CSR Racing 2 APK
  2. Download the file to your phone straight away, or copy it to your phone from your PC.
  3. Now on your phone, go to settings > security > allow unknown sources > check this.
  4. Now using a file manager, locate the APK file that your just copied or downloaded.
  5. Tap the APK file and finish installation using the on-screen instructions.
  6. Once installed, access the newly installed game through app drawer.
  7. That’s all. Enjoy CSR Racing 2 !

Just in case you’re willing to play the new version of Temple Run 2 on your PC then checkout CSR Racing 2 for PC!

Farm Heroes Super Saga for PC Download

0
Farm Heroes Super Saga for PC Download

In this following post, I’ll tell you how to download and install Farm Heroes Super Saga for PC.

Farm Heroes Super Saga is the latest top trending game in Google Play, the creator of Candy Crush Saga and Farm Hero Saga give us a new madness Farm Heroes Super Saga. Now this game carries the same concept as all the games developed by the KingBasically it’s puzzle game where you have to match 4 or more same color in order to grow the Super Cropsies and win the Country Show. Now let’s come back to the main topic, How to install and play Farm Heroes Super Saga on PC.

Farm Heroes Super Saga for PC Download


You can play Farm Heroes Super Saga for PC on your Windows 7/8/8.1/10 desktop PC or laptop and a Mac OS X, MacOS machine as well. You will need an Android emulator to play this game on your computer. We have mentioned how you can play it using BlueStacks, BlueStacks 2 or Andy OS. Let’s have a look on the guide now and start playing Farm Heroes Super Saga for PC without any further ado.

Download Farm Heroes Super Saga For Windows PC & Mac

  1. Download Farm Heroes Super Saga APK
  2. Download and install Bluestacks: Bluestacks Offline Installer | Rooted Bluestacks |Bluestacks App Player
  3. Once you’ve installed Bluestacks, double click the downloaded Farm Heroes Super Saga APK.
  4. The APK will be installed using Bluestacks, once installed open Bluestacks and locate the recently installed Farm Heroes Super Saga.
  5. Click the Farm Heroes Super Saga icon to open it, follow the on-screen instructions to play it.

You can also use Andy OS to install Farm Heroes Super Saga, here’s the tutorialHow To Run Android Apps On Mac OS X With Andy

The Andy OS tutorial explains how to play a game on your Mac OSX, but the same guide will also work for a Windows PC.

That’s all. In case you’re stuck with anything, reach us out through the comment box below.

How to Recover Data from a Soft-Bricked Android Smartphone

12
How to Recover Data from a Soft-Bricked Android Smartphone

Bricking an Android device is a common problem that may occur while you’re trying to go beyond the boundaries on it and something unfortunate happens, it will definitely result either in Soft-bricking your Android device or some similar problem will occur. While some of you might even not be familiar with what is a soft-bricked Android device, to make it easier, let’s have a look at what is it actually.

What is a Soft-Bricked Android Smartphone?

A device is soft-bricked when it boots up but it can’t get into the home screen. It may be either gone into the bootloop or stuck at the boot screen, a dark screen not going moving ahead or anything that makes it stuck as soon as it tries to boot up. Soft-bricked Android smartphones can be recovered either by flashing a new firmware, by resetting it to the factory settings or by restoring a Nandroid Backup if you’ve created one.  But the first two options have a disadvantage of wiping your internal Sdcard’s data from your phone. Soft-bricking may not be mixed up with hard brick that is also known as dead-brick and the phone is not recoverable in that state as it’s a hardware failure.

Data stored on a bricked device is a real mess especially when the device doesn’t support external sd card and all of your important content is stored on the internal storage. Accessing internal storage while a device is bricked can also be handy when you’re looking for a way to flash zip files having a custom recovery already installed and you need to store files on the sd card for flashing purposes.

So, if you have just soft bricked your Android device, you might be looking for a way to grab your data out of our phone that is stored on the internal storage. As in this state, you won’t be able to connect your phone to your PC and access the USB storage mode or any other mode, you might face some trouble, but not anymore once you’re here. In the following post we’ll be going through the remedy to this problem and get your data recovered, the process is a little complex but is easy to go once you understand it.

How to Recover Data from a Soft-Bricked Android Smartphone

Pre-Requisite:

The process involves using a custom recovery [CWM/TWRP] on your device. You can install it using the Android ADB & Fastboot method for some devices specifically for HTC, Sony, Nexus. On some devices, recoveries can be installed using different tools available around. For Samsung Galaxy devices, recoveries are available in .tar.md5 format and can be flashed using Odin. Fastboot/Download modes are accessible on a soft-bricked Android device. You may either use ROM Manager to install a recovery on your device or you may find one here. A little search may also help you in this case.

So, here’s how you can recover data from a Soft-Bricked Android smartphone:

  1. Once you’ve installed a custom recovery on your device, open it using the specific method for your device. E.g for Samsung you can turn off the device completely, then turn it on by pressing and holding Volume Up + Home + Power Key and you will be able to access the recovery. These methods vary for different devices.
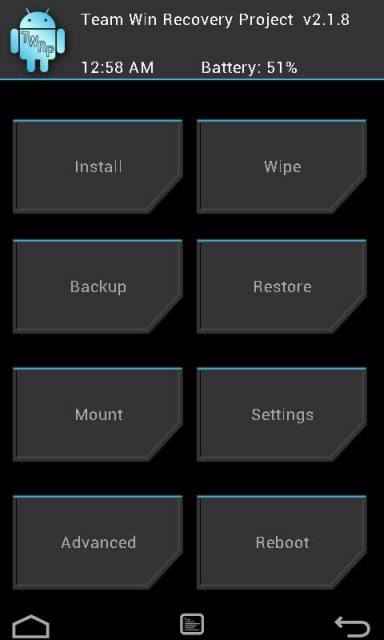
  2. Once in CWM or TWRP Recovery, you will find a number of options.
  3. For CWM Recovery, select “Mounts & Storage > Yes”.
  4. In Mounts and Storage menu, you will find some more options, from the list select “Mount USB Storage or the option depending upon your choice.”.
  5. Now connect your phone to your PC using the data cable.
  6. As soon as you connect your phone to your PC, the USB Storage / Internal Storage will open up in folder view.
  7. You can copy all of your files to your PC now.
  8. For TWRP Recovery, Select “Mount > USB Storage”.
  9. Connect your phone to your PC and it will open up the USB / Internal Storage.
  10. Copy your desired files.
  11. That’s all! You can easily recover all of your data stored on the internal storage of your Android device.

Mount and StorageTWRP

How To Change Netflix Password [ Tips ]

0
How To Change Netflix Password [ Tips ]

I am not a fan of Netflix but there is no doubt that Netflix is the best streaming service, today I’ve setup a guide in which I’ll tell you how you can change the password of your Netflix account. If you are thinking it’s easy, Hell No !.Let’s start the method to change Netflix Password.

Read more: How To Browse Netflix Hidden Genres Using Secret Codes

Netflix: Change Password

From Desktop Browser

  • Open your browser, Login to Netflix and make sure that it’s your primary account. ( if you have forgotten your password, go to thePassword Reset page and follow the instruction.
  • Once logged in, click on your name in upper-right corner, Choose “Your Account“.
  • Now Select the “Change password” link.
  • Enter your “Current Password“, “New Password“, then “Confirm New Password“.
  • Select Save.

Read more: How to download Netflix video on iPhone or Android

From iOS & Android App

  1. Open Netflix app on your iOS device, now log in using your credentials.
  2. Tap on the Menu located on the upper-left corner of the screen.
  3. Now scroll down and select “Account“.
  4. When you click on Account from the menu, it will take you to the browser page. Select “Change password“.
  5. In the next page, you have to enter your “Old Password“, “New Password“, then “Confirm New Password“.
  6. Select Save.

Now this how you can change your Netflix Account password, if you face any issue regarding this guide do tell me in comment section I would love to help.

Download Gordon Ramsay Dash APK for Android

0
Download Gordon Ramsay Dash APK for Android

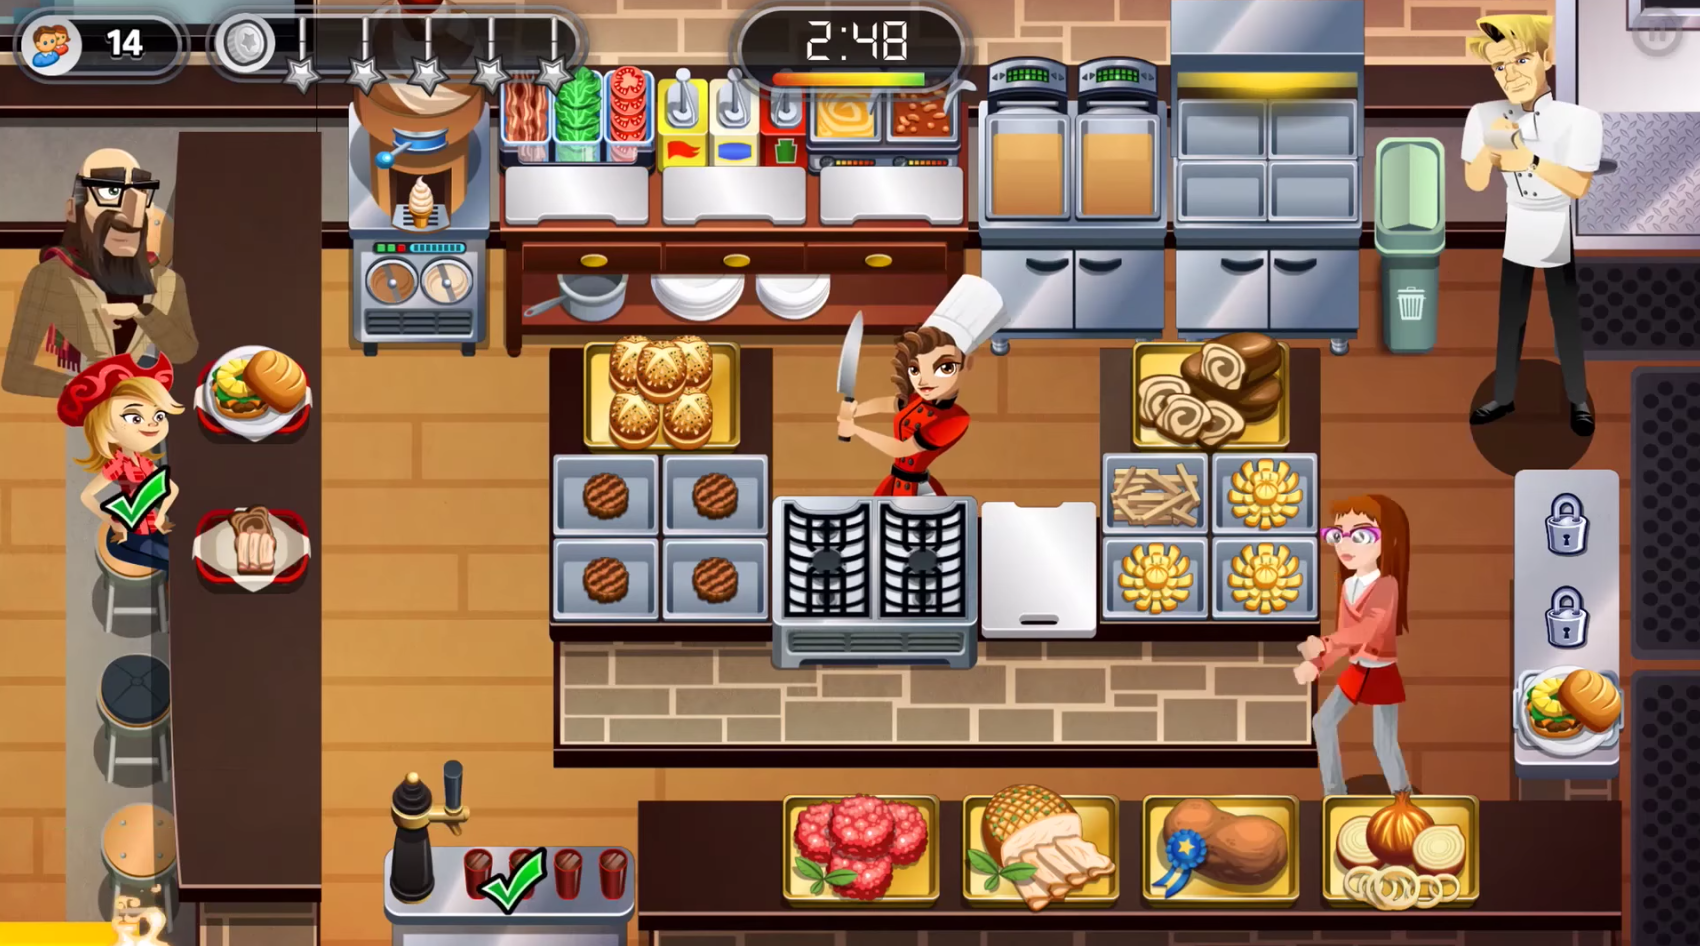
Gordon Ramsay Dash has finally made its way to the Google Play Store for Android. The long awaited application was released earlier yesterday. Gordon Ramsay Dash follow the footsteps of previous celebrity-based games introduced by Glu. In this game you will have a chance to work under the supervision of the star chef Gordon Ramsay. Ramsay will guide you how to cook and run a restaurant. You will travel across the globe, work in different countries, take part in several competitions, cook some delicious recipes with the help of Ramsay and become a star chef. Gordon Ramsay will train you to become the best chef in the world. You can customise your character the way you want. Gordon Ramsay Dash comes with a challenge mode which puts you in a straight forward competition with the bosses. You will have a chance to compete your own guide Gordon Ramsay as well. Gordon Ramsay Dash comes as a free game, you can get it from the Google Play Store.

Gordon Ramsay Dash has made its way to the select countries so far. In case this game is not appearing at your end, you might want to get your hands on its APK file to install it right now. We have managed to get our hands on the Gordon Ramsay APK for Android. The APK file has been linked below alongside the instructions to install it. Download Gordon Ramsay Dash APK now and install it to have cooking fun.

Gordon Ramsay Dash APK and How to Install

  1. Download Gordon Ramsay Dash APK
  2. Download the file to your phone straight away, or copy it to your phone from your PC.
  3. Now on your phone, go to settings > security > allow unknown sources > check this.
  4. Now using a file manager, locate the APK file that your just copied or downloaded.
  5. Tap the APK file and finish installation using the on-screen instructions.
  6. Once installed, access the newly installed game through app drawer.
  7. That’s all. Enjoy Gordon Ramsay Dash !

Top 5 Free Android Launchers

0
Top 5 Free Android Launchers
Android vs iOS is a debate that will never come to an end. There are certain features and functionalities that always put Android users ahead of iOS users. The way we use and customize Android is far better then an iPhone powered up with iOS. One feature, that the Android users have always been using and boasting-off to embarrass the iPhone users is the use of launchers. Android geeks can always use different after market launchers to customize the UI of their phone which is impossible on an iPhone so far.
A launcher is basically responsible for how the home, lock screen, icons in the notification bar and the app drawer look inside your Android device. Manufacturers use their own UI atop of the core Android OS, these UIs have exclusive launchers. For instance, Samsung’s TouchWiz UI has a TouchWiz Home launcher, Sony’s UI has Xperia Home launcher, HTC has its own launcher in the Sense UI, Google has the stock Android Google Home launcher and the same variation continues for all other Android smartphone manufacturers out there.
The purpose of Android launchers is quite understandable. If you’re wishing to get rid of the stock UI of your Android phone, then using a third party launcher is the best choice for you. Or in case you’re wanting to put some custom stuff according to your liking on the home-screen of your Android phone, change the way how icons and elements appear, the only choice you may have to do so is the use of a launcher. Attempting to find out the best launcher can get confused since there is a huge number of launchers available in the Play Store. To save you a few minutes, we’ve done the research work and picked up top 5 evergreen free Android launchers. Let’s have a look on em’ one by one.
A glimpse of the list..
  • Google Now Launcher
  • Nova Launcher
  • Microsoft Arrow Launcher
  • Apex Launcher
  • Nokia Z Launcher

Google Now Launcher


Android’s stock look has always remained the number one choice for Android geeks. The reason turns out to be its responsiveness, efficiency and almost no-complexity. Google Now is a simple to use, easy to understand and master launcher. Google Now Launcher also integreates Google Now cards to bring you the right information quickly by simply swiping towards right. Google Now also allows you to control the entire device using voice-commands. You can set the applications in the app drawer in horizontal or vertical manner. Google Now launcher makes it easy to sort applications.
It’s an official launcher by Google, you can grab it for free from the Play Store.
Nova Launcher
Nova is a feature-rich and also the highly customizable launcher available for Android till date. Nova Launcher boasts tons of features to enable you to get the best out of your Android phone. Nova’s latest version is based on the Material Design UI, which is the latest Android UI. Nova’s powerful features allow you to customize icons, layouts, animations and every single element appearing on the screen in just a few taps.
Nova Launcher offers various icon themes, you can also apply the colors on your UI according to your liking. Just like Google Now Launcher, Nova also allows to enable app drawer in both vertical and horizontal scrolling manners. The Widgets on Nova Launcher are amazing as well. Nova Launcher can also backup your custom settings in case you wish to delete it and install it once again on your Android phone. The dock is scrollable as well, you can put as many icons as you want in the dock of your phone. In case you don’t want to loose the layout of your existing launcher after installing Nova Launcher, you may not worry as Nova will pull that out for you.
Nova Launcher is available as a free application. In case the free version doesn’t fulfill your needs, you may go want to go after Nova Launcher Prime.
Arrow Launcher by Microsoft
Microsoft has been doing pretty great with its Android application lately. Last year, Microsoft launched its own Launcher for Android platform and named it as the Arrow Launcher. Arrow keeps a track of the applications and the people that you interact with the most. It automatically customises itself depending upon your usage-patterns. Arrow Launcher promises to consume the least amount of battery and provide the best performance. Since it’s an application by Microsoft, thus it is powered up with Bing’s Daily Wallpaper, Microsoft Office and Wunderlist.

Arrow also brings a customizable dock and supports third party icon packs. Microsoft Arrow is also a free application and you can easily grab it from the Play Store.

Apex Launcher
After Nova Launcher, Apex launcher maybe the best choice to go with (if you’re looking for a highly customizable launcher). The features of Apex Launcher are almost similar to Nova Launcher. Apex enables the users to hide elements from the home-screen of their Android handheld. There are multiple drawer style available in Apex. Apex also allows you to hide applications from the app drawer which means you don’t need to use any third party application to hide applications now. Apex Launcher also supports gestures like pinch, swipe up/down and double tap. The advanced theme engine makes it extremely easy to customize icons, skins, tweak the UI. The multiple layouts available in this launcher can make you scratch your head for a while when you try to decide which one you should apply.
Apex also has a free version, you can get it from the Play Store.
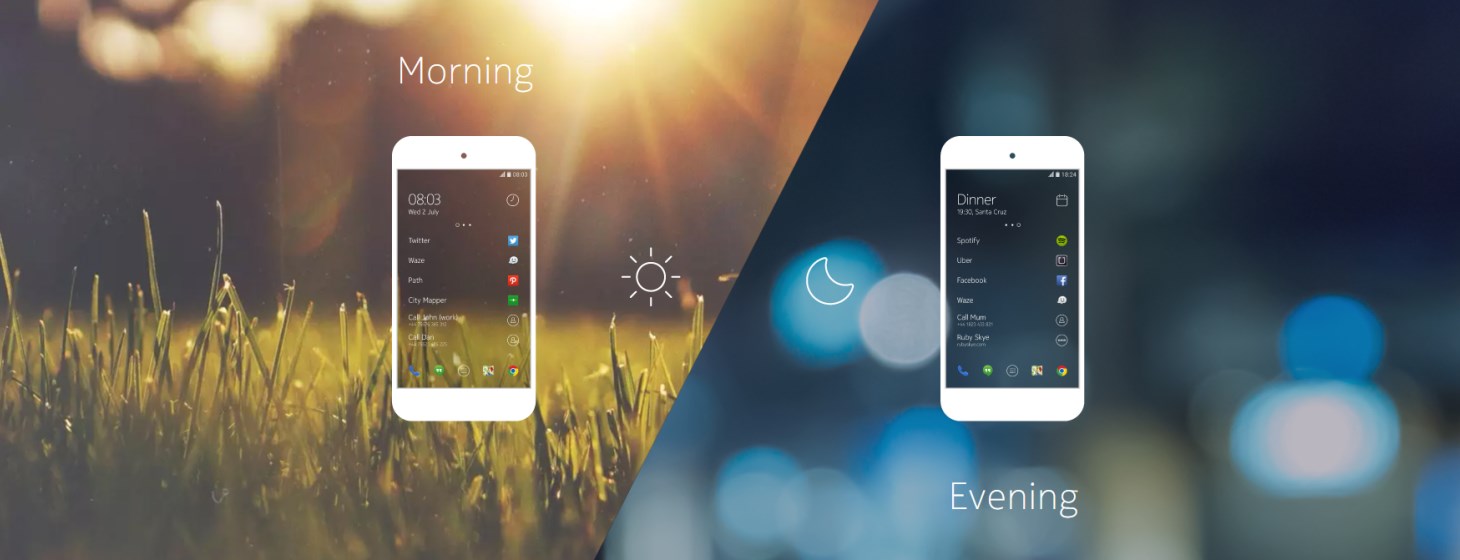
Nokia Z Launcher
Nokia might not be a player of the smartphone industry, but it’s definitely doing good with the bunch of applications that it has the Google Play Store. The Nokia Z Launcher shares some of the features with the Microsoft Arrow Launcher. Z Launcher keeps a track of which applications you use the most, which people you contact frequently and what places do you visit the most. Learning your activities, Z Launcher puts the frequently accessed stuff atop of the screen for you. Z Launcher also makes it quite easy to access applications by just drawing the first letter of an app’s name on the home-screen. Upon drawing the letter, Z Launcher drops down a beautiful list of applications starting with that particular letter.
Nokia Z Launcher is absolute beauty. It’s a free application and you can grab it from the Play Store without spending any bucks.
That’s all. Let us known which Launcher is your favorite one.

How to Install TWRP Recovery and Root LG G5 H850

How to Install TWRP Recovery and Root LG G5 H850

LG G5 H850 which is the international variant of LG’s latest flagship has been rooted and also got a TWRP recovery. The G5 development has now taken a flight and there sure is going to be a bunch of custom ROMs, MODs and tweaks to play with this device. LG G5 H850’s custom recovery is the TWRP 3.0.2 which is the latest version of TWRP with a new UI. On the plus, you can flash SuperSu once you’ve installed this recovery and it will root your phone in order to open your gate towards the customization world of Android. You can go ahead in this on-going guide to learn how to install TWRP recovery and root LG G5 H850.

Before we jump up to the guide, we will have a recap of the LG G5. The G5 was introduced by LG in February 2016. LG G5 flaunts a 5.3-inch QHD display. The G5 runs on Android 6.0.1 Marshmallow under LG’s Optimus UX 5.0 UI. Qualcomm’s Snapdragon 820 CPU accompanied by Adreno 530 GPU is powering up the G5. A RAM of 4 GB is plugged inside and the internal storage begins from 32 GB. There’s an external SD card slot as well in this phone. LG G5 has a 16 MP camera on the back and an 8 MP camera on the front. LG G5 happens to be a unique smartphone as it supports several modules that can enhance your mobile experience up to a great mark.

As we move towards flashing a TWRP recovery and rooting our beloved G5, the very first thing that we will have to do is to unlock the bootloader of this phone. Have a look on the installation preparations and then proceed with the flashing and rooting steps.

Preparations

  • This guide is intended for LG G5 H850 only. Do not try this on any other variant of the LG G5 or else you will result in bricking your device. Check your device’s model number in Settings > About device.
  • Charge your LG G5 up to 50% to ensure power backup during flashing process.
  • Backup your important contacts, sms messages, call logs and also copy your media content to your PC.
  • Enable OEM Unlocking on your LG G5. Also, enable USB debugging on your phone as well.
  • Use OEM data cable to establish connection between your PC and your phone.
  • Download and install Minimal ADB and Fastboot drivers.
  • Download and install LG USB drivers on your computer.
  • Unlock the bootloader of your LG G5 by following the instructions on LG’s official bootloader unlock page.

How to install TWRP Recovery and Root the LG G5 now

  1. Make sure that you’ve unlocked the bootloader of your LG G5.
  2. Now download the TWRP Recovery.img file and rename it as twrp.img only.
  3. Copy the renamed twrp.img file to the Minimal ADB and Fastboot folder that you’ve got in your Windows installation drive
  4. Download SuperSU.zip file and copy it to your LG G5’s external storage.
  5. Enable OEM unlocking and allow USB debugging on your phone.
  6. Now connect your LG G5 to your PC and open the Minimal ADB and Fastboot.exe from your desktop or open the command window using the instructions listed in the Minimal ADB and Fastboot guide.
  7. Now in the command window, enter the following commands one by one.
    1. adb reboot bootloader

    2. fastboot flash recovery twrp.img

  8. Now disconnect your phone from your PC and plug out the battery.
  9. Put the battery back in your phone and boot into recovery mode directly. To do so, Press and hold Volume down + Power button.
  10. As soon as you find the LG logo on you the screen, leave the power button and quickly press it again. Do not leave the Volume down button during this step.
  11. Keep holding the Volume Down and Power key unless you see the Factory Reset option on the screen.
  12. Follow on-screen instructions and perform a factory reset now.
  13. Once done, you’re all set to flash SuperSU.zip in TWRP. As you’ve copied SuperSU.zip into external SD card, you will first need to mount your external SD card by using mount option in TWRP. Once you’ve mounted external SD card, get back to the main menu in TWRP and tap “Install > Locate the SuperSU.zip file in external storage and flash it.
  14. Once SuperSU has been flashed, you can safely boot into the system now as TWRP will also stick here.

Credits: Autoprime

Fix No Whatsapp notifications in Marshmallow-updated Galaxy Note 5

0
Fix No Whatsapp notifications in Marshmallow-updated Galaxy Note 5

Android Marshmallow comes with a lot of new features and improvements, but as there are many new things, people are also getting problems. We have covered many issues on Galaxy Note 5 after updating to Android 6.0. Today I have got another mail from our reader regarding No Whatsapp notifications in Galaxy Note 5 after updating to Marshmallow.

Hi guys. I have a Note 5. i just got an update to 6.0.1 and ever since i got that update i am not getting any Whatsapp notifications in my status bar at all. For example, if i am in another application and i received a Whatsapp message, it would say message from Tom or message from Mary. That’s what used to happen before i got the Marshmallow update.

Read more: Fix Samsung Galaxy Note 5 Constantly Not Charging Issue

Fix No Whatsapp notifications in Marshmallow-updated Galaxy Note 5:

As I have never faced any issue like so I had to dig deeper and found out very positive solutions. Follow all the instruction carefully in order to Fix No Whatsapp notifications in Marshmallow-updated Galaxy Note 5.

  • Open Settings.
  • Tap on Applications.
  • Tap on Manage Applications.
  • Now Tap on All tabs.
  • Tap on Storage.
  • Search for WhatsApp and Tap on it.
  • Now check the “Show notifications” box if it’s checked.

Once you have tried this method, use the other device and send a text on WhatsApp to see it’s working now. After trying the first method you won’t got any success. Try the following one.

  • Open WhatsApp.
  • Tap on 3 dots located on your top right corner.
  • Tap on Settings.
  • First, make sure that ” conversation tone is checked.
  • Tap on Pop-up notification and Select No Pop-up, if the option is changed to other one.

Method#3:

  • Turn off your device.
  • Now press and hold home+Power+Volume Up key.
  • Release the power button once you see the logo, but keep holding home and Volume up keys.
  • Now when you see Android logo, let go both buttons.
  • Use the volume down button to navigate and highlight wipe cache partition.
  • Now use the power key to select the option.
  • You have to select ‘Yes‘ when you’ll be prompted to next menu.
  • Now wait for the process to be completed, once it’s done highlight ‘Reboot system now’ and press power button to select it.
  • All Done.

Secret USSD Codes To Unlock Hidden iPhone Settings [ List ]

0
Secret USSD Codes To Unlock Hidden iPhone Settings [ List ]

As we all know that Android devices have hidden settings and you can access them by inputting few secret codes,  may be most of you people didn’t know about such settings but they do exist. Today I’ve good news for iOS users, I’ve collected Secret USSD Codes To Unlock Hidden iPhone Settings.

Secret USSD Codes To Unlock Hidden iPhone Settings [ List ]  

  1. *3001#12345#* – Activate Field Mode, which contains all of your iPhone’s more technical settings. It also converts the signal bars into an actual number.
  2. *#5005*7672# – Check SMS center
  3. *646# (Postpaid only) – Display your available minutes
  4. *225# (Postpaid only) – Check your current bill’s balance
  5. *#31# – Choose whether to hide your number
  6. *3370# – Enable or disable EFR (Enhanced Full Rate), which improves your iPhone’s voice quality, but will quite likely reduce battery life
  7. *#21# – Check call forwarding status
  8. *777# (Prepaid only) – To check the account balance
  9. *#62# – Check which number calls will be forwarded to if no service is available
  10. *#76# – Check connecting line presentation
  11. *#67# – Check the number to be used for call forwarding
  12. *#33# – Check whether anything is barred, such as international calling etc.
  13. *#61# – Check number of missed calls
  14. *#06# – Displays your iPhone’s IMEI number
  15. *#43# – Check call waiting status
  16. *43# – Activate waiting
  17. #43# – Deactivate call waiting

You need to use all the codes through the phone app, maybe some of these won’t work properly. Enjoy the Secret USSD Codes To Unlock Hidden iPhone Settings.

Nonstop Knight for PC (Windows 7/8/8.1/10 and Mac)

0
Nonstop Knight for PC (Windows 7/8/8.1/10 and Mac)

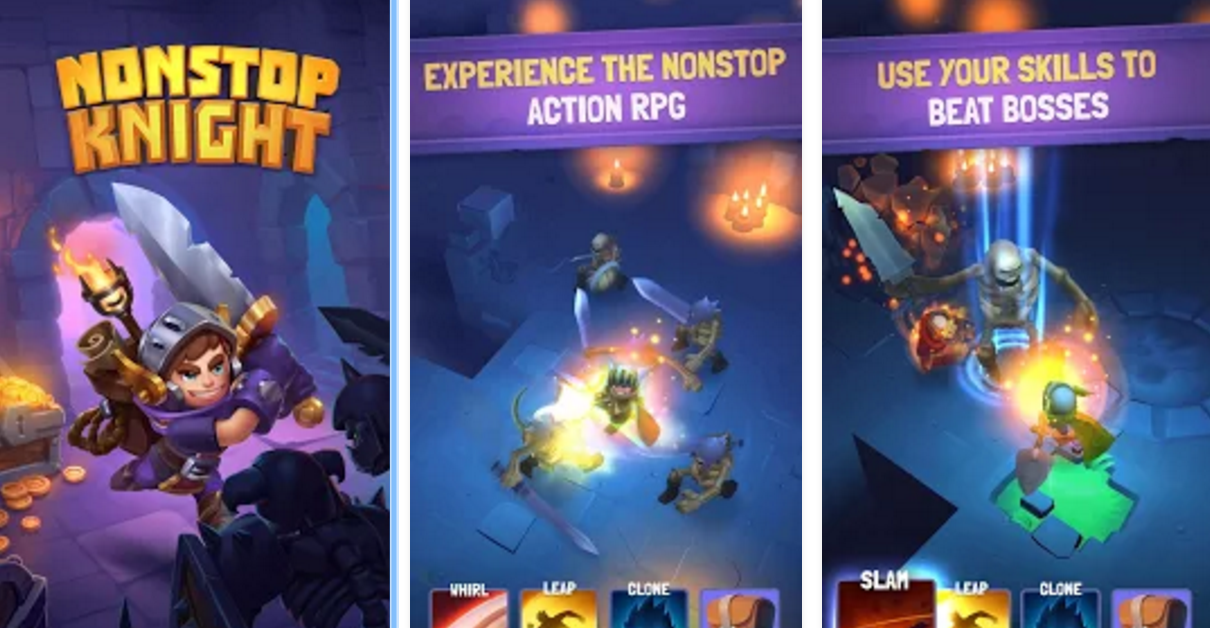
Nonstop Knights by flaregames is a new role playing game drawing its way to the top charts at the moment. The name of this game suggests enough to have an idea about what we have to do in it. It’s a one thumb game which never comes to an end. Your Knight keeps on going ahead as long as you can keep him alive and that’s how he becomes a Nonstop Knight. Smash all the enemies, enemy bosses coming as a hurdle on your way. Beat them to death and set an alert for the incoming enemies. You will earn gold to cope up with the reward system in this game. By the time you upgrade your level, you will be able to upgrade your knight as well, get him some new skills and weapons to fight even better against the enemies. You will uncover unique capabilities of your knight during the battle. The leaderboard is all set for you to put some high score and challenge others. Nonstop Knight is an absolutely free to play game. You can get it from the Play Store for your Android smartphone. If you’re willing to play it on your computer then you have already spotted the right place for that as well. 

You can play Nonstop Knight for PC on your Windows 7/8/8.1/10 desktop PC or laptop and a Mac OS X, MacOS machine as well. You will need an Android emulator to play this game on your computer. We have mentioned how you can play it using BlueStacks, BlueStacks 2 or Andy OS. Let’s have a look on the guide now and start playing Nonstop Knight for PC without any further ado.

Download Nonstop Knight For Windows PC & Mac

  1. Download Nonstop Knight APK
  2. Download and install Bluestacks: Bluestacks Offline Installer | Rooted Bluestacks |Bluestacks App Player
  3. Once you’ve installed Bluestacks, double click the downloaded Nonstop Knight APK.
  4. The APK will be installed using Bluestacks, once installed open Bluestacks and locate the recently installed Nonstop Knight.
  5. Click the Nonstop Knight icon to open it, follow the on-screen instructions to play it.

You can also use Andy OS to install Nonstop Knight, here’s the tutorialHow To Run Android Apps On Mac OS X With Andy

The Andy OS tutorial explains how to play a game on your Mac OSX, but the same guide will also work for a Windows PC.

That’s all. In case you’re stuck with anything, reach us out through the comment box below.


Download Ninja Turtles Legends for PC

0
Download Ninja Turtles Legends for PC

Ninja Turtles joins the mobile gaming world as well. You can now play with your favorite movie characters packed inside a game on your Android or Apple phone. Kraang is the villain in this game, who has kidnapped the mutants and the Ninja Turtles to extract their DNA for superpowers. Your task is to recruit Ninja Turtles to save all those abducted by Kraang before the time slips out of your hands. Ninja Turtles Legends brings the original Ninjas from the movie. It brings 7 chapters and 70 different levels to take down all the evil forces. You can also have a glimpse of Out of the Shadows version of Ninja Turtles for a limited time in this game. You will be helping Leonardo to take down Kraang and other evil forces. Empower Leonardo and save your fellows now. Ninja Turtles Legends carries a handful of features to make the gameplay exciting. To play it on your Android phone, you can grab it in a few taps by going on to the Google Play Store. 

Ninja Turtles Legends can be played on a computer as well. Desktop and laptop gaming freaks can now play Ninja Turtles Legends for PC on their Windows XP/7/8/8.1/10 Laptops/PCs and also on MacOS, OS X devices. All you need is an Android emulator like Bluestacks or Andy OS to play this game on a bigger screen. Have a look at the guide now and start playing Ninja Turtles Legends for PC.

Don’t forget to check out Mobile Legends for PC Mobile Legends for PC as well.

Download Ninja Turtles Legends For Windows PC & Mac

  1. Download Ninja Turtles Legends APK
  2. Download and install Bluestacks: Bluestacks Offline Installer | Rooted Bluestacks |Bluestacks App Player
  3. Once you’ve installed Bluestacks, double click the downloaded Ninja Turtles Legends APK.
  4. The APK will be installed using Bluestacks, once installed open Bluestacks and locate the recently installed Ninja Turtles Legends.
  5. Click the Ninja Turtles Legends icon to open it, follow the on-screen instructions to play it.

You can also use Andy OS to install Ninja Turtles Legends, here’s the tutorialHow To Run Android Apps On Mac OS X With Andy

The Andy OS tutorial explains how to play a game on your Mac OSX, but the same guide will also work for a Windows PC.

That’s all. In case you’re stuck with anything, reach us out through the comment box below.

Show Full Version of Gmail on iPad or iPhone [ Tutorial ]

0
Show Full Version of Gmail on iPad or iPhone [ Tutorial ]

Today I’ll tell you how you can get full Version of Gmail on iPad or iPhone, mostly all the social giants like Facebook, Twitter, Youtube, and Gmail provides a mobile version for those who use a slow internet connection. Mobile version of Gmail provides very few features, that is why I made this tutorial ” Show Full Version of Gmail on iPad or iPhone

Also See: How To View Full Version of Facebook on iPhone – iPad

Show Full Version of Gmail on iPad or iPhone:

Safari Setting

  1. Open  mobile Gmail site and log in with your username and password.
  2. Now tap and hold the circle arrow icon located on the top right side and choose “Request Desktop Site“.

Desktop Link

  • Open  mobile Gmail site and log in with your username and password.
  • Now scroll down and go to the end of the page, Tap on the “Desktop” link.
  • You’ll see the full desktop version of Gmail in your browser.

Use Chrome

  • Open Google Chrome on your iPad or iPhone.
  • Now open mobile Gmail site.
  • Tap on 3 dots located on the top right of the screen.
  • Now Tap on “Request Desktop Site”.