Home Blog Page 308

Fix Missing Operating System Error [Solved]

Fix Missing Operating System Error [Solved]

In this post, I’ll tell you how to fix Missing Operating System or operating System Not Found Error on Windows. The main reason which can trigger this error are your system partition is not active, BIOS (computer input/output) not detect hard disk, Hard disk is corrupted etc. Now let’s start the method to fix operating System Not Found or Missing Operating System error on Windows 10, Windows 8.1, Windows 7, Windows 8, and Windows XP.

Fix Missing Operating System Error

How To Fix Missing Operating System Error:

  • To Fix this issue, you need a Windows CD or DVD, you can also use bootable windows OS USB device.
  • Insert CD or attach Bootable USB with your PC.
  • Now you have to enter your BIOS setup, depending on your system setup.
  • When the boot setup loads up, select the option Repair Your Computer.
  •  When you are in repair computer process, Open CMD (Command Prompt).
  • In CMD type these commands, “disk part” then type “list volume”.
  • When all volumes list is shown, type “select volume ###“(system volume C) shows on CMD. Ex. select volume 3
  • Once you select the volume, type “ACTIVE“. Now type ”exit” to leave disk part and again ”exit” to close cmd.
  • In the End Restart your PC.

Conclusion

This solution is working for many users and I’ve tried it myself, just follow all the steps mention above and you’ll successfully fix Missing Operating System error on Windows 10, Windows 8.1, Windows 7, Windows 8, and Windows XP.

A look at the evolution of Samsung’s Note series from Galaxy Note 1 to Note 7

0
A look at the evolution of Samsung’s Note series from Galaxy Note 1 to Note 7

Samsung Electronics have never failed to astonish Android customers with its every single release. First, its Android smartphone line was a big hit and just as it couldn’t get any better Samsung launched their “Big phone” idea. When smartphone companies were on the caprice of making phones smaller and lighter, Samsung introduced their “Phablet” initiatives, a smartphone design with larger size supposed to overlap the tablet’s working scheme with that of a phone. Samsung Galaxy Notes encourages the use of the “stylus” pen and it has an integrated a “digitizer” which enables the user to hand-draw their tasks such as taking notes and scrap-booking digitally and . The Note has incorporated software characteristics for the stylus and the device’s large screens.

With the brink of its release, it reached extreme popularity and the impression of what it’s like to have a large phone attracted millions of customers. Upon its release in 2011, Samsung sold over 50 million Galaxy Note devices in the following two years. Such a success upon its initial steps leads the smartphone lineup to the most popular up till now.Galaxy_Note_1

With its glorious head-start Samsung Electronic received the encouragement to further enhance the existing models and manufacture further features in it’s one after another model. Samsung Galaxy Notes came out with exciting surprises throughout the years making it till Note 7 from Note 1. We have dug up about the evolution of the Galaxy Note lineup and brought you with this interesting information regarding its models. Let’s check them out.

A Glimpse at the Galaxy Note series

Samsung Galaxy Note [2011]
Samsung Galaxy Note 2 [2012]
Samsung Galaxy Note 3 [2013]
Samsung Galaxy Note Neo [2013]
Samsung Galaxy Note 4 [2014]
Samsung Galaxy Note Edge [2014]
Samsung Galaxy Note 5 [2015]
Samsung Galaxy Note 7 [August, 2016]

Samsung Galaxy Note 1

gnote-white

The First Galaxy Note was proclaimed by Samsung at Berlin in 2011. The 5.3 inch screen was subjected on large bases at the start but later became a big hit for its well stylus functionality proving its larger screen size beneficial. It was acknowledged with the speed of 1.4 GHz dual-core processor. Samsung was proud to announce that it had sold about 1 million Notes in 2 months establishing a profitable victory upon its release in October 2011. The Note initiated with LTE support in 2012, selling 10 million products globally. Note I runs on the firmware of Android OS, v2.3.5 Gingerbread, up-gradable to v4.1.2 Jelly Bean.


Samsung Galaxy Note 2
note2-official-11145

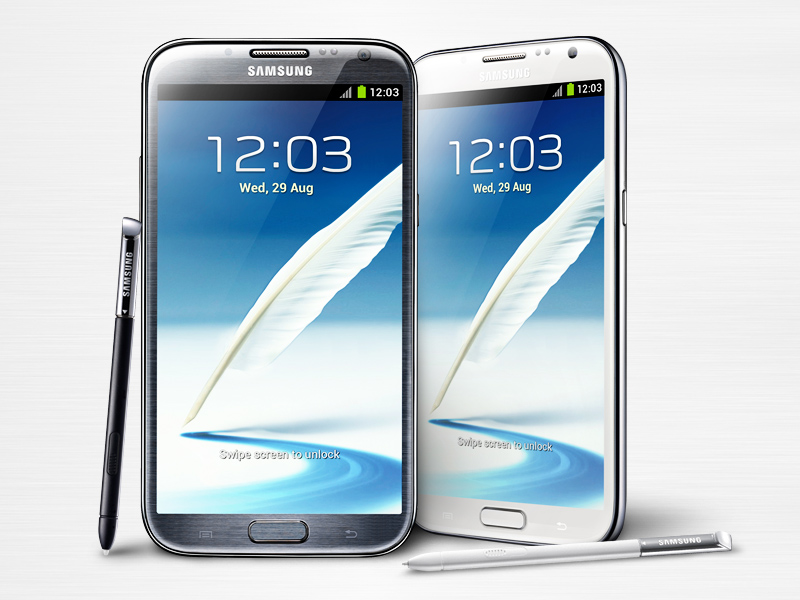
Samsung Galaxy Note 1 was succeeded by Note 2 at Berlin on August 29, 2012. Upon its release with new improvements such as a larger screen of 5.5 inch and quad-core processor hardware, updated stylus and with its digitizer made super pressure sensitive with about 1,024 levels. User could multitask with split-screening, pen gestures and Air view, enabling users to view the content to show by suspending the pen above the screen. Note II runs on the firmware of Android OS, v4.1.1 Jelly Bean later up-gradable to v4.4.2 KitKat.


Samsung Galaxy Note 3
update-galaxy-note-3-n9005-android-4-3-xxubmj1-official-firmware-guide

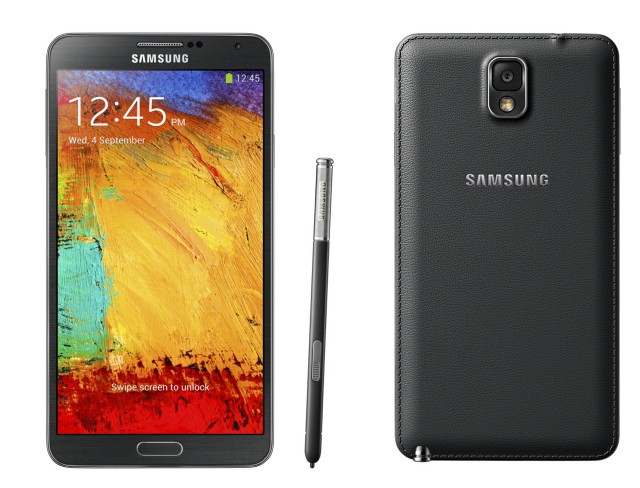
Samsung Galaxy Note 3 was introduced with much advanced features like 3 GB RAM, 13 mega-pixels camera, a 5.7 inch screen size with 1080p view, 16 GB storage and improved stylus functions. It was release on September 4 2013, with the finest plastic leather back-cover and many more characteristics. It runs on the firmware of Android OS, v4.3 Jelly Bean, can be upgraded to v4.4.2 KitKat and to v5.0 Lollipop.

Galaxy Note 3 Ultimate Guide: Features, Custom Recovery, Root, Unroot, Backup, Stock Firmware Installation & More


Samsung Galaxy Note 3 Neo

-samsung-galaxy-note-3-neo-1

Samsung released Note 3 Neo in the earliest of 2014. Despite the fact that a new version is supposed to be improved, this was not the case with Note 3 Neo. It was more like a degraded version of the Note 3 as its camera’s Mega-pixels lessened down to 8 MP, with its storage only 16 GB and 5.5 inch AMOLED resolution decreased to 720p display. It’s 2GB RAM hardware with the rest of Note 3’s software functionality.

Also Samsung added a Hexa-core Samsung Exynos 5260 chipset processor with 1.7 GHz Cortex and a Mali-T624 graphic processing unit. The batteries almost match Note 3’s. Neo has 3,100 mAh and 3,200 mAh for the Note 2. It’s rear-covering is designed with faux leader with a bit of variation. Despite its degraded model, it’s still priced higher then Note 3. It runs on the firmware of Android OS, v4.3 Jelly Bean, can be upgraded to v4.4.2 KitKat andto v5.1.1 Lollipop.

Samsung Galaxy Note 4
Best-Galaxy-Note-4-Apps-1

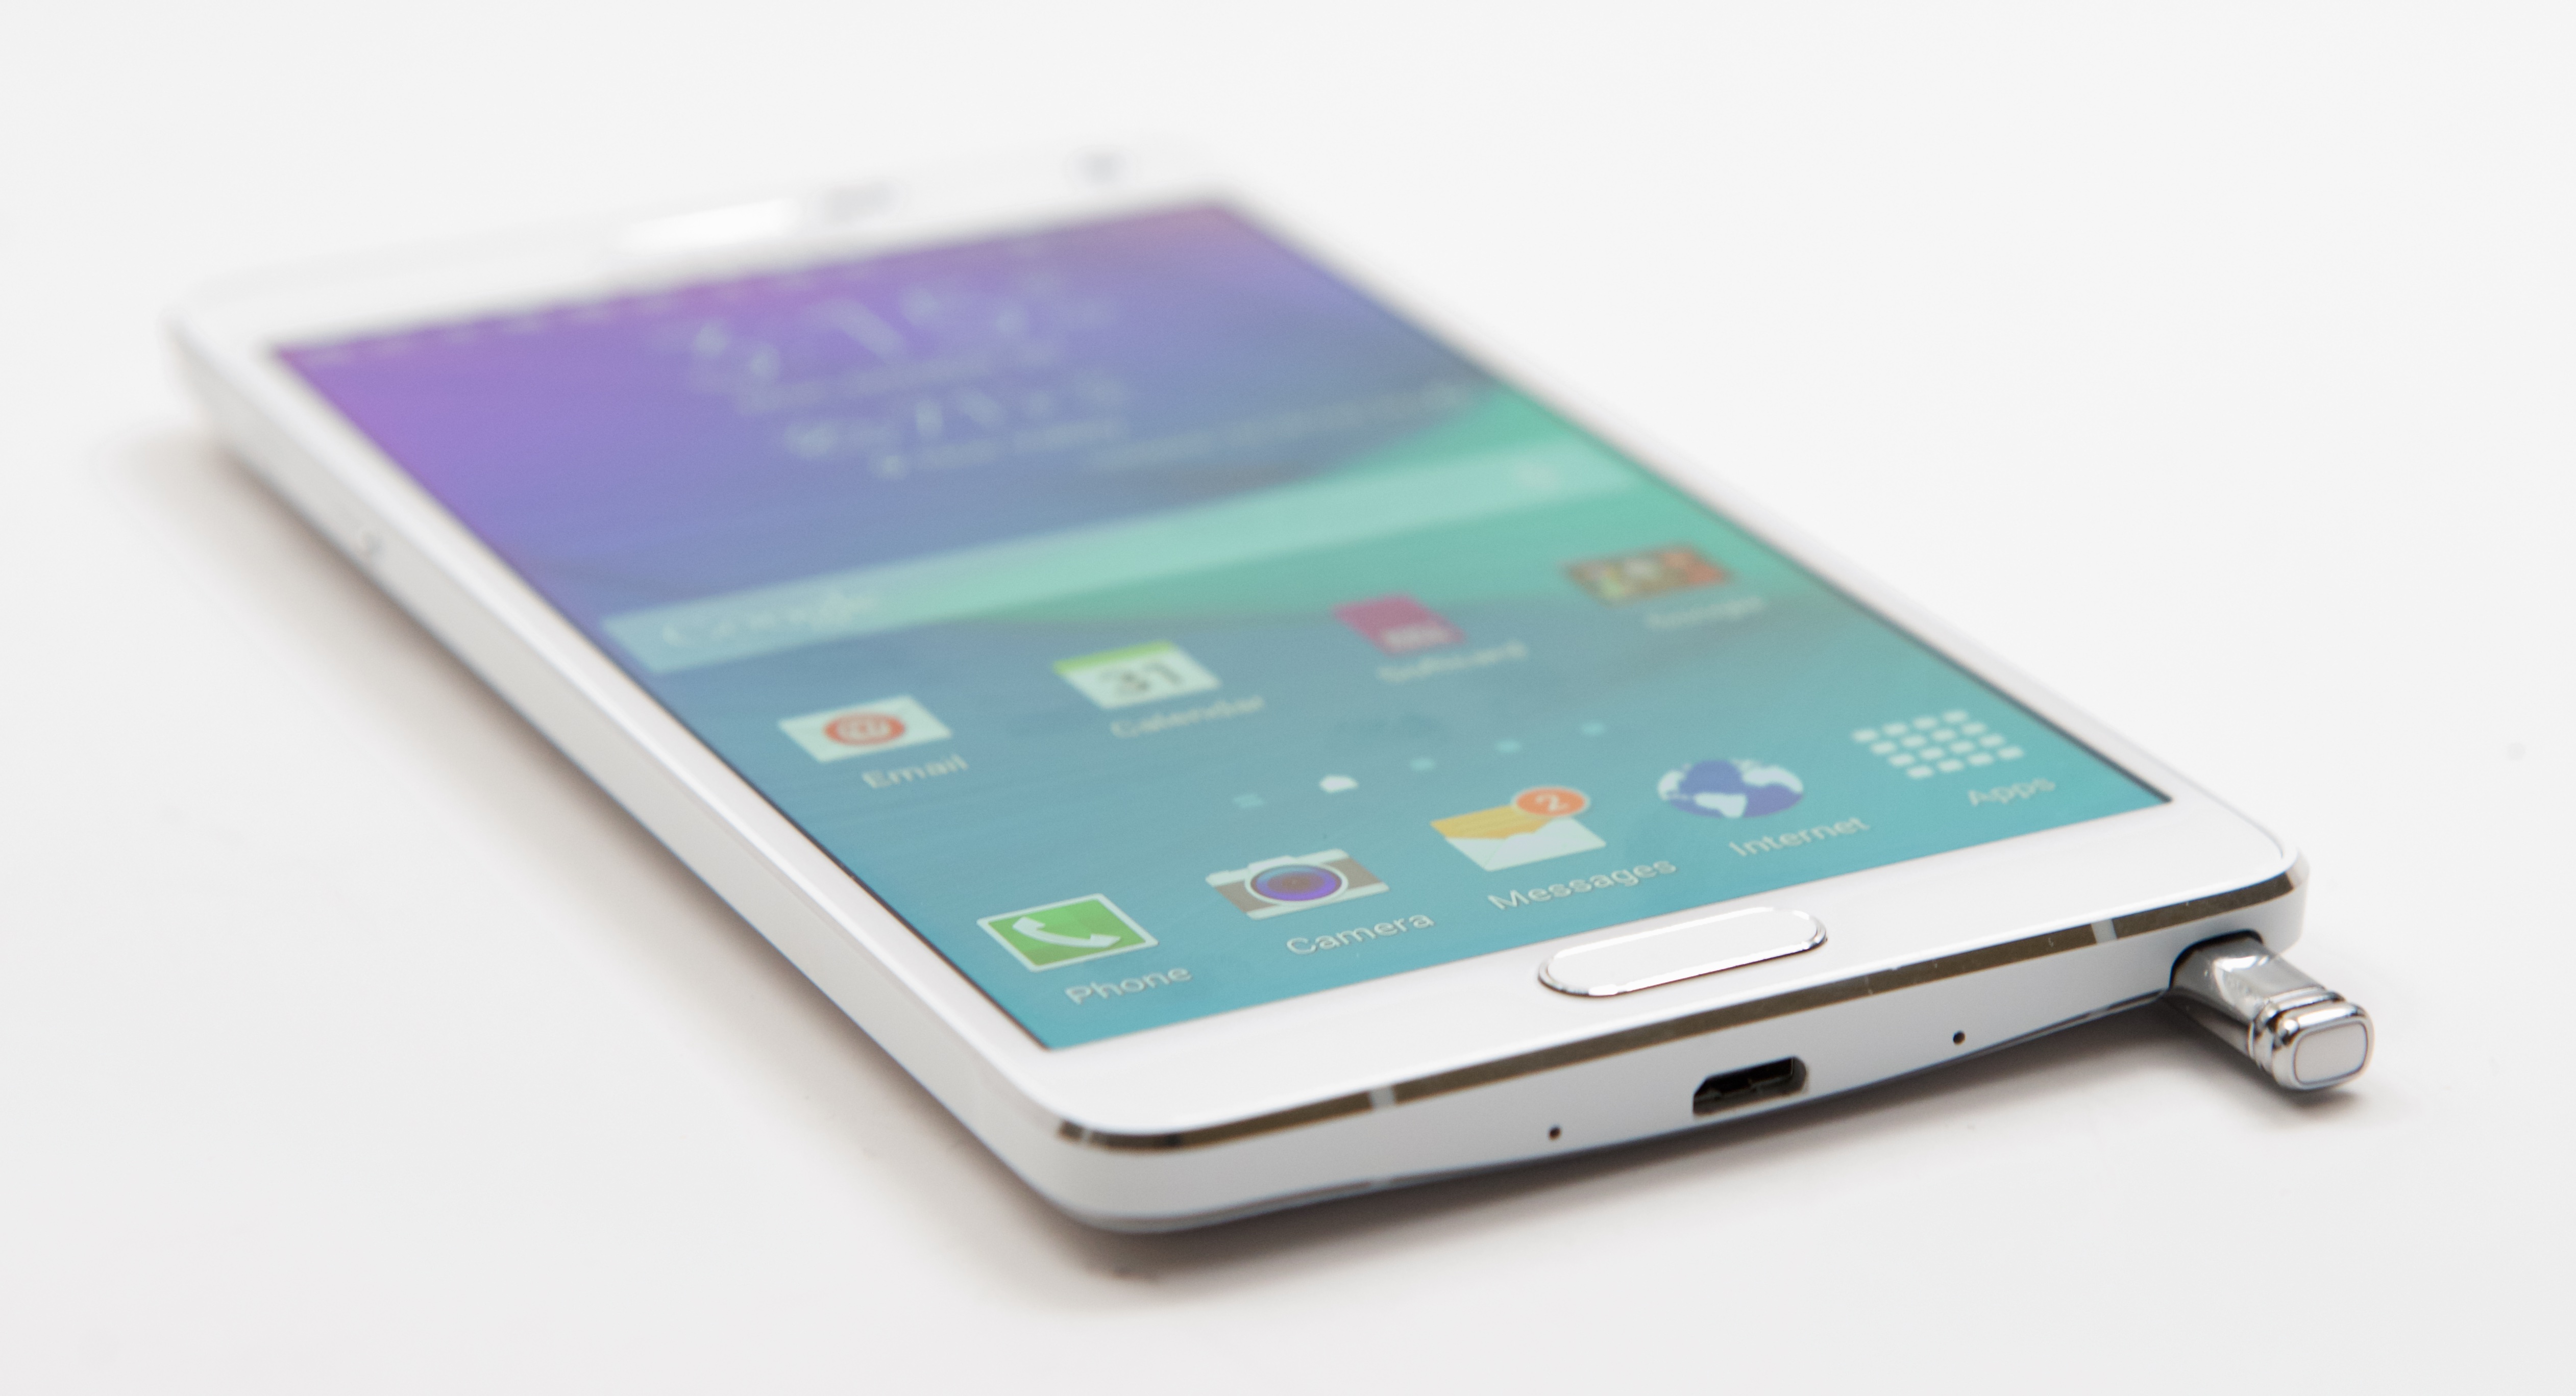
The new model and successor of the Note lineup was release on October 2014. It had similar plastic leather backing like Note 3 but with a metal frame, camera enhanced to 16 MP with optical image stabilization and the same 5.7 inch Quad-HD display of Note 3. The digitizer leveled up to 2,048 of pressure sensitivity. S-pen stylus further enhanced and heavy range of functionality. The most upgrading feature was the fingerprint scanner entrenched in to the home button making an unusual feature come to life. Galaxy Note 4 has proved to be one of the best in the Note lineup to feature Quad-HD resolution, with movements extremely flexible. It runs on the firmware of  Android OS, v4.4.4 KitKat and can be upgraded to v6.0.1 Marshmallow.

Samsung Galaxy Note Edge

Samsung-Galaxy-Note-4-vs-Samsung-Galaxy-Note-Edge-header

Samsung, alongside Note 4, disclosed a unique design of the Note series, the Samsung Galaxy Note Edge”. As it’s named Note “Edge” the Note’s sides stretch out at the two sides and have a cover-like design. Samsung shocked its customers with the sudden release of such a model. With its unique Edges, the size of the screen has been decreased to 5.6 inches. The rest of its hardware and software features prove to be similar to that of Note 4’s. The edge acts as a sidebar to display news, apps and other featured tools. It runs on the firmware of Android OS, v4.4.4 KitKat and upgradable to v6.0 Marshmallow.

Samsung Galaxy Note 5
maxresdefault

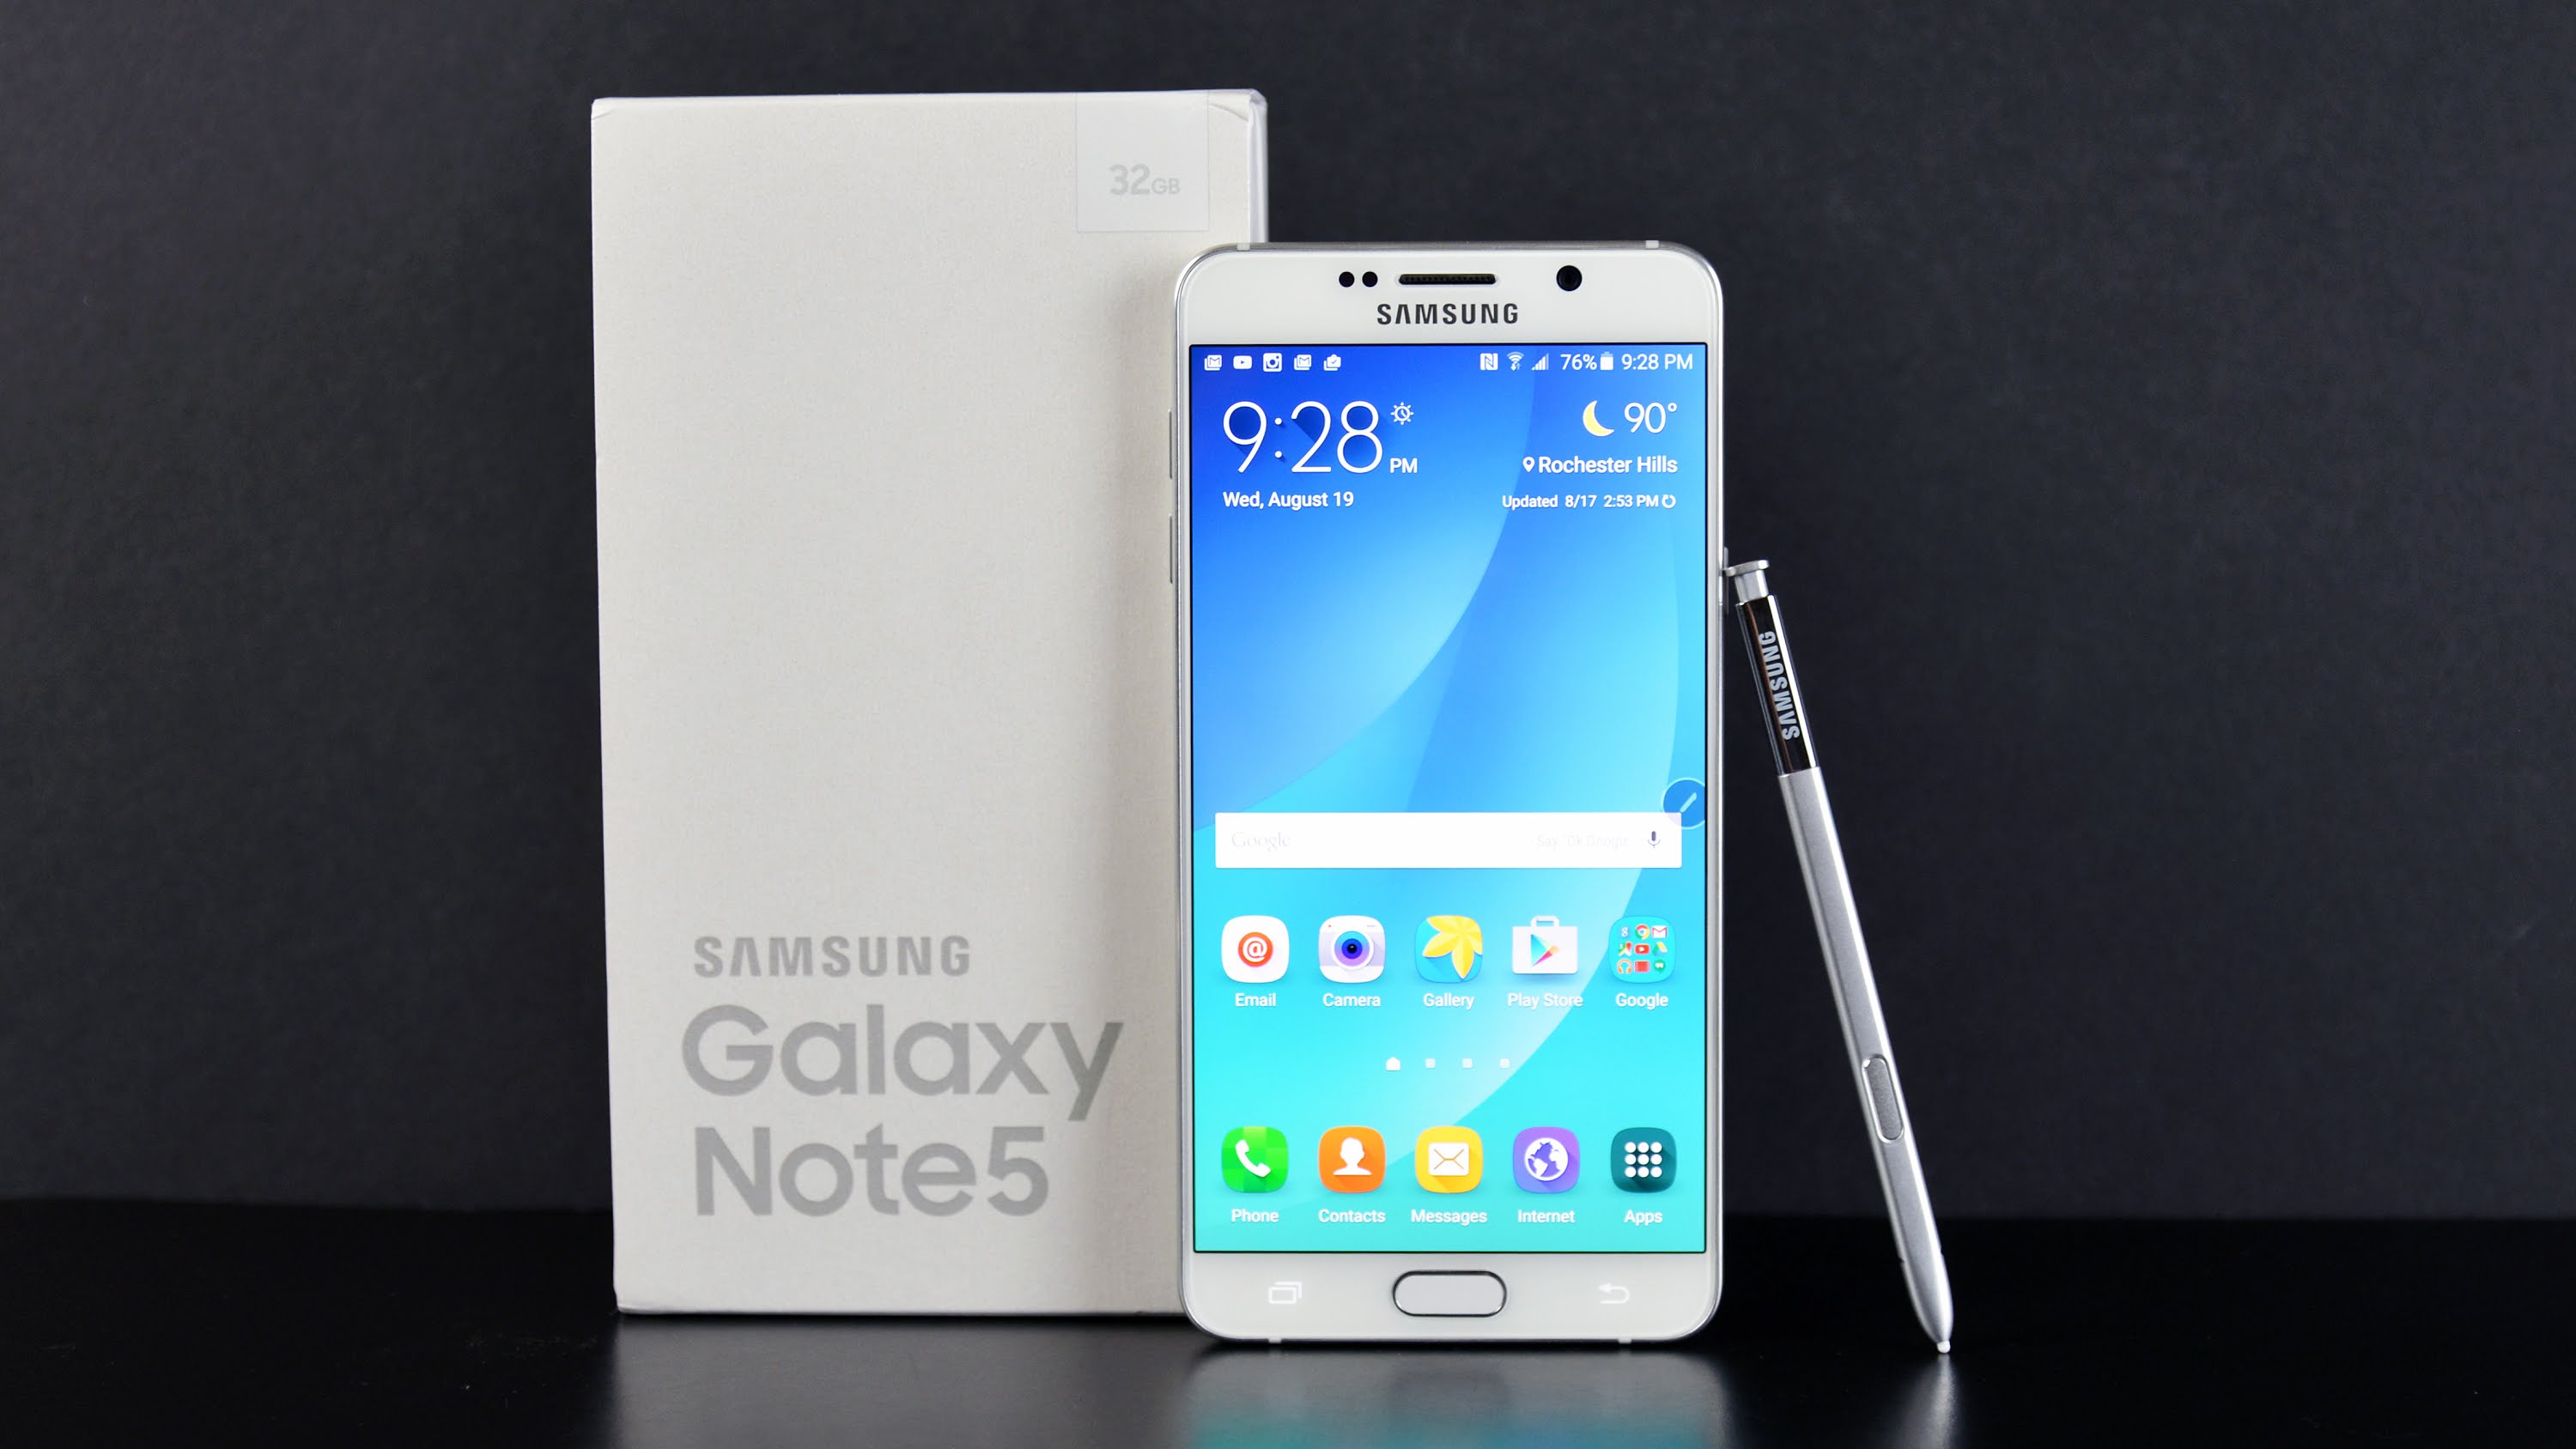
Samsung Galaxy Note 5 unveiled in August 2015, is based on the functionality of Galaxy Note VI. It’s unique glass backing and metal frame gives the phone an exquisite touch. It has a 1440p display of 5.7 inch, a new stylus and Exynos Octa-core 7420. Samsung rounded the edges of the Note to give it a more feel in the hand experience and its almost indistinguishable design to the Note 7. It is designed with a more sensitive fingerprint sensor, enhanced stylus and heat sensor. Most astonishing feature introduced in the phone is the wireless charging and rapid charging. The improved stylus features with the reality like experience of the pen’s click impression and the opening up of a note file the instant the S pen was pulled out of the slot. With its undetectable rear, it has no options of replacing batteries or adding storage to the Note. The list of further surprise features goes on and on, also the camera app enables users take shots and allows live streaming to YouTube publicly and privately. It runs on the firmware of Android OS, v5.1.1 Lollipop and upgradable to v6.0.1 Marshmallow.

https://techbeasts.com/galaxy-note-5-galaxy-s6-edge-plus-released-here-are-the-first-impressions/


Samsung Galaxy Note 7

Samsung-Galaxy-Note-7---all-the-official-images (11)

Samsung release the latest successor of the series on 2nd August, 2016 in New York. Samsung directly skipped to Note 7 because of the confusion it was causing among its consumers with its naming scheme. This model is super leveled up in every one of its features making it dynamic with its Exynos 8890 core processor and 4 GB RAM. With its display made super rich with a 5.7 inch screen and Quad HD super AMOLED display with a curved edge at both sides. Its front camera goes up to 5 MP and the back has a dual Pixel 12 MP camera. Hours of usage need an innovated battery boost these days as more and more task are tend to be done by the smartphones that’s why Samsung has booster the charging amperage to three amperes.

The Note 7 is released in multicolor range, having a wide range of colors for the customers to choose from as they desire. The Note 7 is available in Gold Platinum, Blue Coral, Silver Titanium and Black Onyx colors. The irremovable cover casting enables the user to either insert dual SIM or just insert one SIM and has a slot to insert expendable storage up to 256 GB with a microSD card. It runs on the firmware of Android OS, v6.0.1 Marshmallow, will be upgraded to Android 7.0 Nougat.

With its launch in India on 11th August 2016, Samsung also introduced the new Gear VR headset for a virtual reality experience with Gear IconX earbuds and Gear Fit2 smartband.

Don’t forget to checkout:

https://techbeasts.com/samsung-galaxy-note-7-announced-64-gb-storage-iris-scanner-usb-type-c-water-and-dust-resistant/

Samsung Galaxy Note 7 Official Images

Sources: 1 | 2

Fix VPN Error 619 (error 619 vpn) [ Tutorial ]

Fix VPN Error 619 (error 619 vpn) [ Tutorial ]

In this post, I’ll tell you how to fix VPN Error 619 on your Windows PC, VPN Error 619 is a common error and every Windows user has faced it once. The reason for VPN Error 619 can be many but why this appears, whenever you are trying to connect with a Virtual Private Network you often face the following error.

“Error 619: A connection to the remote computer could not be established, so the port used for this connection was closed. For further assistance, click More Info or search Help and Support Center for this error number.”

Now once you start getting the error, it will start giving you a headache for sure. Let’s start the method to fix VPN Error 619 on your Windows PC.

Fix-PPTP-VPN-Error-619

How To Fix VPN Error 619 on Windows 7,8,8.1-10:

  • First, you need to run a single VPN connection at a time. Remove all the other VPN connections.
  • You need to turn off your Firewalls and Antivirus while you are using VPN connection, these might cause VPN error 619.
  • Sometimes the VPN client software you were running on your PC is an old version, the best solution is to uninstall the current VPN software and install the latest one from the company Website.
  • You need to change the security settings of your VPN connection, Open security settings->VPN type automatic to PPTP->Select CHAP & MS-CHAP v2.
  • If none of this works for you then you need to check your internet connections, try connecting with different ones.

After trying all the methods given above, still no luck then the best solution is to contact you service provider and ask their assistance. Just to tell you these methods are perfectly working on Windows 10, Windows 8.1, Windows 8, Windows 7 and Windows XP.

Root and Install TWRP on Xperia Z2 Android Marshmallow 23.5.A.0.575

1
Root and Install TWRP on Xperia Z2 Android Marshmallow 23.5.A.0.575

Right after the Android 6.0.1 Marshmallow 23.5.A.0.570 update, Sony rolled out another update for the Xperia Z2 and Xperia Z3 series which moved the build number to 23.5.A.0.575. The new update brought stability and some bugs were fixed. If you have updated your device, or you’re planning to update it to the latest Marshmallow firmware while you happen to be an Android power user, you must keep in mind that flashing the stock firmware wipes off the root access, custom recover and other tweaks from your device. If your Xperia Z2 was rooted earlier and now you’ve lost root access, you may want to root it once again to modify the device running on Marshmallow firmware. Rooting Android 6.0.1 Marshmallow directly isn’t possible, but you sure can root it using a little different method that is discussed here.Xperia Z2

We are set to go through the instructions to install a pre-rooted Android 6.0.1 Marshmallow 23.5.A.0.575 on our beloved Xperia Z2 D6503 and D6502. The guide illustrates how you can flash the pre-rooted firmware to gain root access and TWRP recovery. Before getting onto the method, we will learn some precautions to make sure that nothing goes wrong during all this process.

Note: If your device is already running on .264 firmware and is rooted with a recovery installed on it, you may skip the first two steps and jump straight to the method to flash the Marshmallow pre-rooted .zip file.

How To Install CWM/TWRP Recovery and Root Xperia Z2 10.7.A.0.228 Firmware

1. Downgrade to .167 Firmware and Root It

Note: If you already have a custom recovery installed on your phone, you may skip downgrading and flash the pre-rooted .264 firmware directly on your phone.

  1. If you have already updated your smartphone to Android 5.1.1 Lollipop, then you have to downgrade your device to KitKat OS and Root it.
  2. Use this guide to Install .167 firmware.
  3. Root using this guide.
  4. Now you have to Install XZ Dual Recovery (Steps below).
  5. Now phone is rooted, USB Debugging must be enabled.
  6. Download latest installer for Xperia Z2 from here. (Z2-lockeddualrecovery2.8.xx-RELEASE.installer.zip)
  7. Connect phone to PC using OEM date cable and run install.bat.
  8. It will install the custom recovery.
  9. Now work here is done. Lets move on to next step.

2. Flash most recent Lollipop 5.1.1 Pre-rooted Firmware now

  1. Download D6503_Customized ES_1281-4644_23.4.A.1.264_R8C. Copy this file to your phone’s SD card.
  2. For D6502, create your own FTF or wait for the links till we find and add them here.
  3. Now you have to turn off phone.
  4. Turn it on again and press volume up or down to enter either TWRP or CWM recovery.
  5. Now for TWRP recovery, tap Install > scroll all the way to bottom and select the copied pre-rooted firmware.zip file.
  6. After selecting the file, swipe finger from left to right on the bottom to flash.
  7. Once flashed, reboot your device and you will have pre-rooted 10.7.A.0.228 Lollipop firmware.
  8. For CWM, select Install Zip > Choose Zip from SD card > locate pre-rooted firmware.zip file > select yes to flash.
  9. Once flashed, reboot your phone and you will have 10.7.A.0.228 rooted Lollipop firmware.
  10. Now verify root access using an app like Root Checker.

Note: The prerooted ROM listed below has some additional features like Sound MODs, Wallpapers and a few more things.

Root Xperia Z2 on Android 6.0.1 Marshmallow 23.5.A.0.575 and Install TWRP

  1. Download Z2_MM_23.5.A.0.575_by_LaZ with recovery for D6503 and D6502 and copy it to your phone’s SD card.
  2.  For D6502 download this Network Patch as well.
  3. Phone was downgraded to KitKat and rooted, the custom recovery was also installed in the first step.
  4. The phone was updated to pre-rooted Android 5.1.1 Lollipop in the 2nd step.
  5. Now you’re all set to flash the latest Android 6.0.1 Marshmallow.
  6. Now you have to turn off phone.
  7. Turn it on again and press volume up or down to enter TWRP recovery.
    1. Now for TWRP recovery, tap Install > scroll all the way to bottom and select the copied pre-rooted firmware.zip file.
    2. After selecting the file, swipe finger from left to right on the bottom to flash.
    3. Once flashed the firmware on D6503, reboot your device.
    4. For D6502, right after flashing the firmware, flash the Network Patch as well in the same way you flashed the ROM.
    5. Reboot the device.
  8. Now verify root access using an app like Root Checker.
  9. That’s all.

Stuck with something? Reach us out through the comment box below. We would love to help you out.

Credits

Fake GPS Location Spoofer for Windows PC and Mac

1
Fake GPS Location Spoofer for Windows PC and Mac

Fake GPS Location Spoofer helps you to change the location of your Android device without physically moving to a particular location. Such applications are useful when you need to move to a particular location to complete a task in a certain game like Pokemon Go or Pixelmon Go or any application tends you to move to a location for a feature/function to work properly.

FakeGPS_TechBeasts


Physically moving to that location may be quite tough for some people, but with the use of applications like Fake GPS Location Spoofer, such a task can be completed on the go without having yourself moved. Fake GPS Location Spoofer requires specific permissions to work, it may not work simply as it seems. Apart from that, when you want to fake your location, you will come across a number of applications offering such a tweak, but only a few are supposed to work.

We’ve picked up a working Fake GPS application and explained the complete method to make it work. The method to install Fake GPS Location Spoofer on an Android device and a computer both are same. In the guide going down, we’ve installed the application on a Windows PC, but the same method will work for your Android device as well. The only difference is, we are using an emulator to install it on a computer while you will install it on your Android device straight away.

Fake GPS Location Spoofer for PC can be installed on a computer running Windows XP/Vista/7/8/8.1/10 and Mac OS X MacBook/iMac. We will use rooted BlueStacks or BlueStacks 2 for this purpose. We will also require Lucky Patcher for this application to work properly. Let’s go ahead and go through the step by step guide to get the Fake GPS Location Spoofer for PC working.

Fake GPS Location Spoofer for Windows PC and Mac

  1. Download and install Rooted BlueStacks or BlueStacks 2.
  2. Also, Download and install Lucky Patcher for PC in BlueStacks.
  3. Download Fake GPS Location Spoofer APK file.
  4. Copy the downloaded Fake GPS Location Spoofer APK to the BlueStacks or BlueStacks 2 using “Copy Files from Windows” feature in either of these emulators.
  5. Now open Lucky Patcher in BlueStacks.
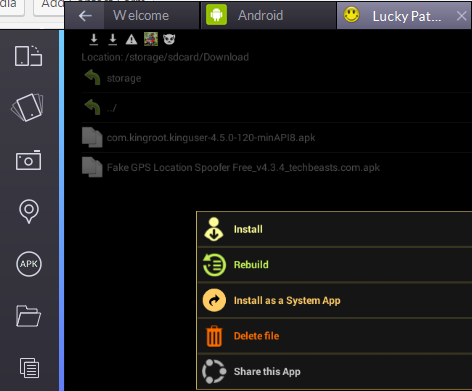
  6. In Lucky Patcher, click “Rebuild and Install” at the bottom.
  7. Now select sd card in next screen.
  8. Open the folder where you’ve copied Fake Location Spoofer APK file from Windows.
  9. Click on the APK file and select “Install as System App”.Screenshot_6
  10. Install the APK file and then click “ok/yes” when it asks to reboot. It will restart your BlueStacks emulator.
  11. Now launch the Fake Location Spoofer from all apps tab in BlueStacks.
  12. Enter your desired location.
  13. That’s all! Your location has been changed now. Best of luck.


Download Pixelmon Go for PC (Windows and Mac)

0
Download Pixelmon Go for PC (Windows and Mac)

Pokemon Go happens to be the best and the most popular Android and iOS game as far as the year 2016 is concerned. It didn’t take too long for Pokemon Go to make its way to the top charts of applications and games. Pokemon Go’s concept was quite unique. After the game was released, the only thing that we were keeping our eyes on was the arrival of games following the footsteps of Pokemon Go.

Soon after Pokemon Go, a new game named as Pixelmon Go made its way to the mobile gaming world. Where you have to catch Pokemons in the Pokemon Go, you have to catch Pixelmons in this game. This one too is an augmented reality game, the only difference is, it replaces Pokemon with Pixelmon. You’ve to build a collection of Pixelmon characters. The word pixelmon here suggests quite well that the characters are pixelated only. Instead of Pokeball, you will throw Pixelcubes at the Pixelcharacters to catch them all. The fights between Pixelmons follow a certain criteria; Fire devours nature, Nature absorbs storm and Storm puts on fire. Pixelmon Go lets you choose skins from minecraft’s pocket edition.Pixelmon Go for PC


Pixelmon Go is an absolutely free to play game. It’s available in the Google Play Store. In case you’re wishing to play Pixelmon Go on your PC, that is possible too. You can install and play Pixelmon Go for PC on Windows XP/Vista/7/8/8.1/10 and Mac OS X Macbook or iMac. You will need the rooted version of BlueStacks, BlueStacks 2, Andy OS or Remix OS in order to be able to play Pixelmon Go for PC. The appropriate guides to install and run Pixelmon Go for PC are linked below. Have a look on the guides and install it now.

Download Pixelmon Go for PC (Windows and Mac)

  1. Download Pixelmon Go APK
  2. Download and install rooted BlueStacks or root BlueStacks 2. Rooted Remix OS is also available.
  3. Now download and install Lucky Patcher for PC.
  4. Download and install Fake GPS location spoofer for PC.
  5. Now follow the steps given in this guide, but use the Pixelmon Go APK to install and you will be all done. That’s all.


5 things you need to know about Android

0
5 things you need to know about Android

Android has taken over the mobile platform with it being the largest installed base of the mobile phones and yet it is still on swift expansion. Every day millions of people are introduced to their Android devices as they power up their mobile devices for the first time to use. Android devices are keys to another dimension of technology with which users can explore beyond their imagination about technology with thousands of apps, games and much more of digital content.

Android’s ingenuousness has made it most preferred for customers and developers similarly, causing strong increase in application expenditure. Billions of people install and update tons of new applications for games, entertainment, digital content, keeping in touch with people with the help of messenger apps and e-mailing and many more. Android is used significantly in life as our daily activities are partial without the use of it.

The consumption rate of the customers is spreading out but less likely do these consumers know much about the origins and important facts about Android. They are more likely to use it then to know depths about it. So, here we are going to share 5 things you need to know about Android.

  1. Android was founded by Andy Rubin and Google bought it later

Android, Inc. was established by Andy Rubin with his coworkers Rich Miner, Nick Sears, Chris White on October 2003 in Palo Alto, California. Rubin wanted to develop, in his words, “smarter mobile devices that are more aware of its owner’s location and preferences”. The company actually intended to develop a sophisticated working system for digital cameras but the company neglected the idea because of its insignificant market value and decided to put its efforts on manufacturing a Smartphone operating device which would be the equal opponent of Microsoft Windows phone and Symbian.

Later Google bought Android Inc. in July 2005 for $50 million. Even after the attainment, the key employees, with Rubin, White and Miner, remained with the company. People assumed after such a step that Google had entered the mobile phone market. Rubin led a team at Google that produced a mobile device platform which was powered by the Linux kernel.

andy-rubin-rcm992x0

  1. There was Android 3.0 known as Android Honeycomb

The only Android version that did not get the limelight it deserved. The Android “Honeycomb” 3.0-3.2.6 was released on February 22, 2011. It was preceded by Android “Gingerbread” 2.3.7. The “Honeycomb” Android platform introduced stirring new features for consumers and developers. It’s currently a ceased version which was basically intended for devices with larger screen ranges, tablets to be exact. It first emerged in the Motorola Xoom and was developed by Google. Honeycomb brought in the interaction model which was manufactured on the main characteristics of Android, for instance notifications, widgets and enabled the user to multitask, also a so called “Holographic” user interface theme. Its latest version was 3.2.6 which was released in February 16, 2014. It was later succeed by Android “Ice Cream Sandwich” 4.0.

unnamed

  1. Daydream Android Virtual reality platform

daydreamz2On May 2016, Google proclaimed that it is developing a feature called Virtual Reality Mode into its operating system’s latest version. The VR Mode is said to improve the application’s performance by including a sequence of optimizations. People will access apps and other digital content as they use the headset let by a Daydream home screen with controller designed by Google. Version N is said to have the platform of VR built in, distinguishing from separate VR headset gadgets. The software will be released on big scale later in 2016 and is available for the developers.
google_daydream_android_n_vr (1)

  1. Android Adaptations on Tablets

Even though its utmost achievements on Smartphone devices, Android tablets were slowly adopted. Because of the less significant value of tablets in the market, developers were uncertain to develop them and so consumers were less likely to buy them for their low quality tablet applications. Android tablets lacked its specific applications for use so previous Android tablet devices had to alter and make use of the Smartphone existing apps. Such apps were unfitting to adjust to the large sizes of the screen whereas Apple’s iPad was filled with Tablet-specific applications for its high quality use and it attracted more customers.

With the launch of Nexus 7 in 2012, Google persuaded its manufactures to code enhanced tablet apps. With such enhancements, shipments of Android platform tablets exceeded iPads’ according to International Data Corporation.

$_32

  1. The world’s most popular mobile platform

Billions of people around the globe switch on their new Android phone for their extensive use all day. People have become addicted to its use and have made it their partner throughout the day for multiple tasking. Android is active on around 1.6 Billion devices as of today, and the Google Play Store has over 2.2 Million applications to entertain Android users. The number of downloads from the Google Play Store has already crossed 50 Billion. People keep in touch through it with its magnificent calling enhancement and applications accessed through the internet. It can locate you in any place of the world and give you gateway to thousands of handy applications to make easy your everyday tasks. Android gives major opportunities for developers to built apps and also distribute them on a marketplace.

The consumption of the Android is never ending with its major advancements and new features and adaptations to tablets as well. Android give you first class app experiences and gives you a single app model that enables you to distribute your applications largely to billions of users with a extensive range of devices. Android also provides tools to develop your own apps. Google Play Store is the solely market place for selling and allocating Android applications. And also the most convenient features of Android devices never fail to attract customers.

android-application-banner

Want to add anything to the list? Reach us out through our contact us page. Thank you.


Sources: 1 | 2 | 3 | 4

Fix DNS Lookup Failed Error in Chrome

Fix DNS Lookup Failed Error in Chrome

In this Post, I’ll tell you how you can fix DNS lookup failed errorthis is the most common error in Google Chrome and I am certain that all of us have faced the ” The server at www.example.com can’t be found, because the DNS lookup failed.” To fix this issue all you need to do is follow the steps below and you’ll be glad you visited Techbeasts.

The server at www.example.com can’t be found, because the DNS lookup failed. DNS is the network service that translates a website’s name to its Internet address. This error is most often caused by having no connection to the Internet or a misconfigured network. It can also be caused by an unresponsive DNS server or a firewall preventing Google Chrome from accessing the network.

DNS-Lookup-Failed-error

Now you have got the complete picture of DNS Lookup Failed Error, Now let’s start the guide to fix the issue.

Fix DNS Lookup Failed Error in Chrome:

  • Open “Command Prompt” as admin.
  • Run the following command one by one in same order.
ipconfig /release
ipconfig /all
ipconfig /flushdns
ipconfig /renew

netsh int ip set dns
netsh winsock reset
  • Once you are done with the command process, restart your PC.

This is how you fix DNS lookup failed error in Google Chrome, you can apply these same steps for ” DNS_PROBE_FINISHED_NXDOMAIN ” and ” DNS_PROBE_FINISHED_NO_INTERNET “.

How to fix application force close errors on Android

0
How to fix application force close errors on Android

Android application force close errors are something more than common. Any moment, any application can put up a pop up on the screen showing a message “Unfortunately example has stopped on Android” and that’s exactly where your application stops working. This kind of errors is most popular with applications like Snapchat, Facebook, Messenger and other such applications which are most widely used all across the globe. Usually, restarting the application will fix it, but at times this kind of errors just get stuck and are in no mood to go away no matter how hard you try. If you’ve fallen in such a situation where this kind of force close error is popping up on screen regarding any application then you need to play some neat tricks to get rid of it and fix it right away. Since we are focusing on Android here, anything is easily possible and so is fixing this error.

To fix force close errors on Android, you can try multiple methods and one of these methods (listed below) will work for sure. Let’s have a look on the methods and learn how to fix application force close errors on Android.

How to fix application force close errors on Android

Method#1

Update application

The error may be  coming up because there’s a latest version of application available in the Google Play Store and the one installed on your Android device has outdated. To fix this issue, simply tap the Google Play Store and search for “application”. If an update is available, hit update and let it install the latest version of the game. Once it has updated, you will not get the Force Close error anymore.

Google Play Store: Link

Method#2

Clear application Data and Cache.

  1. One your Android device, open Settings > Applications / Applications Manager > All Apps
  2. Scroll all the way down and locate your application.
  3. Tap application to open it settings.
  4. If you’re using Android Marshmallow or higher, you will have to tap application > Storage to open cache and data options.
  5. Now tap Clear Data and Clear Cache.
  6. Now restart your Android device.
  7. Once done, open application and the issue should have been resolved by now.

Method#3

Clear cache of your Android device

Just in case you’ve recently updated your Android device or made any potential changes in the system of your phone, it may have hampered the working of the application. To resolve this issue, you simply need to wipe the cache of your device. In order to clear the cache, boot into the stock or custom recovery of your Android device and locate “Wipe Cache or Cache Partition” option. Wipe the cache and restart the phone. After restarting, try opening the application app and it should be working fine.c03754848

That’s all. We hope that your issue has been resolved. In case you have got any queries, reach us out through the comment box below.

Easiest Way to Download Facebook Videos on iPhone

0
Easiest Way to Download Facebook Videos on iPhone

When it comes to Android you can easily download Videos from several sources but iOS users have the very limited option or you can say it’s very hard to download video from social media. Today we’ll tell you the Easiest Way to Download Facebook Videos on iPhone. If you don’t want to use any third party app or Jailbreak tweak to download videos from Youtube, you can use the offline feature provided by Youtube. But when it comes to Facebook there is no such option, you can only save video but still need an active internet connection in order to see the video. Let’s start the method to download Facebook videos on iPhone.

iphone-video-downlaod-from-Facebook
Photo Credit:Shutterstock.com

How to Download Facebook Videos on iPhone:

  • Before moving on you need to download the app MyMedia from App Store.
  • Once the app is downloaded, Open Facebook on your iOS device.
  • Now search for the video you want to download, Play the video, then tap on the arrow to get the link to the video, Copy it.
  • Open MyMedia app, here you’ll be provided a browser, Open savefrom.net
  • Once the site is loaded, Paste the copied link from step 3.
  • When you enter the Video link you’ll be provided two options ( HD or SD download ) .Tap on any option and it will start downloading the video. ( If you face any issue with savefrom.net you can try downfacebook.com ).
  • Once the downloading process starts, you’ll be asked to name the video.
  • When downloading is complete you can find the video in Media tab.
  • If you want to save the video to your camera roll, Tap on the (i) icon and you’ll get the options.

Easiest Way to Download Facebook Videos on iPhone [ Video Tutorial ]

Credit: GuidingTech

Update Huawei Nexus 6P with Android 6.0.1 Marshmallow Pure Nexus ROM

0
Update Huawei Nexus 6P with Android 6.0.1 Marshmallow Pure Nexus ROM

Pure Nexus Custom ROM, which is one of the most popular Custom ROMs for Google Nexus smartphones, is now available for Huawei Nexus 6P. Pure Nexus ROM gives you a chance to enjoy all the goodies that you’d want in your smartphone after rooting. The hefty list of features is good enough to make your mouth watery and flash this ROM right away. Pure Nexus Custom ROM for the Nexus 6P is based on AOSP Android 6.0.1 Marshmallow. The list of features attached below explains what you will get upon flashing this custom ROM.Front_and_back_of_the_Nexus_6P

[showhide type=”link” more_text=”Pure Nexus ROM Features” less_text=”Hide…..”]
-General
*Based on AOSP Android 6.0.1_r62
*SELinux Enforcing
*Busybox
*Init.d support
*Addon.d support
*T-Mobile US/EE WiFi Calling + Project Fi Support 
*Fully Working VoLTE
*Native Sprint PRL/Profile update
*Native ntfs and exfat support
*Full Substratum Theme Engine support
*Google sounds from factory image not the horrible AOSP ones
*Googles marshmallow wallpapers added to wallpaper picker 
*Advanced Reboot menu enabled by default
*Advanced rotation settings
*Enabled Developer settings by default
*Enabled option to use multi-window mode
*Enabled click/longclick on notification panel header items
*Disabled forced encryption
*Disabled Tethering checks
*Show apps being optimized during initial boot
*Bug fix's and stability improvements
*UI Improvements (fixed a bunch google forgot to materialize)
*Download Speed in download notifications
*Scrolling cache improvements
*Seek-bar style animation speed and font size control
*Full 3-Minit battery support no mods needed
*Added headset icon attached icon in statusbar
*Added back volume adjust sounds and toggle
*Added PureAmbient display options
*Added Full CAF based AppOps
*Added Special keys to all keyboard keys
*Added Ability to disable fullscreen keyboard
*Added ability to see app version when sideloading app
*Added app package name to app info screen
*Added play store link to actionbar of app info screen
*Added option to show hide substratum overlays in application screen
*Added ability to disable battery saver color in nav/statusbars
*Added ability to launch purenexus settings from notification drawer (longpress settings icon)
*Added ability to customize Settings dashboard columns, dashboard text lines, dashboard dividers
*Added ability to launch app when touching app icon in app info screen
*Added ability to pause and resume downloads
*Added ability to unlock and set default for usb action with insecure lockscreen
*Added advanced charging sound mod
*Added bluetooth device battery status to statusbar
*Added phone info shortcut to about phone/status on top
*Native Dialer lookup in the aosp dialer
*Increasing ringtone option
*Incall vibration options
*Proximity speakerphone option
*National Data roaming option
*Call/Message blocking
*Option to flip phone to mute/reject incoming call
*Link/Unlink Notification ringtone option
*ADB enhancements (ADB over wifi, Hide ADB icon, colored logcat "abd logcat -C")
*Added ability to change the device hostname
*Added Kexec and Kexec hardboot support
*Added kcal display calibration support
*Added double tap to wake, swipe to wake, swipe to sleep, camera wakeup gestures
*Added High brigtness mode support
*Removed googles bug report option
*Removed googles SystemUpdate option
*Removed googles legal information

-PureNexus Settings
Lock Screen
*Option to customize lockscreen shortcuts
*Option to disable fingerprint authorization vibration
*Long press power for torch
*double tap anywhere to sleep
*Option to disable lockscreen media art
*Scramble pin layout
*Quick pin unlock
*option to hide lockscreen clock
*option to set custom lockscreen clock fonts
*option to hide lockscreen date
*option to hide lockscreen alarm text
*option to set the alpha of lockscreen and lockscreen security bouncer 
*Lockscreeen Wallpaper (add/crop/delete)
Notification Drawer
*Weather
*Force Expanded Notifications
*quick settings pulldown (left,right,always)
*smart pulldown (no ongoing, no dismissable, no notifications)
*brightness slider on/off toggle
*fully customizable quick settings with now up to 30 custom tiles
*option to enable or disable the top two main quicksettings tiles
*option to enable 3/4/5 quick settings tiles per row
*option for advanced cellular tile action
*option for advanced location in location quick setting tile
*option to enable haptic feedback on quick settings tiles
*option to disable quick tiles on secure lockscreen
Recent Apps
*Immersive recents (stock, full screen, statusbar only, navbar only)
*Clear all recents toggle
*Clear all recents location option
*Clear all recents but last app toggle
*Recent searchbar on/off toggle
*slim recents and slim recent options
Statusbar
*Battery customization (stock, landscape, circle, dotted circle, text, none)
*Battery percent options (hidden, inside the icon, next to the icon)
*Battery Bar options (location, color, style, thickness, anitmation)
*Carrier Text customization (text placement, custom text)
*Clock customization (position, am/pm, date, date position, date style, date format)
*Network traffic meter options (disabled/incoming/outgoing/both,  units displayed, update interval, hide arrows, autohide, autohidethreshold)
*Status-bar options (notification counter, double-tap to sleep, statusbar brightness control)
*Option to disable headset icon, vibrate icon, vpn icon in statusbar
Navigation Bar
*Enable/disable
*IME toggle
*Option for arrow cursor keys
*Option for double tap navbar to sleep
*Long-press back to kill toggle
*option to configure back kill delay
*Long-press recents for last app toggle
*Navigation bar size customization (width, height, length)
*Navigation bar customization (placement, buttons)
PowerMenu
*Option to disable on secure lock
*Add/remove (reboot, screenshot, screen-record, torch, airplane mode, user switcher,settings shortcut, search, voice search, lock now, sound panel)
Volume Rocker
*Volume key wake
*Volume key music control
*Volume key keyboard cursor control
*Volume button swap toggle
*Control media volume anytime toggle
*Live volume steps
Display
*Expanded desktop options
*option to enable/disable wake on plug
*option to enable 3 finger swipe to screenshot
*LED controls
Media & Notifications
*option to disable camera shutter sound (does not work with hdr+ mode)
*option to disable double tap camera vibration
*custom heads up options (global on/off, timeout, heads up snooze, force heads up, heads up whitelist, heads up do not disturb, heads up blacklist)
*option to disable low battery notification
*Option to disable battery saver notification
[/showhide]


We are going to help our beloved Huawei Nexus 6P users to flash the Pure Nexus ROM. Make sure that you go through the guide carefully and follow it to the letter to avoid any mishap. While flashing custom ROMs or tweaking the device is not officially recommended by the device manufacturers, we do not hold any responsibility if in case something goes wrong at your end.

Pre-requisites

  1. This ROM is intended for the Huawei Nexus 6P only. Do no try this on any other device at all.
  2. Charge your phone up to 75% to avoid power issues during flashing process.
  3. Unlock Bootloader, Flash TWRP Recovery on your Nexus 6P. Here’s a complete guide.
  4. Backup your important contacts, call logs, sms messages and also copy your media content to your PC. Here’s a complete guide to backup everything.
  5. Follow this guide to the letter to avoid any mishap.

Disclaimer: Unlocking bootloader, rooting and flashing custom recoveries, custom ROMS are highly custom processes. Doing any of these will result in voiding the warranty of your device. Ensure that you’re doing everything at your own risk. In case of a mishap, TechBeasts or the device manufacturer may not be held liable. 

How To Install Android 6.0.1 Marshmallow Pure Nexus Custom ROM on Nexus 6P

  1. Download the latest build of pure_nexus_angler-6.0.1-20160803-OFFICIAL.zip for your Nexus 6P.
  2. Download the GApps for Pure Nexus ROM: PureNexus_Dynamic_GApps-6.x.x-20160803.zip
  3. Download SuperSU.zip beta version: Download
  4. Copy the Pure Nexus ROM.zip, GApps.zip and the SuperSU.zip  files to your Nexus 6P’s external or internal SD card.
  5. Make sure that you’ve unlocked the bootloader, flashed TWRP on your Nexus 6P.
  6. Now boot your Nexus 6P into TWRP recovery mode. To do so, turn off your Nexus 6P completely and then turn it on by pressing and holding Volume Up + Down + Power Key. Once your phone is in bootloader mode, select recovery mode here and it will boot your phone into TWRP recovery.
  7. Create a Nandroid backup of your device’s system and boot.img under the Backup options in TWRP recovery.
  8. Now in the homescreen of TWRP, tap Reboot > Recovery and then swipe to allow modifications.
  9. Perform a factory reset using the Wipe options in TWRP and then get back to the main screen in recovery.
  10. Now tap Install > Locate the Pure Nexus Custom ROM.zip file > swipe to confirm ROM installation.
  11. Similarly, flash the GApps.zip file and after this, flash the SuperSU.zip file as well.
  12. Once done, reboot your device to system and it should launch the newly installed Pure Nexus Custom ROM.

That’s all. If you are stuck with something, reach us out through the comment box or our contact us page.

Credits: BeansTown106

Download Flip Diving for PC (Windows and Mac)

0
Download Flip Diving for PC (Windows and Mac)

Motionvolt and Miniclip have worked in collaboration to unwrap this new sports game named as Flip Diving. Since the Rio Olympics are in a full swing, the game developers probably wanted the Android gaming freaks to perform some stunts as well and brought this game out. Flip Diving is a cool game actually. Just as the name suggests, you’ve to perform as many dives as you can. As the game starts off, your character is standing on a cliff. You have to tap and hold the screen to get into dive position, once you release the screen, the character will dive and then tapping the screen will perform somersaults. While you land into the water, make sure that you’re not tucking. You should have your feet straight downwards. Diving with your head downwards will fail the dive. The cliff height will increase with each jump, as high it gets, the tougher it becomes to perform a dive. That’s all you have to do in this game. The reward system gives you coins and you can also collect coins while performing a dive. Using these coins you can unlock new cool characters. Flip Diving is an absolutely free to play game, it has made its way to the Google Play Store for Android gaming freaks.Flip Diving for PC

The good thing about Flip Diving is, you can also play this game on your computer. You can install and play Flip Diving for PC on your computer powered up with Windows XP/Vista/7/8/8.1/10 and Mac OS X Macbook/iMac. You will have to install and Android emulator like Andy OS, BlueStacks, BlueStacks 2 or Remix OS to start playing Flip Diving for PC. Let’s head towards the installation method to start playing this new game right now.

Download Flip Diving For Windows PC & Mac

  1. Download Flip Diving APK
  2. Download and install Bluestacks: Bluestacks Offline Installer | Rooted Bluestacks |Bluestacks App Player
  3. Once you’ve installed Bluestacks, double click the downloaded Flip Diving APK.
  4. The APK will be installed using Bluestacks, once installed open Bluestacks and locate the recently installed Flip Diving.
  5. Click the Flip Diving icon to open it, follow the on-screen instructions to play it.

You can also use Andy OS to install Flip Diving, here’s the tutorialHow To Run Android Apps On Mac OS X With Andy

The Andy OS tutorial explains how to play a game on your Mac OSX, but the same guide will also work for a Windows PC.