Justice Monsters Five comes from Square Enix, the company behind the famous titles like Final Fantasy Brave Exvious and Mobius Final Fantasy. It’s a pinball action game, it’s not a role playing game like the original Final Fantasy series. Square Enix has just compiled a pinball game inside the graphics of Final Fantasy to give it that look and feel. Justice Monsters Five is available as a free to play game. You can download it from the Google Play Storeand install it on your Android phone or tablet right now. Just in case you’re willing to play this game on your computer, that is possible as well.
Justice Monsters Five for PC can be installed and played on a computer running Windows (XP/7/8/8.1/10) and Mac OS X devices. You will have to install and Android emulator like BlueStacks, Andy or Remix OS to be able to play Justice Monsters Five for PC. Let’s go through the game’s description and then learn how to play it on a computer now.
WORLD
Join the heroes of the Justice Monsters Five and do battle to save the planet Nova from the clutches of the diabolical Lord Vexxos!
Fight for justice and defeat the forces of evil!
GAME
1)Tap and flick your way to victory!
Fight with your flipper in exhilarating battles!
2)Recruit new monsters to join the cause!
Take on epic enemies!
Download Justice Monsters Five For Windows PC & Mac
Netmarble games have released their latest game, the Final Shot for Android in the Google Play Store. With Final Shot out, Netmarble claims to have produced the best FPS game of the year 2016. Netmarble have some famous titles like Marvel Future Fight and Evilbane in their house, so we expect Final Shot to be a game worth spending time as well.
Final Shot offers real time FPS on your Android smartphone. The game supports real time battles. 5 teams are available in this game for fighting off the real time battles. The multiplayer mode just adds to the awesomeness of this game. Upon finding yourself in trouble, one tap will get you the backup and if you someone shots you from the back, you can launch the revolutionary revenge system. Final Shot is equipped with nice maps. There are various shooting modes available to make the game play interesting.
Final Shot made its way to the Google Play Store just yesterday. The game is absolutely free and you can get your hands on it if you have an Android smartphone or tablet running Android 4.0+. In case you are willing to play Final Shot on your computer then that is possible as well.
You can play Final Shot for PCon your Windows XP, 7, 8, 8.1, 10 Desktop PC / Laptop and also Mac OS X powered Macbook and iMac. You will need an Android emulator like BlueStacks, Andy or Remix OS to run Final Shot for PC. Let’s go ahead now and have a look on the method to start playing Final Shot for PC.
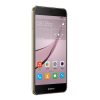
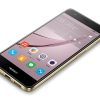
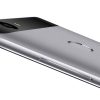
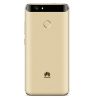
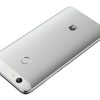
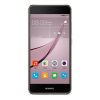
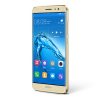
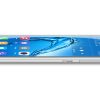
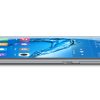
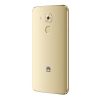
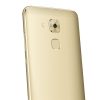
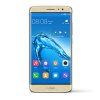
IFA 2016 is going on in a full swing and manufacturers are busy introducing their smartphones to the world. Huawei took the opportunity to introduce two new mid-rangers including the Huawei Novaand the Nova Plus. With these smartphones, Huawei announced a slate as well named as MediaPad M3, which is an 8.4-inch tablet. Let’s have a look on what these new smartphones from the Chinese manufacturer have to offer.
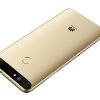
Huawei Nova
The all new Nova come with a 5-inch display with 1080 x 1920 pixels with 441 ppi. The phone’s dimensions measure at 141.2 x 69.1 x 7.1 mm and it weighs at 146g. Huawei Nova is equipped with Qualcomm Snapdragon 625 Octa-core 2.0 GHz Cortex-A53 CPU accompanied by Adreno 506 GPU.
A RAM of 3 GB is placed inside and the internal storage starts from 32 GB. The phone supports hybrid dual SIM model, which means you can either put a 2nd SIM or a microSD card into the slot. It sports a 12 MP camera at the back which has 1.25 µm pixel size, geo-tagging, touch focus, face detection, HDR, panorama. On the front, the phone flaunts an 8 MP shooter. Huawei Nova runs on Android 6.0.1 Marshmallow atop of the EMUI 4.1 out of the box.
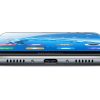
The Huawei Nova incorporates a fingerprint scanner at its back. The phone also pulls out the USB Type C setup for cable connection and charging. Huawei Nova has a whopping battery of 3020 mAh.
Huawei Nova will be available in Europe starting this October. The phone will cost around 440 USD. Huawei will be offering the Nova in four different colors including Rose Gold, Prestige gold, Titanium Grey and Mystic Silver.
Huawei Nova Plus
Huawei Nova Plus comes with a 5.5-inch 1080 x 1920p display with 401 ppi. The phone measures at 151.8 x 75.7 x 7.3 mm and weighs at 160g. Huawei Nova Plus is also equipped with Qualcomm Snapdragon 625 CPU accompanied by Adreno 506 GPU.
Nova Plus also hosts a RAM of 3 GB and 32 GB internal storage. The phone has the same hybrid-dual SIM setup as that of the Huawei Nova. The Nova Plus has a USB Type-C port as well and the phone also has a fingerprint scanner at its back.
Huawei Nova Plus rocks a 16 MP shooter at the back, which is an upgrade over the Nova. The phone on the front has an 8 MP shooter. Huawei Nova Plus also comes with a larger battery i.e. 3,350 mAh. Huawei Nova Plus runs on Android 6.0.1 Marshmallow with Emotion UI 4.1 on the top.
The Nova Plus will be available in three colors including Mystic Silver, Prestige Gold and Titanium Grey. The Nova Plus will be launched in Europe starting October, 2016 for almost 480 USDs.
Huawei MediaPad 3
Huawei MediaPad 3 is the latest 8.4-inch tablet from the Chinese giant. MediaPad 3 flaunts an 8.4-inch 2560 x 1600 pixels display. The MediaPad 3 is packed inside a metallic build. MediaPad 3 is equipped with Huawei’s Kirin 950 octa-core CPU having four of its cores clcoked at 2.3 GHz and the rest 4 at 1.8 GHz. The MediaPad 3 comes with 32 GB or 64 GB internal storage (there is a microSD card option as well) and a RAM of 4 GB. The tablet sports 8 MP shooters on the front and the back.
Huawei has focused on the audio and video properties of the device. Alongside a hi-resolution screen of 8.4 -inch, the MediaPad 3 hosts a dual stereo speaker setup which is supported by Harmon Kardon and Super Wide Sound 3.0.
The MediaPad 3 runs on Android 6.0.1 Marshmallow with Emotion UI on the top. The MediaPad 3 is a house to 5100 mAh battery. MediaPad 3 will start shipping from September 26 in Europe alongside some select Asian markets. The 32 GB variant will cost around 390 USDs and the 64 GB WiFi and 32 GB LTE variant will cost around 440 USD. The 64 GB LTE variant will cost 500 USDs.
That’s all regarding the 3 new devices launched by Huawei. What do you think of these new smartphones and tablet by Huawei? Let us know.
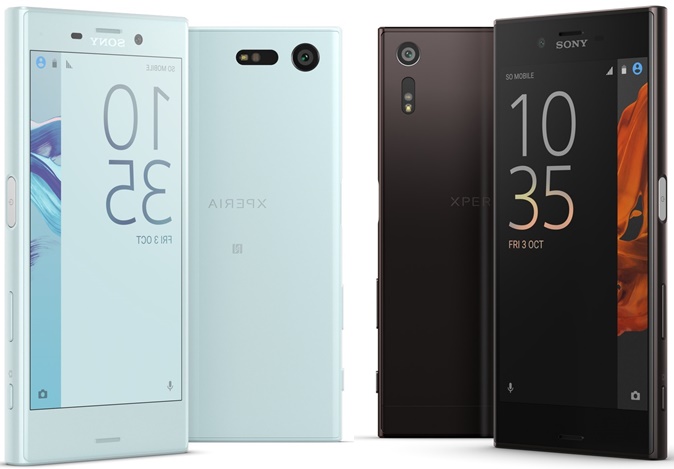
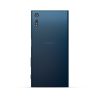
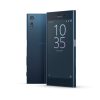
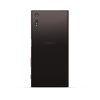
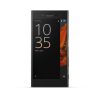
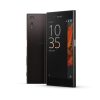
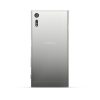
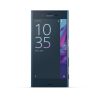
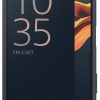
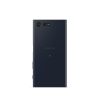
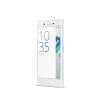
Sony just introduced two new smartphones under its hood: the Xperia XZand the Xperia X Compact. With Sony Xperia XZ, Sony just stepped into the flagship game of the year 2016 while the latter happens to be a mini version of its former Xperia X trio. Earlier this year when Sony introduced the Xperia X series, Sony was found taking a step backwards for introducing a not-so-great smartphone with not-so-high end specifications. Sony Xperia X didn’t do quite well as per Sony’s expectations. It also lead the users to waiting for another great device from Sony and undo all the damage that Sony Xperia Z5 and the Xperia X did to the company. With Sony Xperia XZ, Sony has tried its best to up its game. Let’s have a look into these devices and see what Sony has to offer this time.
Sony Xperia XZ
Design and Dimensions
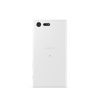
Sony’s new design language, the “Unified Design” has found its way to existence with the all new Xperia XZ. The new design language makes the edges of this smartphone more rounded and adds to the overall beauty. Xperia XZ hosts a Gorilla Glass 4 protection on the front while the back is made of Sony’s “Alakeido” aluminium alloy. Xperia XZ’s dimensions are 146 x 72 x 8.1mm and the phone weighs at 161g only.
Display
Xperia XZ sports a 5.2-inch 1920 x 1080 pixels display with 424 ppi. Sony is sticking with its IPS LCD display. Sony used a 5-inch display on its Xperia X Performance. With the Xperia XZ, Sony has decided to go back to the 5.2-inch display.
Hardware
Sony has embedded a Qualcomm Snapdragon 820 CPU accompanied by Adreno 530 GPU and a RAM of 3 GB. The internal storage starts from 32 GB. Expandable storage option stays there. Xperia XZ bundles a 2900 mAh battery which is 200 mAh more then the Xperia X Performance. USB Type-C has found its way on the Xperia XZ, which now makes this the very first Sony smartphone to pull out the USB Type-C at the bottom. Sony Xperia XZ is IP68 certified which means the phone is water and dust resistant. Xperia XZ also supports fast charging. Sony has also worked on the audio of the latest flagship. Sony has significantly enhanced the audio experience on the XZ with 3D surround speaker.
Camera
Xperia XZ features a 23 MP camera at its back and a 13 MP camera on the front for selfies. The shooter at the back hosts an IMX300 sensor with 1/2.3-inch size and 6-element lens with f/2 aperture. 13 MP shooter on the front comes with 1/3-inch sensor size and a 90 degree wide angle lens. Sony’s new triple image sensing technology is supposed to help snap the pictures better in low-light conditions. Phase detection auto-focus is there for snapping the shots quickly. Laser AF and IR color sensor can be found in its camera as well. Xperia XZ’s camera doesn’t come with OIS since there is Sony’s 5-axis software stabilization available. Xperia XZ’s camera supports 4K video recording.
Software
Sony Xperia XZ runs on Android 6.0.1 Marshmallow out of the box. While Google has already introduced the all new Android 7.0 Nougat and we know that Sony is quite good at rolling out the updates faster, it won’t take too long for us to witness the Android Nougat rolling out for the new Sony flagship. Xperia XZ powers up the Xperia UI atop of the Android Marshmallow.
Availability and Price
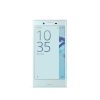
Xperia XZ will be hitting the markets by October 23, 2016. The phone will make its way in three colors including Forest Blue, Platinum and Mineral Black. Keeping in view the prices of past flagships from Sony, the phone should lie somewhere between $600 to $700.
We are keeping our eyes on all the updates regarding the Sony Xperia XZ and will be posting as soon as we come across some new stuff.
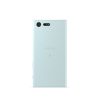
Sony Xperia X Compact
Design and Dimensions
Sony Xperia X Compact carries the same design language as the previous Xperia Z compact smartphones. Xperia X Compact’s dimensions are 5.08 x 2.56 x 0.37 inches and the phone weighs at 135g only. Like the previous Compact smartphones by Sony, Xperia X Compact is a pocket friendly smartphone as well and fits perfectly into the pocket of your jeans. Xperia X Compact also comes with Corning Gorilla Glass 4 protection on the front.
Display
It’s a 4.6-inch 1280 x 720p display with 319 ppi on an IPS LCD panel. The screen to body ratio is 69.53%. The display has a Gorilla Glass 4 to protect itself.
Hardware
Xperia X Compact is powered up with Qualcomm Snapdragon 650 Hexa-core CPU and a RAM of 3 GB. The phone hosts Adreno 510 GPU. The internal storage starts from 32 GB and there is microSD card slot option as well. Xperia X Compact comes with a battery of 2700 mAh. This phone also comes with USB Type-C support which makes it the very first Xperia Compact phone to have this feature. Unfortunately, the Xperia X Compact is not IP68 certified which doesn’t make it a water and dust resistant smartphone. While Sony has added a lot of power into this small phone, we can safely let the non-water resistant properties of this phone fade away.
Camera
The camera setup found on the Xperia X Compact is as same as that of the Xperia XZ, which is quite interesting for the users. A mid-ranger carrying a camera of a flagship is like a bonus at this point.
Software
Xperia X Compact also runs on Android 6.0.1 Marshmallow with Xperia UI on the top. The phone will also receive the Android 7.0 Nougat as Sony prepares it for its Xperia lineup.
Availability and Price
Xperia X Compact is supposed to hit the markets by September, 25. The phone should cost around $450 – 500 keeping in view the prices of past Xperia Compact devices. White, Universe Black and Mist Blue.
Xperia XZ vs Xperia X Compact Specifications
Specs
Xperia XZ
Xperia X Compact
Dimensions
146 x 72 x 8.1mm – 161g Weight
5.08 x 2.56 x 0.37 – 135g Weight
Display
5.2-inch 1920 x 1080p – 424 ppi
IPS LCD Display
4.6-inch 720 x 1280p – 319 ppi
IPS LCD Display
Camera
23 MP Rear IMX300 sensor with 1/2.3-inch size and 6-element lens with f/2 aperture. Triple image sensing technology. 5-axis software stabilization
13 MP Front with 1/3-inch sensor size and a 90 degree wide angle lens
23 MP Rear IMX300 sensor with 1/2.3-inch size and 6-element lens with f/2 aperture. Triple image sensing technology. 5-axis software stabilization
13 MP Front with 1/3-inch sensor size and a 90 degree wide angle lens
Processor & GPU
Snapdragon 820 – Adreno 530 GPU
Snapdragon 650 – Hexa-core. Adreno 510 GPU
RAM
3 GB
3 GB
Storage
32 GB internal – up to 250 GB microSD card supported
32 GB internal – up to 250 GB microSD card supported
Samsung introduced its new Galaxy On series almost 10 months ago. The Galaxy On series brought two smartphones into existence including the Galaxy On5 and the Galaxy On7. After Galaxy On5 and On7 debuted in the Chinese region. These devices found their way to the other regions after some time of the official release. The Galaxy On5 sports a 5-inch 1280 x 720p display and is equipped with Exynos 3475 SoC accompanied by 1.5 GB RAM.
The standard variant of the Galaxy On5 touts an 8MP camera at the back and a 5MP shooter on the front. T-Mobile version of the Galaxy On5 comes with a 5MP shooter at the back and a 2 MP on the front. As these smartphones happened to be low-budget, the base internal storage was only 8GB with an expandable storage option. Galaxy On5 has a 2600 mAh battery and it runs on 5.0 Lollipop. T-Mobile variant is upgradable to Android 6.0 Marshmallow.
The MetroPCS (SM-G550T1) and T-Mobile (SM-G550T) variants of the Galaxy On5 were blessed with a TWRP recovery almost a month ago. With the release of TWRP recovery, rooting these smartphones was made quite easy. Once you have installed the custom recovery, all you need to do is to flash SuperSu and you are done.
Curious users having no or a little knowledge about a custom recovery and root access may be interested in knowing that custom recovery allows you to flash custom ROMs, Mods, and other .zip files. Root access allows you to run root-specific applications and enhance the performance, battery life and also add new features to your Android smartphone. After rooting your phone, you can explore the Google Play Store and find our root specific applications to start modifying and tweaking your phone.
Assuming that Galaxy On5 users have got a brief overview of a custom recovery and TWRP recovery, we can now head back to what we were here for. We are going to show you how to Install TWRP recovery on Galaxy On5 and Root it [G550T/G550T1].
Early preparations
Charge your Galaxy On5 up to 50% to avoid power issues during the flashing process. Check your device’s model number carefully under settings > more / general > about device.
Get a microSD card as you will need to copy SuperSU.zip file to that, otherwise, you will have to use the MTP mode while you boot up into TWRP recovery to flash copy it.
Backup your important contacts, call logs, SMS messages and also copy your media content to your computer as you will have to wipe your phone on the way.
Uninstall/disable Samsung Kies while using Odin. Samsung Kies can hinder the connection between your phone and Odin.
Use OEM data cable to establish a connection between your PC and your phone.
Follow these instructions to the letter to avoid any mishap during flashing process.
Disclaimer:Rooting, flashing custom recoveries and tweaking your device are the processes which are never recommended by device manufacturers or the OS providers. In case a mishap occurs while following the method listed below, TechBeasts or the device manufacturer may not be held responsible. Make sure that you are doing everything at your own risk.
Also, Download the TWRP Recovery.tar file carefully.
TWRP Recovery for Galaxy On5 SM-G550T/G550T1: Download
Download SuperSU.zip file and copy it to your phone’s external SD card. If you haven’t got an external SD card, you will need to copy it to internal storage after installing TWRP recovery.
Install TWRP recovery on Galaxy On5 and Root it [G550T/G550T1]
Open Odin3.exe file from the extracted Odin files that you downloaded above.
Put your Galaxy On5 in download mode now. To do so, turn off your phone first. Now turn it on by pressing and holding Volume Down + Power + Home button. As soon as your device boots up showing a Downloading screen, leave the keys.
Connect your phone to your PC now. Odin should show an “Added” message in the logs and also show the blue light in the ID:COM box. This will verify a successful connection between your phone and your PC.
Now click on the “AP” tab in Odin and select the TWRP Recovery.img.tar file according to your device carefully.
The options ticked in Odin should be only “F.Reset Time“. Make sure that the Auto-Reboot option is not checked, we do not want to reboot the phone after flashing TWRP recovery.
After selecting the file and checking/unchecking the options carefully, hit the start button. Odin will now flash the TWRP and show you a PASS message in a few minutes.
Once done, disconnect your device from your PC now.
Now you need to boot directly into TWRP Recovery. Turn off your phone completely and turn it on by pressing and holding Volume Up + Home + Power key now. Your phone should successfully boot into newly installed custom recovery.
Now make sure that you’ve copied the SuperSU.zip file in external SD Card or USB OTG, if not then transfer it to your external SD Card by using MTP mode in TWRP now. Once you have the files, tap “Install > locate the SuperSU.zip according to the location where you copied > flash it”.
Once done flashing, reboot your phone to the system. That’s all.
That was it guys. Don’t forget to backup your EFS partition now and also create a Nandroid backup. Its’ time to unleash the true power of your Galaxy On5. I hope that this guide proved to be fruitful for all of you. Let us know if you are stuck with something or something isn’t working right for you.
Here’s how you can fix Camera Failed Error on Samsung Galaxy Note 7, it’s a common error on Samsung Galaxy devices. Once you start getting this error you won’t be able to use your camera app. The easiest solution you can find for camera failed error on your Galaxy Note 7 is to install a third party camera app. But not everyone goes for this one, let’s start the guide to Fix Camera Failed Error on Samsung Galaxy Note 7.
Fix Camera Failed Error on Samsung Galaxy Note 7:
Delete the system cache of your phone:
Turn off your device.
Now press and hold home+Power+Volume Up key.
Release the power button once you see logo, but keep holding home and Volume up keys.
Now when you see Android logo, let go both buttons.
Use the volume down button to navigate and highlight wipe cache partition.
Now use the power key to select the option.
You have to select ‘Yes‘ when you’ll be prompted to next menu.
Now wait for the process to be completed, once it’s done highlight ‘Reboot system now’ and press power button to select it.
All Done.
After deleting the system cache nothing changed then follow the steps below, but before moving I would suggest you to backup all your data.
Turn off your device.
Now press and hold home+Power+Volume Up key.
Release the power button once you see logo, but keep holding home and Volume up keys.
Now when you see Android logo, let go both buttons.
Use the volume down button to navigate and highlight wipe data / factory reset.
Now use the power key to select the option.
You have to select ‘Yes‘ when you’ll be prompted to next menu.
Now wait for the process to be completed, once it’s done highlight ‘Reboot system now’ and press power button to select it.
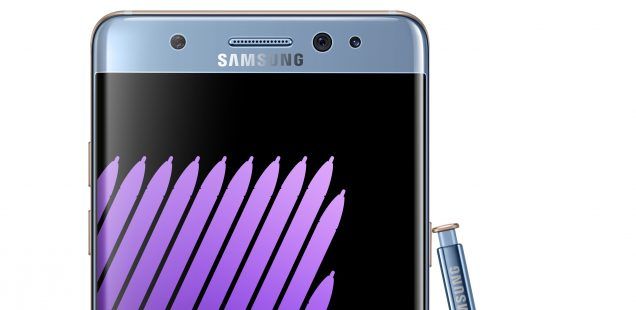
In this post, We’ll tell you how you can bypass or reset your Pin/Password on your Samsung Galaxy Note 7 after you forget it. It happens with everyone and it’s a normal thing, but you really need to know what to do because if you don’t remember your passcode or Pin, you won’t be able to use your device at all. Follow all the steps in order to reset Forgotten Pin-Password on Samsung Galaxy Note 7.
Reset Forgotten Pin-Password on Samsung Galaxy Note 7:
Turn off your device.
Now press and hold home+Power+Volume Up key.
Release the power button once you see logo, but keep holding home and Volume up keys.
Now when you see Android logo, let go both buttons.
Use the volume down button to navigate and highlight wipe data / factory reset.
Now use the power key to select the option.
You have to select ‘Yes‘ when you’ll be prompted to next menu.
Now wait for the process to be completed, once it’s done highlight ‘Reboot system now’ and press power button to select it.
All Done.
The second method is, try Find My Android. It works same like Find my iPhone. Once your device is registered you need to follow the steps below.
Open up find my Android.
Here you’ll find service like a temporary password.
Click on the new button set the new temporary password.
All Done.
The third method is also very easy, Follow the steps below.
Samsung just updated the Galaxy Tab S 10.5 T805 to Android 6.0.1 Marshmallow. It was unclear previously whether Samsung will update the first generation Galaxy Tab S to Android Marshmallow or not. The new update came out as a surprise. Galaxy Tab S 10.5 was running on Android Lollipop for quite a while. The new firmware brings all new goodies which are packed in the stock Android Marshmallow by Google. Android 6.0.1 Marshmallow arrived on the Galaxy Tab S for the users residing inside Germany only. It’s unclear when Samsung will expand this update to other regions. As mentioned earlier, this update made its way only to the T805, which is the LTE variant of the Galaxy Tab S. Samsung hasn’t given any hints on when it will roll out the update for other variants of the Galaxy Tab S 10.5.
Users living in Germany are getting this latest update through OTA or through Samsung Smart Switch. If you own the Galaxy Tab S 10.5 SM-T805 and you are residing outside Germany, chances are you won’t get this update through OTA or through the Samsung PC Suite. To get this update running on your Tab S, you will have to flash it manually using Samsung’s flashtool Odin. The firmware files for this Marshmallow update are already available, which means it is now possible for T805 users to flash this update right away regardless of their region.
The guide going down explains how you can install the Android 6.0.1 Marshmallowofficial firmware on your Samsung Galaxy Tab S 10.5 SM-T805. The same guide will work for other variants of the Galaxy Tab S 10.5, but it will be updated as soon as Samsung pushes it for SM-T800 and its siblings. Let’s have a look on the installation method now.
Early Preparations
Make sure that your device is exactly as mentioned above. To check out what device you have, go to Settings > More/General > About Device or Settings > About Device and match the model number. Be careful about the device model number, flashing a file on a device not listed here might result in bricking it up. In that case, we may not be held responsible.
Your device’s battery should not be weak. In case your device goes dead during the flashing process, your device may get soft bricked and you might be in need of flashing stock firmware and that will ultimately result in wiping up your data as well. So, make sure that you charge your device before you start the flashing process.
Always use the original data cable to establish connection between your Android device and your computer / laptop. Using ordinary data cables might interrupt the flashing process, so to avoid any mishap, you need to meet this requirement as well.
In order to be able to establish connection between your PC and your Galaxy Tab S 10.5, you need to have the Samsung USB drivers installed on your PC. You can find all Android USB drivers here on our site.
Make sure that you turn off Samsung Kies while using Odin3 flashtool. Samsung Kies will interrupt Odin3 and will result in causing errors and may not let you flash your desired firwmrae. Also, make sure that you turn off any antivirus software you’ve installed and also disable firewall to avoid any connection and flashing issues.
Download and extract firmware file [Android 6.0.1 Marshmallow – T805 Only] to get the .tar.md5 file.
Update Galaxy Tab S 10.5 to official Android 6.0.1 Marshmallow
Make sure that you read the instructions listed above carefully and you’re all set to go ahead now.
Wipe your device complete in order to attain a neat installation. You may boot into the recovery mode and perform a factory data reset.
Open Odin3.exe.
Put your Galaxy Tab S 10.5 in download mode. To do so, turn it off and wait for 10 seconds. Turn it on by pressing and holding Volume Down + Home Button + Power Key simultaneously, You should see a warning, press Volume Up to continue. In case this method doesn’t work for you, try one from this guide.
Connect your device to your PC.
As soon as Odin detects your phone, the ID:COM box should turn blue. Make sure that you’ve installed Samsung USB drivers before connecting.
In Odin, hit the AP tab. Select the firmware.tar.md5 or firmware.tar, that you downloaded and extracted above.
Make sure that the options selected in your Odin are exactly as shown in the pic.
This screenshot is of Odin 3.10.6 attached here for reference only. For Galaxy Tab S 10.5, use Odin 3.12.3 which is quite similar. Odin 3.12.3 for the Tab S 10.5 is linked above.
Hit start and wait till the firmware flashing is complete, The flashing process box will turn green upon successful flashing.
Once the flashing process has been completed successfully, disconnect your device and reboot it manually. You can reboot your device by long pressing Volume Up + Volume Down + Power Key.
Once the device boots up, checkout the new firmware now.
Your device will be running on new Android 6.0.1 Marshmallow now.
Once updated to stock, do not try to downgrade, or else you will result in messing up EFS partition of your device.
That’s all!
Got any queries? Make sure that you drop em’ in the comment box below. Good Luck!
The very first thing that you would want to do on your Galaxy Note 7 after you root it will be backing up the EFS and IMEI partitions. Backing up these partitions is a must for you particularly if you’re into flashing custom ROMs and modifying the behaviour of your Galaxy Note 7 by means of third party ROMs and tweaks. The EFS partition is the most sensitive partition and it doesn’t take more then a second for this partition to corrupt. Corrupted EFS partition means your phone will loose all of its connectivity capabilities. Corrupt EFS partitions wipes the IMEI number and shows a null IMEI on your phone. It won’t detect your SIM card, won’t allow you to make any calls or send any text messages. If you do not have a Backup of your EFS and IMEI partitions, you’re kind of doomed. And if by luck you have a backup, you’re all safe and secure. You can simply restore the backup and boom.
For geeks, the EFS (Encryption File System) partition holds the Bluetooth, WiFi MAC addresses, NV data, Radio information and all other such sensitive pieces of information for your device to function properly. Whenever you flash an incompatible file on your device, it results in tampering the EFS partition. In some cases, downgrading your phone to a previous firmware version can also result in damaging EFS partition. There are many other reasons that can disturb the EFS partition of your phone and it will become a phone without calling capabilities and will also loose many other features.
Now that the Galaxy Note 7 has already got a TWRP recovery and it has been rooted as well, it’s time for the Note 7 users to backup the EFS partition. In order to backup EFS, your phone must be rooted and then you are all set to back it up. We can now head towards the tutorial and learn how to Backupand Restore EFS/IMEI on Samsung Galaxy Note 7.
Here are some pre-requisites and precautions.
Make sure that you’ve rooted your device before you proceed with this application. You can root your new Note 7 using the following guides.
This guide is for all the variants of Samsung Galaxy Note 7. The variants are listed below.
Galaxy Note 7: N930F, N930K, N930L, N930X, N930S, N930W8, N930FD and all other variants which are rooted.
Open the application now and grant SuperSu rights.
Now click the small tool settings button at the top besides the information button and select the format in which you want to backup the EFS partition. (select .tar and .img formats)
Now from the partitions list select EFS and RADIO partition. For safety, you can select other partitions as well.
Now tap the small arrow in the circle at the lower right corner.
It will prompt a confirmation message, tap BACKUP here.
That’s all. You will have your EFS files in the “Partitions Backup” folder located in your internet storage.
How to Restore EFS/IMEI partition on Samsung Galaxy Note 7
If you have accidentally corrupted your EFS partition, you can simply restore it using the same application.
Make sure that you have already backed up the EFS partition in .img format.
Now open the partitions backup application and tap the small options button at the top right corner.
Select restore a partition, and then select your radio and efs.img files from the partitions backup folder inside your internal storage.
Once you’ve selected the files, follow on-screen instructions to restore your lost IMEI.
That’s all.
That’s all. Stuck with something? Reach us out through our contact us page or through the comments section.
Galaxy Note 7 has finally been rooted. After a lot of hard work, the Note 7 was finally rooted yesterday because of the collaborative efforts of our friend Dr.Ketan and the famous Android developer Chainfire. Chainfire added support to his SuperSU for the Galaxy Note 7, the device can now be rooted by flashing the latest SuperSU Beta in custom recovery mode.
A TWRP Recovery made its way to the Galaxy Note 7 just after a day or two when the device started shipping. The TWRP recovery’s version is 3.0.2.0, which is the latest version of the TWRP. With the release of TWRP for the Galaxy Note 7, the custom ROMs, MODs and tweaks already started landing on the development forums. Now that the device has been rooted as well, it means that the time to unleash the real power of this all new beast by Samsung has come.
Just to have a recap, Galaxy Note 7 was released by Samsung on August 2 in the New York City. After the Galaxy Note 5, Samsung jumped straight up to the Galaxy Note 7. It brings a 5.7-inch QHD display protected by Gorilla Glass 5. The phone has got Gorilla Glass 5 protection at its back as well. Galaxy Note 7 brings and Iris scanner to help you unlock the phone simply by looking at it. The Note 7 also brings a new and enhanced S Pen. The new TouchWiz UI is quite responsive and there’s less bloatware as compared the previous versions of Galaxy Note 7. Note 7 came out of the box running on Android 6.0.1 Marshmallow. Samsung has promised the Android Nougat update for the Note 7 in the coming 2-3 months.
It’s time for us to get back to what we are here for. This guide will enable enable the Galaxy Note 7 users to flash a TWRP custom recoveryon the phone and root itafterwards. The guide is applicable on the Exynos Galaxy Note 7 running Android 6.0.1 Marshmallow. Exynos variants of the Note 7 include N930F, N930X, N930FD, N930K, N930L and N930S. Assuming that you’ve understood the purpose of this guide, we will head towards the tutorial and get over.
Early preparations
Charge your Galaxy Note 7 up to 50% to avoid power issues during the flashing process. Check your device’s model number carefully under settings > more / general > about device.
Get a microSD card as you will need to copy SuperSU.zip file to that, otherwise you will have to use the MTP mode while you boot up into TWRP recovery to flash copy it.
Backup your important contacts, call logs, sms messages and also copy your media content to your computer as you will have to wipe your phone on the way.
Uninstall/disable Samsung Kies while using Odin. Samsung Kies can hinder the connection between your phone and Odin.
Use OEM data cable to establish connection between your PC and your phone.
Follow these instructions to the letter to avoid any mishap during flashing process.
Disclaimer:Rooting, flashing custom recoveries and tweaking your device are the processes which are never recommended by device manufacturers or the OS providers. In case a mishap occurs while following the method listed below, TechBeasts or the device manufacturer may not be held responsible. Make sure that you are doing everything at your own risk.
Download the TWRP Recovery.tar file carefully according to your device.
TWRP Recovery for Galaxy Note 7 SM-N930F/FD/X/W8: Download
TWRP Recovery for Galaxy Note 7 SM-N930S/K/L: Download
Download SuperSU.zip file and copy it to your phone’s external SD card. If you haven’t got an external SD card, you will need to copy it to internal storage after installing TWRP recovery.
Download dm-verity.zip file and copy it to the extern SD card as well. Alternatively, you can also copy both these.zip files to a USB OTG if you have got one.
Open Odin3.exe file from the extracted Odin files that you downloaded above.
Put your Galaxy Note 7 in download mode now. To do so, turn off your phone first. Now turn it on by pressing and holding Volume Down + Power + Home button. As soon as your device boots up showing a Downloading screen, leave the keys.
Connect your phone to your PC now. Odin should show an “Added” message in the logs and also show the blue light in the ID:COM box. This will verify a successful connection between your phone and your PC.
Now click on the “AP” tab in Odin and select the TWRP Recovery.img.tar file according to your device carefully.
The options ticked in Odin should be only “F.Reset Time“. Make sure that the Auto-Reboot option is not checked, we do not want to reboot the phone after flashing TWRP recovery.
After selecting the file and checking/unchecking the options carefully, hit the start button. Odin will now flash the TWRP and show you a PASS message in a few minutes.
Once done, disconnect your device from your PC now.
Now you need to boot directly into TWRP Recovery. Turn off your phone completely and turn it on by pressing and holding Volume Up + Home + Power key now. Your phone should successfully boot into newly installed custom recovery.
TWRP will ask you whether you want to allow modifications or not, you will need to swipe finger to the right to enable modifications. Swiping the finger to right will trigger dm-verity, if you will need to disable it immediately. Leaving it enabled will not let you boot the phone neither root it. This is an important stuff since we want to be able to modify the system.
Now tap “Wipe > Format Data > type “yes” to formate data. This is important to disable encryption. This step will factory reset your phone, so make sure that you’ve backed up the entire data at hand.
Now go back to the main menu in TWRP Recovery and tap “Reboot > Recovery”. This will once again reboot your phone in TWRP.
Now make sure that you’ve copied the SuperSU.zip and dm-verity.zip files in external SD Card or USB OTG, if not then transfer both these files to your external SD Card by using MTP mode in TWRP now. Once you’ve the files, tap “Install > locate the SuperSU.zip according to the location where you copied > flash it”.
Now once again tap “Install > locate the dm-verity.zip file > flash it”.
Once done flashing, reboot your phone to system.
That’s all. You’re rooted and have a TWRP recovery installed. Best of luck.
That was it guys. Don’t forget to backup your EFS partition now and also create a Nandroid backup. Its’ time to unleash the true power of your Galaxy Note 7. I hope that this guide proved to be fruitful for all of you. Let us know if you are stuck with something or something isn’t working right for you.
Galaxy Note 7 has started reaching the customers in different countries across the globe. As the Note 7 is some space in the hands of developers, the custom stuff for this phone is pouring in as well. We have already got the official TWRP recovery and just yesterday, the phone was rooted as well. Chances are, in a few days there will be a number of custom ROMs available for the Galaxy Note 7. While playing with your phone and tweaking it, you will need to take care of your expertise and you also need to have some beforehand knowledge that what will you do in case something goes wrong. To unroot your phone, or to restore it to the stock state, or to wipe off all the MODs and tweaks from the phone, you will need to flash a stock firmware on it. Before you start looking for a guide here and there, we have already put it up for all our beloved Galaxy Note 7 users.
The guide given here will help you to flash/installthe stock Android 6.0.1 Marshmallow firmwareon your Galaxy Note 7 [all variants] and restore it to the factory state. The method explains how you can use Samsung’s flashtool Odin3 to install the official firmware manually on your Galaxy Note 7. This method comes in handy in the situations particularly when you have soft-bricked your Galaxy Note 7, or your phone just got stuck with something and it is unable to recover through any other means like Smart Switch, Samsung Kies etc. The firmware you will get by following the links attached below are completely pure, official and untouched. The only thing you need to take care of is to follow the method to the letter to avoid any mishap.
Early Preparations
1. This guide is only for Samsung Galaxy Note 7 (All Variants)
Make sure that your device is exactly as mentioned above. To check out what device you have, go to Settings > More/General > About Device or Settings > About Device and match the model number. Be careful about the device model number, flashing a file on a device not listed here might result in bricking it up. In that case, we may not be held responsible.
2. Battery should be charged at least 60%!
Your device’s battery should not be weak. In case your device goes dead during the flashing process, your device may get soft bricked and you might be in need of flashing stock firmware and that will ultimately result in wiping up your data as well. So, make sure that you charge your device before you start the flashing process.
3. Use the OEM data cable to establish connection!
Always use the original data cable to establish connection between your Android device and your computer / laptop. Using ordinary data cables might interrupt the flashing process, so to avoid any mishap, you need to meet this requirement as well.
4. Backup everything!
Just to be on the safe side, you may consider backing up each and everything from your Android device. This is highly recommended so that in case anything goes wrong, you still have the access to all of your data and you can restore it immediately. Also, clean install is always recommended, that means you will probably have to wipe your device to install the new firmware. So, you may backup everything as listed below.
In order to be able to establish connection between your PC and your Galaxy Note 7, you need to have the Samsung USB drivers installed on your PC. You can find all Android USB drivers here on our site.
6. Turn off Samsung Kies and other softwares while using Odin3!
Make sure that you turn off Samsung Kies while using Odin3 flashtool. Samsung Kies will interrupt Odin3 and will result in causing errors and may not let you flash your desired firwmrae. Also, make sure that you turn off any antivirus software you’ve installed and also disable firewall to avoid any connection and flashing issues.
Download and extract firmware file [Android 6.0.1 Marshmallow] (carefully for your variant) to get the .tar.md5 file.
Restore Samsung Galaxy Note 7 to Stock Firmware
Make sure that you read the instructions listed above carefully and you’re all set to go ahead now.
Wipe your device complete in order to attain a neat installation. You may boot into the recovery mode and perform a factory data reset.
Open Odin3.exe.
Put your Galaxy Note 7 in download mode. To do so, turn it off and wait for 10 seconds. Turn it on by pressing and holding Volume Down + Home Button + Power Key simultaneously, You should see a warning, press Volume Up to continue. In case this method doesn’t work for you, try one from this guide.
Connect your device to your PC.
As soon as Odin detects your phone, the ID:COM box should turn blue. Make sure that you’ve installed Samsung USB drivers before connecting.
In Odin, hit the AP tab. Select the firmware.tar.md5 or firmware.tar, that you downloaded and extracted above.
Make sure that the options selected in your Odin are exactly as shown in the pic.
This screenshot is of Odin 3.10.6 attached here for reference only. For Galaxy Note 7, use Odin 3.12.3 which is quite similar. Odin 3.12.3 for the Note 7 is linked above.
Hit start and wait till the firmware flashing is complete, The flashing process box will turn green upon successful flashing.
Once the flashing process has been completed successfully, disconnect your device and reboot it manually. You can reboot your device by long pressing Volume Up + Volume Down + Power Key.
Once the device boots up, checkout the new firmware now.
Your device will be running on stock Android firmware.
Once updated to stock, do not try to downgrade, or else you will result in messing up EFS partition of your device.
That’s all!
Got any queries? Make sure that you drop em’ in the comment box below. Good Luck!
PokéMapper-Pokemon Go Live Map For PC.I have another app for all Pokemon lovers who love to play Pokemon Go on PC, if you don’t want to go out and still want to catch all the Pokemon. You must try PokéMapper-Pokemon Go Live Map app, This app is a live map that finds all the Pokemon around you. In real-time, it shows the locations of gyms, pokestops and Pokemon. The other best thing about this app is that it give you most accurate data no matter where you are. PokéMapper-Pokemon Go Live Map will come real handy, Now let’s start the method to download the PokéMapper-Pokemon Go Live Map for PC running Windows and Mac.
The good thing about PokéMapper-Pokemon Go Live Map is, you can also use this app on your computer. You can install and use PokéMapper-Pokemon Go Live Map for PC on your computer powered up with Windows XP/Vista/7/8/8.1/10 and Mac OS X Macbook/iMac. You will have to install and Android emulator like Andy OS, BlueStacks, BlueStacks 2 or Remix OS to start using PokéMapper-Pokemon Go Live Map for PC. Let’s head towards the installation method to start using this new app right now.
Download PokéMapper-Pokemon Go Live Map For Windows PC & Mac














![Install TWRP recovery on Galaxy On5 and Root it [G550T/G550T1]](https://techbeasts.com/wp-content/uploads/2016/08/Samsung-Galaxy-On5.jpeg "Install TWRP recovery on Galaxy On5 and Root it [G550T/G550T1]")
![Reset Forgotten Pin-Password on Samsung Galaxy Note 7 [ Solution ]](https://techbeasts.com/wp-content/uploads/2016/08/Forgotten-Pin-Password-on-Samsung-Galaxy-Note-7.jpg "Reset Forgotten Pin-Password on Samsung Galaxy Note 7 [ Solution ]")




![Install TWRP Recovery & Root Galaxy Note 7 [Exynos]](https://techbeasts.com/wp-content/uploads/2016/08/phpypxsgx.jpg "Install TWRP Recovery & Root Galaxy Note 7 [Exynos]")