Home Blog Page 477

Instagram v5.1apk – Download Here

0
Instagram v5.1apk – Download Here

Instagram got new update yesterday, comes with new design and better performance. All of your favorite features with an improved interface. It’s a simple way to capture and share the world’s moments on your Android. Customize your photos and videos with one of several gorgeous and custom built filter effects. Transform everyday moments into works of art you’ll want to share with friends and family. Share your photos and videos with friends and followers in a photo feed, or send posts directly to your friends. Follow what your friends post with the click of a single button. Every time you open up Instagram, you’ll see new photos and videos from your closest friends, and creative people from around the world.

Instagram v5.1apk


Features:

• Linear and Radial Tilt-Shift blur effects for extra depth of field
• Instant sharing to Facebook, Twitter, Flickr, Tumblr and Foursquare
• Unlimited uploads
• Send photos and videos directly to friends
• Interact with friends through giving & receiving likes and comments
• And much much more…

Whats New:

  • Improved design!
  • Introducing an updated design for Instagram on Android, making it faster and more responsive. All of your favorite features with an improved interface.

Download Instagram v5.1apk

ROM Manager apk – Download Here

0
ROM Manager apk – Download Here

If you have Rooted Android device then you must have ROM Manager. You can download it from Google play they have a free version and also paid. ClockworkMod Touch recovery (and recovery) is work that needs to put in for every new device that is released by a manufacturer.If work on ROM Manager ceased completely, all the premium features would continue working without issue. However, new recoveries do not port and build themselves. Without ClockworkMod Touch being a per device purchase, there is no way to recoup recurring server costs and labor. Keeping ROM Manager free and operational costs tens of thousands of dollars a year, and that does not include engineering costs.


ROM Manager Features:

* Flash your recovery to the latest and greatest ClockworkMod recovery.
* Manage your ROMs via a handy UI.
* Organize and perform backups and restores from within Android!
* Install ROMs from your SD card.
* Install your favorite ROMs over the air!

Premium Version:
* Incremental update zips (save your data plan!)
* Premium ROMs
* Receive notifications for when your ROM is updated!
* Automatic backups
* Install Queue
* Web Connect
* Backup Download Server lets you easily transfer backups as flashable zips to your computer.

What’s New

5.5.3.7 Only fix permissions on non-system apps.
5.5.3.5 Better Fix Permissions tool (thanks Wil Wheaton!)
5.5.2.8 Crash fixes.
5.5.2.6 Revamp install from SDCard. Add support for Loki patch.
5.5.2.3 Delta download bug fixes.
5.5.2.2 Revamp comments service. All users can comment and rate.
5.5.2.1 Can now view all backups, internal and external, in the restore/manage list
5.5.2.0 ROM Manager now support TWRP
5.5.1.8 Delta downloads
5.5.1.8 Fix crash
Download Rom Manager apk (https://drive.google.com/file/d/0B7CMRbyQIYe2b3V6c3RfWlZ2Q28/edit?usp=sharing)

How to Enable ART on your Android KitKat Device

0
How to Enable ART on your Android KitKat Device

Today i will tell you how you can enable new runtime of Android which is called ART. When ever we install an app on device it compiles and translates the app raw code then installation begins. We all face lag when we open an app. This happens because the current runtime compiler is called Dalvik and it uses a JIT (just in time)which means every time when you open an app, Dalvik compiles it and discards the code every time when it closes. This is the main reason why sometimes we face lag problem when an app is opening or closing.

ART is a new Android runtime being introduced experimentally in the 4.4 release KitKat. This is a preview of work in progress in KitKat. It is available for the purpose of obtaining early developer and partner feedback.

how enable ART

How to Enable ART It on your Android KitKat Device:

Following is the step by step guide on how to enable ART on your Android devices. Kindly follow all the steps carefully in order to enable ART.

Before You Begin:

  1. A device is required with KitKat 4.4 or higher.
  2. Currently I am doing this on my Nexus 5. You can try this on your own devices.
  3. This is just to tell that this is an experimental runtime so all the apps will not work properly.

Before you begin, you have to enable developer options. For that go to setting tap on an About Phone and then tap 5 to 8 times on build number until it says you are a developer. Go back and tap on developer options and turn them on.

Guide:

  • Select Runtime in Developer Options.
  • Now select use ART.
  • Tap OK and wait for device to reboot.
  • When all is done, enjoy the fast device.

How To Uninstall Multiple Applications At The Same Time In Android

0
How To Uninstall Multiple Applications At The Same Time In Android

For an Android user, installing dozen of apps is not something that is unique or rarely seen on some devices and users are happy with all these apps, the real problem starts when those apps starting to get precious memory and that moment they think of an app cleaner app, which usually works with a rooted device. So, there are two options for those users, either root their device or follow this tutorial. It is really simple and easy to done.

Batch-Uninstall

ES File explorer allows users to do such things without any root permission. The best file explorer available in Google Play Store and it is totally free. This tutorial will only work for all the Third party apps that you have installed, for all the Bloatwares you need to root your device.

Getting Prepared:

  1. Open Google Play Store.
  2. Search for ES file Explorer.
  3. Download and install it.
  4. Get ready.

How To Remove Multiple Apps At Once

Screenshot_2013-11-18-10-37-41-168x300

  1. Open ES File Explorer.
  2. Swipe from Left to Right or Tap the Mobile with Globe Icon at Top left side of Screen.
  3. Tap Tool options from the Menu.
  4. Tap App Manager.
  5. Tap and hold onto an Icon and check the ones you wanted to remove.
  6. Once you are done tapping, tap the icon that looks like Trash Icon on Bottom Left.
  7. Tap OK.
  8. That is it.

How To Root LG G Pro 2(F350K, F350L, F350S)

0
How To Root LG G Pro 2(F350K, F350L, F350S)

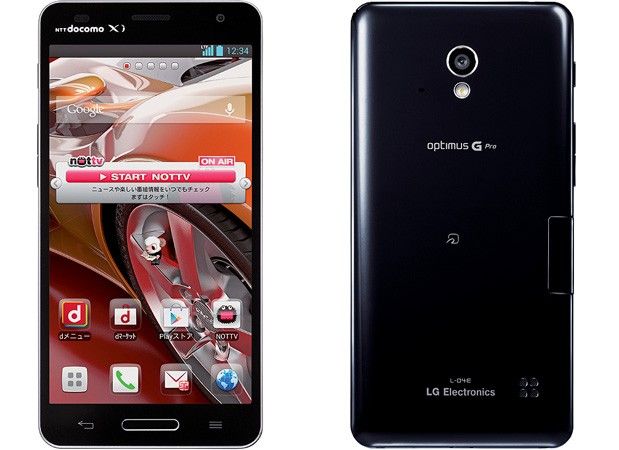
LG released LG G Pro 2 at MWC 2014 that is like a month ago, LG G Pro 2 is gaining the popularity gradually and if you are interested in it this might be the best time to get your hands on it, and the rooting method for all it’s variants is available. Rooting is the key to all customization, I my self is using a device running a Custom ROM, but no root, interesting isn’t it. Rooting allows you to get full control over your device, Stock apps and mods are good, but installing Custom Mods gives you better support and great battery life, you might need to delete some Stock apps from the device, a non-rooted device can’t do that, but a rooted one has the power to remove stock apps too.

1926298527_314808315_o

The tool we are going to use is not the new one, it is like a universal Rooting tool for various LG devices like LG G2, G Flex, Optimus G, etc. Yup the  autoprime famous IOroot tool can now root your LG G Pro 2 and variants like

  • LG G Pro 2 F350K
  • LG G Pro 2 F350L
  • LG G Pro 2 F350S

if you won anyone of the above mentioned Variants, get ready to root it. The IOroot tool will create a backup of your EFS data and you can restore it afterwards, so no need to worry about EFS as Rooting mostly damages it.

Disclaimer:

The methods involved in flashing custom roms and rooting your phone is highly custom and may result in bricking your device,and has nothing to do with Google or the device manufacturers which is LG in our case. In case of any mishap we may not be held responsible. Follow these instructions to the letter to avoid any mishap or bricking. Make sure that whatever you do, you are doing it at your own responsibility.

Warning:

Rooting an Android device Voids Manufacturers Warranty, this Rooting method for LG G Pro 2 is tested and Found Working. If you don’t follow the Procedure as we instructed, You only are responsible for your device. We won’t be liable if any damage occurs to your device and/or its components.

Preparations:

  1. Download IOroot tool.
  2. Enable USB debugging mode.
  3. Install LG USB Drivers


How To Root LG G Pro 2

  • Connect your LG G Pro 2 with PC.
  • Unzip IOroot file and open the extracted folder.
  • Right click the Run.bat file and choose run as admin, For Mac choose root-mac.sh and for Linux choose root-linux.sh
  • A cmd window will appear and all you have to do is to press any Key


Screenshot_9

  • In only a matter of Seconds, your LG G Pro 2 will be rooted.
  • That’s all

Install PhilZ Touch Recovery On Sony Xperia Z C6602 / C6603[Guide]

Install PhilZ Touch Recovery On Sony Xperia Z C6602 / C6603[Guide]

In the world of Android users feel safe with Stock applications, yer they always wanted to try Custom Mods and tweaks on their devices, not to mention custom ROMs too. Custom Recoveries are the necessary part when it comes to installing a Custom ROM as only Custom Recoveries can install the Un-signed Zip files. The latest the recovery is, better the performance will it produce. You won’t get many errors in the Installation process, only if your Zip file is for some other device.It allows you to make a Back-up of your current ROM and restore it afterwards. You can also back-up he EFS data using Custom Recovery. If you are interested in Other Devices Recoveries, you can visit our Custom Recoveries Section, or you can follow this Guide for Sony Xperia Z C6602 / C6603.

sony-xperia-z-ofic-1

Today we will show you How To Install PhilZ Touch Recovery On Sony Xperia Z C6602 / C6603. Tutorial is very simple, even a person with no knowledge about it, can Flash the file without any problem.But before we begin, Make sure that:

  1. That you have a Well Charged Battery, 60%-80% is better.
  2. Back-Up all your important ContactsCall Logs & Messages.It is highly recommended in case of any mishap or data loss to back up all your important data.
  3. Back-Up your Mobiles EFS DataHow To Restore and Back-Up EFS Data On Samsung Galaxy Devices.
  4. Check your device model, Go To Setting > About and Make sure that it is C6602 / C6603
  5. Do-not try it on any other device.

Disclaimer: 

The methods involved in flashing custom roms and rooting your phone is highly custom and may result in bricking your device,and has nothing to do with Google or the device manufacturers which is Samsung in our case. In case of any mishap we may not be held responsible. Follow these instructions to the letter to avoid any mishap or bricking. Make sure that whatever you do, you are doing it at your own responsibility.

Al right let’s head towards the next page and learn how to Install PhilZ Touch Recovery on Sony Xperia Z C6602 / C6603.

Pages: Page 1 | Page 2

Root Galaxy Grand 2 SM-G7102 On Android 4.3 Jelly Bean[Guide]

Root Galaxy Grand 2 SM-G7102 On Android 4.3 Jelly Bean[Guide]

Samsung Galaxy Grand was one of the most popular smartphone released last year, taking that into considerations, Samsung released the successor of Galaxy Grand the same year, Galaxy Grand 2. Arrived with Android 4.3 Jelly Bean and most probably won’t be able to get the update of Android 4.4.2 Kit-Kat. The only problem left was the rooting method of Galaxy Grand 2. Developers first released the Pre-rooted firmware for Galaxy Grand 2, but users claimed that their data was lost after the installation. Keeping that in mind, CF-Auto root method was released for Samsung Galaxy Grand and you can root your device following our tutorial. Rooting allows you to get full control over your device, Stock apps and mods are good, but installing Custom Mods gives you better support and great battery life, you might need to delete some Stock apps from the device, a non-rooted device can’t do that, but a rooted one has the power to remove stock apps too.

436681-samsung-galaxy-grand-2-tipped-to-hit-indian-stores-next-week

If you are familiar with Odin and it’s working, then this tutorial might not be difficult for you. Otherwise read the whole tutorial first before trying it on your device. In this Article, we will show you How To Root Galaxy Grand 2 SM-G7102 On Android 4.3 Jelly Bean.But before we begin, Make sure that:

  1. That you have a Well Charged Battery, 60%-80% is better.
  2. Back-Up all your important ContactsCall Logs & Messages.It is highly recommended in case of any mishap or data loss to back up all your important data.
  3. Back-Up your Mobiles EFS DataHow To Restore and Back-Up EFS Data On Samsung Galaxy Devices.
  4. Check your device model, Go To Setting > About and Make sure that it is SM-G7102.
  5. Do-not try it on Galaxy Grand 2 SM-G7105.

Disclaimer: 

The methods involved in flashing custom roms and rooting your phone is highly custom and may result in bricking your device,and has nothing to do with Google or the device manufacturers which is Samsung in our case. In case of any mishap we may not be held responsible. Follow these instructions to the letter to avoid any mishap or bricking. Make sure that whatever you do, you are doing it at your own responsibility.

Warning:

Rooting an Android device Voids Manufacturers Warranty, this Rooting method for Galaxy Grand 2 SM-G7102 is tested and Found Working. If you don’t follow the Procedure as we instructed, You only are responsible for your device. We won’t be liable if any damage occurs to your device and/or its components.

All done and good, let’s head towards the Next page to See, How you can Root Galaxy Grand 2 SM-G7102.

Pages: Page 1 | Page 2

Root Galaxy Ace 3 S7270 Running Android 4.2.2 XXUANA2 Jelly Bean Official Firmware[Guide]

Root Galaxy Ace 3 S7270 Running Android 4.2.2 XXUANA2 Jelly Bean Official Firmware[Guide]

Before going any further, Follow the link to update your Galaxy Ace 3 S7270 to Android 4.2.2 XXUANA2 Jelly Bean:

Update Galaxy Ace 3 S7270 To Android 4.2.2 XXUANA2 Jelly Bean

Now that you have Updated your device to Android 4.2.2 Jelly Bean and as per rule of installing Official Firmware, your device will loose its root access. The only way to get it back, is by rooting it again. Rooting allows you to get full control over your device, Stock apps and mods are good, but installing Custom Mods gives you better support and great battery life, you might need to delete some Stock apps from the device, a non-rooted device can’t do that, but a rooted one has the power to remove stock apps too.

galaxy-ace-3

If you are familiar with Odin and it’s working, then this tutorial might not be difficult for you. Otherwise read the whole tutorial first before trying it on your device. In this Article, we will show you How To Root Galaxy Ace 3 S7270 On Android 4.2.2 XXUANA2 Jelly Bean Official Firmware.But before we begin, Make sure that:

  1. That you have a Well Charged Battery, 60%-80% is better.
  2. Back-Up all your important ContactsCall Logs & Messages.It is highly recommended in case of any mishap or data loss to back up all your important data.
  3. Back-Up your Mobiles EFS DataHow To Restore and Back-Up EFS Data On Samsung Galaxy Devices.
  4. Check your device model, Go To Setting > About and Make sure that it is GT-S7270.
  5. Do-not try it on Galaxy Ace 3 GT-S7275 or GT-S7272.

Disclaimer: 

The methods involved in flashing custom roms and rooting your phone is highly custom and may result in bricking your device,and has nothing to do with Google or the device manufacturers which is Samsung in our case. In case of any mishap we may not be held responsible. Follow these instructions to the letter to avoid any mishap or bricking. Make sure that whatever you do, you are doing it at your own responsibility.

Warning:

Rooting an Android device Voids Manufacturers Warranty, this Rooting method for Galaxy Ace 3 S7270 is tested and Found Working. If you don’t follow the Procedure as we instructed, You only are responsible for your device. We won’t be liable if any damage occurs to your device and/or its components.

All done and good, let’s head towards the Next page to See, How you can Root Galaxy Ace 3 S7270.

Pages: Page 1 | Page 2

Update Samsung Galaxy Tab 3 SM-T210/T210R With Android 4.2.2 Jelly Bean [How To – Guide]

Update Samsung Galaxy Tab 3 SM-T210/T210R With Android 4.2.2 Jelly Bean [How To – Guide]

Samsung’s Galaxy Tab 3 7.0 is much popular among the users, specially the females sitting at home and enjoying their time playing some cool games or watching tips for their everyday life, one more use of the Tab is for kids who always love to mess around with addictive and amazing Android apps running on it. Tab 3 comes pre-loaded with Android 4.1.2 Jelly Bean, and the device will run on the same Android version until and unless Samsung gives the device some attention and rolls out some information officially about any future updates for Galaxy Tab 3. That may leave signs of disappointment on those who are looking to taste something new and different on their devices, but wait! Don’t worry about it, specially when we have XDA-Developers around.

Thanks to the developer for coming up with Android 4.2.2 Jelly Bean ported from Galaxy Tab Lite SM-T110 to Galaxy Tab 3 SM-T210 and SM-T210R. The stable build has already landed, you may install it on your device and get it a whole new life. Android 4.2.2 surely is a lot better with fixed bugs, performance enhancements here and there and minor UI changes atop. Android 4.2.2 also gives you Multi Window feature that Samsung introduced in Galaxy S3 first of all. Battery life is enhanced as well. Galaxy Tab 3 will not get any update any time soon, so this maybe the best choice to go with for now. In order to get it installed on your device, you may head towards the installation instructions and method now.

Here are the important installation instructions:

      1. This ROM works for Galaxy Tab 3 SM-T210 and SM-T210R. Do not try this on any other device. Check your device’s model under settings > About device > Model.
      2. Your device must be charged over at least 60%. This is highly recommended in order to prevent any mishap during the installation process.
      3. Use the OEM data cable to establish connection between your PC and Phone if needed.
      4. Backup each and everything on your Android phone as you may have to go through data wipes during installation process. Here are the backup procedures.
      5. Backup all your important contacts, find the full guide here.
      6. Backup all your important sms messages, find the full guide here.
      7. Backup all your important call logs, find the full guide here.
      8. Backup all your important media content manually. (Copy to your PC.)
      9. Backup all your apps / data. If you’ve rooted your device, use Titanium Backup to do so. Follow the full guide here.
      10. Your device must have TWRP Recovery installed. Follow the full guide here to install one.
      11. Once installed TWRP or CWM, don’t forget to make a nandroid backup using the backup options in the custom recovery. This is highly recommended in case something goes wrong and you need to go back to the previous working state of your system immediately.
      12. Although this ROM is a stable build, but we recommend you to install this only if you’ve enough knowledge about custom ROMs and you actually know how to handle these. In case you’re not much familiar, you may stick to your phone’s current OS.
      13. Make sure that you read all the important instructions carefully. Once done, you may go ahead.
Disclaimer: The methods involved in flashing custom roms and rooting your phone are highly custom and may result in bricking your device, and has nothing to do with Google or the device manufacturer that is SAMSUNG in our case. Also rooting your device will void its warranty and you will be no longer eligible for any kind of free device services by the manufacturers/warranty providers. In case of any mishap we may not be held responsible. Follow these instructions to the letter to avoid any mishap or bricking. Make sure that whatever you do, you are doing it at your own responsibility.


How to Install Android 4.2.2 Jelly Bean on Galaxy Tab 3 SM-T210/T210R:

Download the zip files for your device:

    1. T110 on T210/210R.zip [ROM.zip]
    2. Download Kernel.zip file
    1. Copy both the downloaded .zip files to your phones’ external or internal SD card.
    2. Now boot into custom recovery (CWM or TWRP)  depending on the one you installed on your device.
    3. In custom recovery wipe factory data first. (for neat installation).
    4. Now select “Install > Choose Zip > locate the file from where you placed it > Choose Kernel.zip file”.
    5. Get back to the main menu in CWM recovery and once again now select “Install > Choose Zip > locate the file from where you placed it > Choose ROM.zip file”.
    6. Complete the ROM installation.
    7. Once the installation is completed, reboot your device.
    8. First boot may take a few minutes, hold on.
    9. Once you see the screen you’re done.
    10. That’s All! Enjoy Android 4.2.2 Jelly Bean on your Galaxy Tab 3.

Here are some screenshots from this ROM:

xi0s


This ROM may take a while to completely boot you into your phone. In case it’s taking too long, boot into CWM recovery and wipe cache and dalvik cache and reboot it. If it’s still stuck on the boot screen, you may want to go back to your phone’s last working state. You can either restore your phone’s nandroid backup or flash a stock firmware using our full guide here.

In case you got any queries, or face any issues with this post, feel free to stop by the comment box below and drop us your words. We will get back to you as soon as possible. Thanks All

1941 Frozen Front For PC – Download Here

0
1941 Frozen Front For PC – Download Here

If you want to become familiar with the atmosphere of a Battlefield, 1941 Frozen Front is the best way to find out how. Not just a normal battlefield but also how a frozen ground of complete destructive Warfare feels like. You have tanks to you can use of let others use them against you, you have an army with you to destroy the army against you. You will need to supply ammunition to your man if you want them to bring victory to you. Just like any other RPG this game also has the same gameplay and controls.This game is available for Both Android and iOS and now you can play in on PC too. Just Follow our Guide and All is Well. But remember this is not an official release for PC, it is just being run on PC using a Third Party Emulator.

V4HttpAssetRepositoryClient-mzl.vudngslg.png-5921800823095343880.1024x1024-65 (1)

Before We go any further, let’s look at the Features of 1941 Frozen Front:

  • FREE TO PLAY
  • Online multiplayer battles
  • Turn-based strategy action in WW2
  • Thrilling campaigns and challenging missions
  • Historical German und Soviet units
  • Repairs, camouflage and fortification of units during the battles
  • Infantry, artillery, tanks and warplanes for both fractions
  • Hex grid for the best overview possible
  • Detailed graphics und super-realistic sounds
  • Full tablet support

All read and Done, let’s see how we can install 1941 Frozen Front On PC.

How to Download and Install 1941 Frozen Front on PC:

  1. You need an Android emulator to run this game on your Windows PC or MAC. We recommend using Bluestacks. Use our guide to install it on your PC.
  2. After downloading and installing Bluestacks, Download 1941 Frozen Front Apk
  3. Open the downloaded APK file now, and let Bluestacks install it.
  4. Open BlueStacks now > All Apps > 1941 Frozen Front
  5. The game will start now, follow the on screen instructions.
  6. Follow the initial screen,  you’ll be able to play it.
  7. Tap the screen by clicking inside the game frame.
  8. Enjoy the most tough game ever!
  9. Don’t forget to let us know about your high score.
  10. That’s All!

Bouncy Seed For PC – Download Here

0
Bouncy Seed For PC – Download Here

The story line goes through like this, Paul is a seed that is out of soil and now looking for Sunlight to grow up, not water stay Paul away from the water as it will die in it. You have to fly Paul over the River but not with wings, Trampoline is there for you to help Paul over the rivers of any kind. The more sunshine and Rainbow will you collect the more points you will get. There will be birds you have to watch out for, especially for the Black Ones, outrun them and all is well. Make wise decisions over the obstacles as they may get you in trouble in the coming parts of the game.This game is available for Both Android and iOS and now you can play in on PC too. Just Follow our Guide and All is Well. But remember this is not an official release for PC, it is just being run on PC using a Third Party Emulator.

mzl.emustwiw.1024x1024-65

Before we Go any further, let’s look at the Feature of Bouncy Seed:

  • A brand new originality game
  • Deceptively simple to play
  • Create your own rainbow in the sky
  • Endless stages
  • Beautiful graphic
  • New balloon item added
  • Leaderboards and achievements
  • Game store with plentiful item

All read and Done, let’s see how we can install Bouncy Seed On PC.

How to Download and Install Bouncy Seed on PC:

  1. You need an Android emulator to run this game on your Windows PC or MAC. We recommend using Bluestacks. Use our guide to install it on your PC.
  2. After downloading and installing Bluestacks, Download Bouncy Seed Apk
  3. Open the downloaded APK file now, and let Bluestacks install it.
  4. Open BlueStacks now > All Apps > Bouncy Seed
  5. The game will start now, follow the on screen instructions.
  6. Follow the initial screen,  you’ll be able to play it.
  7. Tap the screen by clicking inside the game frame.
  8. Enjoy the most tough game ever!
  9. Don’t forget to let us know about your high score.
  10. That’s All!

Install CWM Recovery 6 On Samsung Galaxy Star S5280 / S5282

0
Install CWM Recovery 6 On Samsung Galaxy Star S5280 / S5282

There comes a time in every Android User when He has to install un-singed Zip files on his Device. Stock Recoveries does not allows such things and also when one try to Factory Reset his device using Stock Recovery, everything is gone including media in most cases, but on a Custom Recovery allows a lot of things that a Stock one can’t. It allows you to make a Back-up of your current ROM and restore it afterwards. You can also back-up he EFS data using Custom Recovery. If you are interested in Other Devices Recoveries, you can visit our Custom Recoveries Section, or you can follow this Guide for Galaxy Star .

samsung-galaxy-star-screen-big

If you are familiar with Odin and it’s working, then this tutorial might not be difficult for you. Otherwise read the whole tutorial first before trying it on your device. In this Article, we will show you How To Install CWM Recovery 6 On Samsung Galaxy Star S5280 / S5282.But before we begin, Make sure that:

  1. That you have a Well Charged Battery, 60%-80% is better.
  2. Back-Up all your important ContactsCall Logs & Messages.It is highly recommended in case of any mishap or data loss to back up all your important data.
  3. Back-Up your Mobiles EFS DataHow To Restore and Back-Up EFS Data On Samsung Galaxy Devices.
  4. Check your device model, Go To Setting > About and Make sure that it is S5280 / S5282
  5. Do-not try it on any other device.

Disclaimer: 

The methods involved in flashing custom roms and rooting your phone is highly custom and may result in bricking your device,and has nothing to do with Google or the device manufacturers which is Samsung in our case. In case of any mishap we may not be held responsible. Follow these instructions to the letter to avoid any mishap or bricking. Make sure that whatever you do, you are doing it at your own responsibility.

Al right let’s head towards the next page and learn how to Install ClockworkMod Recovery 6 on Galaxy Star S5280 / S5282.

Pages: Page 1 | Page 2