Home Blog Page 474

Panda Run For PC – Download Here

0
Panda Run For PC – Download Here

After the release of Temple Run there were many apps released with the same Gameplay with different areas and different achievements, but all have one thing is common, Endless running. Today we will share another app of the same Category with you but instead of a Guy ins suite or a beautiful girl, they have included a really cute Panda. That Panda is basically lost in a Bamboo forest and trying to get out from there, I don’t know the thinking behind the game because Pandas love Bamboos and in the whole Forest is just like a Paradise for Pandas.This game is available for Both Android and iOS and now you can play in on PC too. Just Follow our Guide and All is Well. But remember this is not an official release for PC, it is just being run on PC using a Third Party Emulator.

Screenshot_1

Before We go any further, Let’s Look at the Features of Panda Run:

  • Collect more coins to achieve high score
  • Simple tap to control the game, comfortable feel
  • Lovely panda with funny emotion

How to Download and Install Panda Run on PC:

BlueStacks-app-player

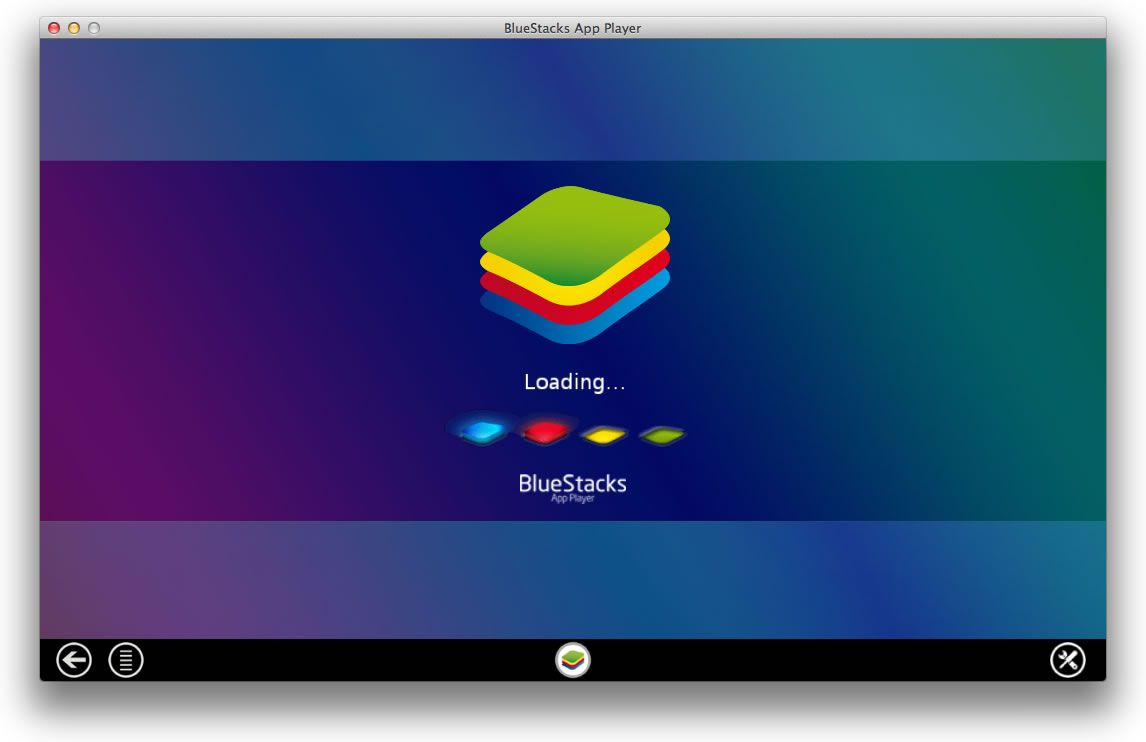
  1. You need an Android emulator to run this game on your Windows PC or MAC. We recommend using Bluestacks. Use our guide to install it on your PC.
  2. After downloading and installing Bluestacks,Open it
  3. Search for Panda Run and Download the One by sagego.
  4. Open BlueStacks now > All Apps > Panda Run
  5. The game will start now, follow the on screen instructions.
  6. Follow the initial screen,  you’ll be able to play it.
  7. Tap the screen by clicking inside the game frame.
  8. Enjoy the Endless game with a Cute Panda
  9. Don’t forget to let us know about your high score.
  10. That’s All!

Root Xperia Z1 Running Latest 14.3.A.0.681 Firmware [How To – Guide]

21
Root Xperia Z1 Running Latest 14.3.A.0.681 Firmware [How To – Guide]

Sony’s former flagship Xperia Z1 along with  some of it’s family members is currently receiving updates to the latest and greatest version of Android, that is Android 4.4.2 KitKat. The new update comes up with a lot of enhancements and some new features that you may taste upon updating your device. In case you’ve already updated and you’re a looking for a method to root your device on the latest Android 4.4.2 KitKat 14.3.A.0.681 firmware, then you’re spotted the right spot at the moment. In the following post we’ll be going through a detailed and step by step guide to get the device rooted on the latest firmware.

Before we head towards the pre-requisites and root instructions, some of you, whoa are newbies, may want to know what is root access and why you should root your device. To make it clear, we’ll be first having a look on a brief introduction of the root access.

Rooting your phone gives you complete access over all the data which is apparently locked by the manufacturers. This includes removal of the factory restrictions and making changes to the internal system and the operating system. Gaining the root access gives you the privileges to install various applications to enhance the performance of your device, allows you to remove the built-in applications/programs, helps you to upgrade the battery life of your device & install the apps which require the root access for the proper functionality and modify your device in so many other ways e.g using mods and custom roms. By installing custom recovery, you can flash custom roms in the phone easily. Custom recovery also let’s you backup your current rom and restore it in case of any mishap. There is a laundry list of things you can do after having your device rooted and installed the custom recovery, now once you’re rooted and have installed custom recovery, go ahead and enjoy it on your phone. Here’s our collection of 10 Best Root Apps.

Here are some pre-requisites:

    1. The Root instructions are only for Xperia Z1 C6903/C6902/C6906/C6943 running latest Android 4.4.2 KitKat 14.3.A.0.681 firmware. Check your firmware version in Settings > About Device and make sure that it matches the one mentioned here.
    2. Please make sure that your phone’s battery is charged at least over 60%. This is highly recommended in order to prevent any power issues during the recovery flashing process.
    3. Backup each and everything on your Android phone as follows:
    4. Backup all your important contacts, find the full guide here.
    5. Backup all your important sms messages, find the full guide here.
    6. Backup all your important call logs, find the full guide here.
    7. Backup all your important media content manually. (Copy to your PC.)
    8. Backup all your apps / data. If you’ve rooted your device, use Titanium Backup to do so. Follow the full guide here.
    9. Backup your current system using a custom recovery (CWM or TWRP) if you’ve flashed one. This is recommended in case something goes wrong with rooting your phone, you can use the custom recovery and return to the old working state of your system.
    10. Make sure that you read the instructions carefully and applied all precautionary measures. Let’s go ahead.

Disclaimer: The methods involved in flashing custom roms and rooting your phone is highly custom and may result in bricking your device, and has nothing to do with Google or the device manufacturer that is SONY in our case. Also rooting your device will void its warranty and you will be no longer eligible for any kind of free device services by the manufacturers/warranty providers. In case of any mishap we may not be held responsible. Follow these instructions to the letter to avoid any mishap or bricking. Make sure that whatever you do, you are doing it at your own responsibility.

How to Root Xperia Z1 Running Latest Android 4.4.2 KitKat 14.3.A.0.681 Firmware:

    1. You need to install CWM recovery first. Follow our full guide here to install it on your device.
    2. Download Supersu.zip file now.
    3. Place the downloaded Supersu.zip file on your phone’s sd card.
    4. Now boot into CWM recovery on your phone. To do so, turn off your device first. Now turn it on, as soon as you see the Pink LED, press the Volume Up Key rapidly.
    5. You should see the CWM recovery interface shortly.
    6. Once in CWM, select “Install Zip > Choose Zip from SDcard > Select SuperSu.zip > Yes”.
    7. This will flash SuperSu.zip file, once flashing is complete, reboot your device.
    8. Find SuperSu in app drawer now. You can also install Root Checker app from Play Store to check root.
    9. Congrats! You’re rooted now!
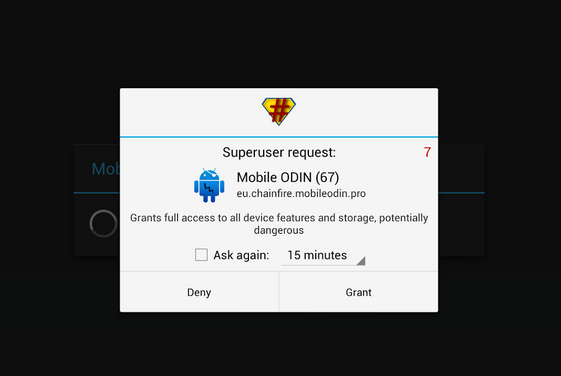
    10. SuperSu

That’s All! Let us know if the tutorial worked fine for you. In case you got any queries or face any issues regarding this post, please feel free to stop by the comment box below and drop us your words. We will get back to you as soon as possible. Thanks all.

Install CWM 6 Recovery On Sony Xperia Z1 Running Latest 14.3.A.0.681 Firmware [How to – Guide]

Install CWM 6 Recovery On Sony Xperia Z1 Running Latest 14.3.A.0.681 Firmware [How to – Guide]

Have you just update your Xperia Z1 to Android 4.4.2 KitKat that Sony just rolled out recently? Well, if so, then you may be looking out for a method to get a ClockworkMod [CWM] or TeamWin [TWRP] recovery on your device. We’ll not be having some here and there talks and will be heading towards the recovery installation instructions in the following post in a few minutes, before we begin, let’s have a look on a brief intro to the custom recovery (for those who are not familiar with it) and why you should install it on your Xperia Z1 C6902 / C6903 / C6906 or C6943 running Android 4.4.2 KitKat 14.3.A.0.681 Firmware.

A custom recovery allows you to install custom roms, mods etc. Along with these, you can make a Nandroid backup, this helps you a lot as you can move back to the previous working state of your phone at any time you want if you have backed up your current system. In some cases, to root the phone you need to flash SuperSu.zip file in the custom recovery, having installed the recovery may help you while in some casesto install the recovery easily, you need to have the phone rooted. You can also wipe cache and dalvik cache of your phone using a custom recovery.

Pre Requisites:

  1. The CWM recovery is only for Xperia Z1 C6903/C6902/C6906/C6943 running latest Android 4.4.2 KitKat 14.3.A.0.681 firmware. Check your firmware version in Settings > About Device and make sure that it matches the one mentioned here.
  2. You must have installed Android ADB & Fastboot drivers. Follow the quick guide here.
  3. Your device must have an unlocked bootloader. Follow our full guide here in order to unlock.
  4. Please make sure that your phone’s battery is charged at least over 60%. This is highly recommended in order to prevent any power issues during the recovery flashing process.
  5. Backup each and everything on your Android phone as follows:
  6. Backup all your important contacts, find the full guide here.
  7. Backup all your important sms messages, find the full guide here.
  8. Backup all your important call logs, find the full guide here.
  9. Backup all your important media content manually. (Copy to your PC.)
  10. Backup all your apps / data. If you’ve rooted your device, use Titanium Backup to do so. Follow the full guide here.
  11. Backup your current system using a custom recovery (CWM or TWRP) if you’ve flashed one. This is recommended in case something goes wrong with CWM installation, you can use the custom recovery and return to the old working state of your system.
  12. Enable USB debugging mode on your device.  Get it in Settings > Developer Options > USB Debugging mode.
  13. Use only OEM data cable to establish connection between your PC and Phone.
  14. Alright! Follow this guide to the letter now.

Disclaimer: The methods involved in flashing custom roms and rooting your phone is highly custom and may result in bricking your device, and has nothing to do with Google or the device manufacturer that is SONY in our case. Also rooting your device will void its warranty and you will be no longer eligible for any kind of free device services by the manufacturers/warranty providers. In case of any mishap we may not be held responsible. Follow these instructions to the letter to avoid any mishap or bricking. Make sure that whatever you do, you are doing it at your own responsibility.


How to Install CWM 6 Recovery on Xperia Z1 Running Android 4.4.2 KitKat 14.3.A.0.681 Firmware:

    1. Download Doomlord’s Advanced Stock Kernel with CWM Recovery
    2. Rename the downloaded .img file to boot.img
    3. Place the downloaded boot.img file in the Minimal ADB & Fastboot folder that you created using our ADB & Fastboot Quick Setup Guide.
    4. If you are using Android ADB & Fastboot full package, you can place the downloaded and renamed boot.img file in the Fastboot folder or in the Platform-tools folder.
    5. Open the folder where you placed the boot.img  file. E.g Minimal ADB & Fastbootor Fastboot or Platform Tools.
    6. Press and hold the shift key and right click on an empty area within the folder, and click on “Open Command Window Here”.
    7. Turn off your Xperia Z1 completely.
    8. Now press the Volume Up Key and while keeping it pressed plug in the USB cable.
    9. You should see a blue light in the notification light of your phone, that means your device is now connected in Fastboot mode.
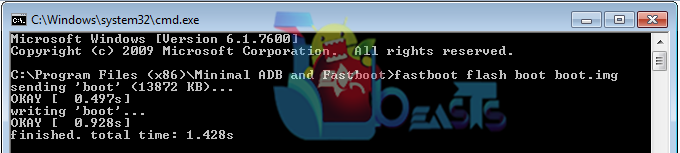
    10. Now type the following command: fastboot flash boot boot.img
    11. Hit Enter and it will quickly flash CWM 6.0.4.6 recovery in your Xperia Z1
    12. Once recovery is flashed, now issue this command “fastboot reboot”
    13. In case this doesn’t work, you may reboot the device manually.
    14. Your device will reboot now, as soon as you see the Sony logo,  and the pink LED, press Volume Up key to enter recovery.
    15. Congrats! You should now see the custom recovery.
    16. That’s all.

Screenshot_1

You may also want to root your device now in on the latest firmware, check out Root Xperia Z1 Running Latest 14.3.A.0.681 Firmware [How To – Guide]

That’s all with the recovery installation. In case you have any queries or you’re facing any issues regarding this post, please feel free to stop by the comment box below and drop us your words. We will definitely get back to you as soon as possible. Thanks all.

Credits: Doomlord

How To Update Xperia Z1 C6943 to Official Android 4.4.2 KitKat 14.3.A.0.681 Firmware

0
How To Update Xperia Z1 C6943 to Official Android 4.4.2 KitKat 14.3.A.0.681 Firmware

Xperia Z1 C6943 owners can now update their device to latest official Android 4.4.2 KitKat as Sony has begin rolling out this firmware recently based on the build number 14.3.A.0.681. Latest firmware has some performance enhancements that have made the device even more responsive. Sony’s main focus, camera has also improved in this update and there is a new WiFi data transfer option, there are some other changes as well that you may experience upon installing this update on your device.

To get this update you may connect your device to your PC and check for it using Sony PC Companion or check out using OTA option in your device. In case you end up finding no update and you got worried, you may need to get rid of it now as you’re on the right spot at the moment. In the following post we’ll be going through a very detailed method that will help you to get latest Android 4.4.2 KitKat 14.3.A.0.681 firmware on your Xperia Z1 C6943. All you need to do is, to keep a little patience and follow the steps carefully.

Pre Requisites:

  1. As mentioned, this firmware is only for Xperia Z1 C6943. Do not try this on any other phone, that may result in bricking your device. Check your device’s model number in Settings > About device.
  2. You must have installed Sony Flashtool. Find the full guide here.
  3. After installing Sony Flashtool, open the Flashtool folder from the drive where you installed it.
  4. Now open Flashtool>Drivers>Flashtool-drivers.exe and install the Flashtool, Fastboot & Xperia Z1 drivers from the list. [Important]
  5. Your phone must be charged at least over 60%. This is highly recommended in order to prevent any power issues during the flashing process.
  6. Enable USB debugging mode on your device. To do so, tap settings>developer options>USB debugging. If you can’t find developer options in settings, then tap settings > about device and tap “Build Number” for 7 times and you’ll get em’ activated under settings.
  7. Make sure that you back up all your important media content,  contactscall logs and text messages. This is highly recommended and important in case something goes wrong during the flashing process or in case you select the data wipe option before flashing. You can easily restore whenever you need.
  8. To flash this firmware, you do not need to root your device, you do not need to unlock the bootloader. All you need is, your device must be the one mentioned and must be running on Android 4.2.2 or 4.3 Jelly Bean.
  9. Download the firmware file properly.
  10. Use the OEM data cable to connect your phone to your PC. Using any other data cable might cause connection problems.
  11. This firmware can be flashed on Xperia Z1 in any region/any country.
  12. Alright! Follow this guide to the letter in order to prevent any mishap.

How to Install Android 4.4.2 KitKat 14.3.A.0.681 on Xperia Z1 C6943:

  1. Before moving forward, please make sure that you’ve read the pre requisites and ensure that you are set to go ahead.
  2. Download the latest firmware Android 4.4.2 KitKat 14.3.A.0.681 FTF file. [Generic]
  3. Extract the downloaded rar file and you will get the ftf.
  4. Copy the file and paste in Flashtool>Firmwares folder.
  5. Open Flashtool.exe now.
  6. Hit the small lightening button on the top left corner and select Flashmode.
  7. Select the FTF firmware file that you placed in the Firmware folder. 
  8. From the right side, select what do you want to wipe. Data, cache and apps log, all wipes are recommended, however you may select if you don’t want.
  9. Click on OK, and it will start preparing the firmware for flashing. This may take a little while to load.
  10. As soon as the firmware is loaded, it will prompt you to attach the phone by turning it off and keeping the back key press.
  11. For Xperia Z1Volume Down key will do the job of back key, just turn off your phone, keep the Volume Down key pressed and plug in the data cable.
  12. As soon as the phone is detected in Flashmode, the firmware will start flashing, Do not leave the Volume Down key until the process is complete.
  13. As soon as you see “Flashing ended or Finished Flashing” leave the Volume Down key, plug the cable out and reboot.
  14. That’s All! Congrats! You’ve installed latest Android 4.4.2 KitKat on your Xperia Z1 C6943. Enjoy

Also Checkout:

In case you got any queries or face any problems regarding this guide, please feel free to stop by the comment box below and let us know. We will get back to you as soon as possible. Thanks all!

Replace Default Messaging App in iOS 7 – How To

0
Replace Default Messaging App in iOS 7 – How To

Unlike Android, Apple barely allow users to replace their Default/Stock apps with a third part ones, so the Phone, Messaging and E-Mail apps will remain the same and you will have to stuck with them, Of course if your device is not Jailbroken. Once your device is Jaibroken you can do a lot of things that seems impossible in the first sight on Apple Devices including the replacement of default Messaging app in iOS 7.

BiteSMS-6.0-1

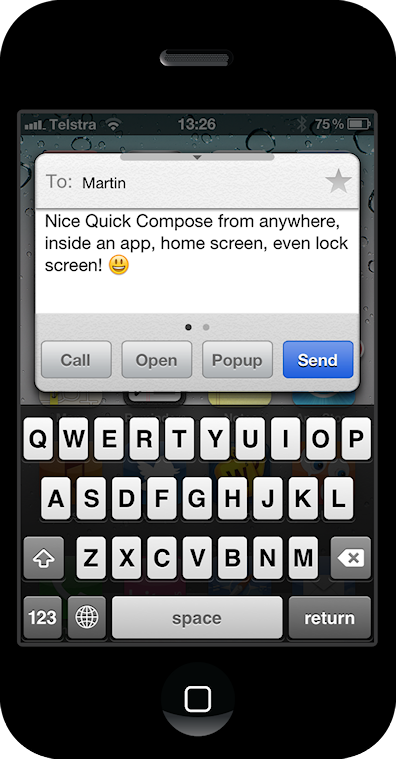
Thanks to BiteSMS and the Team behind it, now users of iOS 7 can replace the Stock Boring Messaging app and use a brand new BiteSMS app, which is of-course only for Jailbroken devices.With tons of new features, including quick reply and quick compose, adding contact pics to the messaging threads, and tons of customization options, it’s worth checking out and the Best Part it is Free.

Jailbreak your iOS Device.

Since the following tutorial needs an iOS device which is Jailbroken, you need to Jailbreak your device. If your device is still in its normal condition. Follow our Jailbreak Section to find out how to Jailbreak your device

Add BiteSMS Repo To Cydia

  1. Open Cydia.
  2. Tap Manage at the Bottom.
  3. Open Sources.
  4. Navigate to Edit at bottom.
  5. Tap on Add on the Left.
  6. Enter the Following in the Text Field, http://test-cydia.bitesms.com, and hit Add Source.
  7. Return to Cydia

Install BiteSMS

  1. Open App Store.
  2. Search for BiteSMS .
  3. Tap BiteSMS  once the search is over.
  4. Tap Install in the top right corner.
  5. Tap Confirm.
  6. Let it install.
  7. Tap Restart.

How To Use BiteSMS

  1. Open BiteSMS from the spot where your Previous messaging app was.
  2. Pull down from the top to get the search bar to open at top
  3. Tap Settings and on the left of Search bar.
  4. Explore the bunch of settings and change them as you like
  5. Enjoy!

Update Xperia Z1 C6906 to Official Android 4.4.2 KitKat 14.3.A.0.681 Firmware

4
Update Xperia Z1 C6906 to Official Android 4.4.2 KitKat 14.3.A.0.681 Firmware

Android 4.4.2 KitKat update is available for Sony’s former flagship device Xperia Z1 and can be installed using Sony PC Companion or through OTA updates, but just in case you’re unable to catch this update in your region, this may cause a little worry and you may not be able to get the latest and greatest version of Android on your Sony Xperia Z1 C6906.

So, to overcome this problem, we’ve made a comprehensive guide that will help you to get Android 4.4.2 KitKat 14.3.A.0.681 firmware running on your Xperia Z1 C6906. The new update comes with performance enhancements, the device is more responsive, multi-tasking has got better. Sony has also improved camera and there is a WiFi data transfer option available in the device, there is a number of other improvements you may find upon installing this latest update. All you need to do is, to move ahead and go through the following step by step guide to get it done successfully.

Pre Requisites:

  1. As mentioned, this firmware is only for Xperia Z1 C6906. Do not try this on any other phone, that may result in bricking your device. Check your device’s model number in Settings > About device.
  2. You must have installed Sony Flashtool. Find the full guide here.
  3. After installing Sony Flashtool, open the Flashtool folder from the drive where you installed it.
  4. Now open Flashtool>Drivers>Flashtool-drivers.exe and install the Flashtool, Fastboot & Xperia Z1 drivers from the list. [Important]
  5. Your phone must be charged at least over 60%. This is highly recommended in order to prevent any power issues during the flashing process.
  6. Enable USB debugging mode on your device. To do so, tap settings>developer options>USB debugging. If you can’t find developer options in settings, then tap settings > about device and tap “Build Number” for 7 times and you’ll get em’ activated under settings.
  7. Make sure that you back up all your important media content,  contactscall logs and text messages. This is highly recommended and important in case something goes wrong during the flashing process or in case you select the data wipe option before flashing. You can easily restore whenever you need.
  8. To flash this firmware, you do not need to root your device, you do not need to unlock the bootloader. All you need is, your device must be the one mentioned and must be running on Android 4.2.2 or 4.3 Jelly Bean.
  9. Download the firmware file properly.
  10. Use the OEM data cable to connect your phone to your PC. Using any other data cable might cause connection problems.
  11. This firmware can be flashed on Xperia Z1 in any region/any country.
  12. Alright! Follow this guide to the letter in order to prevent any mishap.

How to Install Android 4.4.2 KitKat 14.3.A.0.681 on Xperia Z1 C6906:

  1. Before moving forward, please make sure that you’ve read the pre requisites and ensure that you are set to go ahead.
  2. Download the latest firmware Android 4.4.2 KitKat 14.3.A.0.681 FTF file. [Generic – Canada]
  3. Extract the downloaded rar file and you will get the ftf.
  4. Copy the file and paste in Flashtool>Firmwares folder.
  5. Open Flashtool.exe now.
  6. Hit the small lightening button on the top left corner and select Flashmode.
  7. Select the FTF firmware file that you placed in the Firmware folder. 
  8. From the right side, select what do you want to wipe. Data, cache and apps log, all wipes are recommended, however you may select if you don’t want.
  9. Click on OK, and it will start preparing the firmware for flashing. This may take a little while to load.
  10. As soon as the firmware is loaded, it will prompt you to attach the phone by turning it off and keeping the back key press.
  11. For Xperia Z1Volume Down key will do the job of back key, just turn off your phone, keep the Volume Down key pressed and plug in the data cable.
  12. As soon as the phone is detected in Flashmode, the firmware will start flashing, Do not leave the Volume Down key until the process is complete.
  13. As soon as you see “Flashing ended or Finished Flashing” leave the Volume Down key, plug the cable out and reboot.
  14. That’s All! Congrats! You’ve installed latest Android 4.4.2 KitKat on your Xperia Z1 C6906. Enjoy

In case you got any queries or face any problems regarding this guide, please feel free to stop by the comment box below and let us know. We will get back to you as soon as possible. Thanks all!

Quickly Access a Contact From Home-Screen in iOS 7 – How To

0
Quickly Access a Contact From Home-Screen in iOS 7 – How To

There comes a time when you are in a hurry to contact someone but you get late because of finding it form the long list of contacts. I myself have encountered such problem in the past,even though I am using an Android device but I can except iOS users to go through the same problem. What if there is something that allows you to contact directly from the Home-Screen, not all of them but at-least some of them, Worry not for all iOS 7 users the problem has been solved.

QuickContacts

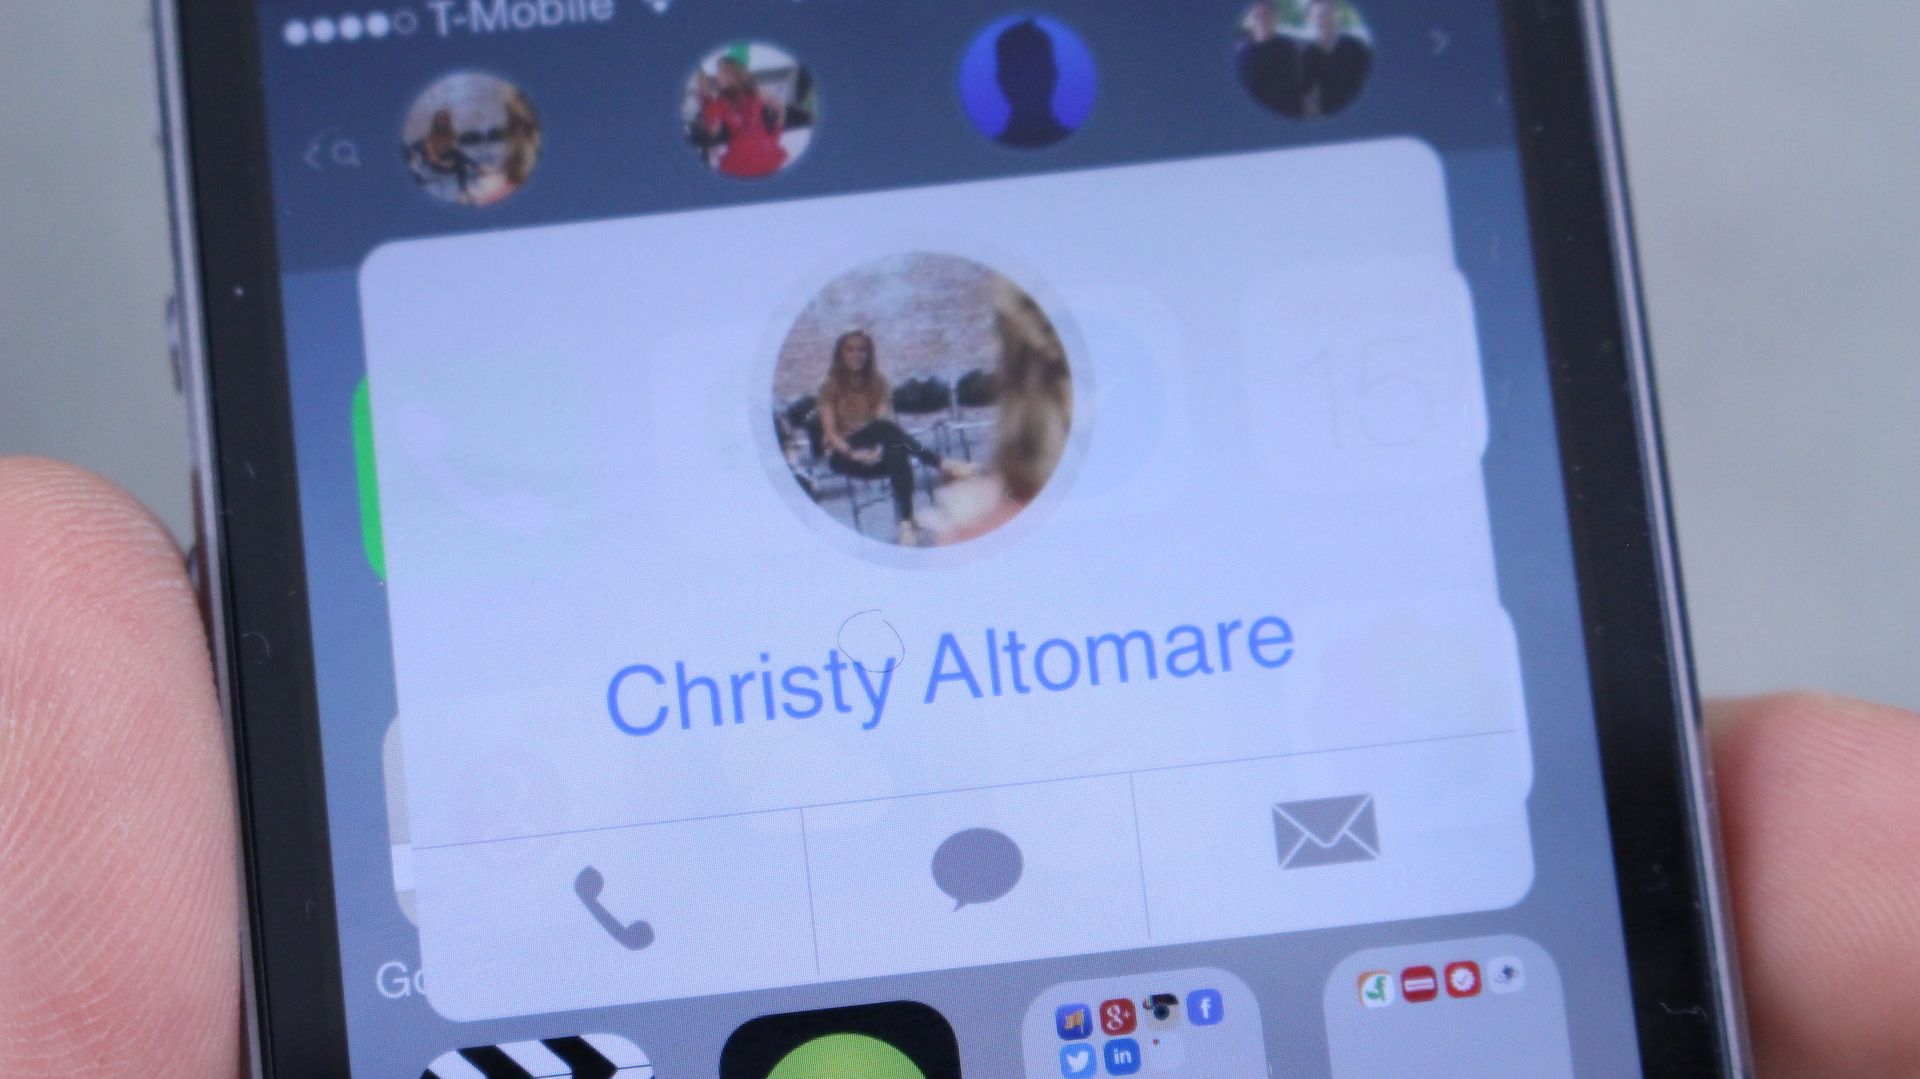
QuickContacts is a jailbreak Tweak for iOS 7 only, that allows you to create a quick access for 4 of your chosen contacts. All you need to do is to Swipe Down on Home-Screen and those 4 contacts will be there for you.After that it’s just two quick taps to either call, message, or email them. Problem solved!Here is how you can install and use it.

Jailbreak your iOS Device.

Since the following tutorial needs an iOS device which is Jailbroken, you need to Jailbreak your device. If your device is still in its normal condition. Follow our Jailbreak Section to find out how to Jailbreak your device

Download QuickContacts:

  1. Open Cydia.
  2. Search for QuickContacts.
  3. Tap QuickContacts once the search is over.
  4. Tap Purchase in the top right corner.
  5. Pay and Close it and then Tap install.
  6. Tap Confirm.
  7. Restart your device

How To Use QuickContacts

  1. Pull down from Home-Screen to show QuickContacts icon.
  2. Tap on any and Select which contact you want.
  3. Tap and hold on an already selected contact to Change it.
  4. Tap their icon to bring up their widget with quick access to Calling, Texting, or Emailing them.
  5. Enjoy!

Update Sony Xperia Z1 C6903 to Official Android 4.4.2 KitKat 14.3.A.0.681 Firmware

1
Update Sony Xperia Z1 C6903 to Official Android 4.4.2 KitKat 14.3.A.0.681 Firmware

The good news is here for all Xperia Z1 owners! Sony has finally started rolling out Android 4.4.2 KitKat 14.3.A.0.681 firmware update for it’s former flagship devices along with some of it’s siblings as well. The new update packs up camera enhancements, performance enhancements, bug fixes, WiFi data transfer and a lot more. As you all know about that official updates roll out depending on the regions specifically and it may take a long time to hit your region. This may become pain in vein if you’re an Android Enthusiast who always loves to get hands on the latest and greatest firmware of Android as soon as it rolls out.

So, while you’re impatient to get KitKat on your Xperia Z1 and the update is not seeing your way anytime soon, you may be a little worried but we’ve cooked up the solution to your problem already here. In the following post we’re going to install latest Android 4.4.2 KitKat based on the build number 14.3.A.0.681 on Sony Xperia Z1 C6903. All you need to do is to move forward and follow this step by step guide to get it running on your device successfully.

Pre Requisites:

    1. As mentioned, this firmware is only for Xperia Z1 C6903. Do not try this on any other phone, that may result in bricking your device. Check your device’s model number in Settings > About device.
    2. You must have installed Sony Flashtool. Find the full guide here.
    3. After installing Sony Flashtool, open the Flashtool folder from the drive where you installed it.
    4. Now open Flashtool>Drivers>Flashtool-drivers.exe and install the Flashtool, Fastboot & Xperia Z1 drivers from the list. [Important]
    5. Your phone must be charged at least over 60%. This is highly recommended in order to prevent any power issues during the flashing process.
    6. Enable USB debugging mode on your device. To do so, tap settings>developer options>USB debugging. If you can’t find developer options in settings, then tap settings > about device and tap “Build Number” for 7 times and you’ll get em’ activated under settings.
    7. Make sure that you back up all your important media content,  contacts, call logs and text messages. This is highly recommended and important in case something goes wrong during the flashing process or in case you select the data wipe option before flashing. You can easily restore whenever you need.
    8. To flash this firmware, you do not need to root your device, you do not need to unlock the bootloader. All you need is, your device must be the one mentioned and must be running on Android 4.2.2 or 4.3 Jelly Bean.
    9. Download the firmware file properly.
    10. Use the OEM data cable to connect your phone to your PC. Using any other data cable might cause connection problems.
    11. This firmware can be flashed on Xperia Z1 in any region/any country.
    12. Alright! Follow this guide to the letter in order to prevent any mishap.

Xperia-Z1_14.3.A.0.681_1-315x560

How to Install Android 4.4.2 KitKat 14.3.A.0.681 on Xperia Z1 C6903:

    1. Before moving forward, please make sure that you’ve read the pre requisites and ensure that you are set to go ahead.
    2. Download the latest firmware Android 4.4.2 KitKat 14.3.A.0.681 FTF file: Link 1 | Link 2 | Link 3
    3. Copy the file and paste in Flashtool>Firmwares folder.
    4. Open Flashtool.exe now.
    5. Hit the small lightening button on the top left corner and select Flashmode.
    6. Select the FTF firmware file that you placed in the Firmware folder. 
    7. From the right side, select what do you want to wipe. Data, cache and apps log, all wipes are recommended, perhaps you may select if you don’t want.
    8. Click on OK, and it will start preparing the firmware for flashing. This may take a little while to load.
    9. As soon as the firmware is loaded, it will prompt you to attach the phone by turning it off and keeping the back key press.
    10. For Xperia Z1Volume Down key will do the job of back key, just turn off your phone, keep the Volume Down key pressed and plug in the data cable.
    11. As soon as the phone is detected in Flashmode, the firmware will start flashing, Do not leave the Volume Down key until the process is complete.
    12. As soon as you see “Flashing ended or Finished Flashing” leave the Volume Down key, plug the cable out and reboot.
    13. That’s All! Congrats! You’ve installed latest Android 4.4.2 KitKat on your Xperia Z1 C6903. Enjoy

Also Checkout:

In case you got any queries or face any problems regarding this guide, please feel free to stop by the comment box below and let us know. We will get back to you as soon as possible. Thanks all!

Make iOS 7 Lockscreen More Functional – How To

0
Make iOS 7 Lockscreen More Functional – How To

There was an app called IntelliscreenX, that was way to popular in iOS 6 and all those who updated their iOS version to iOS 7 or bought the iOS 7 device after iOS 6 they must have known about it and they must have realized how important and awesome that app was. What this app generally do is that it gives you more functions on your iOS lockscreen/Control Center than a normal one. If your device is Jailbroken then get ready to install this app on your device.

Screenshot_2

 This tweak that allows you to replace your lockscreen and you control center with a more function option that has feeds from your different social networks, email or RSS, has come to iOS 7. Along with them you can also add some other ticker-like features and a new app switcher and some other bonus features. Without further ado, let’s get to the installation process and then how to use it.

Jailbreak your iOS Device.

Since the following tutorial needs an iOS device which is Jailbroken, you need to Jailbreak your device. If yourdevice is still in its normal condition. Follow our Jailbreak Section to find out how to Jailbreak your device

Download IntelliscreenX:

  1. Open Cydia.
  2. Search for IntelliscreenX.
  3. Tap IntelliscreenX once the search is over.
  4. Tap installin the top right corner.
  5. Tap Confirm.
  6. Restart your device

How To Use IntelliscreenX

  1. Navigate To Settings.
  2. Tap IntelliscreenX
  3. Add your Social Feeds you want to display or edit them so they can’t be displayed.
  4. Change the other options as you pleased
  5. Enjoy

Change The Entire UI of iOS 7 With NextGenUI – How To

0
Change The Entire UI of iOS 7 With NextGenUI – How To

Last time we posted an Article about Springtimezone that Customizes the UI of iOS 7, today we would like to share another whole new level in Customizing the UI of iOS 7, not just Customizing, this app will transform the Entire UI of iOS 7. This new app will transform your home-screen with a new “futuristic” Home-Screen, it give you a layer of Background that you can see part and the rest as you scroll on, in which you can add “nodes” to, these nodes can be apps, folder of apps etc.

NextGenUI

This app which is called NextGenUI is available at Cydia Store, installing which will requires a Jailbroken device. NextGenUI will cost only $2.99, which is not a big problem for Apple fans and those who deliberately owns an iOS device will love it that they will almost erase the sadness of paying the money. Here is how you can install and use it.

Jailbreak your iOS Device.

Since the following tutorial needs an iOS device which is Jailbroken, you need to Jailbreak your device. If your device is still in its normal condition. Follow our Jailbreak Section to find out how to Jailbreak your device

Download NextGenUI:

  1. Open Cydia.
  2. Search for NextGenUI.
  3. Tap NextGenUI once the search is over.
  4. Tap Purchase in the top right corner.
  5. Pay and Close it and then Tap install.
  6. Tap Confirm.
  7. Restart your device

How To Use NextGenUI

  1. Go To Settings.
  2. Tap NextGenUI.
  3. Enable it.
  4. Choose the settings appear beneath it and change it to how you like it.
  5. Tap Respring
  6. Enjoy!

Make Text Selection Even Easier In iOS 7 – How To

0
Make Text Selection Even Easier In iOS 7 – How To

We should all be thankful to that person, who invented that instead of deleting the whole line, we can remove the letter or the word and replace it with the correct one. But now on Smartphones, everyone hates the Auto-Correct and on the other side everyone hates to alternate the words while writing a Text, especially when it comes to Replace the position of the word, the selection is quite difficult. But there is a way you can make the selection easier, if you have a Jailbroken device.

Easier-to-Select-Text

SwipeSelection is an app that helps you in this matter as it takes away the current way of selecting text and change it with a real simple way. It will work on almost every app which contains or wherever Text is concern, like any Note keeping app or Texting app like Messaging, Facebook Messenger even in Facebook itself.

Jailbreak your iOS Device.

Since the following tutorial needs an iOS device which is Jailbroken, you need to Jailbreak your device. If your device is still in its normal condition. Follow our Jailbreak Section to find out how to Jailbreak your device

Download SwipeSelection:

  1. Open Cydia.
  2. Search for SwipeSelection.
  3. Tap SwipeSelection once the search is over.
  4. Tap Install in the top right corner.
  5. Tap Confirm.
  6. Restart your device

How To Use SwipeSelection

  1. Swipe along the keyboard keys to move the cursor within text.
  2. Hold Shift on the keyboard with one finger
  3. Then move along the keyboard keys with the other to highlight text