Home Blog Page 450

20 Awesome Windows 7 Themes

0
20 Awesome Windows 7 Themes

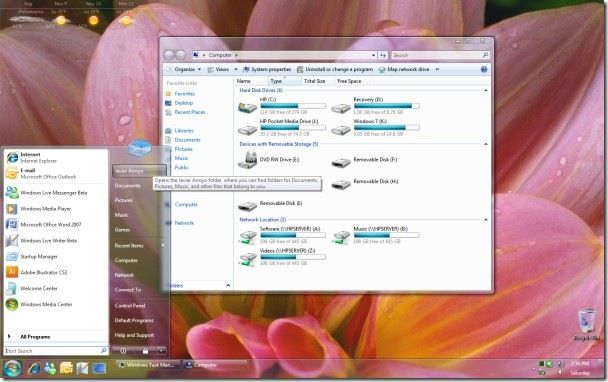
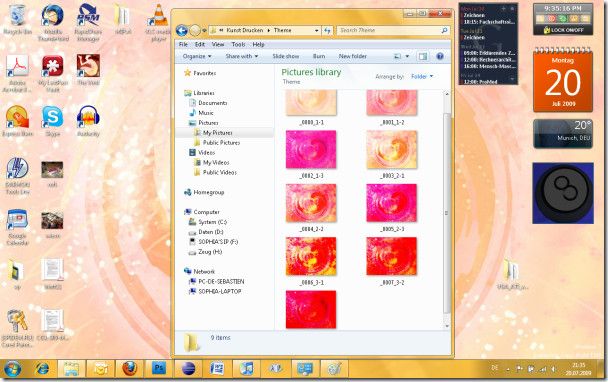
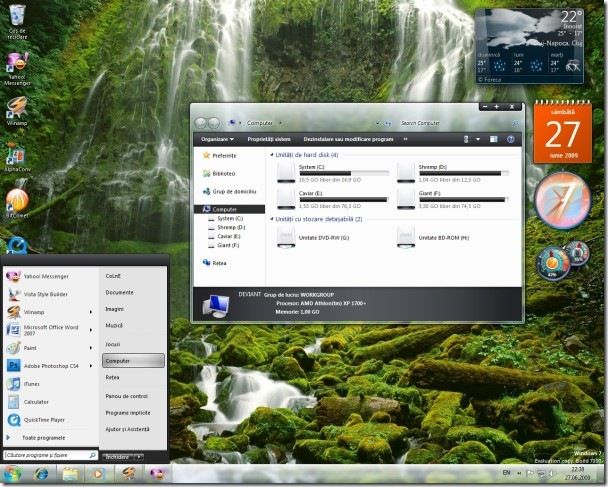
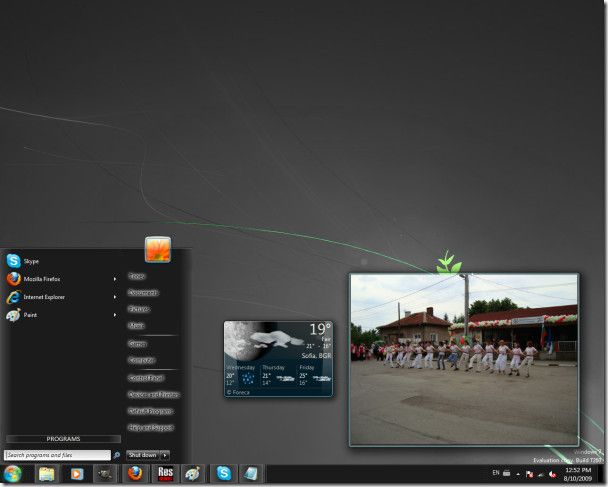
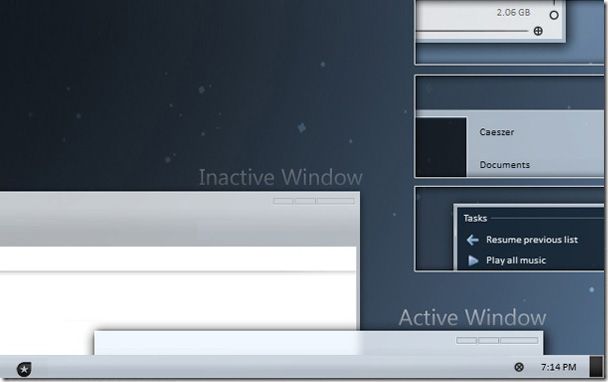
Windows 7 is one of the first best GUI by Microsoft and it gave hell of a boost to the market. I prefer Windows 7 over Windows 8 because it’s easy to use, Windows 8 came out with the new interface which most of people don’t prefer as user friendly. Even, from developer’s point of view Windows 7 is the best. I’ve posted many HD Wallpapers for Windows 7 but today, I’ve collected 20 Awesome Windows 7 Themes. You can download all these awesome Windows 7 themes make your PC/Laptop look more cool and stylish.

7Pro Final For 7

7Pro-Final-for-Windows-7-Theme

Adagio Theme For Windows 7

Adagio-Theme-for-Windows-7

Aero Diamond For Windows 7

Aero_Diamond_for_Windows_7_x64

AeroLighting For Windows 7

Aerosnap_7_Theme_by_Freak180

Alternative For Windows 7

Alternative_for_Windows_7_RC

Desk 09 With New Windows 7

Desk_09_with_New_Windows_7_OS

Heart Windows 7 Theme

Heart_Windows_7_Theme

Lumens For Windows 7

Lumens_for_Windows_7

Macos X For Windows 7

Macos-X-Theme-for-Windows-7

OnlyBlack Windows 7

OnlyBlack_Windows_7_RC_theme

Purity 7 Windows 7

Purity-7-Windows-7-Theme1

Shine 2.0 For Windows 7

Shine-2.0-Windows-7-Theme

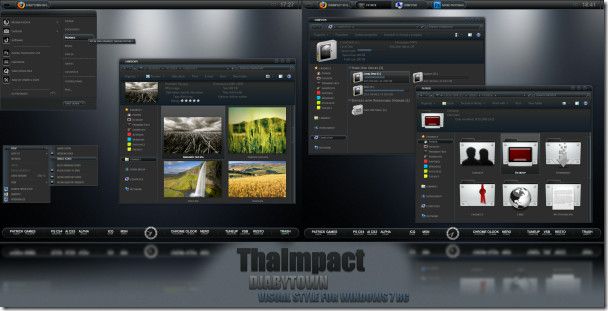
ThaImpact VS For Windows 7

ThaImpact_VS_for_Windows_7_RC

Theme For Winodws 7

Theme_For_Winodws_7

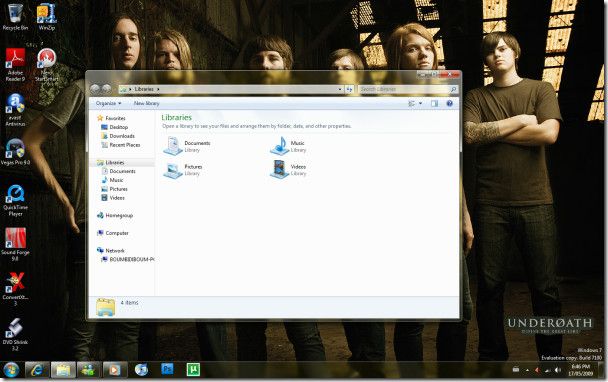
Underoath Theme For Windows 7

Underoath_Theme_for_Windows_7

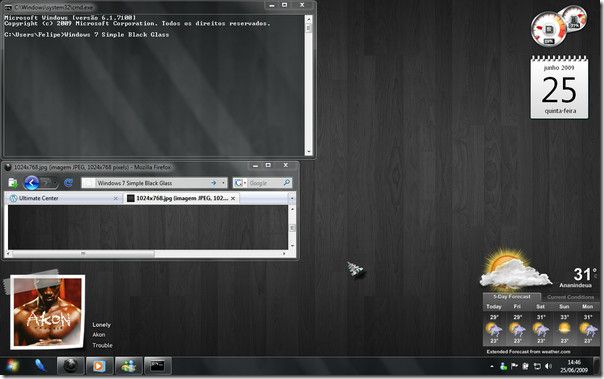
Windows 7 Simple Black Glass

Windows_7_Simple_Black_Glass

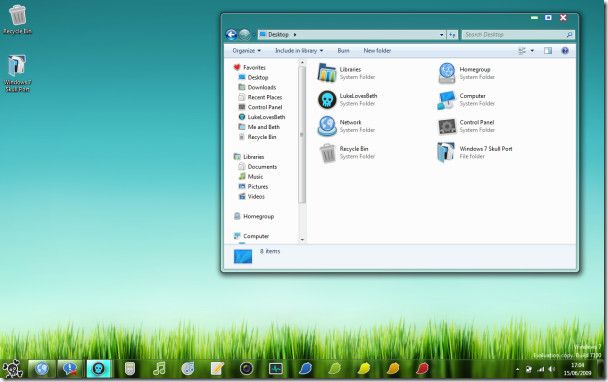
Windows 7 Skull Visual Style

Windows_7_Skull_Visual_Style

Windows7 Black Transparent

Windows7_Black_Transparent

Woodstock Windows 7 Theme

Woodstock_Windows_7_Theme

Quickly Switch Back and Forth Between Two Apps in iPhone

0
Quickly Switch Back and Forth Between Two Apps in iPhone

Windows users must have been familiar with Alt + Tab combination to switch between open programs within seconds, this feature really comes in handy if you hate touch pads in your Laptop, which personally I really do. Using this feature you can minimize the apps which are not responding and much more. But this feature is limited to Windows PC’s only, however, you can also use this type of feature on your iPhone if it is Jailbroken.

Flipflop is a Jailbreak tweak, that brings Alt + Tab functionality on your iPhone by means of a handy activator action. This tweak can be assigned to any available Activator gesture and developers stated the Home Button as to be the best one for the job. If you are looking for fast and quick switching between app, Flipflop is the thing you are looking for. After installing, the tweak is pre-configured, you don’t need to do anything to configure it. Once activated, all you need is to press the Home button and the desired action will be in front of you. You will have the choice to open any other app or minimize to Home Screen.

Screenshot_2

Jailbreak your iOS Device.

Since the following tutorial needs an iOS device which is Jailbroken, you need to Jailbreak your device. If your device is still in its normal condition. Follow our Jailbreak Section to find out how to Jailbreak your device.

Download Flipflop:

flipflop-Activator

  1. Open Cydia.
  2. Search for Flipflop .
  3. Tap Flipflop once the search is over.
  4. Tap Install on the top right corner.
  5. Tap Confirm.
  6. Restart your Device.

How To Update HTC One SV to Android 4.2.2 via ViperSV Custom ROM

5
How To Update HTC One SV to Android 4.2.2 via ViperSV Custom ROM

Team Venom has been presenting us with one of the most beautiful ROMs ever to be stepped onto the world of Customization. ViperS is available for a lot of devices, from flagship to low end devices and it is filled with huge bundle of features, stable and not to mention it also generates a decent battery life. HTC One SV doesn’t have much Custom ROMs available on the web and especially which are official, and some of them have been discontinued by the developer and you can’t even find their Download links. However, ViperSV is still active and ready to roll but you might need to do a little preparations before installing this ROM. If you are interested in Other ROMs, you can Visit our Custom ROMs section or you can install this ROM on your HTC One SV by following our tutorial below. This is not an official release from HTC but a Custom ROM, you need to install a Custom Recovery on your device to install this and also your device must be rooted.

hub screens 2

But why would anyone go for a Custom ROM instead of staying on the Stock On, allow me to explain. “Stock and Official ROMs are good, but they are created with keeping in mind the demands of all, some wants performance and some wants speed, some want looks and some want features. Putting them altogether in one ROM can cause a Lag, performance issues and bugs. But Custom ROM is basically designed for either Looks or Performance and Custom ROM gives speed and great performance with Tweaks and System Tools.”

In this Article,  we will show you How To Update HTC One SV to Android 4.2.2 via ViperSV Custom ROM. But before we begin, Make sure:

  1. That you have a Well Charged Battery, 60%-80% is better.
  2. Back-Up all your important ContactsCall Logs & Messages.It is highly recommended in case of any mishap or data loss to back up all your important data.
  3. Back-Up your Mobiles EFS Data.
  4. Check your device model, Go To Setting > About and Make sure that it is HTC One SV
  5. Do not try it on any other device.
  6. Enable USB Debugging Mode
  7. Download USB Driver For HTC Devices: Link
  8. Bootloader Must Be Unlocked: How To Unlock Bootloader of HTC Devices
  9. Root Your Device: Root HTC One SV and Install Recovery

Disclaimer:

The methods involved in flashing custom ROMs and rooting your phone is highly custom which may result in bricking of your device,and it has nothing to do with Google or the device manufacturers which is HTC in our case. In case of any mishap we may not be held responsible. Follow these instructions to the letter to avoid any mishap or bricking. Make sure that whatever you do, you are doing it at your own responsibility.

Downloads Required:

  1. Download Android 4.2.2 ViperSV ROM: Link

How To Install It.

  • Download ViperSV ROM and Google Apps  from the Above link
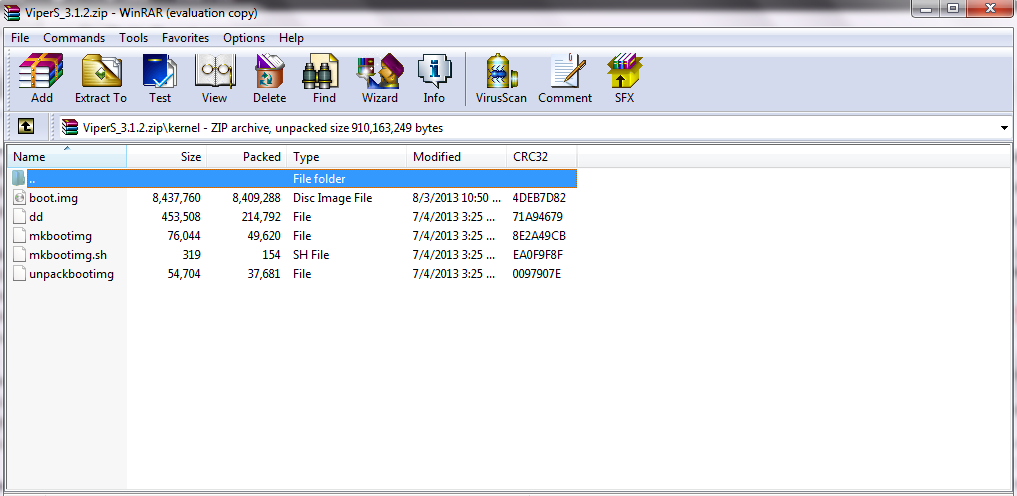
  • Extract the ViperSV.zip file and either in Kernal Folder or in the Main Folder there is a file called boot.img.

Screenshot_3

  •  Copy and paste the boot.img to the Fastboot Folder.
  • Now copy and paste the Zip files to the root of your SD card.
  • Turn off your phone and open Bootloader/Fastboot mode. How? Press and hold Volume Down + Power button until you see some text on screen.
  • Now Open Command prompt in Fastboot Folder, How? Hold Shift Key and Right Click anywhere in the Fastboot folder.

Screenshot_17

  • Now type in the following command: fastboot flash boot boot.img Press Enter.

Screenshot_1

  • Then type in the following command: fastboot reboot.

Screenshot_2

  • After the reboot, take out the battery and wait for at least 10 seconds.
  • Then re-insert the battery and enter Bootloader mode. How? Press and hold Power + Volume Down button till you see some text on screen, From bootloader select Recovery.

CWM/PhilZ Recovery:

  • First Choose ‘Wipe Cache’.
  • Then Navigate to ‘advance’ and choose ‘Devlik Wipe Cache’ so you won’t get in any bootloop.
  • Then Finally Choose Wipe Data/Factory Reset.
  • Navigate to ‘Install zip from sd card’ another windows will open in front of you.
  • Select ‘choose zip from sd card’ from the Options.
  • Select the file ViperSV.zip and confirm the installation on next screen.
  • Once both files are flashed, Select +++++Go Back+++++
  • Select Reboot Now to Reboot the System.

TWRP Recovery:

  • Tap on Wipe Button and Select Cache, System, Data.
  • Swipe the Confirmation Slider.
  • Go back to Main Menu and Tap Install Button.
  • Locate the ViperSV.zip, Swipe the Slider To install it.
  • Once the Installation is Over, you will promoted to Reboot System Now
  • Select Reboot Now to Reboot the System..

Voila! that’s it, your HTC One SV is now upgraded to ViperSV Android 4.2.2 Custom ROM, to check Go-to settings> About > Software Version

How To Root and Install CWM Recovery On HTC One SV

1
How To Root and Install CWM Recovery On HTC One SV

Now, I can assure that you won’t be able to find much about HTC One SV, especially about rooting and Custom recovery.  They will only give you the One click Root method which doesn’t work at all, while Framaroot on the other hand also gives up in such cases. All that left now, is to do everything manually which simply means finding and installing/flashing all on your own. What you need now is a Flashable SuperSU.zip file and CWM recovery image file. Since, HTC has officially stated that they won’t release Android 4.2.2 Jelly Bean for HTC One SV. To directly jump for Android 4.4.2 whose update, which you can get from Custom ROMS only, also we will be keeping  you updated with that too, till then just root your device and install custom recovery on it.

Rooting allows you to get full control over your device, Stock apps and mods are good, but installing Custom Mods gives you better support and great battery life. You might need to delete some Stock apps from the device as well which a non-rooted device can’t do, but a rooted one has the power to remove stock apps too. In this Article, we will show you How To Root and Install CWM Recovery On HTC One SV.

Screenshot_7

But before we begin, Make sure that:

  1. That you have a Well Charged Battery, 60%-80% is better.
  2. Back-Up all your important ContactsCall Logs & Messages.It is highly recommended in case of any mishap or data loss to back up all your important data.
  3. Back-Up your Mobiles EFS Data.
  4. Check your device model, Go To Setting > About and Make sure that it is HTC One SV
  5. Do-not try this tutorial on any other device.
  6. Enable USB Debugging Mode
  7. Download USB Driver For HTC Devices: Link
  8. Bootloader Must Be Unlocked: Link
  9. Fastboot/ADB Must be configured: Link

Downloads Required:

Download CWM RecoveryLink 

Download Super SU: Link

How To Install CWM Recovery On HTC One SV

  1. Download the CWM Recovery Image and paste it in the Fastboot folder
  2. Now Open Command prompt in Fastboot Folder.  How? Hold Shift Key and Right Click anywhere in the Fastboot folder.
  3. Connect your Device with PC.
  4. Enter adb reboot bootloader and press Enter, now your device is in Fastboot/Bootloader Mode
  5. Now Type fastboot flash recovery recovery.img to flash the CWM Recovery on your device
  6. Type fastboot reboot, to reboot your device
  7. After a proper reboot, your device will be running CWM Recovery

How To Root HTC One SV

  • Download and Copy the Super SU to the Root of your SDcard.
  • Connect your Device to PC
  • In Command Window, type: adb reboot recovery, to boot your device in recovery mode
  • Navigate to ‘Install zip from SDcard’ another windows will open in front of you.
  • Select ‘choose zip from sd card’ from the Options.
  • Select the Super SU.zip file and confirm the installation on next screen.
  • Once the Installation is Over, Select +++++Go Back+++++.
  • Select Reboot Now to Reboot the System.

That’s it! your HTC One SV  has been Rooted. Download any Root Checker app or See Super SU in app Drawer to Verify root access.

Tap Anywhere On The Screen To Take Photo With MinimalCamera

0
Tap Anywhere On The Screen To Take Photo With MinimalCamera

Since the time, when Apple forced everyone to update their devices to iOS 7, they’ve made several other changes to their Camera app, the main reason why iPhone 5s camera was considered to be a lot better than many other devices. While there are those who just keep praising Apple updates, even there are those too who just don’t want to use Apple default applications, including the camera app and then there are those who just use the cam to take straightforward photos without focusing here and there, for both of these people, MinimalCamera is the best app.

MinimalCamera erases the Capture button and gives you the option to take photos by tapping anywhere on the screen within the camera app, making capturing faster but also taking away the touch Focus feature which is something not acceptable by those who use the Camera frequently. After installing this tweak, at first nothing will change, but once you’ve discovered the Guide to use this app in settings and go back to the tweak, tapping on the screen will magically fade the Buttons.

Screenshot_5

Jailbreak your iOS Device.

Since the following tutorial needs an iOS device which is Jailbroken, you need to Jailbreak your device. If your device is still in its normal condition. Follow our Jailbreak Section to find out how to Jailbreak your device.

Downlaod MinimalCamera:

BosTANcIAAEtoEf

  1. Open Cydia.
  2. Search for MinimalCamera.
  3. Tap MinimalCamera once the search is over.
  4. Tap Install on the top right corner.
  5. Tap Confirm.
  6. Restart your Device.

Add Emergency Information to Lock-Screen with InCaseOf Jailbreak Tweak

0
Add Emergency Information to Lock-Screen with InCaseOf Jailbreak Tweak

Well, let’s hope that none of us gets in any such situations in which we have to use this, but life is unpredictable, no one knows what will happen next. You are good till you are in your home, or with those friends who has the Contact numbers of your Family, however, not all the time you are with your friends, in such times you need something that can be used to contact your close ones, simply means an emergency call or message and especially with speed, you can’t just rely on opening the app or dialer to contact.

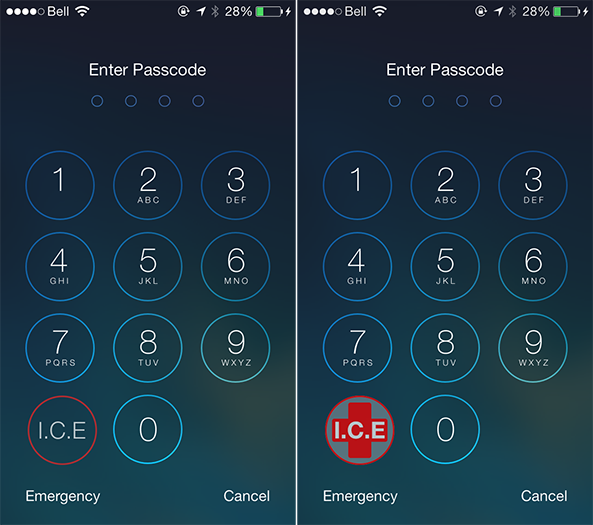
InCaseOf is a Jailbreak tweak, that helps you in bringing the emergency info on the Lock-Screen, so in case of emergency you don’t have to unlock the device and contact anyone. Once you enabled this tweak, it will add an ICE button to your Lock-Screen dialer, where a password protected iPhone becomes useless, this ICE button will let the person knows about you without opening the device, some data includes name, address, date of birth, blood type, medical history and emergency contact information.

You can go to the settings to configure this app. While setting an emergency contact, you will have to provide the Number for that person too. The person can tap the Gree Circular button at the bottom of the tweak to call that person without opening the device. The tweak is still in its beta condition, making any comments on it is useless and because of its bets version is totally free.

Screenshot_5

Jailbreak your iOS Device.

Since the following tutorial needs an iOS device which is Jailbroken, you need to Jailbreak your device. If your device is still in its normal condition. Follow our Jailbreak Section to find out how to Jailbreak your device.

Downlaod InCaseOf:

InCaseOf-Lock-Screen

  1. Open Cydia.
  2. Search for InCaseOf.
  3. Tap InCaseOf once the search is over.
  4. Tap Install on the top right corner.
  5. Tap Confirm.
  6. Restart your Device.

Easily Get The iOS 6 Keyboard on iOS 7, 7.1

0
Easily Get The iOS 6 Keyboard on iOS 7, 7.1

Personally I didn’t like iOS 7 keyboard, and so I started searching how to get iOS 6 keyboard back on iOS 7. After a long search, I have finally found a way to get old iOS 6 classic keyboard on iOS 7. You can easily replace your stock iOS 7 keyboard with iOS 6 keyboard. Thanks to Ryan Petrich, the most influential developer in the Jailbreak world. Ok now let’s start the process ” How to get iOS 6 Keyboard on iOS 7, 7.1 “.

DSC_0471


How To Easily Get The iOS 6 Keyboard on iOS 7, 7.1 :


  • First your device must be Jailbroken.
  • To Jailbreak Your device try our [ Jailbreak Guides ]
  • Now goto Cydia on your iPhone or iPad.
  • Open Mange tab and select Sources.
  • After selecting sources tap on edit [ on your screen right top ]
  • After tapping the edit no tap on Add located on your top left corner.
  • Now add the repo [ http://rpetri.ch/repo ] and tap Add Source.
  • Wait for installation to completed.
  • Now go to search tab in Cydia.
  • Writer Vintage Keys and search.
  • Now after finding the vintagekeys install it.
  • Wait for installation to be completed.
  • Now restart the spring board.
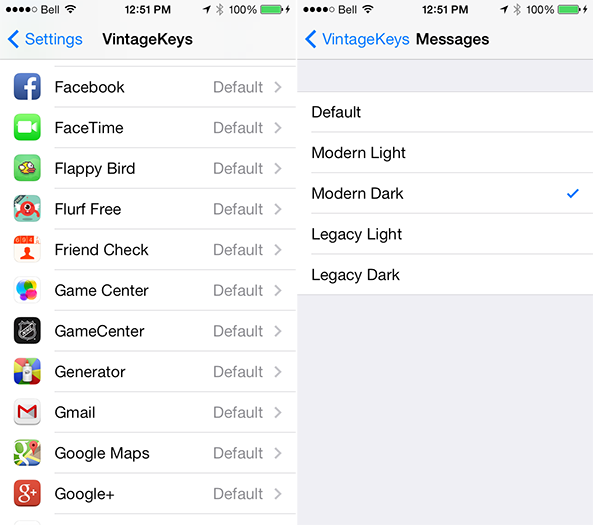
  • After your device is rebooted go to settings and find Vintage Keys.
  • Tap on it now you’ll see all your apps on whom you use keyboard.
  • Now tap on messaging app, you’ll get 5 option select legacy light.


Here you go you have iOS 6 keyboard on your iOS 7, Enjoy!

Want To Switch Back To Old iOS 6 Keyboard, Try VintageKeys.

0
Want To Switch Back To Old iOS 6 Keyboard, Try VintageKeys.

One of the most accomplished Jailbreak Developer, Ryan Petrich, is spreading some of the amazing ideas in the Jailbreak community. He is responsible for creating many brilliant Jailbreak tweaks, including his latest release, or I might have heard about it a little bit late, VintageKeys, an extension which allows you to adjust your keyboard styling in your device. You have four choices here, modern light, modern dark, legacy light and legacy dark.

Thought that iOS 7 keyboard is accepted by many users and it has been accustomed to over the past year, yet those who wants to try different things again and again, will even switch to old school. VintageKeys also have a classic appearance of iOS 6 and earlier. However, a Custom keyboard can’t be system wide at such points, you have to go to the settings and choose which keyboard you want for which app. VintageKeys supports both 3rd party and stock apps, so you won’t have to worry about compatibility. One thing, you have to respring your device and switching between classic and old style requires to kill and restart the app every time.

Screenshot_5

Jailbreak your iOS Device.

Since the following tutorial needs an iOS device which is Jailbroken, you need to Jailbreak your device. If your device is still in its normal condition. Follow our Jailbreak Section to find out how to Jailbreak your device.

Download VintageKeys:

VintageKeys1

  1. Open Cydia.
  2. Search for VintageKeys.
  3. Tap VintageKeys once the search is over.
  4. Tap Install on the top right corner.
  5. Tap Confirm.
  6. Restart your Device.

LG G3 HD Wallpapers – Download Here

0
LG G3 HD Wallpapers – Download Here

LG launched the new flagship yesterday and there is no doubt LG G3 is a beast in performance as well in Display. LG G3 comes with Android 4.4.2, 13MP with Optical Image Stabilization, Snapdragon 801, quad-core Krait 400 at 2.5GHz, 16GB/32GB built-in and 3,000mAh Battery. So with this high definition display you need HD wallpapers for LG G3. And so I’ve collected few for you all, do check them out.

LG-G-Pro-2-wallpapers

wallpaper_01

wallpaper_02-631x560

wallpaper_08

lg g3 hd wallpapers

lg g3 wallpapes 

How To Clear, Disable and Enable Auto-Complete Feature in Outlook 2013

0
How To Clear, Disable and Enable Auto-Complete Feature in Outlook 2013

One thing that I never liked in the old smartphones was the Manual inserting of Contacts or Mail etc. and even in this modern era of automatism, if you have to put things manually is quite tiresome. Outlook 2013 features Auto-Complete, like in Facebook if you write the first letter of the name, you’ll see a lot of results to choose from, but in Outlook 2013 if you type the first letter of the Mail, the whole address is written automatically without typing further even though you have sent an E-Mail to the same contact once.

This features is lively and used well by many, but sometimes when you need to send e-mails to new contacts and don’t want to be interrupted by the pop-up, you need to either disable it or clear it. Or for some reason it has been disabled and you want to enable it, as it is quite easy from the exact same place from where you had disabled it.

1_zps38f1bd1e

How To Enable, Disable and Clear Auto-Complete in Outlook 2013.

autocomplete-list-option

  1. Click File on the Top Menu.
  2. Click Options.
  3. In the next Menu, Find Mail and Click it.
  4. This section is filled with tons of features, scroll down till you find a section called Send Messages.
  5. If you want to Enable the Auto-complete option, Simply Tick Use Auto-Complete List to suggest names when typing in the To, Cc and Bcc lines.
  6. And If you want to disable it, simply un-tick it.
  7. Search the same section a little more till you find the Option Empty Auto-Complete List and if you want a fresh start simply click this button.

Top 7 Free Data Recovery Software

0
Top 7 Free Data Recovery Software

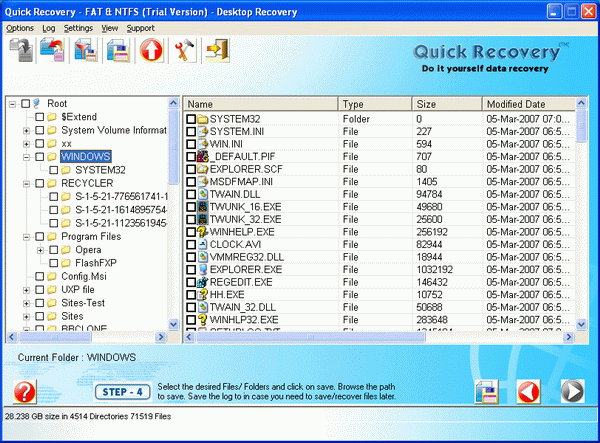
In today’s modern era, technology is almost everywhere we use laptops, mobiles, tablets, Computers and Macbooks for work as well as for the entertainment. But there was an issue of  losing and recovering data, which came along with all these technological stuff but with the help of” Data Recovery ” it doesn’t matter if we lose data on smartphones or computers. Data recovery issue remains and every one wants to find a Free Data Recovery Software. So today I have collected Top 7 Free Data Recovery Softwares for all of your enjoy.

Well, if we do a routine backup or upload our important files to online storage services like Dropbox, Box, Google Drive and many more, then we don’t need such kind of recovery software.

unistal_data_recovery_software-49561

Top 7 Free Data Recovery Software:

Following are the top best Free Data Recovery Software most of these Softwares are for Windows. I’ll be adding Data Recovery  softwares for Mac, Smartphones and tablets.

Before Starting:

  • Stop using the drive from which you want to recover the data.
  • Don’t install or extract software on same hard you want to recover data from.
  • After recovering the files don’t save them on same drive.

1. Recuva

7ecovery-recuva

Using Recuva you can easily recover files from FAT, NTFS drives. It can easily recover files emptied from the Recycle bin and also from Digital cameras, memory cards and Mp3 players.

Download Recuva

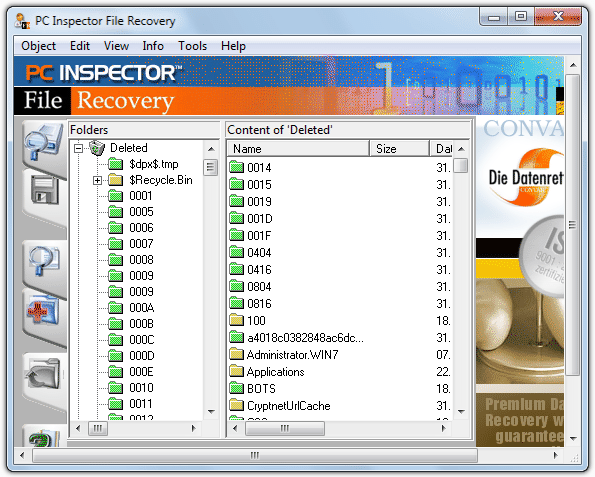
2. PC Inspector File Recovery

7recovery-pcinspector

Download PC INSPECTOR File Recovery

3. Puran File Recovery

puran-file-recovery

Download Puran File Recovery

4. LazeSoft Data Recovery Home/Free

lazesoftdatarecovery

Download LazeSoft Data Recovery Home/Free

5. Wise Data Recovery

7recovery-wise

Download Wise Data Recovery

6. SoftPerfect File Recovery

7recovery-softperfect

Download SoftPerfect File Recovery

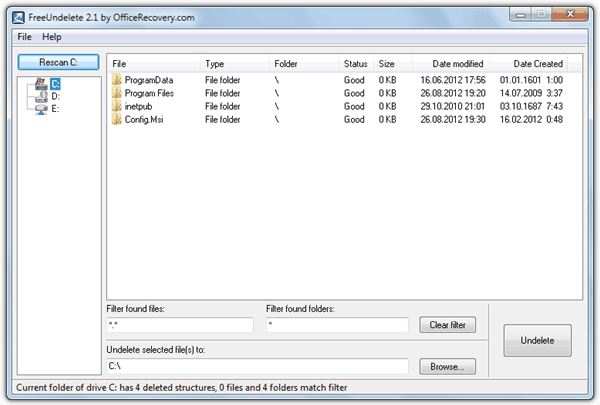
7. FreeUndelete

7recovery-freeundelete

Download FreeUndelete

How To Use Spotify As The Default Music Player in iPhone

0
How To Use Spotify As The Default Music Player in iPhone

Spotify is the biggest Music Database with more than 40 Million active users all around the world, despite that it is only available in some of the countries, still there are some ways to use Spotify out of those countries, while there are those who don’t want to use wrong ways to use this app, there are those who can Enjoy this Service as a default Music Player in their Jailbroken devices. All you need to download a simple Extension and you are all good to go.

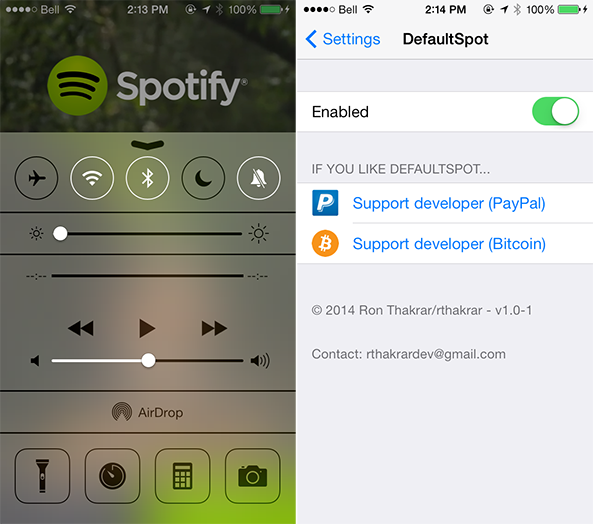
DefaultSpot is a Jailbreak tweak that does the job, but it will work only for those who have an Apple ID that is made in USA or the country in it is set as USA and as they have advertized it, it actually works like the same. When the Stock Music App is not in used, just  a single tap on the Play button from anywhere in your Phone will trigger the Spotify to work as your default Music Player. The tweak is totally free and you can download it after adding the Bigboss repos.

Screenshot_5

Jailbreak your iOS Device.

Since the following tutorial needs an iOS device which is Jailbroken, you need to Jailbreak your device. If your device is still in its normal condition. Follow our Jailbreak Section to find out how to Jailbreak your device.

Download DefaultSpot:

Spotify-DefaultSpot

  1. Open Cydia.
  2. Search for DefaultSpot.
  3. Tap DefaultSpot once the search is over.
  4. Purchase the app and wait for the Install button to appear
  5. Tap Install on the top right corner.
  6. Tap Confirm.
  7. Restart your Device.
  8. One thing you must keep in mind, that if you have already installed SmartClose Tweak, uninstall it for no bugs in this one