Home Blog Page 439

How To Root Sony Xperia TX LT29i running 9.2.A.1.215 Firmware [Locked/Unlocked BL]

2
How To Root Sony Xperia TX LT29i running 9.2.A.1.215 Firmware [Locked/Unlocked BL]

Xperia TX’s latest firmware is on a slow roll out at the moment. The core firmware is Android 4.3 Jelly Bean, while the build number has been changed to 9.2.A.1.215. There are minor bug fixes, performance enhancements and some other updates packed inside this latest OS. If you’ve already updated your Sony Xperia TX and now you’re looking for a method to gain root access on your device running this latest firmware, you’ve spotted the right place then.

In the following post we are going to root Sony Xperia TX LT29i running Android 4.3 Jelly Bean 9.2.A.1.215 firmware without touching the bootloader of the device. We will be using XDA Dev GeoHot’s Towelroot application, that is capable of rooting a number of Android devices without any requirements or rules. You only need to follow this guide carefully and get it done successfully.Root Xperia TX .215 Firmware

Here are the early preparations:

      1. This guide is only for Sony Xperia TX LT29i running latest Android 4.3 Jelly Bean 9.2.A.1.215 firmware.
      2. Make sure that your phone’s battery is charged at least over 60%. This is highly recommended in order to prevent any power issues during the rooting process.
      3. USB debugging mode must be enabled on your device. To do so, go to Settings > Developer Options > USB debugging mode > Enable. In case you can’t find the developer options, then go to Settings > About Device > Tap Build Number for 7 Times to enable the developer options.
      4. Use only on OEM data cable to establish connection between your PC and your Phone.
      5. Allow “Unknown Sources” on your phone. To do so,  go to Settings > Security > Unknown Sources > Tick.

How To Root Sony Xperia TX LT29i running 9.2.A.1.215 Firmware [Locked/Unlocked Bootloader]

        1. Download Towelroot apk.
        2. Connect your Xperia to your PC now.
        3. Copy the downloaded APK file to your device.
        4. Disconnect your device and locate the APK file on it.
        5. Tap the APK file to begin installation.
        6. Select “Package Installer” if prompted.
        7. Allow Unknown Sources from Settings > Security if required.
        8. Proceed with the installation and complete it.
        9. Now open the Towelroot application from the app drawer.
        10. Tap the button “make it ra1n” in the towelroot app.
        11. Now download SuperSu.zip file.
        12. Unzip the file, and grap Superuser.apk from the common folder in the unzipped folder.
        13. Now copy this apk to your Xperia, and install it using steps 2 – 8.
        14. Once installed, update Superuser or SuperSu using Google Play Store.
        15. Phewwww! That’s all, you can now enjoy your rooted Xperia TX.

TowelRoot-Verizon-At&t-SGS5

How to install busybox now?

      1. Go to Google Play Store on your phone.
      2. Search for “Busybox Installter”.
      3. Once you find it, install it.
      4. Run the Busybox installer and proceed with the installation.
      5. That’s all!

How to check if the device is properly rooted or not?

      1. To do so, go to Google Play Store on your Xperia.
      2. Find “Root Checker” and install it.
      3. Open Root Checker.
      4. Tap “Verify Root”.
      5. It will ask you for SuperSu rights, tap “Grant”.
      6. It should show you Root Access Verified Now!
      7. That’s All!

1560688_10202529514651766_2061540064_n


What to do once you’re rooted?

Rooting your phone gives you complete access over all the data which is apparently locked by the manufacturers. This includes removal of the factory restrictions and making changes to the internal system and the operating system. Gaining the root access gives you the privileges to install various applications to enhance the performance of your device, allows you to remove the built-in applications/programs, helps you to upgrade the battery life of your device & install the apps which require the root access for the proper functionality and modify your device in so many other ways e.g using mods and flashing custom recoveries and custom ROMs. Here’s our collection of 10 Best Root Apps.

That’s all. Please consider a donation to the developer for his hardwork on this application. Just in case you got any queries or you face any difficulties regarding this post, feel free to reach us through the comment box below. We will try our best to help you out.

How To Root Sony Xperia V LT25i 9.2.A.2.5 Firmware [Locked/Unlocked BL]

10
How To Root Sony Xperia V LT25i 9.2.A.2.5 Firmware [Locked/Unlocked BL]

Have you updated your Xperia V LT25i to the latest Android 4.3 Jelly Bean firmware based on build number 9.2.A.2.5? Well, if so, you might be looking out for a method to break the jails on this latest firmware and make your Xperia V fly high, and that too keeping the bootloader of your device safe and secure, unlike the traditional root methods.

In case you’re wondering how can you do so,  you need to calm yourself for a while and scroll down this post as we are going to root Xperia V LT25i running latest Android 4.3 Jelly Bean 9.2.A.2.5 firmware. We will be using GeoHot’s Towelroot, a very nice little application capable of rooting a number of applications based on an exploit. All you need is, you need to follow this guide carefully in order to get it done successfully.Sony-Xperia-V

Here are the early preparations:

      1. This guide is only for SonyXperia V LT25i running latest Android 4.3 Jelly Bean 9.2.A.2.5 firmware.
      2. Make sure that your phone’s battery is charged at least over 60%. This is highly recommended in order to prevent any power issues during the rooting process.
      3. USB debugging mode must be enabled on your device. To do so, go to Settings > Developer Options > USB debugging mode > Enable. In case you can’t find the developer options, then go to Settings > About Device > Tap Build Number for 7 Times to enable the developer options.
      4. Use only on OEM data cable to establish connection between your PC and your Phone.
      5. Allow “Unknown Sources” on your phone. To do so,  go to Settings > Security > Unknown Sources > Tick.

How To Root Sony Xperia V LT25i running 9.2.A.2.5 Firmware with Locked Bootloader:

      1. Download Towelroot apk.
      2. Connect your Xperia to your PC now.
      3. Copy the downloaded APK file to your device.
      4. Disconnect your device and locate the APK file on it.
      5. Tap the APK file to begin installation.
      6. Select “Package Installer” if prompted.
      7. Allow Unknown Sources from Settings > Security if required.
      8. Proceed with the installation and complete it.
      9. Now open the Towelroot application from the app drawer.
      10. Tap the button “make it ra1n” in the towelroot app.
      11. Now download SuperSu.zip file.
      12. Unzip the file, and grap Superuser.apk from the common folder in the unzipped folder.
      13. Now copy this apk to your Xperia, and install it using steps 2 – 8.
      14. Once installed, update Superuser or SuperSu using Google Play Store.
      15. Phewwww! That’s all, you can now enjoy your rooted Xperia.

TowelRoot-Verizon-At&t-SGS5

How to install busybox now?

      1. Go to Google Play Store on your phone.
      2. Search for “Busybox Installter”.
      3. Once you find it, install it.
      4. Run the Busybox installer and proceed with the installation.
      5. That’s all!

How to check if the device is properly rooted or not?

      1. To do so, go to Google Play Store on your Xperia.
      2. Find “Root Checker” and install it.
      3. Open Root Checker.
      4. Tap “Verify Root”.
      5. It will ask you for SuperSu rights, tap “Grant”.
      6. It should show you Root Access Verified Now!
      7. That’s All!

1560688_10202529514651766_2061540064_n


What to do once you’re rooted?

Rooting your phone gives you complete access over all the data which is apparently locked by the manufacturers. This includes removal of the factory restrictions and making changes to the internal system and the operating system. Gaining the root access gives you the privileges to install various applications to enhance the performance of your device, allows you to remove the built-in applications/programs, helps you to upgrade the battery life of your device & install the apps which require the root access for the proper functionality and modify your device in so many other ways e.g using mods and flashing custom recoveries and custom ROMs. Here’s our collection of 10 Best Root Apps.

That’s all. Please consider a donation to the developer for his hardwork on this application. Just in case you got any queries or you face any difficulties regarding this post, feel free to reach us through the comment box below. We will try our best to help you out.

Update Sony Xperia TX LT29i to Official Android 4.3 Jelly Bean 9.2.A.1.215 Firmware

0
Update Sony Xperia TX LT29i to Official Android 4.3 Jelly Bean 9.2.A.1.215 Firmware

Xperia TX received a new update few days back, the core OS is Android 4.3 and there’s a change in the build number, which now is changed to 9.2.A.1.215. This update hasn’t been listed on Sony’s site yet, but we believe that sooner or later it will as the update has been received and reported by some users. Changes aren’t known yet, but there surely are performance enhancements, bug fixes and better battery life besides a new kernel and new baseband version.

As this update isn’t on a major roll out, many of the Sony Xperia TX owners might be wondering how they can get it on their device. As off now, the only method that can help you to update your device is to do it manually. Before you start looking here and there for a comprehensive guide, we’ve already done this job for you. As you scroll down, you will be able to update your Sony Xperia TX to Android 4.3 Jelly Bean 9.2.A.1.215 firmware using the Sony Flashtool. This firmware is official, you don’t need to worry about anything, nor you need to follow any hard and fast rules. Just go ahead and get it done.xperia-tx

Here are some important installation instructions:

      1. This guide is only for Sony Xperia TX LT29i. Please check your device model first in Settings > About Device > Model.
      2. You must have installed Sony Flashtool – Get the full guide here. Also Install drivers using Flashtool > Drivers > Flashtool-drivers > Flashtool, Xperia TX, Fastboot, select all these and install.
      3. Your phone’s battery must be charged at least over 60%. This is highly recommended in order to prevent any power issues during the process.
      4. Flashing this firmware will wipe all your apps, apps data, system data, contacts, call logs & messages. It will not wipe the internal storage (media) data. Proceed after you’ve backed up, in the next step the guides are linked in.
      5. Make sure that you backup your media content,contactscall logs and text messages.  This is important and recommended so that in case you decide to wipe your phone during the flashing process, you can get all of your data back using the backup.
      6. Enable USB debugging mode on your device. To do so, tap settings>developer options>USB debugging. If you can’t find developer options in settings, then tap settings > about device and tap “Build Number” for 7 times and you’ll get em’ activated under settings.
      7. To flash this firmware, you do not need to root your device, you do not need to unlock the bootloader. All you need is, your device must be the one mentioned and must be running on Android 4.2.2 or 4.3 Jelly Bean.
      8. Download the firmware file properly.
      9. Use the OEM data cable to connect your phone to your PC. Using any other data cable might cause connection problems.
      10. You need enough confidence to perform this custom method.
      11. Alright! Follow this guide to the letter in order to prevent any mishap.

How to Install Android 4.3 9.2.A.1.215 Official Firmware on Xperia TX LT29i:

      1. Download Stock Android 4.3 Jelly Bean 9.2.A.1.215 Firmware for Xperia TX LT29i Link 1 | Link 2 [Unbranded / Generic ]
      2. Copy the file and paste in Flashtool>Firmwares folder.
      3. Open Flashtool.exe now.
      4. Hit the small lightening button on the top left corner and select Flashmode.
      5. Select the FTF firmware file that you placed in the Firmware folder.
      6. From the right side, select what do you want to wipe. Data, cache and apps log, all wipes are recommended, perhaps you may select if you don’t want.
      7. Click on OK, and it will start preparing the firmware for flashing. This may take a little while to load.
      8. As soon as the firmware is loaded, it will prompt you to attach the phone by turning it off and keeping the back key press.
      9. For Xperia TX LT29iVolume Down key will do the job of back key, just turn off your phone, keep the Volume Down key pressed and plug in the data cable.
      10. As soon as the phone is detected in Flashmode, the firmware will start flashing, Do not leave the Volume Down key until the process is complete.
      11. As soon as you see “Flashing ended or Finished Flashing” leave the Volume Down key, plug the cable out and reboot.
      12. That’s All! Congrats! You’ve installed latest Android 4.3 Jelly Bean on your Xperia TX Enjoy.

That’s All! In case you got any queries/suggestions or face any difficulties regarding this post, please feel free to stop by the comment box below and drop us your message. We will respond as quick as we can.

FTF Credits

Update Sony Xperia V LT25i to Official Android 4.3 Jelly Bean 9.2.A.2.5 Firmware

2
Update Sony Xperia V LT25i to Official Android 4.3 Jelly Bean 9.2.A.2.5 Firmware

Sony released a new firmware for Xperia V, the Android 4.3 Jelly Bean based on build number 9.2.A.2.5 a few days ago. The new firmware packs up minor bug fixes, the user experience has been enhanced and the OS of the device is even more smooth now. Besides this, the battery performance of Xperia V is way better after getting this update. As usual, this update is on a slow roll out through Sony PC Companion or through OTA and will reach different regions around the world on its time, but if you happen to be an Android enthusiast and you can’t wait for the OTA to reach you, you may be looking out for something helpful at the moment, and that’s what exactly we are here for.

We will be installing Android 4.3 Jelly Bean 9.2.A.2.5 firmware on Sony Xperia V LT25i manually using the Sony Flashtool in a while. The firmware is official, you do not need to worry about anything, nor you need to make any tweaks to your device. All you need to do for now is to read this guide carefully and update your device to the latest firmware without any hiccups here and there.Xperia V 9.2.A.2.5 Firmware

Here are some important installation instructions:

      1. This guide is only for Sony Xperia V LT25i. Please check your device model first in Settings > About Device > Model.
      2. You must have installed Sony Flashtool – Get the full guide here. Also Install drivers using Flashtool > Drivers > Flashtool-drivers > Flashmode, Xperia V, Fastboot, select all these and install.
      3. Your phone’s battery must be charged at least over 60%. This is highly recommended in order to prevent any power issues during the process.
      4. Flashing this firmware will wipe all your apps, apps data, system data, contacts, call logs & messages. It will not wipe the internal storage (media) data. Proceed after you’ve backed up, in the next step the guides are linked in.
      5. Make sure that you backup your media content,contactscall logs and text messages.  This is important and recommended so that in case you decide to wipe your phone during the flashing process, you can get all of your data back using the backup.
      6. Enable USB debugging mode on your device. To do so, tap settings>developer options>USB debugging. If you can’t find developer options in settings, then tap settings > about device and tap “Build Number” for 7 times and you’ll get em’ activated under settings.
      7. To flash this firmware, you do not need to root your device, you do not need to unlock the bootloader. All you need is, your device must be the one mentioned and must be running on Android 4.2.2 or 4.3 Jelly Bean.
      8. Download the firmware file properly.
      9. Use the OEM data cable to connect your phone to your PC. Using any other data cable might cause connection problems.
      10. You need enough confidence to perform this custom method.
      11. Alright! Follow this guide to the letter in order to prevent any mishap.

How to Install Android 4.3 9.2.A.2.5 Official Firmware on Xperia V LT25i:

      1. Download Stock Android 4.3 Jelly Bean 9.2.A.2.5 Firmware for Xperia V LT25i [Unbranded / Generic ]
      2. Copy the file and paste in Flashtool>Firmwares folder.
      3. Open Flashtool.exe now.
      4. Hit the small lightening button on the top left corner and select Flashmode.
      5. Select the FTF firmware file that you placed in the Firmware folder. 
      6. From the right side, select what do you want to wipe. Data, cache and apps log, all wipes are recommended, perhaps you may select if you don’t want.
      7. Click on OK, and it will start preparing the firmware for flashing. This may take a little while to load.
      8. As soon as the firmware is loaded, it will prompt you to attach the phone by turning it off and keeping the back key press.
      9. For Xperia V LT25iVolume Down key will do the job of back key, just turn off your phone, keep the Volume Down key pressed and plug in the data cable.
      10. As soon as the phone is detected in Flashmode, the firmware will start flashing, Do not leave the Volume Down key until the process is complete.
      11. As soon as you see “Flashing ended or Finished Flashing” leave the Volume Down key, plug the cable out and reboot.
      12. That’s All! Congrats! You’ve installed latest Android 4.3 Jelly Bean on your Xperia V Enjoy.

That’s all. In case you got any queries, feel free to stop by the comment box below and let us know about it. We will get back to you as soon as possible. Thank you all.

Skater Boy For PC (Windows 7, 8, XP, Vista and Mac)

0
Skater Boy For PC (Windows 7, 8, XP, Vista and Mac)

Android platform is full of games and some of them are so brilliantly composed that no matter what happens, you will play it even if you hate it many times while in the Gameplay. Like Flappy bird, people have destroyed their mobile phones while playing the game, yet they are still playing it and getting angry. While, there are other difficult games available on this platform and some are those that are way too easy to play, however some games are only there to just have fun and Skater Boy is one of them. The Game revolves around a boy Skating through a lot of different obstacles. However, unlike a usual skater boy, this one has to jump through a lot of obstacles and also has to show some tricks throughout they way. This game is available for both Android and iOS, but you can also play this on PC, just follow our guide and skate along.

Screenshot_12

Also See: Dead Trigger 2 For PC

Features Of Skater Boy:

  • Simple and Clear Pictures.

  • Detailed Animation.

  • 3 Different Terrains.

  • More than 90 Addictive and Cool Levels.

  • Amazing and Mind-blowing Tricks

  • More Levels on the Way

Also See: Retrcia for PC

How to Download and Install Skater Boy On PC:

  1. Running Android apps on PC is possible through an App Player / Android Emulator only. To do this, we recommend BlueStacks. Follow the full guide here and install it on your PC.
  2. Download Skater Boy  file to your PC.
  3. Once downloaded, go to the downloaded file location.
  4. Double click the downloaded APK file now.
  5. Wait for the installation to get complete with BlueStacks.
  6. Once it complete, open BlueStacks now.
  7. Click on “All Apps” in the BlueStacks now and click on the app that you just installed.
  8. Use the app by following the on-screen instructions.
  9. That’s All! Enjoy!

How To Jailbreak iOS 7.1.2 Untethered On iPhone, iPad, iPod touch

0
How To Jailbreak iOS 7.1.2 Untethered On iPhone, iPad, iPod touch

Few days back, we’ve posted How To Jailbreak iOS 7.1.1 and 7.1 Untethered On iPhone, iPad, iPod touch using Pangu. Just today Apple rolled out iOS 7.1.2 and the good news is that you don’t have to wait for iOS 7.1.2 Untethered Jailbreak because it is already here. You can Jailbreak your iPhone, iPad and iPod Touch using the same tool Pangu. It has been confirmed and is 100% working on iOS 7.1.2, so those who have updated their devices on iOS 7.1.2, can now Jailbreak their devices with a single click.

Screenshot_5


Also See: Jailbreak iOS 7.1.1 and 7.1 untethered

Compatible devices:

  • iPhone 5s
  • iPhone 5c
  • iPhone 5
  • iPhone 4s
  • iPhone 4
  • iPad Air
  • Retina iPad mini
  • iPad mini
  • iPad 4, 3, 2
  • iPod touch 5

How to jailbreak iOS 7.1.2 untethered using Pangu:

Pangu1

Step 1: Download Pangu for Windows and Mac.

Step 2: Now connect your device with iTunes and backup everything before proceeding.

Step 3: After backing up your iPhone, Open Pangu Jailbreak tool.

Step 4: Now your device is connected with Pangu click on Jailbreak button.

Step 5: When you click on Jailbreak button, you’ll have to change your time and date too ( 2nd, June 2014, and time to 20:30 ).

Step 6: After performing the date and time change task. Your device will reboot.

Step 7: Once rebooting is done you’ll see Pangu logo on your device display now tap it.

Step 8: Now all you’ve to do is follow all the steps by click on ” Continue “. Wait for whole process to be completed.

All done, you’ve successfully Jailbroken your device using Pangu tool. You can easily perform these steps on your device those are running iOS 7.1.2.

How To Root Sony Xperia Z1 C6902/C6903/C6906/C6943 14.4.A.0.108 Firmware [Locked Bootloader]

46
How To Root Sony Xperia Z1 C6902/C6903/C6906/C6943 14.4.A.0.108 Firmware [Locked Bootloader]

Have you updated your Sony Xperia Z1 to the latest Android 4.4.4 KitKat firmware that Sony just rolled out few days back? Well if so, and if you happen to be an Android enthusiast, its time to get root access on your Xperia Z1 having this latest firmware with the .108 firmware.

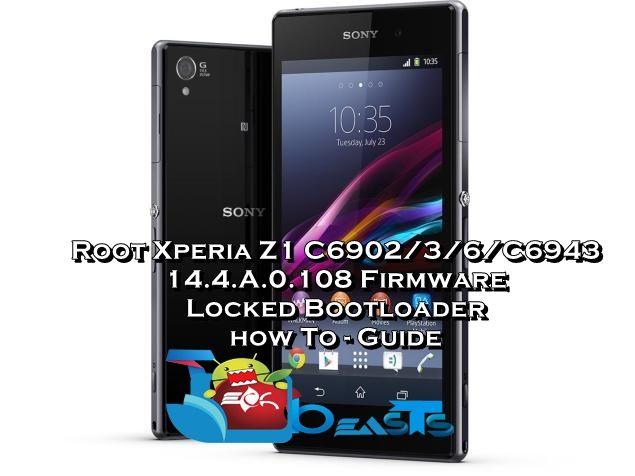
To make it easier for you, we will be rooting Sony Xperia Z1 C6902, C6903, C6906 and C6943 running latest Android 4.4.4 KitKat firmware based on the build number 14.4.A.0.108. You just need to be careful while following this guide in order to gain the root access successfully.94201383907PM_635_sony-xperia-z1

Here are the early preparations:

  1. This guide is only for Sony Xperia Z1 C6902, C6903, C6906 and C6943 running 14.4.A.0.108 firmware.
  2. Install Sony’s USB drivers from here.
  3. Make sure that your phone’s battery is charged at least over 60%. This is highly recommended in order to prevent any power issues during the rooting process.
  4. USB debugging mode must be enabled on your device. To do so, go to Settings > Developer Options > USB debugging mode > Enable. In case you can’t find the developer options, then go to Settings > About Device > Tap Build Number for 7 Times to enable the developer options.
  5. Use only on OEM data cable to establish connection between your PC and your Phone.
  6. Allow “Unknown Sources” on your phone. To do so,  go to Settings > Security > Unknown Sources > Tick.

How To Root Sony Sony Xperia Z1 running 14.4.A.0.108 Firmware [Bootloader Locked]:

  1. Download the EasyRoot Tool.zip file
  2. Extract the file to get the install.bat file.
  3. Connect your Xperia Z1 to your PC now.
  4. Run the install.bat file.
  5. Follow the on-screen instructions now and get it done.
  6. That’s All! You’re rooted now.

How to install busybox now?

  1. Go to Google Play Store on your phone.
  2. Search for “Busybox Installter”.
  3. Once you find it, install it.
  4. Run the Busybox installer and proceed with the installation.
  5. That’s all!

How to check if the device is properly rooted or not?

  1. To do so, go to Google Play Store on your Xperia.
  2. Find “Root Checker” and install it.
  3. Open Root Checker.
  4. Tap “Verify Root”.
  5. It will ask you for SuperSu rights, tap “Grant”.
  6. It should show you Root Access Verified Now!
  7. That’s All!

1560688_10202529514651766_2061540064_n


What to do once you’re rooted?

Rooting your phone gives you complete access over all the data which is apparently locked by the manufacturers. This includes removal of the factory restrictions and making changes to the internal system and the operating system. Gaining the root access gives you the privileges to install various applications to enhance the performance of your device, allows you to remove the built-in applications/programs, helps you to upgrade the battery life of your device & install the apps which require the root access for the proper functionality and modify your device in so many other ways e.g using mods and flashing custom recoveries and custom ROMs. Here’s our collection of 10 Best Root Apps.

That’s all, Just in case you got any queries or you face any difficulties regarding this post, feel free to reach us through the comment box below. We will try our best to help you out.

How To Root Sony Xperia Z Ultra C6802/C6806/C6833 14.4.A.0.108 Firmware [Locked Bootloader]

16
How To Root Sony Xperia Z Ultra C6802/C6806/C6833 14.4.A.0.108 Firmware [Locked Bootloader]

Latest firmware for Sony Xperia Z Ultra with the build number 14.4.A.0.108 based on Android 4.4.4 KitKat is now being rolled out to the users slowly in different regions through Sony PC Companion and OTA. If you’ve received this update or you have manually updated your Xperia Z Ultra to this latest firmware, you might be looking out for a method to root your device now. Before you start wondering here and there, we’ve already done this job for you as we’ve found a working method that let’s you root your Xperia Z Ultra without unlocking the bootloader.

As you move forward, you will find a detailed guide to root your Sony Xperia Z Ultra C6802, C6806 and C6833 running Android 4.4.4 KitKat 14.4.A.0.108 firmware. Make sure that you follow all the steps carefully in order to get the root access successfully.

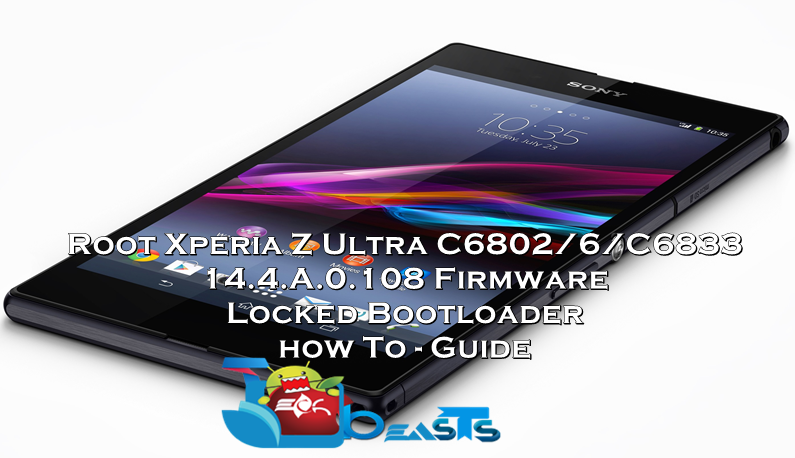
Root Xperia Z Ultra 14.4.A.0.108

Here are the early preparations:

  1. This guide is only for Xperia Z Ultra C6802/C6803/C6833 running 14.4.A.0.108 firmware.
  2. Install Sony’s USB drivers from here.
  3. Make sure that your phone’s battery is charged at least over 60%. This is highly recommended in order to prevent any power issues during the rooting process.
  4. USB debugging mode must be enabled on your device. To do so, go to Settings > Developer Options > USB debugging mode > Enable. In case you can’t find the developer options, then go to Settings > About Device > Tap Build Number for 7 Times to enable the developer options.
  5. Use only on OEM data cable to establish connection between your PC and your Phone.
  6. Allow “Unknown Sources” on your phone. To do so,  go to Settings > Security > Unknown Sources > Tick.

How To Root Sony Xperia Z Ultra running 14.4.A.0.108 Firmware [Bootloader Locked]:

  1. Download the EasyRoot Tool V7.zip file
  2. Extract the file to get the install.bat file.
  3. Connect your Xperia Z Ultra  to your PC now.
  4. Run the install.bat file.
  5. Follow the on-screen instructions now and get it done.
  6. That’s All! You’re rooted now.

How to install busybox now?

  1. Go to Google Play Store on your phone.
  2. Search for “Busybox Installter”.
  3. Once you find it, install it.
  4. Run the Busybox installer and proceed with the installation.
  5. That’s all!

How to check if the device is properly rooted or not?

  1. To do so, go to Google Play Store on your Xperia.
  2. Find “Root Checker” and install it.
  3. Open Root Checker.
  4. Tap “Verify Root”.
  5. It will ask you for SuperSu rights, tap “Grant”.
  6. It should show you Root Access Verified Now!
  7. That’s All!

1560688_10202529514651766_2061540064_n


What to do once you’re rooted?

Rooting your phone gives you complete access over all the data which is apparently locked by the manufacturers. This includes removal of the factory restrictions and making changes to the internal system and the operating system. Gaining the root access gives you the privileges to install various applications to enhance the performance of your device, allows you to remove the built-in applications/programs, helps you to upgrade the battery life of your device & install the apps which require the root access for the proper functionality and modify your device in so many other ways e.g using mods and flashing custom recoveries and custom ROMs. Here’s our collection of 10 Best Root Apps.

That’s all, Just in case you got any queries or you face any difficulties regarding this post, feel free to reach us through the comment box below. We will try our best to help you out.

Flappy Bird: New Season for PC (Windows 8, 7, XP, Vista and Mac)

0
Flappy Bird: New Season for PC (Windows 8, 7, XP, Vista and Mac)

Flappy Bird was the most famous app but short lived, when the developer took it down from both of the PlayStores. After that many developers tried cloning the same app, but none of them has succeeded so far. Few days back we were checking some of the new games in Appstore, and what we came across was a very new game just like Flappy Bird, ” Flappy Bird: New Season “.
Music Paradise has created a perfect clone of the real Flappy Bird, everything is the exact same nothing is different at all. So, we thought of playing it on PC, firstly we used Bluestacks but as Flappy Bird: New Season is not available on Google Play, it couldn’t be installed on PC. But no need to worry, you can install it through iPadian and play Flappy Bird: New Season on PC. 

Also See: Boom Beach for PC

Flappy Bird- New Season for PC

How To Play Flappy Bird: New Season on PC:

[How to play] 

> Tap to flap your wings to fly. 
> Avoid pipes. 
> Try to get 4 medals: Bronze, Silver, Gold (hard), Platinum (very hard).

Also See: 2048 for pc

Download Flappy Bird: New Season for PC ( Windows and Mac ):

The apps on Android Play Store are easy to use on PC because you can use BlueStacks for them, Flappy Bird: New Season is only available on iOS AppStore that’s why you’ve to use iPadian app Emulator.

  1. First download iPadian app Emulator on your PC.
  2. After installing the iPadian on your PC, open it and go to search bar write Flappy Bird: New Season.
  3. Once you have found the right app click on and select install. It will take take few seconds to complete the installation.
  4. Once done, now you can play Flappy Bird: New Season.

Also See: Flappy Bird for pc 

How To Update Sony Xperia Z1 C6902/C6906 To Official Android 4.4.4 KitKat 14.4.A.0.108 Firmware

29
How To Update Sony Xperia Z1 C6902/C6906 To Official Android 4.4.4 KitKat 14.4.A.0.108 Firmware

Sony has been doing pretty much a great job with the software updates. It isn’t been long since Google rolled out Android 4.4.4 KitKat, and Sony didn’t take a while to pick it up and roll out for its mainstream devices. The latest firmware, Android 4.4.4 KitKat based on the build number 14.4.A.0.108 is now being rolled out to Sony Xperia Z1, Z1 Compact, Z Ultra. The update is on a slow roll out, and reaching the different regions through OTA or through Sony PC Companion.

If you’re Xperia Z1 owner, specifically C6902 or C6903 owner, and you’ve been looking for a way to get your device to this latest firmware and the update hasn’t reached your end through PC Companion or OTA, you might be in need of a manual method and that’s what exactly we are here for. We are going to update Sony Xperia Z1 C6902/C6906 to Official Android 4.4.4 KitKat firmware with the build 14.4.A.0.108 using the Sony Flashtool. There aren’t any hard and fast rules to follow as this is the complete stock, and official firmware. All you need is, you need to follow each and every single step explained in this guide carefully.Xperia Z1 Android 4.4.4 KitKat

Early Preparations:

  1. As mentioned, this firmware is only for Xperia Z1 C6902 and C6906. Do not try this on any other phone, that may result in bricking your device. Check your device’s model number in Settings > About device.
  2. You must have installed Sony Flashtool. Find the full guide here.
  3. After installing Sony Flashtool, open the Flashtool folder from the drive where you installed it.
  4. Now open Flashtool>Drivers>Flashtool-drivers.exe and install the Flashtool, Fastboot & Xperia Z1 drivers from the list. [Important]
  5. Your phone must be charged at least over 60%. This is highly recommended in order to prevent any power issues during the flashing process.
  6. Enable USB debugging mode on your device. To do so, tap settings>developer options>USB debugging. If you can’t find developer options in settings, then tap settings > about device and tap “Build Number” for 7 times and you’ll get em’ activated under settings.
  7. Make sure that you back up all your important media content,  contactscall logs and text messages. This is highly recommended and important in case something goes wrong during the flashing process or in case you select the data wipe option before flashing. You can easily restore whenever you need.
  8. To flash this firmware, you do not need to root your device, you do not need to unlock the bootloader. All you need is, your device must be the one mentioned and must be running on Android 4.2.2 or 4.3 Jelly Bean.
  9. Download the firmware file properly.
  10. Use the OEM data cable to connect your phone to your PC. Using any other data cable might cause connection problems.
  11. This firmware can be flashed on Xperia Z1 in any region/any country.
  12. Alright! Follow this guide to the letter in order to prevent any mishap.

Xperia Z1 C6903 owners may use this guide.

Here’s how you can update your Xperia Z1 C6902/C6906 to official 14.4.A.0.108 Android 4.4.4 KitKat firmware:

  1. Before moving forward, please make sure that you’ve read the pre requisites and ensure that you are set to go ahead.
  2. Download the latest firmware Android 4.4.4 KitKat 14.4.A.0.108 FTF file.
      1. For Xperia Z1 C6902 [Generic/Unbranded]
      2. For Xperia Z1 C6906 [Generice/Unbranded]
  3. Copy the file and paste in Flashtool>Firmwares folder.
  4. Open Flashtool.exe now.
  5. Hit the small lightening button on the top left corner and select Flashmode.
  6. Select the FTF firmware file that you placed in the Firmware folder.
  7. From the right side, select what do you want to wipe. Data, cache and apps log, all wipes are recommended, perhaps you may select if you don’t want.
  8. Click on OK, and it will start preparing the firmware for flashing. This may take a little while to load.
  9. As soon as the firmware is loaded, it will prompt you to attach the phone by turning it off and keeping the back key press.
  10. For Xperia Z1, Volume Down key will do the job of back key, just turn off your phone, keep the Volume Down key pressed and plug in the data cable.
  11. As soon as the phone is detected in Flashmode, the firmware will start flashing, Do not leave the Volume Down key until the process is complete.
  12. As soon as you see “Flashing ended or Finished Flashing” leave the Volume Down key, plug the cable out and reboot.
  13. That’s All! Congrats! You’ve installed latest Android 4.4.4 kitkat on your Xperia Z1. Enjoy

In case you got any queries or face any problems regarding this guide, please feel free to stop by the comment box below and let us know. We will get back to you as soon as possible. Thanks all!

How To Install Safestrap Recovery On AT&T/Verizon Galaxy S5

0
How To Install Safestrap Recovery On AT&T/Verizon Galaxy S5

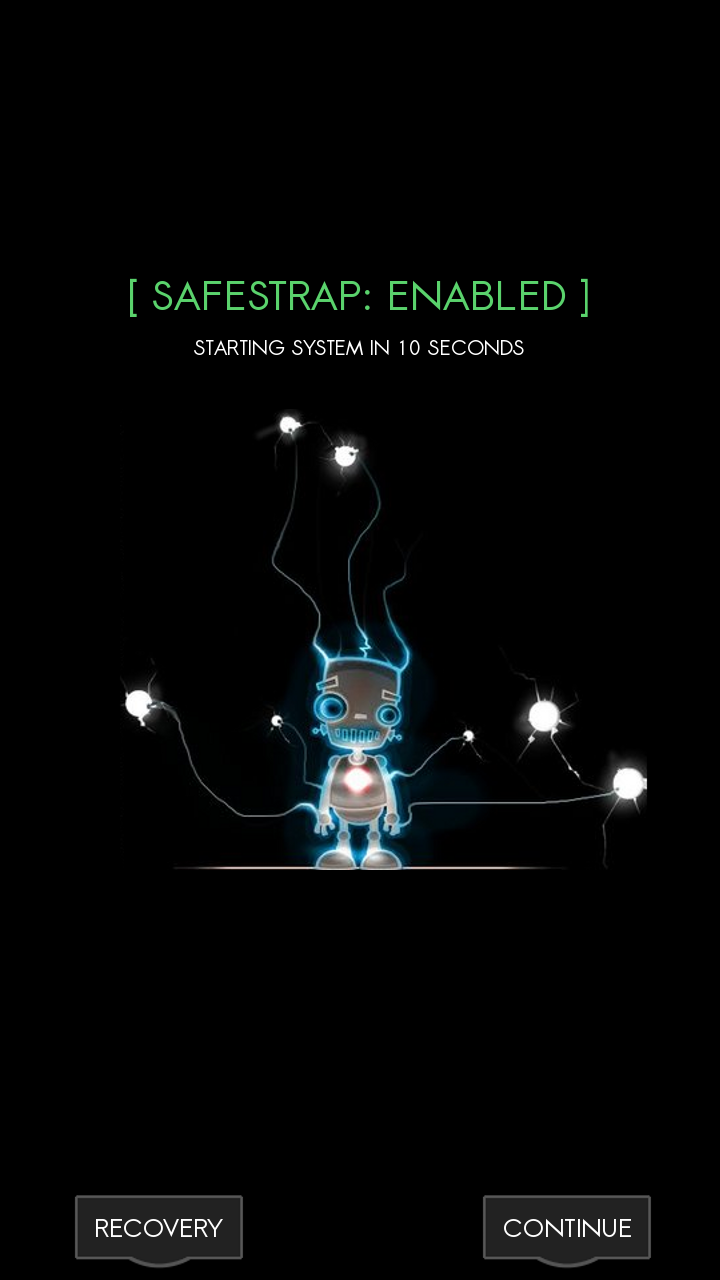
When it comes down to purchasing devices, most of the times users go after the international version because of the its support and stuff. However, not all the times that international version is good enough when it comes to comparing it with carrier bounded variant. In this case, both Verizon and AT&T Galaxy S4 are getting the Safestrap Recovery, which allows them to do all the stuff a custom recovery can do but without interfering with the System, letting it act as a complete stock. You don’t need to unlock the bootloader of your device to install this Recovery and even you don’t need to do much to install it either, no need to use Odin or via fastboot commands, but a simple Apk file will be there to install and then the rest of the process will be on screen for you, yet still we will show you how to download and install this recovery, so get ready.

Verizons-S5-Reminder

Requirements:

  1. Your Device Must Be Rooted: Link (Verizon & AT&T)
  2. Install BusyBox From Play Store.
  3. Use an External Card for this Recovery.
  4. Un-install Xposed Framework, you can install it again after installing the Recovery
  5. Go to Settings > Security and Check “Install From Unknown Sources”
  6. Install any File Manager app that lets you install the Apk files

Downloads:

Installation Process:

post-20101-0-95629400-1380956638

  1. Download the Apk to your device or Copy it from PC.
  2. Tap on the Apk and select Install, and choose Open.
  3. It will ask you for Super SU permission, Grant it.
  4. A Pop-up will appear, Tap Agree.
  5. Now Tap on Recovery, and watch the Installation of SafeStarp Recovery on your Galaxy S5.
  6. Now boot into recovery and you will find there the SafeStrap recovery, it completely looks like TWRP.

Update Sony Xperia Z Ultra C6833 To Android 4.4.4 KitKat 14.4.A.0.108 Firmware

19
Update Sony Xperia Z Ultra C6833 To Android 4.4.4 KitKat 14.4.A.0.108 Firmware

Xperia Z Ultra’s has been updated to Android 4.4.4 KitKat and the  latest firmware is based on the build number 14.4.A.0.108. The new update fixes some bugs, enhances performance, camera has been improved and there are some other minor improvements packed inside Google’s few days old Android 4.4.4 KitKat, that Sony picked up quite soon. As always, the update is on a slow roll out, and will be received using Sony PC Companion or through OTA on your device, but just in case you couldn’t receive this latest update for your Sony Xperia Z Ultra C6833, we’ve a little solution here for you.

In the following post we are going to update Sony Xperia Z Ultra C6833 to Android 4.4.4 KitKat based on the build number 14.4.A.0.108 firmware using Sony Flashtool. The method is manual, and requires to be done being aware, so make sure that you follow this guide carefully in order to get your device this latest firmware successfully.xperia-z-ultra

Early Preparations:

      1. As mentioned, this firmware is only for Xperia Z Ultra C6833. Do not try this on any other phone, that may result in bricking your device. Check your device’s model number in Settings > About device.
      2. You must have installed Sony Flashtool. Find the full guide here.
      3. After installing Sony Flashtool, open the Flashtool folder from the drive where you installed it.
      4. Now open Flashtool>Drivers>Flashtool-drivers.exe and install the Flashtool, Fastboot & Xperia Z Ultra drivers from the list. [Important]
      5. Your phone must be charged at least over 60%. This is highly recommended in order to prevent any power issues during the flashing process.
      6. Enable USB debugging mode on your device. To do so, tap settings>developer options>USB debugging. If you can’t find developer options in settings, then tap settings > about device and tap “Build Number” for 7 times and you’ll get em’ activated under settings.
      7. Make sure that you back up all your important media content,  contacts, call logs and text messages. This is highly recommended and important in case something goes wrong during the flashing process or in case you select the data wipe option before flashing. You can easily restore whenever you need.
      8. To flash this firmware, you do not need to root your device, you do not need to unlock the bootloader. All you need is, your device must be the one mentioned and must be running on Android 4.2.2 or 4.3 Jelly Bean.
      9. Download the firmware file properly.
      10. Use the OEM data cable to connect your phone to your PC. Using any other data cable might cause connection problems.
      11. This firmware can be flashed on Xperia Z Ultra in any region/any country.
      12. Alright! Follow this guide to the letter in order to prevent any mishap.

Here’s how you can update your Xperia Z Ultra C6833 to official 14.4.A.0.108 Android 4.4.4 KitKat firmware:

      1. Before moving forward, please make sure that you’ve read the pre requisites and ensure that you are set to go ahead.
      2. Download the latest firmware Android 4.4.4 KitKat 14.4.A.0.108 FTF file. [Generic]
      3. Copy the file and paste in Flashtool>Firmwares folder.
      4. Open Flashtool.exe now.
      5. Hit the small lightening button on the top left corner and select Flashmode.
      6. Select the FTF firmware file that you placed in the Firmware folder.
      7. From the right side, select what do you want to wipe. Data, cache and apps log, all wipes are recommended, perhaps you may select if you don’t want.
      8. Click on OK, and it will start preparing the firmware for flashing. This may take a little while to load.
      9. As soon as the firmware is loaded, it will prompt you to attach the phone by turning it off and keeping the back key press.
      10. For Xperia Z Ultra, Volume Down key will do the job of back key, just turn off your phone, keep the Volume Down key pressed and plug in the data cable.
      11. As soon as the phone is detected in Flashmode, the firmware will start flashing, Do not leave the Volume Down key until the process is complete.
      12. As soon as you see “Flashing ended or Finished Flashing” leave the Volume Down key, plug the cable out and reboot.
      13. That’s All! Congrats! You’ve installed latest Android 4.4.4 kitkat on your Xperia Z Ultra C6833. Enjoy

In case you got any queries or face any problems regarding this guide, please feel free to stop by the comment box below and let us know. We will get back to you as soon as possible. Thanks all!