Home Blog Page 403

Most Popular Facebook Timeline Covers Free Download

0
Most Popular Facebook Timeline Covers Free Download

Facebook has added many new features and keeps working on more new stuff, but the one feature I like the most is Facebook Timeline because I can add awesome kind of cover on my profile. So today I have collected Most popular Facebook timeline covers for your Timeline. The best thing about these timeline covers is that they are top ranked Facebook timeline covers, so you cannot decide easily which one best for you.

404-Error-Facebook-Profile-Timeline-Cover

Most Popular Facebook Timeline Covers Free Download 

Install AOSP Android 5.0 Lollipop On Xperia Z Ultra

0
Install AOSP Android 5.0 Lollipop On Xperia Z Ultra

Sony’s only phablet, the Xperia Z Ultra will be one of the lucky devices to receive Android 5.0 Lollipop, but we are not sure when the update will roll out and hit the device. For the users who own this device, XDA recognized developer krabappel2548 has built an unofficial Android 5.0 Lollipop AOSP based custom ROM. This is a very early build and contains a lot of bugs, but most of the mainstream features are found to be working so it’s actually worth giving a try just to have a look, taste and feel of Android 5.0 Lollipop on your Xperia Z Ultra, before the official update arrives. We do not recommend the newbies to flash this ROM, those who have a good idea about flashing custom ROMs and actually know how to deal with em’, they may proceed without any hiccups here and there.

As you move forward in the proceeding guide, you will come across a complete and comprehensive method that will help you to install AOSP Android 5.0 Lollipop custom ROM on your Sony Xperia Z Ultra. Before you begin with the installation, you need to go through the early preparations carefully in order to avoid and mishaps.

xperia-z-ultra-hero-black-620x420-a82de52b739491a12b1212ca4f27a18d

Here’s what’s working and what’s not working in this ROM

Working:
– Bluetooth
– Wifi
– NFC??
– LED
– Texting
– Calling
– Mobile Data
– Sound
– Sensors
– Auto-Brightness
– Vibration
– Screen/Touch
– SELinux
– Recovery
– everything that’s not in the “not working list”

Not working:
– Camera
– Mobile Data?
– Mic on calling
– Video Playback (Use VLC or another app as workaround for now)
– GPS


Early Preparations:

1. This is only for Sony Xperia Z Ultra!

This custom ROM is only for the device mentioned above. Make sure that your model number matches the one listed above. To do so, go to Settings > About Device on your device and see your model number. Flashing this ROM on any other device will result in bricking it so make sure that you meet this requirement first of all.

2. Battery should be charged at least over 60%.

Make sure that your battery is charged enough to complete the flashing process. In case your battery is low and your device goes dead during the flashing process, you may end up soft bricking your device as it won’t complete the flashing process.

3. Unlock Bootloader.

Your device’s bootloader must be unlocked in order to flash this custom ROM. You can unlock it by using our Sony bootloader unlock  guide.

5. Backup everything!

Just to be on the safe side, you may consider backing up each and everything from your Android device. This is highly recommended so that in case anything goes wrong, you still have the access to all of your data and you can restore it immediately. You may backup everything as listed below.

  1. Backup SMS Messages
  2. Backup Call Logs
  3. Backup Contacts
  4. Backup Media – Copy your files manually to your PC or Laptop.
  5. Titanium Backup – If already rooted, use Titanium Backup to backup all of your apps, system data and other important content.
  6. Backup Nandroid – If CWM  or TWRP installed previously, otherwise skip this step and perform this at the end of flashing.

6. Disclaimer

The methods involved in flashing custom recoveries, ROMs and rooting your phone are highly custom and may result in bricking your device, and has nothing to do with Google or the device manufacturer that is Sony in our case. Also rooting your device will void its warranty and you will be no longer eligible for any kind of free device services by the manufacturers/warranty providers. In case of any mishap we may not be held responsible. Follow these instructions to the letter to avoid any mishap or bricking. Make sure that whatever you do, you are doing it at your own responsibility.

How To Install Android 5.0 Lollipop On Xperia Z Ultra Using AOSP Custom ROM

  • Download the Xperia Z Ultra AOSP 5.0 Beta v3.0 file. (Android L > (togari) ZU > Beta 3 (right click beta 3 and download as zip))
  • Extract the ROM.zip file to get boot.img and system.img files.
  • Download Android ADB and Fastboot drivers, here’s our comprehensive guide for setting up ADB & Fastboot.
  • Open the extracted ROM.zip and copy all the .img files.
  • Now paste all the .img files file that you extracted from the zip folder in the minimal adb and fastboot folder that you got in the windows drive after installing the Minimal ADB and Fastboot drivers from the guide linked above.
  • Connect your Xperia Z Ultra in Fastboot mode with your PC now. To do so, turn it off completely, now connect it with your PC while keeping Volume Up key pressed. As soon as your PC has detected your phone in Fastboot mode, a blue light will blink up in the notification LED.
  • Assuming that you’ve already placed all the .img files in the fastboot folder, now open the Minimal ADB & Fastboot.exe from your desktop.
  • Once opened, issue the following commands.
  1. fastboot devices” – to verify if the device is properly connected in fastboot or not, once verified, proceed to next command.

  2. fastboot flash boot boot.img”

  3. “fastboot flash userdata userdata.img”

  4.  “fastboot flash system system.img”.


  • In case you are confused, follow the Android ADB & Fastboot drivers guide carefully.
  • Once all files are flashed, unplug your Xperia Z Ultra.
  • Reboot your device in recovery mode and wipe cache and dalvik cache.
  • Reboot your device now and checkout Android 5.0 Lollipop working on it.

How To Install Gapps Now

  1. Download Gapps.zip file for Android 5.0 Lollipop.
  2. Copy the Gapps.zip file to your phone’s SD card.
  3. Boot into recovery mode. To do so, reboot your device and quickly press Volume Up key simultaneously. You will see the recovery mode.
  4. In recovery, select “install zip > choose zip from SD card > select the Gapps.zip file”.
  5. Flash the Gapps and reboot your device.
  6. You will have all Google Apps working fine on your phone now.

In case something goes wrong, you can either restore your Nandroid backup using the guide linked above or you may want to learn How To Download Sony Xperia Official Firmware And Create FTF File

That’s all with the ROM installation. In case you’re stuck with anything or you’re facing any issues, feel free to drop your words in the comment box below. We will get back to you as soon as possible.

Install Android 5.0 Lollipop On Xperia Z2 Using AOSP Custom ROM

6
Install Android 5.0 Lollipop On Xperia Z2 Using AOSP Custom ROM

Former Sony Xperia Flagship, the Xperia Z2 ran on Android 4.4.2 KitKat out of the box. Currently the device is running on Android 4.4.4 KitKat and is in the queue to receive the best Android update, the Android Lollipop. Sony has already unveiled its plans to update the entire Xperia Z family to the latest iteration of Android. While Sony cooks up the official version of sweet Android, it will be pretty hard for some Android power users to wait and they may want to look for another way to taste the Lollipop while it officially is under construction. To calm those users and provide them with a way to get the sweetness of Lollipop, some great developers have started coming up with the unofficial builds of Android 5.0 Lollipop based on custom ROMs like AOSP and CyanogenMod.

This job for our beloved Xperia Z2 has been done by XDA recnogized developer krabappel2548 came up with a very early unofficial build of AOSP Android 5.0 Lollipop  for the device. Currently there are so many bugs in the ROM, but if you only want to have a feel and look of Android 5.0 Lollipop, it’s worth giving this ROM a try since the mainstream features including Calling, texting, WiFi, Bluetooth and some other are found to be working fine. Although this ROM may not be kept for everyday use, but there’s always a room for improvement and we will be seeing the issues getting resolved in the upcoming builds. Another thing you may keep in mind is, proceed with flashing this ROM only if you’re an Android pro user and if you’ve a very good idea of dealing with the custom ROMs. We highly recommend newbies to stay away.

Before we head towards the installation guide for Android 5.0 Lollipop AOSP custom ROM on Sony Xperia Z2, some of the users may want to have an idea about Android 5.0. For those who don’t know, Android 5.0 is the latest version of Android that packs up some major UI enhancements, the new UI is named as Material Design. Performance, stability and battery improvements have been made to the OS now. All the manufacturers will be updating their flagships and some other mainstream devices to this latest version of Android and as mentioned, Sony has already unveiled its plans for the lucky devices as well. Let’s head towards the guide now.z2

Here’s what’s working and what’s not working in this ROM

Working:
– Bluetooth
– Wifi
– LED
– Texting
– Calling
– Sound
– Sensors
– Auto-Brightness
– Vibration
– Screen/Touch
– SELinux
– Mobile Data

– everything that’s not in the “not working list”

Not working:
– Camera
– Mic on calling??
– Youtube Video Playback
– GPS


Early Preparations:

1. This is only for Sony Xperia Z2!

This custom ROM is only for the device mentioned above. Make sure that your model number matches the one listed above. To do so, go to Settings > About Device on your device and see your model number. Flashing this ROM on any other device will result in bricking it so make sure that you meet this requirement first of all.

2. Battery should be charged at least over 60%.

Make sure that your battery is charged enough to complete the flashing process. In case your battery is low and your device goes dead during the flashing process, you may end up soft bricking your device as it won’t complete the flashing process.

3. Unlock Bootloader.

Your device’s bootloader must be unlocked in order to flash this custom ROM. You can unlock it by using our Sony bootloader unlock  guide.

5. Backup everything!

Just to be on the safe side, you may consider backing up each and everything from your Android device. This is highly recommended so that in case anything goes wrong, you still have the access to all of your data and you can restore it immediately. You may backup everything as listed below.

  1. Backup SMS Messages
  2. Backup Call Logs
  3. Backup Contacts
  4. Backup Media – Copy your files manually to your PC or Laptop.
  5. Titanium Backup – If already rooted, use Titanium Backup to backup all of your apps, system data and other important content.
  6. Backup Nandroid – If CWM  or TWRP installed previously, otherwise skip this step and perform this at the end of flashing.

6. Disclaimer

The methods involved in flashing custom recoveries, ROMs and rooting your phone are highly custom and may result in bricking your device, and has nothing to do with Google or the device manufacturer that is Sony in our case. Also rooting your device will void its warranty and you will be no longer eligible for any kind of free device services by the manufacturers/warranty providers. In case of any mishap we may not be held responsible. Follow these instructions to the letter to avoid any mishap or bricking. Make sure that whatever you do, you are doing it at your own responsibility.

How To Install Android 5.0 Lollipop On Xperia Z2 Using AOSP Custom ROM

  • Download the Xperia Z2 AOSP 5.0 Beta v3.0 file. (Android L > (sirius) Z2 > Beta 3 (right click beta 3 and download as zip))
  • Extract the ROM.zip file to get boot.img and system.img files.
  • Download Android ADB and Fastboot drivers, here’s our comprehensive guide for setting up ADB & Fastboot.
  • Open the extracted ROM.zip and copy all the .img files.
  • Now paste all the .img files file that you extracted from the zip folder in the minimal adb and fastboot folder that you got in the windows drive after installing the Minimal ADB and Fastboot drivers from the guide linked above.
  • Connect your Xperia Z2 in Fastboot mode with your PC now. To do so, turn it off completely, now connect it with your PC while keeping Volume Up key pressed. As soon as your PC has detected your phone in Fastboot mode, a blue light will blink up in the notification LED.
  • Assuming that you’ve already placed all the .img files in the fastboot folder, now open the Minimal ADB & Fastboot.exe from your desktop.
  • Once opened, issue the following commands.
  1. fastboot devices” – to verify if the device is properly connected in fastboot or not, once verified, proceed to next command.

  2. fastboot flash boot boot.img”

  3. “fastboot flash userdata userdata.img”

  4.  “fastboot flash system system.img”.


  • In case you are confused, follow the Android ADB & Fastboot drivers guide carefully.
  • Once all files are flashed, unplug your Xperia Z2.
  • Reboot your device in recovery mode and wipe cache and dalvik cache.
  • Reboot your device now and checkout Android 5.0 Lollipop working on it.

How To Install Gapps Now

  1. Download Gapps.zip file for Android 5.0 Lollipop.
  2. Copy the Gapps.zip file to your phone’s SD card.
  3. Boot into recovery mode. To do so, reboot your device and quickly press Volume Up key simultaneously. You will see the recovery mode.
  4. In recovery, select “install zip > choose zip from SD card > select the Gapps.zip file”.
  5. Flash the Gapps and reboot your device.
  6. You will have all Google Apps working fine on your phone now.

In case something goes wrong, you can either restore your Nandroid backup using the guide linked above or you may want to learn How To Download Sony Xperia Official Firmware And Create FTF File

That’s all with the ROM installation. In case you’re stuck with anything or you’re facing any issues, feel free to drop your words in the comment box below. We will get back to you as soon as possible.

Install AOSP Android 5.0 Lollipop On Xperia Z1

0
Install AOSP Android 5.0 Lollipop On Xperia Z1

Sony’s 2013 flagship, the Xperia Z1 will be receiving the Android 5.0 Lollipop update officially very soon, but if you just cannot wait to sweeten your device officially, you may want to do that right now unofficially. There surely are a lot of hiccups if you’re going to do it unofficially, but we believe that for now, just to have that taste, it’s worth updating your device to Android 5.0 Lollipop using AOSP custom ROM compiled by XDA recognized developer krabappel2548, who also compiled the same ROM for some other Xperia devices as well. This is a very early build of Android 5.0 Lollipop, a lot of bugs are expected but the mainstream features are found to be working, and for Android custom ROM freaks, it won’t matter much. Although this ROM isn’t a daily driver right now, but the developer is working hard on fixing the bugs as soon as he’s coming to know about those.

For those who are not well aware of the Android 5.0 Lollipop, they would like to know that Android 5.0 is the latest version of Android. It also happens to be the biggest update in the UI department after the Android ICS, which was unveiled in 2011. Google introduced a new UI, that it named as Material Design. This new UI makes the graphics flat and smooth, the elements look close to real time objects. There are core enhancements, battery life has been greatly improved. New features including Bluetooth enhancements, Notifications on lockscreen and some other mouth watering stuff has been added to the Android 5.0 Lollipop as well. Sony will be updating the entire Xperia Z family to Android 5.0 Lollipop very soon, but the release dates are not known yet, until then the users will either have to wait or find some other way to update their device to this latest, greatest and coolest version of Android.

Okay, that was all about the Android 5.0. Let’s get back to our topic now. You must be wondering right now that how you can actually install the unofficial and custom build of Android Lollipop on your Xperia Z1, that we just talked about. If you really are doing that, you may stop thinking that and scroll down a little more to go through the guide to update your Sony Xperia Z1 to Android 5.0 Lollipop using the AOSP custom ROM.xperia-Z1-gallery-04-1240x840-d597d1646d91366693a1e737ca890c08

Here’s what’s working and what’s not working in this ROM

Working:
– Bluetooth
– Wifi
– NFC??
– LED
– Texting
– Calling
– Mobile Data
– Sound
– Sensors
– Auto-Brightness
– Vibration
– Screen/Touch
– SELinux
– Recovery
– everything that’s not in the “not working list”

Not working:
– Camera
– Mic while calling
– Mobile Data?
– Video Playback (Use VLC or another app as workaround for now)
– GPS

Early Preparations:

1. This is only for Sony Xperia Z1!

This custom ROM is only for the device mentioned above. Make sure that your model number matches the one listed above. To do so, go to Settings > About Device on your device and see your model number. Flashing this ROM on any other device will result in bricking it so make sure that you meet this requirement first of all.

2. Battery should be charged at least over 60%.

Make sure that your battery is charged enough to complete the flashing process. In case your battery is low and your device goes dead during the flashing process, you may end up soft bricking your device as it won’t complete the flashing process.

3. Unlock Bootloader.

Your device’s bootloader must be unlocked in order to flash this custom ROM. You can unlock it by using our Sony bootloader unlock  guide.

5. Backup everything!

Just to be on the safe side, you may consider backing up each and everything from your Android device. This is highly recommended so that in case anything goes wrong, you still have the access to all of your data and you can restore it immediately. You may backup everything as listed below.

  1. Backup SMS Messages
  2. Backup Call Logs
  3. Backup Contacts
  4. Backup Media – Copy your files manually to your PC or Laptop.
  5. Titanium Backup – If already rooted, use Titanium Backup to backup all of your apps, system data and other important content.
  6. Backup Nandroid – If CWM  or TWRP installed previously, otherwise skip this step and perform this at the end of flashing.

6. Disclaimer

The methods involved in flashing custom recoveries, ROMs and rooting your phone are highly custom and may result in bricking your device, and has nothing to do with Google or the device manufacturer that is Sony in our case. Also rooting your device will void its warranty and you will be no longer eligible for any kind of free device services by the manufacturers/warranty providers. In case of any mishap we may not be held responsible. Follow these instructions to the letter to avoid any mishap or bricking. Make sure that whatever you do, you are doing it at your own responsibility.

How To Install AOSP Android 5.0 Lollipop On Xperia Z1

  • Download the Xperia Z1 AOSP 5.0 Beta v3.0 file. (Android L > Xperia Z1 > Beta 3 (right click beta 3 and download as zip))
  • Extract the ROM.zip file to get boot.img and system.img files.
  • Download Android ADB and Fastboot drivers, here’s our comprehensive guide for setting up ADB & Fastboot.
  • Open the extracted ROM.zip and copy all the .img files.
  • Now paste all the .img files file that you extracted from the zip folder in the minimal adb and fastboot folder that you got in the windows drive after installing the Minimal ADB and Fastboot drivers from the guide linked above.
  • Connect your Xperia Z1 in Fastboot mode with your PC now. To do so, turn it off completely, now connect it with your PC while keeping Volume Up key pressed. As soon as your PC has detected your phone in Fastboot mode, a blue light will blink up in the notification LED.
  • Assuming that you’ve already placed all the .img files in the fastboot folder, now open the Minimal ADB & Fastboot.exe file from your desktop.
  • Once opened, issue the following commands.
  1. fastboot devices” – to verify if the device is properly connected in fastboot or not, once verified, proceed to next command.
  2. fastboot flash boot boot.img

  3. fastboot flash system system.img”.

  • In case you are confused, follow the Android ADB & Fastboot drivers guide carefully.
  • Once all files are flashed, unplug your Xperia Z1.
  • Reboot your device in recovery mode and wipe cache and dalvik cache.
  • Reboot your device now and checkout Android 5.0 Lollipop working on it.

How To Install Gapps Now

  1. Download Gapps.zip file for Android 5.0 Lollipop.
  2. Copy the Gapps.zip file to your phone’s SD card.
  3. Boot into recovery mode. To do so, reboot your device and quickly press Volume Up key simultaneously. You will see the recovery mode.
  4. In recovery, select “install zip > choose zip from SD card > select the Gapps.zip file”.
  5. Flash the Gapps and reboot your device.
  6. You will have all Google Apps working fine on your phone now.

In case something goes wrong, you can either restore your Nandroid backup using the guide linked above or you may want to learn How To Download Sony Xperia Official Firmware And Create FTF File

That’s all with the ROM installation. In case you’re stuck with anything or you’re facing any issues, feel free to drop your words in the comment box below. We will get back to you as soon as possible.

How to Remove Bootloader Warning in Moto G 2014

0
How to Remove Bootloader Warning in Moto G 2014

Although unlocking a locked bootloader is something that is not recommended by all the OEMs, but without unlocking the bootloader, no one can do any sort of customization on their device. Bootloader unlocking is the very first step towards customization, followed by Rooting and then the Custom Recovery. Unlocking a bootloader is not a difficult job at all. HTC has their own Development site, that will help you in doing such stuff, Nexus, LG and Motorola series, all requires an active Fastboot and a small command to unlock the bootloader, however, LG and Nexus device along wit HTC and others, don’t tease you after unlocking the bootloder, but Moto G 2014 will surely give you a lot of pain in this matter.

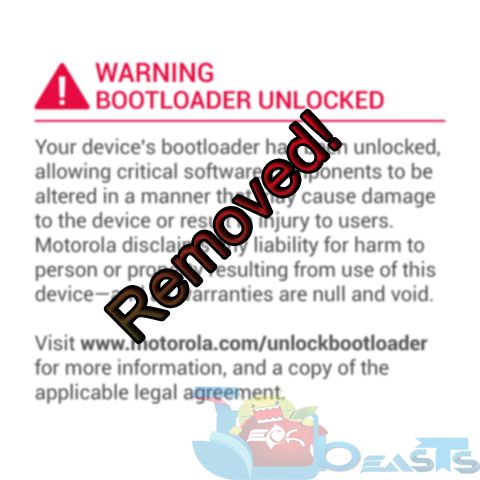
Once you have unlocked the bootloader of Moto G 2014, that device will keep giving you the warning of Unlocked Bootloader, and that you should visit the Official Motorola Site to learn more about it, for a typical user, it is not much of a problem, but when a brand new user sees this kind of warning, in simple words, that person is almost dead. But there is nothing to fear, cause it is just a warning, which should be removed before the person you are selling the device sees it. and thanks to XDA portal, we have got our hands on the Solution. XDA Member rafaelbrunner, has made a simple file, after installation of which, this warning logo will be removed permanently and you’ll see the Motorola Logo instead. Without further ado, let’s continue.

How to Remove Bootloader Warning in Moto G 2014

Early Preparations:

1. This is only for Moto G 2014!

This custom ROM is only for the device mentioned above. Make sure that your model number matches the one listed above. To do so, go to Settings > About Device on your device and see your model number. Flashing this ROM on any other device will result in bricking it so make sure that you meet this requirement first of all.

2. Battery should be charged at least over 60%

Make sure that your battery is charged enough to complete the flashing process. In case your battery is low and your device goes dead during the flashing process, you may end up soft bricking your device as it won’t complete the flashing process.

3. Backup everything!

Just to be on the safe side, you may consider backing up each and everything from your Android device. This is highly recommended so that in case anything goes wrong, you still have the access to all of your data and you can restore it immediately. You may backup everything as listed below.

4. Unlock Bootloader of Your Device!

Since this method won’t work until you have an Unlocked bootloader, follow the link to unlock the Bootloader: Link

5. Disclaimer

The methods involved in flashing custom recoveries, roms and rooting your phone are highly custom and may result in bricking your device, and has nothing to do with Google or the device manufacturer that is Motorola in our case. Also rooting your device will void its warranty and you will be no longer eligible for any kind of free device services by the manufacturers/warranty providers. In case of any mishap we may not be held responsible. Follow these instructions to the letter to avoid any mishap or bricking. Make sure that whatever you do, you are doing it at your own responsibility.

Downloads Required:

LogoFixWarningv2.zip: Link

How To Remove Bootloader Warning:

  1. Download and Copy the Zip file to your sdcard.
  2. Reboot your device into Recovery mode.
  3. Navigate to Install Zip.
  4. Choose the Downloaded Zip file and confirm the installation.
  5. Once the Installation is done, reboot the device.
  6. While on the Boot Screen, check whether the Warning is gone or not.

How to Enable Call Recording in Sony Xperia Z2 & Z3

0
How to Enable Call Recording in Sony Xperia Z2 & Z3

There are times when you need to make a record of all of your conversations, or at least for your important conversations. While the messages can be saved and shown to anyone, calls aren’t usually stored in the same way. even though calls are far important than messages and since everyone know that they can be caught on Messages, they try to keep as low as possible on Message. However, since most of the times users don’t have the option to record a call, the other person can take this opportunity and say whatever he likes. So having a feature to record any call comes in handy in certain situations. However, most of the OEMs keep the call recording feature hidden, although not a difficult way at all, if you want to use them.

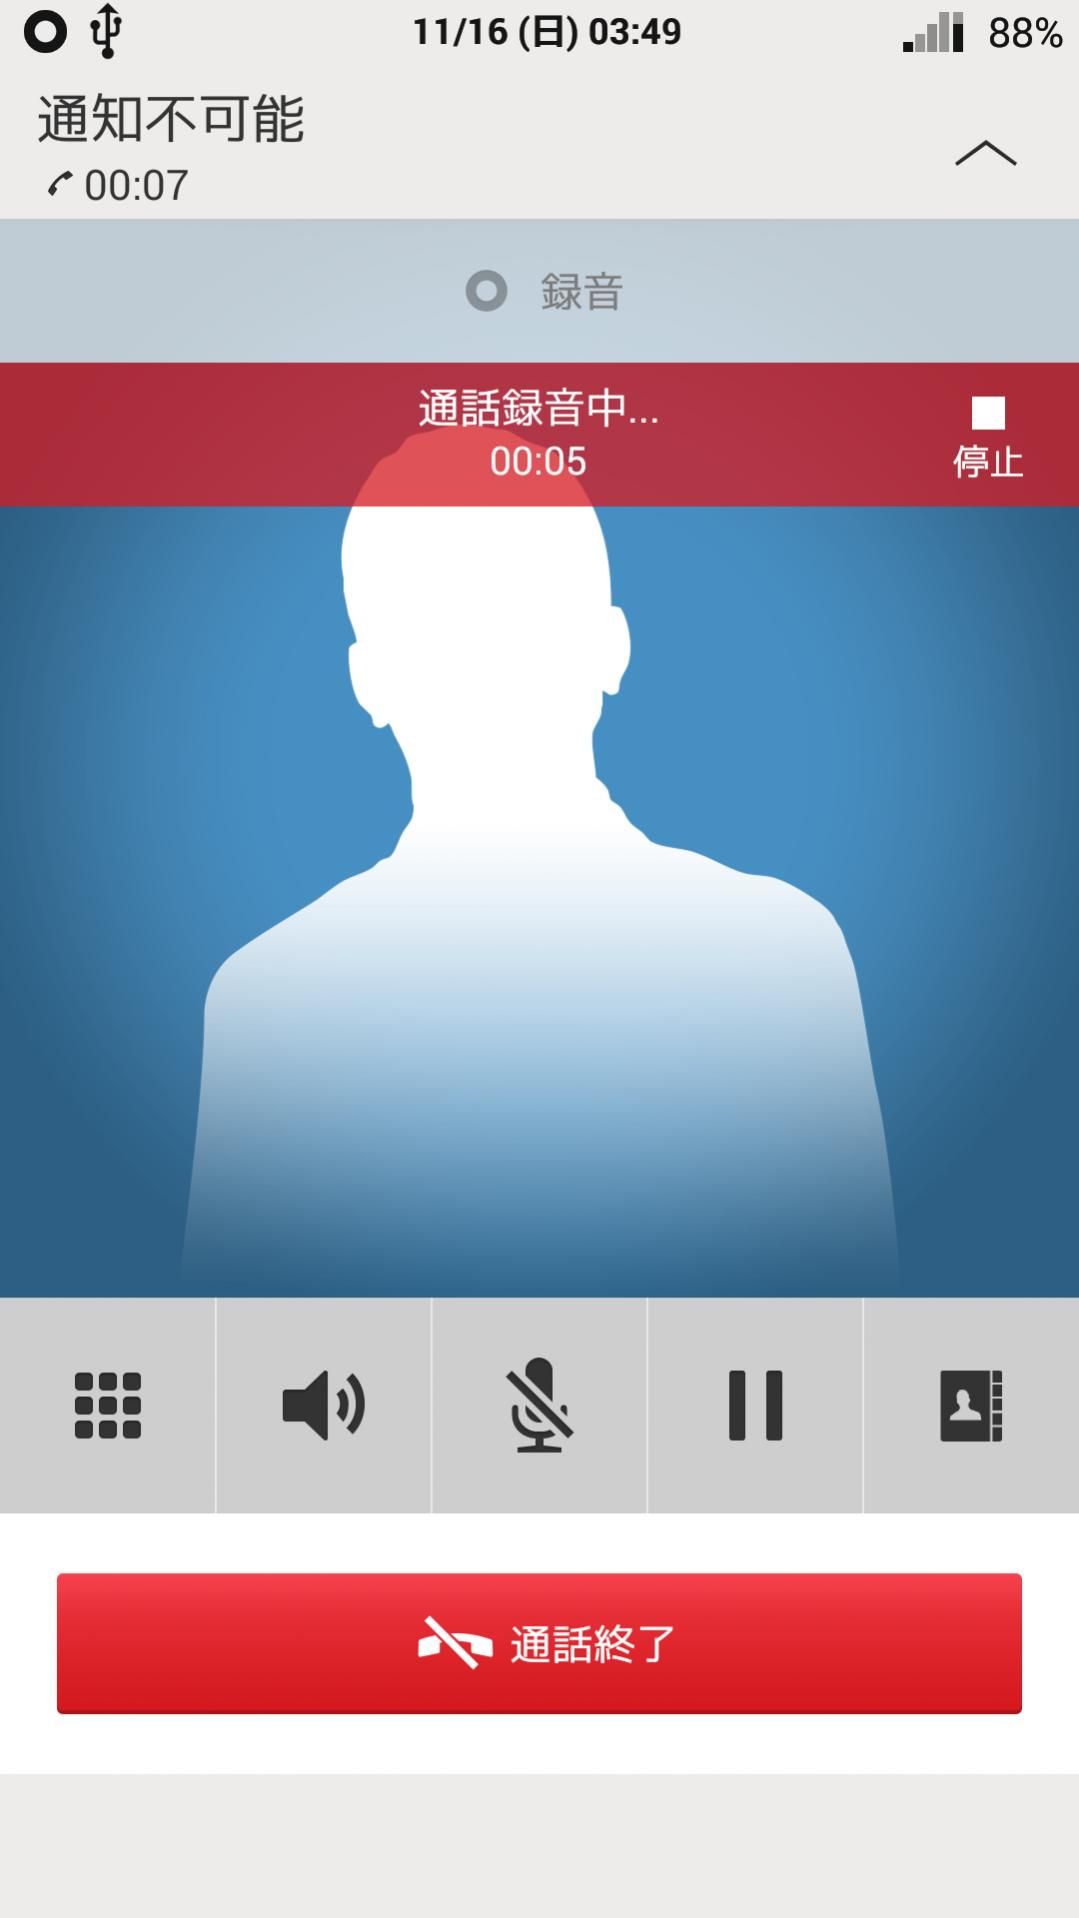
On Sony devices, old firmwares like Android 4.4.2 has a hidden feature of Call recording in SmecPhone.apk, which has been split over multiple applications. Thanks to XDA, now all the Sony Xperia Z3 and Sony Xperia Z3 users can enable the Call recording in their device, XDA member  AndroPlus has extracted the CallRecording.apk file from a Chinese Variant of Firmware, which can be flashed on a device using any of the Popular recoveries like CWM, TWRP or PhilZ Touch. You will need a rooted device to flash it. Afterwards, it can be activated by in Settings > Call Settings > Call Recording. In this Article, We will show you How to Enable Call Recording in Sony Xperia Z2 & Z3, without further ado, let’s continue.

Screenshot_2014-11-16-15-49-05.png

Downloads Required:

Call recording apk: Link | Mirror

How To Enable Call Recording:

  1. Download the .zip file from above.
  2. Copy it to the Root of your device.
  3. Boot into Recovery.
  4. Navigate to install zip
  5. Choose the downloaded zip file and Confirm the Installation.
  6. Once the Installation is done, reboot your device.
  7. After the reboot, navigate to Settings.
  8. Open Call Settings > Call Recording
  9. If your country allows the Call recording, then you’ll be able to record any call made to anyone, or any call made to you.
  10. Enjoy!

For any problem, either let us know in comments, or visit the Official thread for more ease: Link

Install Android 5.0 Lollipop On Galaxy S4 I9505 With CyanogenMod 12 Custom ROM

13
Install Android 5.0 Lollipop On Galaxy S4 I9505 With CyanogenMod 12 Custom ROM

Folks over Sammobile have already shown the Android freaks a few swings of the Android 5.0 Lollipop running flawlessly on the Galaxy S4, but the firmware isn’t nearing its release anytime soon. Until then it will be pretty hard for the S4 owners to wait for the official firmware to hit their devices and get the extreme sweetness of the Lollipop. This will be the biggest update for the Galaxy S4 ever since this update will not only bring a new UI, it will also add a lot of new features to the device, there will be battery improvements and performance will get much more better. The device might get some features from the Galaxy S5 as well, but that’s a matter of latter once the update is out. Until then we can only either talk about the Lollipo update or find some other way to taste the sweetest update of Android on our Galaxy S4.

It looks like XDA senior memeber AntaresOne couldn’t wait for the update he decided to come up with unofficial build of CyanogenMod 12 for our beloved Galaxy S4’s LTE variant GT-I9505. In case you don’t know about CyangenMod, it happens to be the best and the most popular custom ROM for Android. The early builds of CyangenMod aren’t recommended as a daily-dose, you’ve to go through a lot of hiccups here and there. One thing that we found in the very early builds of CyanogenMod 12 was, we couldn’t find the phone functionality working for several devices, that included CM 12 for Galaxy S2, CM 12 for Galaxy Note, Galaxy S3 Mini and few others, but it seems that we pretty lucky since these major functionalities are working for the Galaxy S4. In short, it’s actually worth giving this CyanogenMod 12 Android 5.0 Lollipop build a try on the Galaxy S4 I9505.Samsung-Galaxy-S-4-white-three-up-front-profile-back

You may be wondering how  you can install this firmware on your device, well that’s actually what we are here for right now. Let’s move ahead and go through the guide to install Android 5.0 Lollipop using CyanogenMod 12.0 unofficial build on the Galaxy S4 GT-I9505.

Early Preparations

1. This Guide Is Only For Galaxy S4 GT-I9505

This custom ROM is only for the device mentioned above. Make sure that your model number matches the one listed above. To do so, go to Settings > About Device on your device and see your model number. Flashing this ROM on any other device will result in bricking it so make sure that you meet this requirement first of all.

2. Battery should be charged at least over 60%

Make sure that your battery is charged enough to complete the flashing process. In case your battery is low and your device goes dead during the flashing process, you may end up soft bricking your device as it won’t complete the flashing process.

3. Flash a Custom Recovery

A custom recovery is required for flashing this ROM. You may use our guide to install TWRP recovery on your Galaxy S4 I9505.

4. Backup everything!

Just to be on the safe side, you may consider backing up each and everything from your Android device. This is highly recommended so that in case anything goes wrong, you still have the access to all of your data and you can restore it immediately. You may backup everything as listed below.

  1. Backup SMS Messages
  2. Backup Call Logs
  3. Backup Contacts
  4. Backup Media – Copy your files manually to your PC or Laptop.
  5. Backup EFS
  6. Titanium Backup – If already rooted, use Titanium Backup to backup all of your apps, system data and other important content.
  7. Backup Nandroid – You can do this using CWM/TWRP recovery.

5. Disclaimer

The methods involved in flashing custom recoveries, ROMs and rooting your phone are highly custom and may result in bricking your device, and has nothing to do with Google or the device manufacturer that is SAMSUNG in our case. Also rooting your device will void its warranty and you will be no longer eligible for any kind of free device services by the manufacturers/warranty providers. In case of any mishap we may not be held responsible. If your device has the Knox counter on the bootloader, it will be tripped and you won’t be able to reset it ever. Follow these instructions to the letter to avoid any mishap or bricking. Make sure that whatever you do, you are doing it at your own responsibility.

Known issues in this ROM:

External SD (works only if formatted in FAT32, exFAT is broken on any device at the moment)
F2FS (works only for /system, formatting /cache makes ROM unbootable)
NFC

How To Install Android 5.0 Lollipop On Galaxy S4 I9505 With CyanogenMod 12 Custom ROM

  1. Download cm-12-20141121-UNOFFICIAL-jflte.zip file.
  2. Download Google Gapps.zip file.
  3. Connect your phone to your PC now.
  4. Copy both the .zip files to the storage of your phone.
  5. Now disconnect your phone and turn it off complete.
  6. Boot into TWRP recovery now, in order to do so, turn it on by pressing and holding Volume Up + Home Button + Power Key. You should see the recovery mode in a while.
  7. Now in TWRP recovery select wipe option and wipe cache, factory data reset, dalvik cache.
  8. After wiping all these three, select “Install” option.
  9. Now select “Install > Choose Zip from SD card / locate the zip file > Select cm-12-20141121-UNOFFICIAL-jflte.zip file > Yes”.
  10. This will flash the ROM in your phone.
  11. Once again in TWRP select “Install > Choose zip from SD card / locate the file > Gapps.zip file > Yes”.
  12. This will flash Gapps in your phone.
  13. Reboot your device.
  14. You should see the Android 5.0 Lollipop CM 12.0 running on your device in a while.
  15. That’s all!

First boot may take up to 10 minutes, so hold on tighter until your device gets ready. Just in case you don’t find this ROM working so great, you may want to restore your Galaxy S4 to stock condition.

If you’ve any queries or you’re stuck with anything regarding this post, please reach us through the comment box below. We will get back to you immediately. Thank you all.

How To Fix “no Sim Card Installed” Error On iPhone 5,5S,5C

0
How To Fix “no Sim Card Installed” Error On iPhone 5,5S,5C

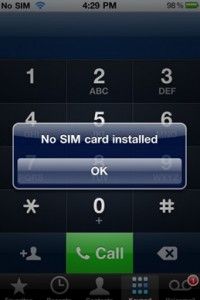
Back in the days we have posted Fix ‘no service’ issue in iPhone 4, 4S and today i am about to tell you how to fix “no Sim Card Installed” Error On iPhone 5,5s,5c. Although iPhone 5 is very powerful device, but still an electronic device is not perfect. Most of the users told me that they have solved the “no Sim Card Installed” error On iPhone 5,5s and 5c by just restarting the device. But not everyone is so lucky so for those who are still facing “no Sim Card Installed” Error On iPhone 5, you can fix it by following the steps mentioned below.

“no-sim-card-installed”-error-on-iPhone-5-200x300

How To Fix “no Sim Card Installed” Error On iPhone 5,5s,5c:

You can apply these methods on mostly all the iPhone variants, but I am not sure that this solution will work iPhone 6 and iPhone 6 Plus.

Step 1: Make Sure your device is updated to the latest version.

Step 2: Goto Settings on your iPhone 5.

Step 3: Now Toggle Airplane mode On and Off.

Step 4: Perform a hard reset on your iPhone 5.

Step 5: Open Settings on your iPhone.

Step 6: Tap on General.

Step 7: Tap on Reset.

Step 8: Now Tap on Reset Network Settings.

Step 9: Restart your device.

Step 10: Take out the Sim card wait for few seconds insert back.

Step 11: Get a new Sim card.

Step 12:  Restore your iPhone 5.

I hope by applying these steps on your iPhone 5 you are not seeing this popup “no Sim Card Installed” . If you face any kind of issue regarding this guide let me know in comments.

Sony Xperia Z4 News, Rumors, Specs, Release Date & Price

0
Sony Xperia Z4 News, Rumors, Specs, Release Date & Price

Updates

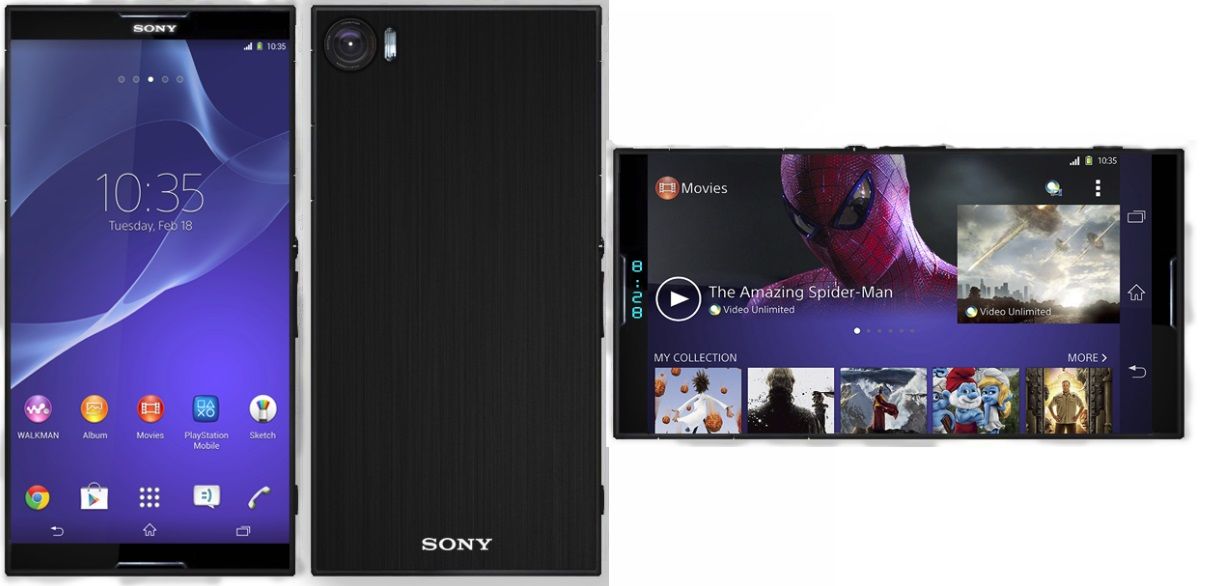
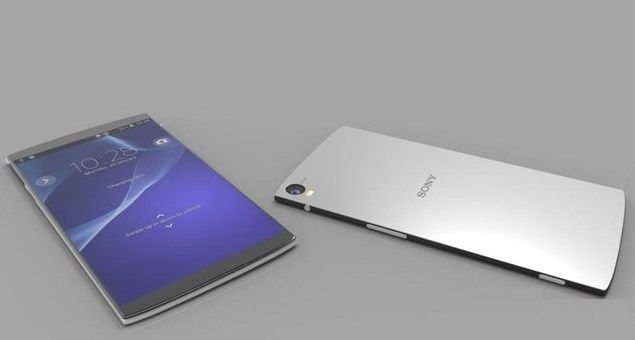
ro-ri-thong-tin-ve-sony-xperia-z4-sony-se-khong-con-chinh-sach-6-thang-1-flagshipYear 2014 remained busy with the unveiling of some big guns. The manufacturers were pretty busy to put their best in the products and stay in the competition, and with the end of the year, we are heading towards a new line of rumors, speculations and anticipations. Samsung’s Galaxy S5 didn’t get too much spotlight because of some great features this device missed. LG did a great job with the G3, HTC once again managed to produce the most beautiful smartphone in the world by unveiling its premium-look One M8 and Sony unveiled Xperia Z2 to begin with the on-going year. In this set of smartphones, LG  managed to take the lead by powering up the LG G3 with the most desired specifications, atop of those we saw a QHD screen. At IFA 2014, we saw Samsung’s Galaxy Note 4 that now happens to be the favorite phablet for the users, we saw two new smartphones by Sony, the Sony Xperia Z3 and Z3 Compact. Sony may have won a lot of respect through Sony Xperia Z3 Compact, the device is simply what the name says, “Compact”. Xperia Z3 Compact is just a great combination of specs, size and build, but it definitely is a bit costlier.

And then comes the Z3, while Sony already unveiled the Z2, it was greatly expected that Z3 will sport some enchanting specifications, features, something new will be there to tempt the users, but unfortunately the device turned out to be another Xperia Z2 under the name Z3. Both these devices sport almost same specifications, there are very minor touch-ups here and there, very less notable changes, and it didn’t help Sony to a great extent. Now all the eyes on Xperia Z4 as 2015 is on the door, we will be going through some great events as the year begins. CES & MWC will definitely bring us some eye-catching stuff, and Xperia Z4 is likely to be in that stuff as well. A new line of rumors has already kick-started, expectations from Sony are pretty high this time. We believe that keeping the Xperia Z3 under a low-shed was Sony’s very own plan and it’s going to unpack the Xperia Z4 to win all the space on shelves. The news and rumors that have surfaced so far suggest that Xperia Z4 is going to bucket some features in both the hardware and software departments that never existed before and it will be a completely unique gadget for the next year. It looks like Sony is patiently waiting for the right time to be in some hype and then surprise the Xperia lovers.

Earlier we collected all the details about the Galaxy S6, and now it’s time for the Xperia Z4. We’ve collected all the available information (for now) about the device’s hardware and software features, release date and price. Let’s go through the segments one by one and learn all we know so far about the Sony Xperia Z4.

Sony Xperia Z4 Display

In dimensions, the Xperia Z4’s display isn’t expected to change from that of the Xperia Z3. Z3 sported a 5.2 inch Full HD screen, and the same 5.2-inch or a 5.5 inch screen is expected in the Z4, but it won’t be a full HD. Sony missed the QHD (1440 x 2560 pixels) screen on Z3, and for now the manufacturers are making the use of this new display so there isn’t a chance for Sony to go with a full HD display as it might make the Xperia Z4 a flop.

A site running under the name futuresupplier.com has leaked out a screenshot, that according to it, is allegedly the digitizer of the Sony Xperia Z4. The digitizer doesn’t hint at anything prominently, there are just speaker’s placement changes atop of the screen, while it’s also pretty hard to determine the screen size difference between the Xperia Z3 / Z4. For those who don’t know what is a digitizer, a digitizer is a glass sheet placed above your phone’s display. It helps the phone interact with the user by converting the finger’s touch and swipes into digital form and allows the phone to read em’.

xperia-z4-lcd-touch-digitizer

Sony Xperia Z4 Hardware 

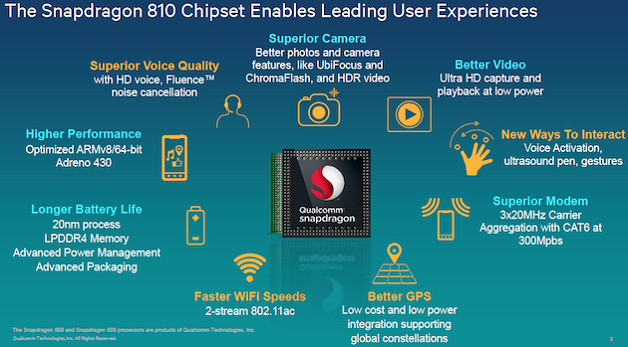
snapdragon-810-graph 

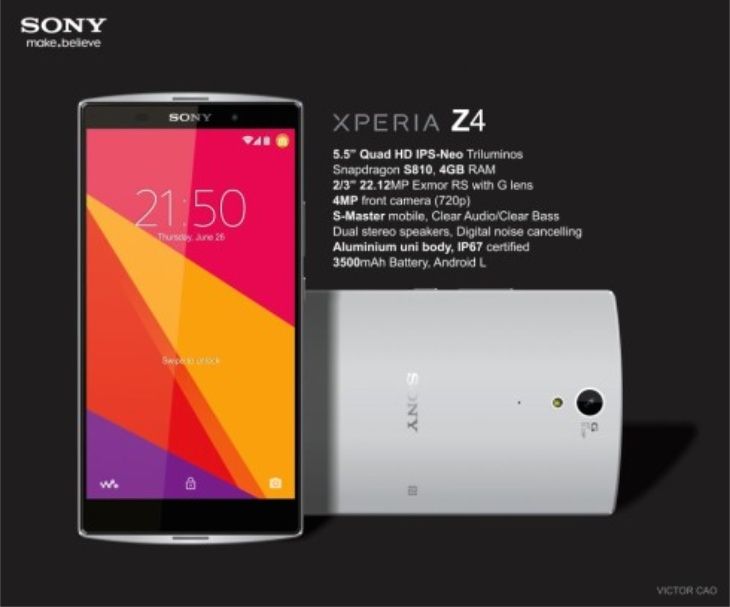
Some latest leaked information suggests that Xperia Z4 will be powered up with Qualcomm’s Snapdragon 810 SoC, that will be a 64-bit Octa Core chipset and will most likely get accompanied by Adreno 430 GPU. A RAM of 4 GB is what’s looking like to be a part of the device as well, and speculations suggest that Sony will be choosing 32 GB as the standard internal storage memory for it’s flagship devices with the Sony Xperia Z4.  A 3500 mAh battery will be placed under the hood.

On the connectivity end, there’s bluetooth 4.1. Category 6 LTE band is there as well. Another anticipation streaming around hints at the Sony Xperia Z4’s speakers to be accompanied by amplifiers, that will produce a sound like HTC’s BoomSound.

Sony Xperia Z4 Software

Android Lollipop is already out, there’s no point in saying that the Sony Xperia Z4 will be running on any lower version of Android, the device will debut running on Android 5.0 Lollipop out of the box, having Sony’s own customization above the OS.

Sony Xperia Z4 Camera

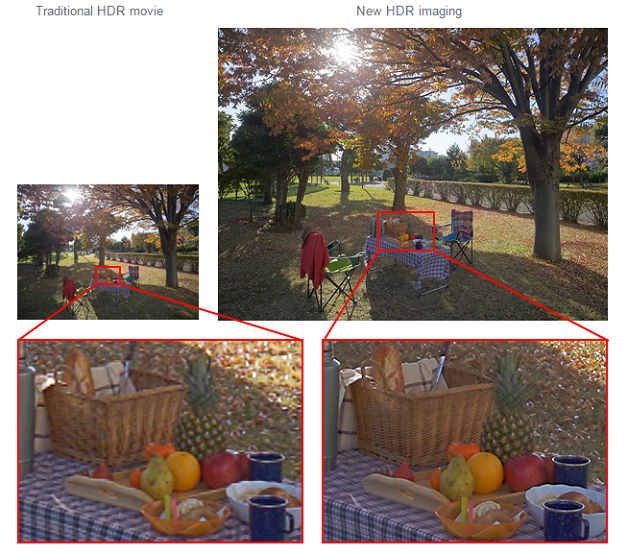
Sony recently unveiled it’s all new EXMOS RS IMX230 that also happens to be the very first Stacked CMOS Image Sensor with an Image Plane Phase Detection Signal Processing Function for High-Speed AF. The new sensor is capable of capturing the fast moving objects with a much better quality, the pictures will be less blurred. Sony’s new 21 MP shooter with IMX230 sensor performs way better in HDR mode, the sensor is also capable of recording 4K videos at 30 fps. sony-camera-sensor-xperia-z4

Sony Xperia Z4 Release Date

Sony is unveiled the Xperia Z2 in March, 2014, the Z3 in September 2014 and now the event that seems to be the best for Sony is MWC 2015. It will most likely occur between 2nd and 5th of April, and that might be the time when we will be seeing Xperia Z4 coming out of the curtains with having some greatly enchanting features, giving the users some prominent users for upgrading their Xperia device.

Sony Xperia Z4 Price

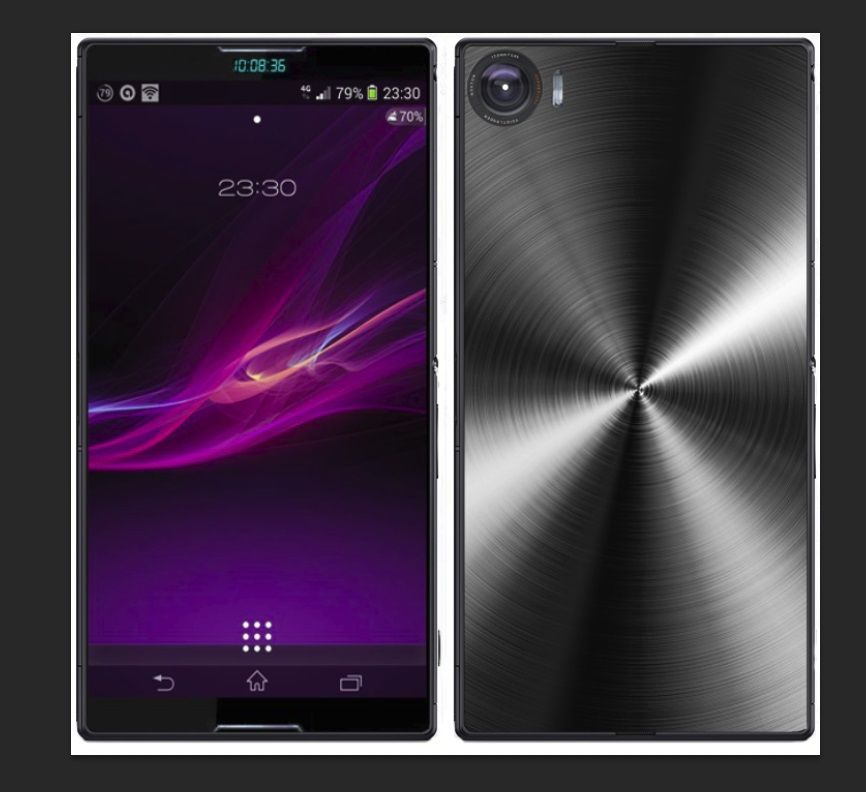
There hasn’t been any info hinting at the price of the Xperia Z4. We do not expect this device to have its price deviating too much from that of the Xperia Z3. It will most likely cost around $600 to $700. Sony-Xperia-Z4-design-with-optimism sony-xperia-z4-konsept-resim-2 xperia-z4-f-1-600x4001

That’s all we know so far about the Xperia Z4. Stay connected with us and don’t forget to bookmark this link for more updates about this device as well be putting all the new information in this post.

Update Galaxy S3 I9300 To Android 4.4.4 KitKat With Paranoid Android ROM

1
Update Galaxy S3 I9300 To Android 4.4.4 KitKat With Paranoid Android ROM

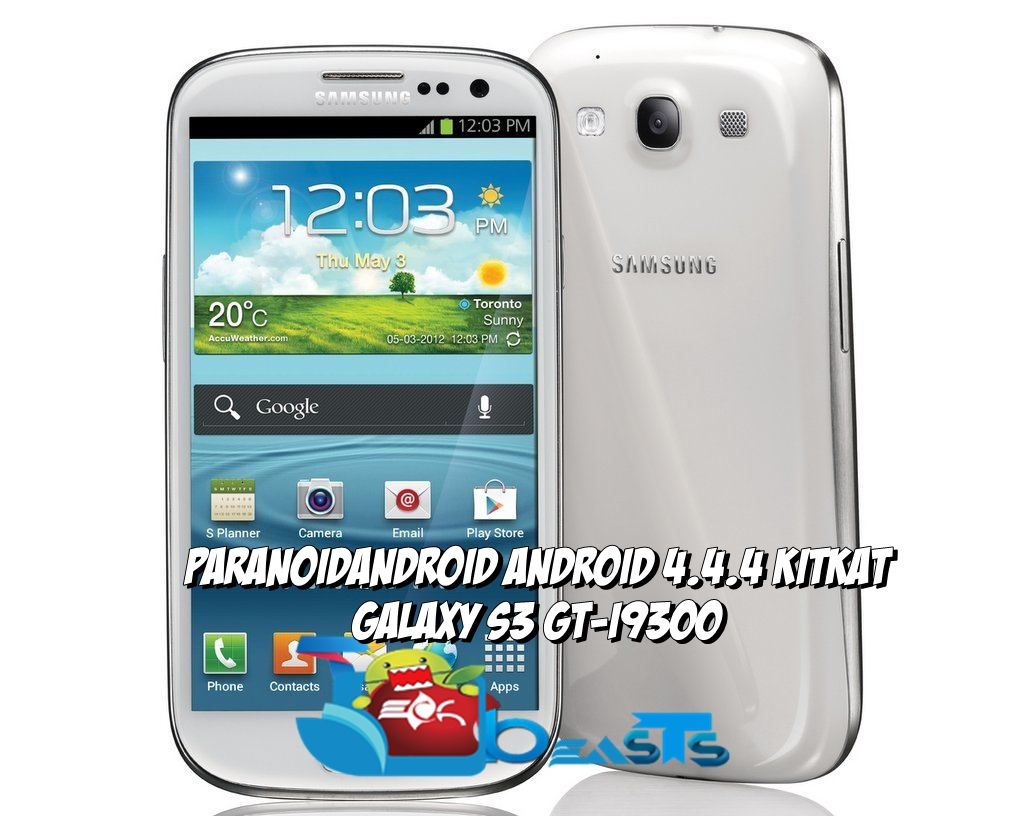
The Galaxy S3 was one of the very best Android devices at the time of its release, the device earned Samsung some great respect, but unfortunately Samsung is unable to treat this device very well and the international variant GT-I9300 will be sticking to Android 4.3 Jelly Bean for the rest of its life due to hardware limitations. Other variants of the Galaxy S3 are already running on Android 4.4.4 KitKat officially, this also adds to the disappointment of the I9300 variant owners. But there isn’t a need to worry about this while having some great developers up at the XDA forums who always brought us something cool to run on our Android devices, and for the Galaxy S3, this job has been done by XDA recognized contributor gokussjx who pulled the curtains off from the Paranoid Android ROM for GT-I9300.

Paranoid Android is one of the most popular custom ROMs for Android, after CyanogenMod, this ROM is greatly selected by the people and known for it’s performance. This ROM is compiled up by using sources from AOSP/Google, CyanogenMod and AOKP. Paranoid Android offers great performance and stability. The ROM has a great UI as well, it’s pretty much responsive and attractive. There’s a number of features available on this ROM that can simply enhance your device’s life. To have a look on the features, check out this thread. 

If you’re willing to get your device a taste of Android 4.4.4 KitKat, you would like to have this ROM installed on it. In case you’re wondering how you can do so, you may stop worrying about it as we are going to install this Android 4.4.4 KitKat ParanoidAndroid custom ROM on our beloved Galaxy S3 I9300 in the following post. Let’s go through the early preparations and then head towards the installation guide.galaxy-s3-i9300-gets-official-port-android-4-4-4-kitkat-update

Early Preparations

1. This Guide Is Only For Galaxy S3 GT-I9300

This custom ROM is only for the device mentioned above. Make sure that your model number matches the one listed above. To do so, go to Settings > About Device on your device and see your model number. Flashing this ROM on any other device will result in bricking it so make sure that you meet this requirement first of all.

2. Battery should be charged at least over 60%

Make sure that your battery is charged enough to complete the flashing process. In case your battery is low and your device goes dead during the flashing process, you may end up soft bricking your device as it won’t complete the flashing process.

3. Flash a Custom Recovery

A custom recovery is required for flashing this ROM. You may use our guide to install TWRP recovery on your Galaxy S3  I9300.

4. Backup everything!

Just to be on the safe side, you may consider backing up each and everything from your Android device. This is highly recommended so that in case anything goes wrong, you still have the access to all of your data and you can restore it immediately. You may backup everything as listed below.

Backup SMS Messages
Backup Call Logs
Backup Contacts
Backup Media – Copy your files manually to your PC or Laptop.
Backup EFS
Titanium Backup – If already rooted, use Titanium Backup to backup all of your apps, system data and other important content.
Backup Nandroid – You can do this using CWM/TWRP recovery.

5. Disclaimer

The methods involved in flashing custom recoveries, ROMs and rooting your phone are highly custom and may result in bricking your device, and has nothing to do with Google or the device manufacturer that is SAMSUNG in our case. Also rooting your device will void its warranty and you will be no longer eligible for any kind of free device services by the manufacturers/warranty providers. In case of any mishap we may not be held responsible. If your device has the Knox counter on the bootloader, it will be tripped and you won’t be able to reset it ever. Follow these instructions to the letter to avoid any mishap or bricking. Make sure that whatever you do, you are doing it at your own responsibility.

How To Update Galaxy S3 I9300 To Android 4.4.4 KitKat With Paranoid Android ROM

  1. Download pa_i9300-4.41-20140705.zip file.
  2. Download Google Gapps.zip file.
  3. Connect your phone to your PC now.
  4. Copy both the .zip files to the storage of your phone.
  5. Now disconnect your phone and turn it off complete.
  6. Boot into TWRP recovery now, in order to do so, turn it on by pressing and holding Volume Up + Home Button + Power Key. You should see the recovery mode in a while.
  7. Now in TWRP recovery select wipe option and  wipe cache, factory data reset, dalvik cache.
  8. After wiping all these three, select “Install” option.
  9. Now select “Install > Choose Zip from SD card / locate the zip file > Select pa_i9300-4.41-20140705.zip file > Yes”.
  10. This will flash the ROM in your phone.
  11. Once again in TWRP select “Install > Choose zip from SD card / locate the file > Gapps.zip file > Yes”.
  12. This will flash Gapps in your phone.
  13. Reboot your device.
  14. You should see the ParanoidAndroid ROM running on your device in a while.
  15. That’s all!

CzqspEq5e2HrtD-2pL53I20pM6f_iK4GfiZqtaGaStc

First boot may take up to 10 minutes, you may not worry if it’s taking that much long. In case it’s taking too long, you may boot into CWM  or TWRP recovery and wipe cache and dalvik cache and reboot your device as it may fix the issue. In case your device is having issues, you may return to your old system using the Nandroid backup or follow our guide here to install stock firmware.

In case you got any issues or you face any difficulties regarding this post, please feel free to stop by the comment box below and let us know. We will get back to you as soon as possible. Thank you all.

How To Install Philz Advanced CWM On Galaxy Note 4 SM-N910C/K/U/H

0
How To Install Philz Advanced CWM On Galaxy Note 4 SM-N910C/K/U/H

Galaxy Note 4’s development is greatly in runs, There are so many good custom ROMs and mods available around that can add charm to the existing functionality of your latest beast. To load these custom ROMs, MODs, and to create Nandroid backpus and perform some other tasks, you will be in need of a custom recovery for your Note 4. CWM and TWRP are already available for some variants of the Note 4, and now the modified version of CWM, popularly known as Philz Advanced Touch CWM recovery is also available for Exynos variants of the Galaxy Note 4. Philz Advanced Touch CWM, as the name suggests, is the touch version of the CWM recovery. Philz Advanced CWM recovery has a pretty good and easy to use UI, the recovery is feature rich and works very well on the Galaxy Note 4. Initial build of the recovery has some issues, but performs all basic functions like wiping cache, wiping rom for clean install, flashing custom ROMs, backups etc. While the developers come up with a stable version of the Philz Advanced CWM for our beloved Galaxy Note 4, some of the users may want to use the existing version for now, and before you start looking for the installation guide here and there, we’ve already compiled it all up here.

As you scroll down, you will come across a complete guide to install Philz Advanced Touch CWM recovery on your Samsung Galaxy Note 4 SM-N910C, SM-N910K, SM-N910U & SM-N910H. This recovery has been compiled up be XDA senior member ChunD.K, we would like to thank him for his effort, while all the credit for this great recovery goes to Philz3759. Let’s go through the early preparations and then start flashing this recovery on your Exynos Galaxy Note 4.

Note 4_PhilzAdvanced CWM

Here are the pre-installation instructions:

1. This guide is only for Samsung Galaxy Note 4 SM-N910U,SM-N910H, SM-N910K & SM-N910C!

Make sure that your device is exactly as mentioned above. To check out what device you have, go to Settings > More/General > About Device or Settings > About Device and match the model number. Be careful about the device model number, flashing a file on a device not listed here might result in bricking it up. In that case, we may not be held responsible.

2. Battery should be charged at least 60%!

Your device’s battery shouldn’t be weak. In case your device goes dead during the flashing process, your device may get soft bricked and you might be in need of flashing stock firmware and that will ultimately result in wiping up your data as well. So, make sure that you charge your device before you start the flashing process.

3. Enable USB Debugging Mode

USB debugging mode should enabled on your device in order to avoid any connection issues. To enable USB debugging mode, go to settings > developer options > check “Allow/Enable USB Debugging”. In case you can’t find the developer options in settings, you will have to activate the options by going into settings > about device > tap the build number for 7 times and you should get the developer options under settings, and then you can enable USB debugging mode.

4. Use the OEM datacable to establish connection!

Always use the original data cable to establish connection between your Android device and your computer / laptop. Using ordinary data cables might interrupt the flashing process, so to avoid any mishap, you need to meet this requirement as well.

5. Backup everything!

Just to be on the safe side, you may consider backing up each and everything from your Android device. This is highly recommended so that in case anything goes wrong, you still have the access to all of your data and you can restore it immediately. You may backup everything as listed below.

  1. Backup SMS Messages
  2. Backup Call Logs
  3. Backup Contacts
  4. Backup Media – Copy your files manually to your PC or Laptop.

6. Turn off Samsung Kies and other softwares while using Odin3!

Make sure that you turn off Samsung Kies while using Odin3 flashtool. Samsung Kies will interrupt Odin3 and will result in causing errors and may not let you flash your desired recovery or root file. Also, make sure that you turn off any antivirus software you’ve installed and also disable firewall to avoid any connection and flashing issues.

7. Disclaimer

The methods involved in flashing custom recoveries, ROMs and rooting your phone are highly custom and may result in bricking your device, and has nothing to do with Google or the device manufacturer that is SAMSUNG in our case. Also rooting your device will void its warranty and you will be no longer eligible for any kind of free device services by the manufacturers/warranty providers. The Galaxy Note 4 comes with Knox, so rooting will also trip the Knox counter and you won’t be eligible to claim the warranty anyway. In case of any mishap we may not be held responsible. Follow these instructions to the letter to avoid any mishap or bricking. Make sure that whatever you do, you are doing it at your own responsibility.

Downloads Required

  1. Download and extract Odin3 v3.09.
  2. Download and Install Samsung USB drivers.
  3. Download the CWM Recovery For Your Device – Please choose your variant carefully.

How To Install CWM Recovery On Your Galaxy Note 4 SM-N910C/H/K/U

  1. Download CWM Recovery.tar.md5 file [According to your choice and your device].
  2. Open Odin3.exe.
  3. Put your Galaxy Note 4  in download mode. To do so, turn it off and wait for 10 seconds. Turn it on by pressing and holding Volume Down + Home Button + Power Key simultaneously, You should see a warning, press Volume Up to continue. In case this method doesn’t work for you, try one from this guide.
  4. Connect your device to your PC.
  5. As soon as Odin detects your phone, the ID:COM box should turn blue.  Make sure that you’ve installed Samsung USB drivers before connecting.
  6. For Odin 3.09 hit the AP tab. Select the recovery.tar.md5  or recovery.tar, that you downloaded above.
  7. If you’re using Odin 3.07, you will select “PDA” tab instead of the AP tab, rest of the options remain untouched.
  8. Make sure that the options selected in your Odin are exactly as shown in the pic. Odin 3.09 explained. (2)
  9. Hit start and wait till the recovery flashing is complete, as soon as your device restarts, remove it from PC.
  10. You can now boot into recovery mode by turning off your device, and then turning it on by pressing and holding Volume Up + Home + Power Key.
  11. That’s all!
  12. Screenshot_6

Root The Galaxy Note 4 Now

Although there’s a much easy method available to root your Galaxy Note 4, that can be found here. But, in case you haven’t rooted yet and you’ve flashed the recovery only, you would like to have the root access too, here’s a way to root your device using the custom recovery.

  1. Download the Root Package.zip file [ UPDATE-SuperSU-v2.16.zip ]
  2. Copy the downloaded Root Package.zip file to your Galaxy Note 4’s SD card.
  3. Boot into recovery mode on your Galaxy Note 4, use step 11 in the recovery installation guide.
  4. Now Select “Install > Choose Zip from SD card > Root Package.zip > Yes / Confirm”.
  5. This will flash the Root Package and quickly gain the root access on your Galaxy Note 4.
  6. Reboot your device.
  7. Find SuperSu in the App Drawer.

How to check if the device is properly rooted or not?

  1. To do so, go to Google Play Store on your Galaxy Note 4.
  2. Find “Root Checker” and install it.
  3. Open Root Checker.
  4. Tap “Verify Root”.
  5. It will ask you for SuperSu rights, tap “Grant”.
  6. It should show you Root Access Verified Now!
  7. Screenshot_1

You may want to create EFS and Nandroid Backup now.

That’s all. We hope that you found this guide helpful. If you’re stuck with anything or got any queries, make sure that you use the comment box below and reach us. Thank you all.

How to Install TWRP Recovery on Nexus 6

0
How to Install TWRP Recovery on Nexus 6

Previously we posted an article about the Bootloader unlocking of Nexus 6, although there was no Official thread related with such unlocking the method is the same in every Nexus device. Now another step related to extreme customization is here, a custom recovery and again, TWRP recovery has won the game. So many Android devices running Android 5.0 had already been rooted but Motorola Nexus 6 is still in the line to be rooted.

Nonetheless, TWRP recovery is available and it is time for us to show you how to Install TWRP Recovery on Nexus 6. Although there won’t be much use of it as rooting method is still not available and typical Super SU won’t do any good. So we will have to wait for the rooting method. Till then you can download and flash the TWRP Recovery and for the least, Back-up your ROM for no reason at all. I never liked the TWRP recovery and so far, for these latest flagships, TWRP recovery has made its way. I liked the CWM Recovery, simple and great, not recommended by a lot of developers, but who cares, it is your device and your choice do whatever you like with it.

How to Install TWRP Recovery on Nexus 6

How to Install TWRP Recovery on Nexus 6

Early Preparations:

1. This is only for Nexus 6!

This custom ROM is only for the device mentioned above. Make sure that your model number matches the one listed above. To do so, go to Settings > About Device on your device and see your model number. Flashing this ROM on any other device will result in bricking it so make sure that you meet this requirement first of all.

2. Battery should be charged at least over 60%

Make sure that your battery is charged enough to complete the flashing process. In case your battery is low and your device goes dead during the flashing process, you may end up soft bricking your device as it won’t complete the flashing process.

3. Backup everything!

Just to be on the safe side, you may consider backing up each and everything from your Android device. This is highly recommended so that in case anything goes wrong, you still have the access to all of your data and you can restore it immediately. You may backup everything as listed below.

4. Unlock Bootloader of Your Device!

Since this recovery or any other Custom Mod or tweak can’t be installed without unlocking the Bootloader first, you’ll need to unlock the bootloader, follow the link to do so: Link

5. Disclaimer

The methods involved in flashing custom recoveries, roms and rooting your phone are highly custom and may result in bricking your device, and has nothing to do with Google or the device manufacturer that is Google in our case. Also rooting your device will void its warranty and you will be no longer eligible for any kind of free device services by the manufacturers/warranty providers. In case of any mishap we may not be held responsible. Follow these instructions to the letter to avoid any mishap or bricking. Make sure that whatever you do, you are doing it at your own responsibility.

Downloads Required:

TWRP Recovery.img: Link [LAtest 3.2.3-0 Added]

[Rename the dowlnoaded file to recovery.img]

ADB Tools: Link

Copy the recovery.img file to the Minimal ADB and Fastboot folder which is located in your Windows drive’s Program Files x86 folder.

How To Flash TWRP Recovery:

  1. Now on your phone, go to Bootloader/Fastboot mode, Press and hold Power + Volume Down Buttons till you see some text on-screen
  2. Now open Minimal ADB and Fastboot.exe file from your computer’s desktop.
  3. Connect your Device with PC.
  4. Now Type fastboot flash recovery recovery.img to flash the TWRP Recovery on your device.
  5. Type fastboot reboot, to reboot your device.
  6. After a proper reboot, your device will be running TWRP Recovery.