Home Blog Page 318

Temple Run 2 Blazing Sands APK Download

0
Temple Run 2 Blazing Sands APK Download

Temple Run 2 faces another overhaul in the form of Temple Run 2 Blazing Sands. The APK is now available and you can download it now.

Temple Run is one of the very few runner games which is still very dear to many Android and iPhone gaming geeks. Temple Run’s successor Temple Run 2 replaced the original game and managed to earn respect from almost all the Temple Run users. For the past few years, Temple Run 2 was running on the same theme with which it was released. Back in December 2015, we saw Temple Run 2 getting a revamp in the form of Temple Run 2 Frozen Shadows. The updated Temple Run was liked by many and once again gave life to this game in the devices of users.Temple-Run-2-Blazing-Sands-Android

It looks like Imangi Studios are not going to let the charm of Temple Run 2 fade away. The developers have once again updated the game, and this time we are all set to go through the Blazing Sands. Temple Run 2 Frozen Shadows has been overtaken by Temple Run 2 Blazing Sands now. It’s still the same runner game, but brings you an entirely new theme, new locations, new rewards, new bonuses and everything that you would imagine in a land full of sand. It looks like Imangi Studios are going to follow the footsteps of Kiloo (the people behind Subway Surfers) and will launch the new locations in Temple Run 2 every now and then.

Temple Run 2 Blazing Sands is around for almost last 3 days. We’ve just got our hands on the APK file and pulled it out for our users. You can go ahead and download the all new Temple Run 2 Blazing Sands APK and then learn the instructions to install it on your phone right away.

Temple Run 2 Blazing Sands APK and How to Install

  1. Download Temple Run 2 Blazing Sands APK
  2. Download the file to your phone straight away, or copy it to your phone from your PC.
  3. Now on your phone, go to settings > security > allow unknown sources > check this.
  4. Now using a file manager, locate the APK file that your just copied or downloaded.
  5. Tap the APK file and finish installation using the on-screen instructions.
  6. Once installed, access the newly installed game through app drawer.
  7. That’s all. Enjoy Temple Run 2 Blazing Sands!

Just in case you’re willing to play the new version of Temple Run 2 on your PC then checkout Temple Run 2 Blazing Sands for PC!

Install and Download MovieBox For iOS 9 / 9.2.1 / 9.3.2 Without Jailbreak

0
Install and Download MovieBox For iOS 9 / 9.2.1 / 9.3.2  Without Jailbreak

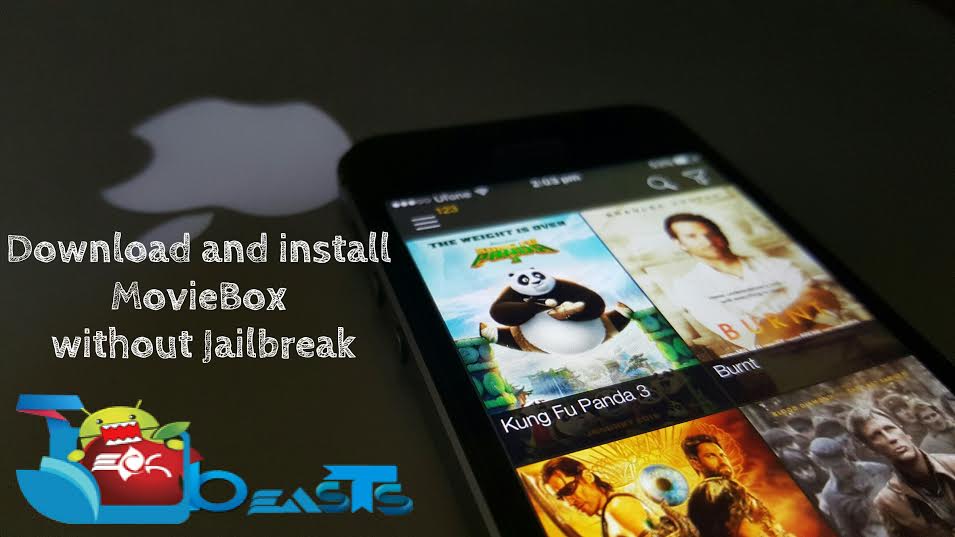
Following are the instruction for how to download and install MovieBox for iOS 9 / 9.1 / 9.2.1/ 9.3.2 Without Jailbreak. 

install moviebox without jailbreak

There was a time when Jailbreak was must in order to install third-party apps and tweaks on iPhone, but as technology is growing every day now we don’t go in a complex process in order to install third-party apps on iOS devices. As we all know that MovieBox is a perfect app when it comes to watch movies online for free, back in days we have to install MovieBox using Jailbreak but now we don’t need to Jailbreak our device to install such apps. In the following guide I’ll tell you how to download and install MovieBox For iOS 9 / 9.1 / 9.2.1/ 9.3.2 Without Jailbreak.

Also See: How to Install vShare on iOS 8-9,9.1 without Jailbreak

Install and Download MovieBox For iOS 9 / 9.1 / 9.2.1/ 9.3.2 Without Jailbreak:

install moviebox without jailbreak

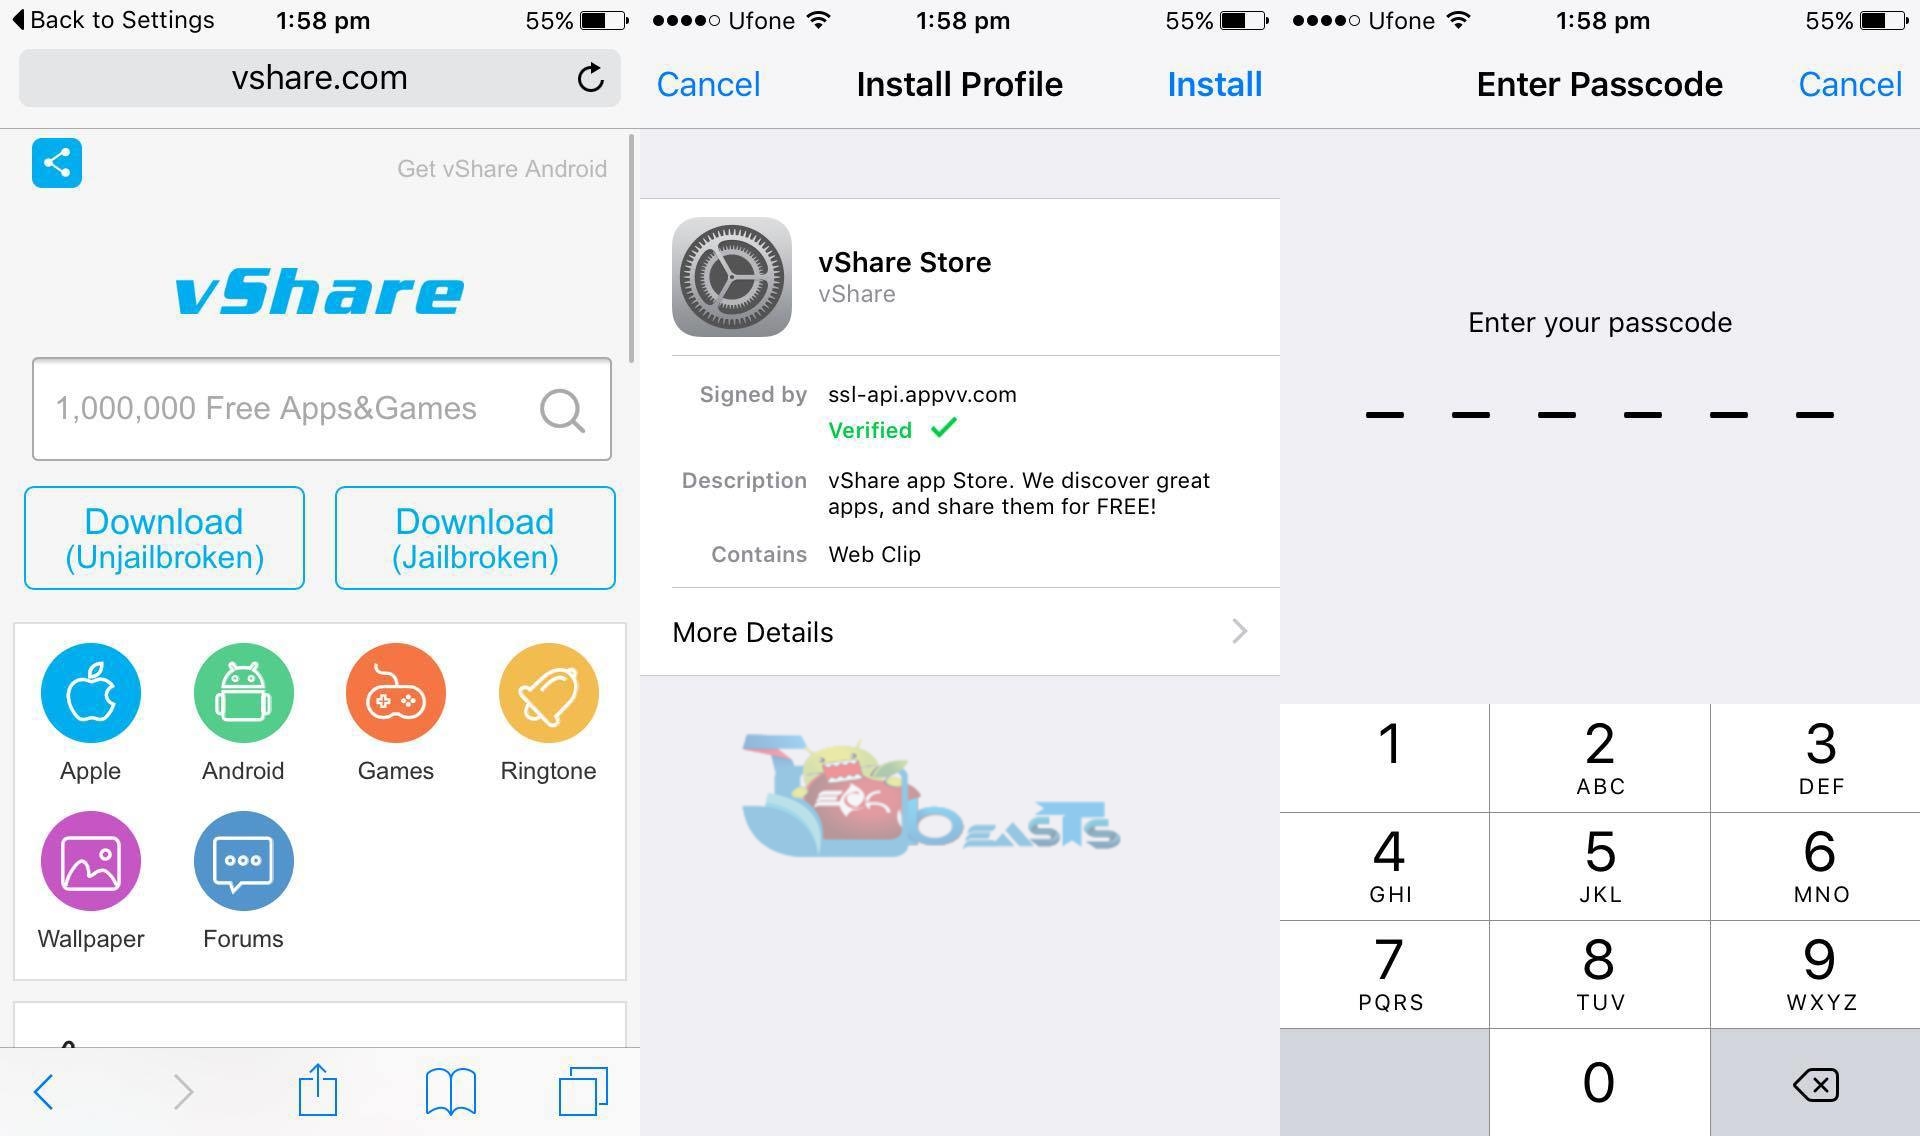
Step1: Open Safari on your iPhone->open this url ( http://www.vshare.com/ )->Tap on UnJailbroken->Install->enter passcode->Tap Install.

install vshare

Step2: On your home screen you’ll see vShare icon tap on it. Now search for MovieBox, tap on install and go back to your home screen, wait for MovieBox to install.

install movie box without jailbreak

Step3:On your home screen you’ll see MovieBox icon. Tap on it and you’ll get error, to fix it goto Settings->General->Profiles & Device Management->Tap on Huawei->Tap on trust.

install moviebox

Now Head back to home screen, Tap on MovieBox and you’ll see it will start working. Click on any movie to start watching it online for free. Enjoy !!

install moviebox without jailbreak

Also see:

How To Fix Galaxy Note 5 won’t install system update after upgrading to Marshmallow

How To Fix Galaxy Note 5 won’t install system update after upgrading to Marshmallow

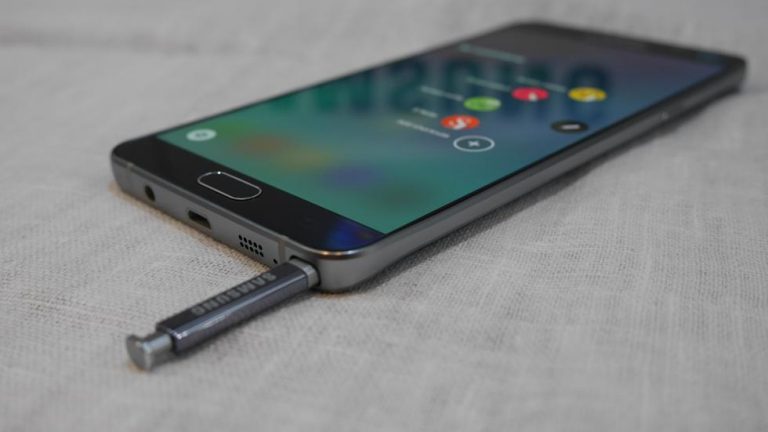
Few days back I’ve posted about Samsung Galaxy Note 5 problems after Android Marshmallow update, Today I’ve received another email regarding issue on Galaxy Note 5. Lets’ start the method on Fix Galaxy Note 5 won’t install system update after upgrading to Marshmallow.

This is what I’ve received in email:

[note] ” Now there is an update of 359mb, may be a stability update. I have downloaded it several times with high speed net and it gets downloaded in few minutes but whenever it gets installed after booting process and a blue screen appears with a Droid showing the update process, it gets failed everytime it reaches 26% of updating. The same thing has happened every single time i have updated my phone for this update. After the boot gets complete there is a message which says “unable to update software. Kindly contact Samsung care” & then there is an error report log is created of .98mb and i report it every time to same.[/note]

Fix Galaxy Note 5 won’t install system update after upgrading to Marshmallow

How To Fix Galaxy Note 5 won’t install system update after upgrading to Marshmallow:

Follow all the instruction carefully in order to install systems updates after updating your Galaxy Note 5 to Android 6.0.

  • First of all, check your phone storage, it’s a common mistake which we ignore. If your phone storage is full then your device cannot install the update, although it will download the update.
  • Try to clear the cache of your device before installing the update.
  • Make sure that all the stock, carrier, Samsung and other apps are enabled, sometime accidentally or by mistake we disable a critical app and because of that you cannot install the system update.

After applying all these solution still you are facing the same issue, then follow the instruction below and it will be your last resort

  • Turn off your device.
  • Now press and hold home+Power+Volume Up key.
  • Release the power button once you see logo, but keep holding home and Volume up keys.
  • Now when you see Android logo, let go both buttons.
  • Use the volume down button to navigate and highlight wipe data / factory reset.
  • Now use the power key to select the option.
  • You have to select ‘Yes‘ when you’ll be prompted to next menu.
  • Now wait for the process to be completed, once it’s done highlight ‘Reboot system now’ and press power button to select it.
  • All Done.

Soft and Hard Reset Asus Eee Pad Transformer [ How To ]

Soft and Hard Reset Asus Eee Pad Transformer [ How To ]

Asus Eee Pad Transformer is very old sheep in tablets world, but still a large number of people owns them. Yesterday one of our readers asked me how to Soft and Hard Reset Asus Eee Pad Transformer. In the following guide, I’ll explain how you can hard and soft reset Asus Eee Pad Transformer.

sof hard reset Asus Eee Pad Transformer

How To Soft and Hard Reset Asus Eee Pad Transformer:

Soft Reset

Let’s start with the Soft Reset, this came handy when your device is bit laggy or start freezing. Press and hold down the power button “to perform a soft reset” until your Asus Eee Pad screen turns black.

Hard Reset

Hard Reset also know as Factory reset, by performing hard reset on any device means your device will be back in Factory settings. All you data will be wiped out, following are the methods to do hard reset on Asus Eee Pad Transformer.

Method#1:

  • Firs, Power off the Eee Pad.
  • Press and hold the volume down button, then press and hold the power button.
  • When bootloader screen appears you can let go off both buttons.
  • Now you have to wait for a prompt saying  “Press <VOL_UP>” then press the Volume Up button to start the process.

Method#2:

Open the Settings->Privacy->Factory data reset->Erase tablet->Erase everything.

All Done.


How To Turn Safe Mode On or Off on Moto X

0
How To Turn Safe Mode On or Off on Moto X

If you are an owner of Moto X, then this article will be helpful for you. In this post, I’ll tell you how to turn Safe Mod On or Off Moto X. Now Safe Mode came handy whenever you face a problem with an App or settings, that won’t let you start your device. Safe Mode allows you to access the base of Android software. Let’s start the method to Turn Safe Mode On or Off on Moto X.

turn on and off safe mode on moto x

How To Turn Safe Mode On or Off on Moto X:

Enable Safe Mode

  • First, Press and hold power key.
  • Now when you see the logo on the screen, release the power and hold Volume down key.
  • Don’t let go the volume down key until your device finishes rebooting.
  • When you see Safe mode in the bottom left corner of your screen, release the volume down button.

Disable Safe Mode

  • Press the power button, wait until the menu appears.
  • Select the power off.
  • Now you device will boot up normally.

How To Fix Samsung Galaxy S7 Won’t Connect to PC

How To Fix Samsung Galaxy S7 Won’t Connect to PC

Samsung gives us the best Android devices, but not the perfect devices. Samsung Galaxy S7 is the latest flagship of Samsung high-end devices. As I said every device has problems in the post, I’ll tell you how to fix Samsung Galaxy S7 won’t connect to PC. I’ve found a few useful methods to fix this issue. Let’s start it !

galaxy-s7-wont-connect-to-pc

How To Fix Samsung Galaxy S7 Won’t Connect to PC:

Following are the all possible solutions that can help your fix Samsung Galaxy Won’t connect to Pc.

  • First and foremost, check your USB cable. If you are using another cable other than the cable came within the box, use the original cable. After trying this there is no luck, connect any other device if the result is the same, then change your cable.
  • Now our Laptop and computers have multiple USB ports. I would say try different ports if you are getting nothing with one.
  • If you are using Windows, check your drivers are they upto date. If they are not, visit this site “Samsung’s Support site“. Download and install the latest drivers for your Samsung Galaxy S7.
  • If you are using a Mac the only thing you can do is download and install “ Android File Transfer “.
  • Now after updating the drivers, still you are facing the same issue try the following steps.
  1. Open Run on your windows.
  2. Type the command “devmgmt.msc“, then press “Enter“.
  3. Click on other devices to expand it and then select “Portable Devices” sections.
  4. Find the device wit Yellow Sign,“SAMSUNG_Android” or “Unknown Device”.
  5. Right-click on the device and select uninstall.
  6. Now right click anywhere in device manager and click on “Scan for hardware changes
  7. All Done.

How to Download Previously Purchased Apps in iOS

0
How to Download Previously Purchased Apps in iOS

In this post, I’ll tell you how to download previously purchased music, movies and apps from iTunes. I’ll post sperate guides for computer, iPhone, iPod and iPad. This option came handy when you lost your data on computer or when you buy a new Apple device. Let’s start the method to download previously purchased music, movies and apps from iTunes.

itunes-download-previous-purchases

How to Download Previously Purchased Items on Computer:


  • Open iTunes on your computer and select iTunes Store.
  • On the right menu you’ll see different options, click on the purchased.
  • Now you have to add your Apple id credentials if you are not logged in.
  • In purchased tab, you can choose from Music,  TV Shows, Apps or Books.
  • You can also choose to view “All” or items “Not in My Library”.
  • Click on the Cloud icon right next to the item you want to download.
  • If you want to download all the purchased items, look for Download All and click on it.


How to Download Previously Purchased items on iPhone, iPad and iPod Touch:


  • Open iTune Store app on your iPhone, iPad or iPod Touch.
  • Tap on More.
  • Select Purchased.
  • Tap on Music, Movie or TV Shows.
  • Now select All or Not on this device.
  • Choose the item you wish to download.
  • Tap the Cloud icon next to the item.

How to Download Previously Purchased Apps:


  • Open App Store on your device.
  • If you are on iPad tap on Purchased and if you are iPhone and iPad Tap on updates.
  • Tap on Purchased.
  • Tap on Cloud icon next to the item you wish to download.


This all, you can easily download previously purchased apps, games, music, movie or books from iTunes. If you face any issue regarding this post please tell me in comments so I can help you with it


Download KingRoot APK & For Windows – All Versions [ Latest Apk Updated ]

0
Download KingRoot APK & For Windows – All Versions [ Latest Apk Updated ]

After Framaroot, KingRoot happens to be the most popular one-click root application for Android devices. KingRoot is capable of rooting hundreds of Android devices, it works particularly with the smartphones which are apparently ignored by the developers and do not get a lot of custom stuff.

KingRoot has definitely eased the lives of millions of users as they don’t have to follow any complex method to gain root access on their device. Simply installing this application on the device and tapping the root button does the job.

This application happens to be pretty amazing because it doesn’t require the users to select the root exploit to root their device like Framaroot. If you are too much lazy to find out an exploit or flash any custom files to root your device, KingRoot is definitely meant to be for you.

KingRoot has all the root exploits stored on the cloud storage. When you will tap the root button, it will find the best possible exploit from its cloud database and apply on your device to root it. As of now, KingRoot supports almost 103790 Android smartphones. KingRoot can easily root Huawei, Sony, Samsung, LG, Google Nexus & ZTE devices. You can install KingRoot on your Android smartphone and you can also download its desktop version and root your device using a computer.

Users who are not very well familiar with the root access, they may want to know that root access basically opens the doors to the powerful open source world of Android. You can customize your Android smartphone the way you want once rooted. One of the biggest advantages of root access is, it allows you to remove the in-built applications which are the bloatware loaded by device manufacturers. Rooting your device will also allow you to install root-specific applications like Greenify, Titanium Backup, Flashify, Flash Gordon, WiFi Kill etc. Using these applications you can enhance the battery life of your device, you can backup all the contents of your device. You can also flash recovery images and get a custom recovery on your device. Creating EFS or IMEI backup is another thing that you can do after gaining the root access on your Android smartphone. You can also overclock and underclock the CPU of your phone and change its performance capabilities. You learn more about best root-specific applications here.

Let’s have a look at the compatibility list of KingRoot and then head towards the download links. Press Control + F or Command + F to find your device.

Google

google a1
google roar_a50
google micromax aq4501
google mi438s
google a536
google sd4930ur
google mito_a10
google evercoss a65
google sprout
google micromax aq4501
google google-nexus*10
google h940
google nexus 5
google iris 708
google material
google spice mi-498
google myphone uno
google nexus 4
google nexus 7
google roar_a50
google nexus 6
google sparkle v
google google-nexus-10


Samsung

samsnug-p5200 samsnug-p5200
samsnug n9106
samsug p5200
samsung n9106 samsung n9106
samsung n9106hd samsung n9106hd
samsung t805s samsung t805s
samsung t950s t950s
samsung xe7008 xe7008
samsung*t805s t805s
samsung-n9106 samsung-n9106
samsung-t805s samsung-t805s
samsung-t950 samsung-t950
samsung samsung n9106hd
samsung g900
samsung sm-a300h
samsung sm-a3009
samsung sm-a300m
samsung sm-a300yz
samsung sm-a300g
samsung sm-a300f
samsung sm-a3000
samsung sm-a300fu
samsung sm-a500h
samsung sm-a5009
samsung sm-a500g
samsung sm-a500m
samsung sm-a500f
samsung sm-a5000
samsung sm-a500yz
samsung sm-a500y
samsung sm-a500l
samsung sm-a500s
samsung sm-a500fu
samsung sm-a700h
samsung sm-a700f
samsung sm-a7009
samsung sm-a700k
samsung sm-a700s
samsung sm-a700fd
samsung sm-a7000
samsung sm-a700yd
samsung sm-t805y
samsung sm-t805c
samsung sm-t807t
samsung sm-t805m
samsung samsung-sm-t807a
samsung sm-t805
samsung gt-i9506
samsung sm-g360bt
samsung sm-g360p
samsung sm-s820l
samsung sm-g360m
samsung sm-g360f
samsung sm-g3518
samsung sm-t231
samsung sm-t235
samsung sm-t235y
samsung sm-n9106w
samsung 三星 a7000
samsung sm-e500h
samsung sm-e500m
samsung sm-e500f
samsung sm-e700h
samsung sm-e7009
samsung sm-e700f
samsung sm-e700m
samsung sm-e7000
samsung samsung-sgh-i437
samsung sm-g530h
samsung sm-g530bt
samsung sm-g5309w
samsung sm-g530f
samsung sm-g530m
samsung sm-g530mu
samsung sm-g5308w
samsung sm-g5306w
samsung sm-g530y
samsung sgh-t399n
samsung sm-g720n0
samsung sm-g720ax
samsung sm-g7200
samsung samsung-sm-g530az
samsung sm-g530fz
samsung gt-i9100
samsung gt-n7000
samsung gt-p5310
samsung sm-n9009
samsung sm-n9002
samsung sm-n9008
samsung sm-n9006
samsung sm-n9000q
samsung sm-n900
samsung sm-g357m
samsung sm-g357fz
samsung sm-n7500q
samsung sm-n750
samsung sm-n750
samsung sm-n7509v
samsung sm-n7505l
samsung sm-n7505
samsung sm-n7505
samsung sm-n7508v
samsung sm-n7506v
samsung sm-n7507
samsung sm-n900w8
samsung sm-n9008v
samsung sgh-n075t
samsung sm-n9008s
samsung sm-n9005
samsung sm-n9005
samsung sm-n9005
samsung sm-n9008v
samsung 三星 i9158
samsung gt-i9502
samsung sch-i959
samsung gt-i9500
samsung gt-i9500
samsung shv-e300k
samsung shv-e300l
samsung shv-e300s
samsung sph-l720
samsung gt-i9505
samsung sm-g355m
samsung sm-g5109
samsung sm-g5108q
samsung sm-g5108
samsung sm-t705y
samsung sm-t705c
samsung samsung-sm-t707a
samsung sm-t705
samsung sm-g9009w
samsung sm-g9008w
samsung sm-g900m
samsung n900t
samsung sm-g9006v
samsung sm-g800m
samsung sm-g800f
samsung sm-g906k
samsung sm-g906l
samsung sm-g906s
samsung sm-p601
samsung gt-i9300
samsung gt-i9300
samsung gt-i9308
samsung sm-c1116
samsung sm-c115m
samsung sm-c115
samsung samsung-sm-g750a
samsung sm-g750f
samsung gt-i9158v
samsung samsung/三星galaxy tab3 gt-p5200
samsung samsung-n9106
samsung samsung-t950s
samsung sm-w2014
samsung sm-g7106
samsung sm-g7105
samsung sm-g7108v
samsung sm-t2519
samsung sm-t2556
samsung sm-g360g
samsung sm-g360gy
samsung gt-i9301i
samsung samsung t805s
samsung n9106
samsung samsung-n9106hd
samsung samsung_n9106
samsung sc-01g
samsung gt-i9192i
samsung sm-g850fq
samsung sm-g850k
samsung sm-g850l
samsung sm-g850s
samsung sm-g850m
samsung sm-g850f
samsung sm-g850y
samsung sm-n9000
samsung gt-n7100
samsung samsung t950s
samsung samsung_t950s
samsung sm-n915k
samsung sm-n915l
samsung sm-n915s
samsung sm-n915fy
samsung sm-n915w8
samsung sm-n915g
samsung sm-n915t
samsung samsung-sm-n915a
samsung sm-n915f
samsung sm-n9150
samsung sm-n910h
samsung sm-n910k
samsung sm-n910l
samsung sm-n910s
samsung sm-n910c
samsung sm-n910u
samsung sm-n910u
samsung sm-n910w8
samsung sm-n910g
samsung sm-n9109w
samsung sm-g920f
samsung sm-9100
azumiplus azumiplus
samsung cosmos_note_4
samsung sm-n910p
samsung sm-n910t
samsung sm-n910a
samsung samsung-sm-n910a
samsung sm-p901
samsung sm-g750h
samsung sm-g7509
samsung sm-g7508q
samsung sm-g3588v
samsung sm-g3586v
samsung sm-g9092
samsung sm-g9098
samsung sm-g313mu
samsung sm-g313f
samsung Note
samsung Note4

ZTE

zte zte blade a450
zte n958st
zte zte q505t
zte u9180
zte blade s6
zte blade l3 plus
zte zte q7
zte zte q5-t
zte zte grand s ii lte
zte n9180
zte n918st
zte a880
zte k30-t
zte blade l2 zte blade l2
zte zte blade l2
zte bgh joy smart axs
zte zte blade l3
zte blade l3
zte beeline pro
zte zte q507t
zte zte geek 2
zte zte blade vec pro
zte zte v831w
zte zte q301c
zte avea intouch 4
zte zte blade v220
zte z933
zte zte q505t
zte zte q802t
zte zte q2s-t
zte zte q801u
zte zte g720c
zte zte g720t
zte z987
zte z830
zte amazing x1
zte amazing x2
zte amazing p6
zte zte blade vec 4g
zte blade apex2
zte zte blade apex2
zte zte geek ii 4g
zte turkcell t50
zte z970
zte z998
zte zte grand s ii lte
zte zte s2004
zte zte s2005
zte zte star
zte zte s2002
zte zte star 1
zte u988s
zte zte u9180
zte u9180
zte v9180
zte x9180
zte zte a880
zte zte g718c
zte zte-g718c
zte zte g719c
zte zte q801l
zte zte q802c
zte zte q802d
zte zte v9820
zte 乐檬k3
zte zte blade l3 apex
zte zte blade l3 plus
zte zte blade s6 plus
zte n9520
zte zte v993w
zte n9515
zte n9510

SONY

sony sol26
sony lenovo s920
sony xperia s
sony xperia ion
sony c2104
sony c5302
sony c5303
sony c5502
sony c5503
sony c6502
sony xperia zl
sony c6503
sony c6506
sony c6602
sony xperia z
sony xperia z
sony xperia z
sony l36h
sony c6616
sony c6802
sony c6806
sony c6806_gpe
sony c6833
sony c6833
sony c6902
sony c6902
sony xperia z1
sony l39h
sony l39t
sony c6903
sony c6906
sony c6906
sony c6916
sony c6943
sony xperia p
sony d2202
sony d2203
sony d2206
sony d2212
sony d2243
sony d2302
sony d2303
sony d2305
sony d2306
sony d2403
sony d2406
sony d2502
sony d2502
sony d2533
sony d2533
sony d5102
sony d5103
sony d5106
sony d5303
sony d5303
sony d5306
sony d5316
sony d5322
sony d5322
sony d5503
sony d5503
sony d5803
sony d5803
sony d5833
sony d5833
sony d6502
sony d6502
sony xperia z2
sony d6503
sony d6503
sony l50t
sony l50u
sony d6543
sony d6543
sony d6563
sony d6563
sony d6603
sony d6603
sony d6616
sony d6633
sony d6633
sony d6643
sony d6643
sony d6653
sony d6653
sony xperia z3
sony d6683
sony e2003
sony e2033
sony e2043
sony e2104
sony e2105
sony e2115
sony full android on c6603
sony l50t
sony l50u
sony l55t
sony l55u
sony xperia tx
sony m36h
sony m50w
sony s55t
sony s55u
sony sgp321
sony sgp341
sony sgp351
sony sgp521
sony sgp521
sony sgp621
sony sgp621
sony sgp641
sony xm50h
sony xm50t
sony xperia z2


LG

lg g tablet
lg lg-d855
lg u22 lg u22
lg g-pad8.5
lg ux10
lg lg ux10


HUAWEI

huawei huawei g750-t01
huawei coolpad 8297
huawei g750
huawei huawei
huawei h30-u10
huawei 4x
huawei huawei ale-l04
huawei huawei b199
huawei huawei b199
huawei huawei c199
huawei huawei c199s
huawei huawei c8816
huawei huawei c8816d
huawei c8817d
huawei huawei c8817e
huawei huawei c8817l
huawei chc-u01
huawei chc-u03
huawei chc-u23
huawei u9508
huawei u9510
huawei huawei d2-2010
huawei kestrel
huawei speedsurfer
huawei huawei g6-c00
huawei huawei g6-l11
huawei huawei g6-l33
huawei huawei g6-t00
huawei huawei g6-u00
huawei huawei g6-u10
huawei huawei g620-l72
huawei g620-l75
huawei g620s-l01
huawei g620s-l02
huawei g620s-l03
huawei g620s-ul00
huawei huawei g628-tl00
huawei huawei g660-l075
huawei g7-l01
huawei huawei g7-l03
huawei huawei g7
huawei huawei g7-tl00
huawei huawei g7-ul20
huawei huawei g730-l075
huawei huawei g750-t00
huawei huawei g750-t20
huawei h30-c00
huawei h30-c00
huawei h30-t00
huawei h30-t10
huawei h60-l01
huawei h60-l02
huawei h60-l03
huawei h60-l04
huawei honor 6
huawei h60-l11
huawei h60-l12
huawei h60-l21
huawei huawei h891l
huawei huawei hn3-u01
huawei hol-u19
huawei honor 6 h60
huawei honor 6 h60-l01
huawei holly u19
huawei mediapad m1 8.0
huawei 403hw
huawei huawei mt1-t00
huawei huawei mt1-u06
huawei huawei mt2-c00
huawei huawei mt2-l01
huawei huawei mt2-l02
huawei huawei mt2-l05
huawei mt2l03
huawei huawei mt7-cl00
huawei huawei mt7-j1
huawei huawei mt7-l09
huawei huawei mt7-tl00
huawei huawei mt7-tl10
huawei huawei p6-c00
huawei p6-t00
huawei huawei p6-t00
huawei huawei p6-t00v
huawei huawei p6-u06
huawei p6-u06
huawei 302hw
huawei huawei p6 s-u06
huawei huawei p7-l00
huawei huawei p7-l01
huawei huawei p7-l05
huawei huawei p7-l07
huawei huawei p7-l09
huawei huawei p7-l10
huawei huawei p7-l11
huawei huawei p7-l12
huawei huawei p7 mini
huawei pe-cl00
huawei pe-tl00m
huawei pe-tl10
huawei pe-tl20
huawei pe-ul00
huawei huawei sc-cl00
huawei huawei sc-ul10
huawei t1-a21w
huawei mediapad t1 8.0 pro
huawei t1-821w
huawei t1-823l
huawei huawei y536a1
huawei huawei y550-l01
huawei huawei y550-l02
huawei huawei y550
huawei y550-l03
huawei huawei y625-u13
huawei huawei y625-u32
huawei huawei y625-u43
huawei huawei y635-cl00
huawei huawei y635-tl00
huawei hol-u10

HTC

htc 321ey
htc 321e
htc htc desire 510
htc htc d820mt
htc htc d820mu
htc htc_d620u
htc htc desire 620g dual sim
htc htc_d620h
htc htc desire 620
htc htc d626d
htc htc desire 626gplus dual sim
htc htc d626w
htc htc_d626x
htc htc d820us
htc htc d820ts
htc htc desire 820s dual sim
htc htc_d820f
htc htc desire 820
htc htc d816h
htc htc desire 816g dual sim
htc htc desire 816
htc htc one_m8
htc htc desire 816
htc htc one
htc htc desire 610
htc htc one
htc htc one mini
htc htc one mini 2
htc htc one_m8
htc htc
htc htc d610t
htc htc d820t
htc htc d816t
htc htc d816t
htc htc m8w
htc htc m8t
htc htc m8t
htc htc m8st
htc htc m8st
htc htc d820u
htc htc 802t 16gb
htc htc 802t
htc htc 802t 16gb
htc htc 802t
htc htc d816d
htc htc d816d
htc htc d816v
htc htc m8d
htc htc m8d
htc htc m8sd
htc htc m8sd
htc htc 802d
htc htc 802d
htc htc d816w
htc htc d816w
htc htc d816e
htc htc d816e
htc htc m8w
htc htc m8e
htc htc m8e
htc htc m8sw
htc htc m8sw
htc htc 801e
htc htc 801e
htc htc 802w
htc htc 802w
htc htc331zlvwpp
htc htc6525lvw
htc htc6525lvw
htc htc_0p6b
htc htc desire 820 dual sim
htc htc desire 816 dual sim
htc htc one_e8
htc htc one_e8
htc htc desire 516 dual sim
htc htc_butterfly_s_901s
htc htc_d610x
htc htc_d820u
htc htc_d816x
htc htc_d816x
htc htc_m910x
htc htc_m910x
htc htc_m8x
htc htc_m8x
htc htc_m8sx
htc htc_m8sx
htc htc one 801e
htc htc one 801e
htc htc one 801s
htc htc butterfly s
htc htc desire eye
htc htc one_m8 dual sim
htc htc one dual sim
htc htl23
htc one
htc one
htc htc one
htc htl22
htc htc m8et
htc htc m8et
htc htc_pn071
htc 831c
htc 831c
htc 0paj5
htc htcone
htc 0pcv1
htc 710c
htc 710c
htc htc_0pcv2
htc htc_pn071
htc htc desire 320
htc htc desire 526gplus dual sim
htc htc_d526h
htc htc desire 526g dual sim
htc htc6435lvw
htc_d816t htc_d816t
htc_d816 htc_d816
htc_d816w htc_d816w
htc_d820u htc_d820u
htc_m8t htc_m8t
htc htc d816v
htc verizon

rooting-tile

Please keep in mind that KingRoot doesn’t root all devices on all firmwares. For some devices, the root will depend on its firmware version. You may go ahead and give it a try. Most of the chances are, the application will root your devices successfully.

Download KingRoot Android APK & Desktop version

KingRoot APK for Android:

Download KingRoot V4.0.1.237 APK

Download KingRoot V4.1.0.245 APK

Also, Download KingRoot V4.1.0.249 APK

Download KingRoot V4.1.0.524 APK

Download KingRoot V4.1.0.703 APK

Also, Download KingRoot V4.5.0.722 APK

Download KingRoot V4.5.0.803 APK

Download KingRoot V4.5.0.902 APK

Also, Download KingRoot V4.9.2 APK

Download kingRoot V4.9.3 Apk  (Latest)

If the download link shows you a warning about the file being infected, ignore it and click on “Download Anyway”.  These files are safe and secure to use.

For some devices, the mobile version may not work. You will have to use the desktop version for those.

How To Root Your Any Android Phone Using KingRoot:

  1. Download the APK file directly on your Android phone or copy it to your phone after downloading it on your PC.
  2. Locate the APK file on your phone now and tap to install it.
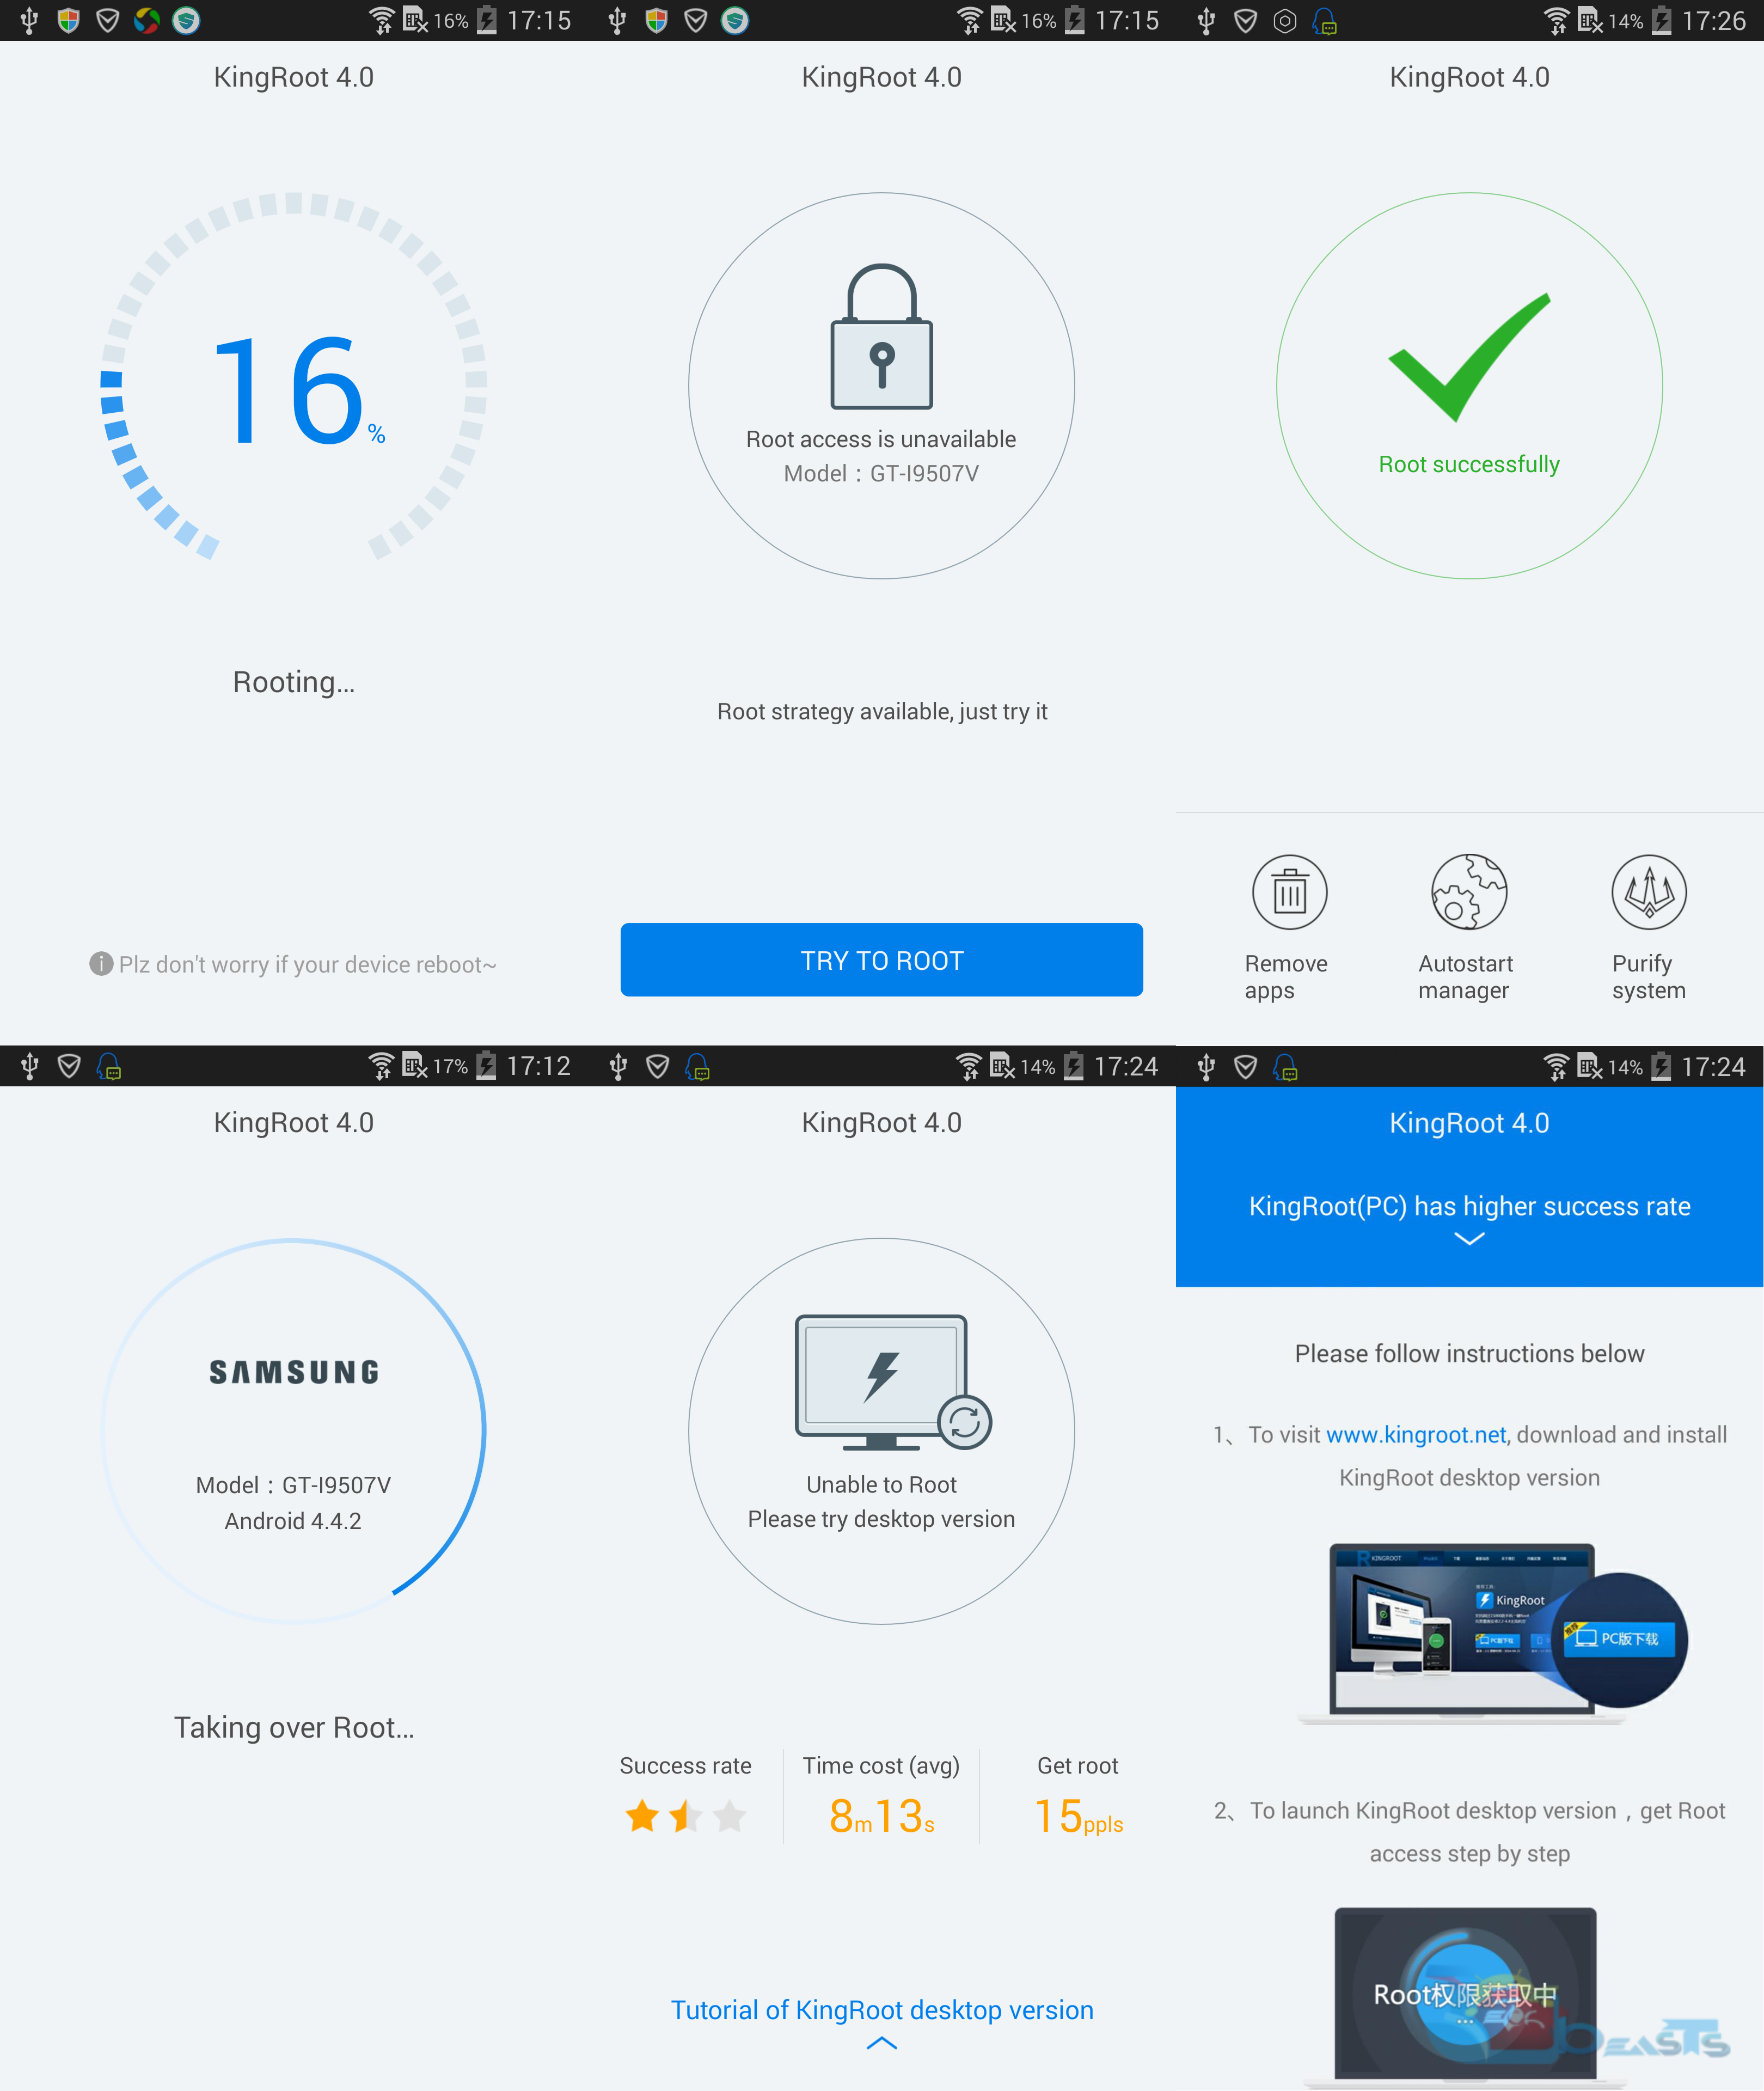
  3. Once installed, open the installed KingRoot application from App drawer and tap the root button.
  4. The application will now root your phone and install KingUser which is similar to SuperSu.
  5. Install Root Checker from Play Store to verify root access on your smartphone now.
  6. That’s all.

KingRoot for Desktop PC (Windows)

  • Download KingRoot for Windows.
  • Install it on your PC now.
  • Connect your phone while having the USB Debugging mode turned on.
  • Click on “开始root” button to root now.
  • That’s all.

If you have any queries or issues, you may visit the official KingRoot page and get the help right away.


[Solved] Fix Laptop Keyboard Not Working – Tips

[Solved] Fix Laptop Keyboard Not Working – Tips

In this post, I’ll tell you how to fix Laptop keyboard not working, it’s a common error and everybody faced it for sure. Today I’ll give you some tips that will help you to easily fix your laptop keyboard if it’s not working properly, you can use these tips and tricks for Apple, HP, Dell, Lenovo, Toshiba, Acer, Asus, Samsung, Sony and all other brands to solve keyboard not working error.

Laptop-Keyboard-Not-Working

How To Fix Laptop Keyboard Not Working [Tips]:

Following are the best tips and tricks that can help you fix laptop keyboard not working issue on all the laptops.

Tip1:

First, whenever you face this issue while you are working on your laptop, save your current work and restart your system. A simple can help you solve your issue when your system will restart it will automatically adapt the best settings which were saved.

Tip2:

Check your drivers and see they are up to date or not, if your drivers are not the latest then first you need to update them. I’ve seen many users reporting that after updating the drivers their keyboards started working perfectly fine.

These were all the basic step that can easily fix your Laptop keyboard not working problem, now let’s start the main method.

How To Fix Laptop Keyboard Not Working [ Video ]

  • First, Right Click on Windows icon and select the device manager or you can open  Run and type “devmgmt.msc”, it will open device manager.
  • Now find Keyboard device and click on it.
  • Select Scan for hardware changes.
  • Your laptop screen will flick and the list will auto refresh, that’s it.

Fix Laptop Keyboard Not Working Video Part 2:

[Solved ]How To Fix USB Device Not Recognized Error In Windows

[Solved ]How To Fix USB Device Not Recognized Error In Windows

Today in this post, I’ll help you solve USB Device Not Recognized Error in any Windows version. This error is well-known and mostly all of us has faced this issue once or twice. I am not getting into reasons why this happens or whatever is causing this, last night I faced this issue after very long. Now let’s start the methods to fix USB Device Not Recognized Error In Windows.

USB-Device-Not-Recognized

Following are the error messages you receive, every time you see USB device not recognized.

[note]“The last USB device you connected to this computer malfunctioned, and Windows does not recognize it.”
Or
“One of the USB devices attached to this computer has malfunctioned, and Windows does not recognize it. For assistance in solving this problem, click this message.”[/note]

How To Solve USB Device Not Recognized Error In Windows:

Following are the different sort of troubleshooting steps that can help you fix USB device not recognized error.

Method#1:

  • First, restart your PC.
  • Now remove the power plug.
  • Put your USB device in USB port.
  • Plug back Power cable and turn on your PC.

Method#2:

  • Open Windows menu and search for RUN.
  • Click on RUN and when new Windows open up.
  • Type “devmgmt.msc” and click OK.
  • You’ll see a new window will open, click on Universal Serial Bus controllers to expand it.
  • Now plug-in your device and you’ll see a port with Yellow sign.
  • Right click on that port and select uninstall.
  • Once drivers are uninstalled, Restart your PC.
  • When your PC boots up, USB drivers of the device will be automatically re-installed.

Method#3:

  • Open device manager on your PC.
  • You’ll see a list of devices, Click on Universal Serial Bus controllers. 
  • Now locate your device which is not recognized by the Windows.
  • Right Click on that port, select update drivers.
  • Now if you have a backup of USB drivers then select the destination where you have stored them.
  • If you don’t have any backup, select install automatically. It will download the drivers from the Web.

How To Fix USB Device Not Recognized Error In Windows 


Method#4:

  • Right Click on battery icon in your Windows.
  • Select power options.
  • In next page, click on change plans.
  • Now in next page, click on change advanced power settings.
  • Click on USB Settings from the list.
  • Click on USB selective suspend settings and Disable both On battery and Plugged in settings.

Fix No Connection Retry error message on Google Play

Fix No Connection Retry error message on Google Play

I am sure that every Android user knows about this error [ No Connection Retry error message on Google Play ] and also faced it once, In this post I’ll tell you how you can fix No Connection Retry error message on Google Play. I really don’t know why this error or issue start popping up but I’ve solutions to fix the no connection error on Google Play.

These are all basic troubleshooting steps, which can be helpful. The main reason of no connection error appears on Google Play is that you may be using an old version of Google Play Store. Let’s start the method to fix this issue.

[note] Learn how to fix all Google Play Store errors. [/note]

Fix No Connection Retry error message

Fix No Connection Retry error message on Google Play:

Check Google / Gmail Password:

To download and install apps from Google Play we need an active Gmail account in order to access Google Play store properly. Go to Settings-Accounts->Gmail->Sync-Enable, Also if you’ve recently changed your Gmail id password then you have to re-enter the password in your device.

Check Date / Time Settings:

It’s important that your device Time and Date is correct and according to your time zone. If your device Time and date setting are incorrect then you’ll face network problems and when you open Google play you’ll get the same no connection error.

Factory reset:

  • Turn off your device.
  • Now press and hold home+Power+Volume Up key.
  • Release the power button once you see logo, but keep holding home and Volume up keys.
  • Now when you see Android logo, let go both buttons.
  • Use the volume down button to navigate and highlight wipe data / factory reset.
  • Now use the power key to select the option.
  • You have to select ‘Yes‘ when you’ll be prompted to next menu.
  • Now wait for the process to be completed, once it’s done highlight ‘Reboot system now’ and press power button to select it.
  • All Done.

Clear the Cache on your Android Device:

Step#1: Open Settings on your Android device.

Step#2: Now tap on More tab.

Step#3: Tap on Application Manager from the list.

Step#4: Now select All Application by swipe to left.

Step#5: There you’ll see all your installed apps, Tap on Google Play.

Step#6: Now all you have to do tap on Clear Cache and Clear data.

Step#7: Now goto home screen and restart your device.

  • Install the latest Google Play Store version:

This is the most effective solution till now and I’ve heard many users saying that ” After installing the latest Google Play Store version this issue is fixed ” . You can download the latest Google Play Store version from the following link.

[note] Download Google Play Store Latest Apk [/note]

How to fix Unfortunately com.samsung.ipservice has stopped

How to fix Unfortunately com.samsung.ipservice has stopped

In this post, I’ll tell you how to fix unfortunately com.samsung.ipservice has stopped on Samsung. There are many reason which can cause this issue, but the main thing is how to fix this, Let’s start the guide to fix unfortunately com.samsung.ipservice has stopped.

[note] Learn how to fix Unfortunately, Settings has stopped error on Android [/note]

fix unfortunately com.samsung.ipservice has stopped

How to fix Unfortunately com.samsung.ipservice has stopped:

Following are the best possible solutions to fix unfortunately com.samsung.ipservice has stopped.

  • Turn off your device.
  • Now press and hold home+Power+Volume Up key.
  • Release the power button once you see logo, but keep holding home and Volume up keys.
  • Now when you see Android logo, let go both buttons.
  • Use the volume down button to navigate and highlight wipe cache partition.
  • Now use the power key to select the option.
  • You have to select ‘Yes‘ when you’ll be prompted to next menu.
  • Now wait for the process to be completed, once it’s done highlight ‘Reboot system now’ and press power button to select it.
  • All Done.

Method2:

  • Goto Settings on your device.
  • Select Backup and reset.
  • Tap on Factory Data reset.
  • Now Tap on reset device.
  • Now enter you password or pattern to proceed.
  • Tap on delete all.

Method3:

  • Turn off your device.
  • Now press and hold home+Power+Volume Up key.
  • Release the power button once you see logo, but keep holding home and Volume up keys.
  • Now when you see Android logo, let go both buttons.
  • Use the volume down button to navigate and highlight wipe data / factory reset.
  • Now use the power key to select the option.
  • You have to select ‘Yes‘ when you’ll be prompted to next menu.
  • Now wait for the process to be completed, once it’s done highlight ‘Reboot systemnow’ and press power button to select it.
  • All Done.