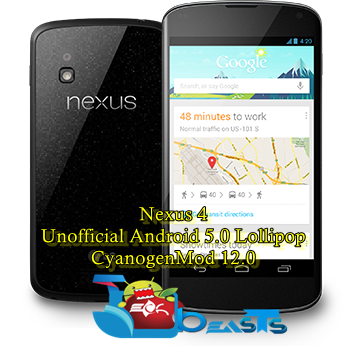
Google’s Nexus 4 is all set to get the Android 5.0 Lollipop update, but just in case it’s getting hard for you to wait for the official Lollipop update to hit your device, you may want to taste Lollipop on your device with this latest unofficial CyanogenMod 12 Custom ROM. If you’re not familiar with CyanogenMod, you may want to know that among so many custom ROMs, CyanogenMod is the best one and a choice for millions of users. CyanogenMod’s 12th version, that will be based on Android 5.0 Lollipop will be out very soon, but since the sources are already out, the developers are always able to come up with the unofficial builds of the custom firmware, and one for the Nexus 4 got outed a few days ago.
This unofficial build of CyanogenMod 12 has been compiled up by XDA member AndroGeek974. In the following post we are going to have a look on a guide that will explain you how you can install this unofficial CM 12 Android 5.0 Lollipop on your Nexus 4. If you are not pretty much familiar with the use of custom ROMs, you may not install this as this firmware is not recommended to be kept for everyday use. There’s a high chance of instability and bugs in this custom ROM, so proceed at your own risk keeping everything in mind.
Early Preparations:
1. This is only for LG Nexus 4!
This custom ROM is only for the device mentioned above. Make sure that your model number matches the one listed above. To do so, go to Settings > About Device on your device and see your model number. Flashing this ROM on any other device will result in bricking it so make sure that you meet this requirement first of all.
2. Battery should be charged at least over 60%.
Make sure that your battery is charged enough to complete the flashing process. In case your battery is low and your device goes dead during the flashing process, you may end up soft bricking your device as it won’t complete the flashing process.
3. Install a Custom Recovery
You need a custom recovery to flash this ROM. TWRP is recommended for install this CM 12 ROM, you may install it using our One-Click tool for nexus devices guide.
4. Backup everything!
Just to be on the safe side, you may consider backing up each and everything from your Android device. This is highly recommended so that in case anything goes wrong, you still have the access to all of your data and you can restore it immediately. You may backup everything as listed below.
5. Disclaimer
The methods involved in flashing custom recoveries, roms and rooting your phone are highly custom and may result in bricking your device, and has nothing to do with Google or the device manufacturer that is Google in our case. Also rooting your device will void its warranty and you will be no longer eligible for any kind of free device services by the manufacturers/warranty providers. In case of any mishap we may not be held responsible. Follow these instructions to the letter to avoid any mishap or bricking. Make sure that whatever you do, you are doing it at your own responsibility.
How To Update Nexus 4 With Android 5.0 Lollipop Unofficial CM 12 Custom ROM
This post was last modified on November 14, 2014 7:24 pm
Snapchat is a popular social sharing platform so when something goes wrong it can be…
Android 12 Compatibility Definition Document (CDD) calls for device manufacturers to specify the performance classes…
New features in Telegram Beta 8.0.0 for Android include group video chat 2.0, live video…
Download the Blackout Bingo app on your PC. With a competitive twist to the classic…
Download the Wombo app on your PC. All you have to do is add a…
Download the Golf Rival app on your PC. Follow the steps discussed below to get…
This website uses cookies to provide you up-to-the-mark services.