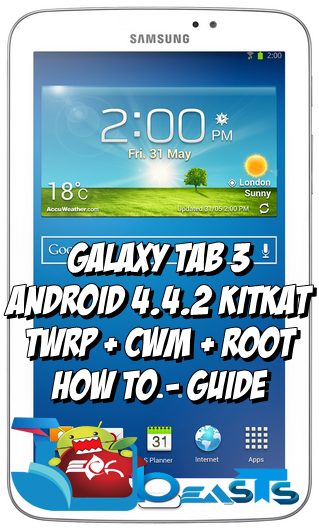
Samsung recently updated the 3G/SIM+WiFi variant of its popular Galaxy Tab 3 to Android 4.4.2 KitKat. The update is not less then a surprise as Samsung remained quite silent about any further version of Android for the Tab 3, and it suddenly made a direct move from Android 4.1.2 Jelly Bean to Android 4.4.2 KitKat. There are bug fixes, performance enhancements, stability has been improved, notification bar has been changed with white icons atop and a lot of UI changes here and there including the lockscreen. A while ago we posted the guide to update the Tab 3 SM-T211 to this latest firmware, just in case you’ve updated your Tab 3 and now you’re looking to go out of the boundaries on your Galaxy Tab 3 running the latest firmware, we’ve compiled up the following guide for you.
We are going to install CWM or TWRP recovery and root the Galaxy Tab 3 SM-T211 running Android 4.4.2 KitKat firmware. Although both these recoveries are used for the same purpose, but the users have their own liking and may pick one depending upon their own choice. CWM stands for ClockworkMod and is the simple recovery while TWRP stands for Team Win Recovery Project and basically is the Touch Recovery with very user friendly UI. Before we move forward to the installation instructions, it is important to remove any confusions that the newbies/first timers may have. In order to do so, let’s go through a brief introduction of a custom recovery and the root access.
What is a custom recovery and root access?
A custom recovery allows you to install custom roms, mods etc. Along with these, you can make a Nandroid backup, this helps you a lot as you can move back to the previous working state of your phone at any time you want if you have backed up your current system. In some cases, to root the phone you need to flash SuperSu.zip file in the custom recovery, having installed the recovery may help you while in some casesto install the recovery easily, you need to have the phone rooted. You can also wipe cache and dalvik cache of your phone using a custom recovery.
Rooting your phone gives you complete access over all the data which is apparently locked by the manufacturers. This includes removal of the factory restrictions and making changes to the internal system and the operating system. Gaining the root access gives you the privileges to install various applications to enhance the performance of your device, allows you to remove the built-in applications/programs, helps you to upgrade the battery life of your device & install the apps which require the root access for the proper functionality and modify your device in so many other ways e.g using mods and flashing custom recoveries and custom ROMs. Here’s our collection of 10 Best Root Apps.
Early Preparations:
Downloads Required:
How to install CWM or TWRP Recovery on Samsung Galaxy Tab 3 SM-T211 running Android 4.4.2 KitKat:
How to Root Galaxy Tab 3 SM-T211 running Android 4.4.2 KitKat:
How to install busybox now?
How to check if the device is properly rooted or not?
That’s all the credits for the recovery goes to XDA dev gr8nole. In case you’re happy with his work, don’t forget to make him a donation for his hardwork. If you’re facing any difficulties regarding this post, feel free to stop by the comment box and drop us your words. We will get back to you ASAP!
This post was last modified on January 31, 2015 9:11 pm
Snapchat is a popular social sharing platform so when something goes wrong it can be…
Android 12 Compatibility Definition Document (CDD) calls for device manufacturers to specify the performance classes…
New features in Telegram Beta 8.0.0 for Android include group video chat 2.0, live video…
Download the Blackout Bingo app on your PC. With a competitive twist to the classic…
Download the Wombo app on your PC. All you have to do is add a…
Download the Golf Rival app on your PC. Follow the steps discussed below to get…
This website uses cookies to provide you up-to-the-mark services.
View Comments
eu cumpri todos os passos do poste, ele instalou o super su mas o root não funciona
Sorry, want say i did all steps but just install the super su and root dont work... i tried three times and anyone work
i'm use samsung tab 3 7 (sm_t211)
im sorry my bad English
@rubenrc:disqus download SuperSu from here: download.chainfire.eu/supersu
and flash this one instead of the file linked above.
This should work perfectly fine.. Let me know..
It's the same with me, I installed step, as in the following all post install super su, but the root does not.
I manage to flash cwm n root my sm-t211 on kk 4.2.2 succesfully.. Thanks!!
Hello, I have followed all the instructions to CWM my T211 as you provided, but it doesn't change anything. I tried that for several times already. Any suggestion please?
@disqus_mJAfWU0vC9:disqus make sure that you flashing the files properly. This is a working guide!
Thanks for a quick reply. well, this can be a stange case. I downloaded and extracted to get the recovery.tar.md5 and did all the proceeding above.
i use ODIN 3.09. :(
that is what you did wrong. You don't need to extract the file, it is already .tar.md5!
To root a phone , is it necessary to flash it
@disqus_jOKTlUqvwF:disqus for this method, yes, you must flash a recovery first.
bro after following the odin instrctns n flashing it . i can't install the super user zip , as i got no options in the recovery mode . it only shows downloading ...if u hve any fb page where we can instantly chat will b great ..
@disqus_jOKTlUqvwF:disqus that's not recovery mode buddy. You've booted up your device in download mode, you need to boot it up into recovery mode.
thanks , i got the root acces , bt after few hrs it says the binary are not updated and now i cant acces the root ... how can i uninstall the superuser to re install ..
dude , im still stuck at the supersu binary installation problem ..
how can i access root again .. pls help
@disqus_jOKTlUqvwF:disqus download supersu.zip file from here: http://download.chainfire.eu/578/SuperSU/UPDATE-SuperSU-v2.14.zip
Unzip it, and find the SuperSu apk in the folders.
Install SuperSu using that APK file on your phone and then run it.
The issue should be resolved now. Good Luck.
i gain root acces for few hrs , bt now its gone as it is not updated .. wat should i do to gain access again
i jst flash , bt cant install the super user zip .. it dosent show an install option rather its showing downloading ... anything wrong here ?
@disqus_jOKTlUqvwF:disqus to flash .zip files you need to use a custom recovery, you can't flash SuperSu.zip using Odin.
usama , ive got the super user app in the app drawer ..
bt it says SU binary is not installed .. what shud i do next plz hurry
@disqus_jOKTlUqvwF:disqus Download the latest SuperSu.zip file from here: http://download.chainfire.eu/578/SuperSU/UPDATE-SuperSU-v2.14.zip
Unzip the file and you will find an APK file within that.
Install SuperSu in your device using this APK file, and it should go fine. Let me know if it works for you or not :) Good Luck.
Usama,,I follow the the instruction above for my tab 3.7..but FAIL and my tab show "FIRMWARE UPGRADE UNCOUNTERED AN ISSUE"....PLEASE ANSWER AND HELPS.
@disqus_dFhgIN1hCs:disqus try using this : https://techbeasts.com/2014/04/14/firmware-upgrade-encountered-an-issue/
@disqus_dFhgIN1hCs:disqus this will work for you as well: https://techbeasts.com/2013/10/12/how-to-install-stock-firmware-on-samsung-android-smartphones/
after following the above guide , i got the super app in the app drawer ...
but when i opened it it says SU binary is not installed ... what should i do next ?
Hello sir usama! when i click the downloaded trp or cmw, it says md5 file error: binary is invalid.. pls upload new md5 file. pls
@markangelofallorinagonzalvo:disqus what's your device model number?
sm-t211.. i think it has nothing to do with my mode. when i click the AP and selected the md5, it says md5 error: binary is invalid.. hmmn
@markangelofallorinagonzalvo:disqus Try renaming the file to recovery.tar.md5
and give it a try. Let me know it works or not.
it works for sm-t110 wifi tab 3 lite?
@disqus_tc0blUITWO:disqus no it will not.
thank's..
it's work for me..
GREAT..
@shinichiezakudo:disqus That's great, thanks for the feedback. Stay connected with us.
can't download cwm or twrp, file deleted ?