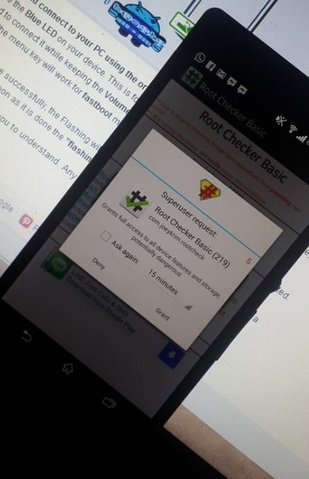
In order to root your phone, you must install a CWM recovery first.
So, Here’s how to install a CWM recovery on your device first:
- Download CWM Recovery kernel from here.
- Copy the downloaded boot.img file to the Minimal ADB and Fastboot drivers folder that you got after installing Android ADB and Fastboot drivers using our quick guide.
- Open the folder where you placed the downloaded recovery.img or boot.img file. E.G Minimal ADB and Fastboot or Fastboot.
- Press and hold the shift key and right click on any empty area within the folder and click on “Open Command Window Here”.
- Turn off your Xperia ZR completely.
- Now Press and hold the Volume Up Key and plug in the USB data cable.
- You should see the LED turning blue on your phone now, that means it is connected properly in Fastboot mode.
- Now in the command prompt type: Fastboot flash boot boot.img [Replace the Boot name with the filename you downloaded],
- It will take a few seconds and flash recovery in your phone, check out the logs on the command prompt.
- Plug out the USB data cable, Turn on your device, as soon as you see the Sony logo press the Volume Up key rapidly, you should boot into the CWM recovery now.
- Congrats! You’re done with the recovery installation.
How to Root Xperia ZR running Android 4.3 10.4.B.0.569 firwmare now:
- Download SuperSu.zip file and copy it to your phone’s internal or external SD card.
- Boot into the CWM recovery that you just installed.
- Select “Install Zip > Choose Zip from Sd Card > SuperSu.zip > Yes”.
- It will quickly flash SuperSu in your phone.
- That’s it, find it in app drawer after flashing.
- Install Busy Box now from the Google Play store if you need.
- Congrats! You’re rooted now as well.
Once rooted, you can go back to your phone’s stock kernal now. In order to do this, follow these steps.
- Open Sony Flashtool, hit the small lightening button on the top left and click on “Flashmode”.
- Select the firmware [Android 4.3 Jelly Bean 10.4.B.0.569] that you flashed in Xperia ZR.
- In the selection menu on the right side, exclude everything except Kernel.
- Click on “Flash”. Connect your device in flashmode when prompted.
- Let the Kernel flash process complete.
- Phewwwwww! You’re back to your stock kernel now and have a rooted phone now.
That’s all with rooting and recovery installation on the Xperia ZR. We hope that you find the guide easy to understand. In case you got any queries/suggestions or face any difficulties regarding this post, please feel free to stop by the comment below. We will respond you as quick as we can.
Pages: Page 1 < Page 2


Will this guide work? Still pretty doubtful as it is the only guide available for the xperia ZR on 4.3
@redbirdz:disqus yes it will. Let us know after you are done.
Hello Usama
I m not able to get into the recovery mode after pressing the voulme up button rapidly as you suggested..
@disqus_LKLmODhhkw:disqus use adb to boot into recovery. Issue this command: adb reboot recovery
and let me know do you see the recovery or not.
help me bro…after install cwm,i think my phone crash..now i cant log in my phone..continue reboot..sorry for my bad english..
same problem with mind succesfully install the cwm but now keep on rebooting only
@goodnyt:disqus you can quickly flash the firmware and get it fixed again.
@mohd_zulhilmi:disqus you can quickly flash the firmware and get it fixed again.
where i can the firmware??
after i install cwm,when switch on,after xperia logo,my phone keep on rebooting..help me bro..
@mohd_zulhilmi:disqus https://techbeasts.com/2014/01/12/update-xperia-zr-c5503-to-android-4-3-jelly-bean-10-4-b-0-569-official-firmware/
Sorry bro for late reply..
Bro I need u r help badly..;(
i done it like this , let me know whether its correct or not
C:Program FilesMinimal ADB and Fastboot>adb reboot recovery
daemon not running. starting it now on port 5037 *
daemon started successfully *
@disqus_LKLmODhhkw:disqus there’s a shortcut created on your desktop as well. This is strange, no such message appears here, kindly send me the screenshots if you can.
C:Program FilesMinimal ADB and Fastboot>adb reboot recovery
error: device not found
Bro now I get this message..
@disqus_LKLmODhhkw:disqus that means your device is not properly booted into fastboot mode, please make sure that you’ve installed all the drivers.
Thank u bro..I finally rooted..:)
is it possible to get the original Android kitkat 4.4.2 for Sonay Xperia ZR c5502 …if Yes..How to get and install…Waiting for favor bro
@disqus_LKLmODhhkw:disqus kitkat isn’t available for Xperia ZR at the moment.
Bro I m game freek can u suggest any condition zero ROm
Bro here the screenshot,,Bro I got into recovery mode…I added the SuperSU-v1.89_2 in Phone memory…But I m not able to find the file…I m helpless now…what to do…
@disqus_LKLmODhhkw:disqus place SuperSu.zip on your phone’s internal sd and then locate it, you should find it easily.
Hiiii
I done what u suggested but i m not ab;e to get into custom recovery mode by as you suggested…Help………….
hi
I’ve done all the steps but I can not install zip file.
there is no zip file installation on my phone.
where can I find zip file installation.
please help me
@omidtom:disqus if you have flashed the recovery carefully, you must get a zip flash option in cwm. Please read the tutorial carefully.
hi
I am getting a error in fastboot remote: command not allowed
whats going wrong?
hi
i am getting an error remote command not allowed
whats going wrong?
@disqus_QComi6LdhJ:disqus you’re having connection issues / or your bootloader is not unlocked. Please connect your device properly and check if it’s unlocked or locked.
i do have the boot-loader unlocked and using the standard cable provided with zr
did somebody done this succesfully?
Hi
my zr is rooted.
i have aokp 4.4 on my phone but i want to bring back stock rom to it.
I’ve tried flashing stock rom but it just brings sony logo.
Please help me to bring back stock rom to my phone.
I don’t have any backup from my stock rom.
Regards
omid tom use this guide: https://techbeasts.com/2014/01/12/update-xperia-zr-c5503-to-android-4-3-jelly-bean-10-4-b-0-569-official-firmware/
https://techbeasts.com/2014/01/12/update-xperia-zr-c5502-to-android-4-3-jelly-bean-10-4-b-0-569-official-firmware/
stuck on waiting for device!
@disqus_WgHtFLVySR:disqus it’s connection issue. Please connect your device properly.
the device is connected and thers the blue light light yet its still waiting!!
@disqus_WgHtFLVySR:disqus this is an issue with the drivers. You got to install your drivers properly. Please do some research work on how to solve this issue, this is not a big problem. You either are connecting it without install drivers or something else. You may install sony flashtool, using flashtool drivers, install Fastboot drivers for sony specifically and then connect it.
hi..what should i iype in Command Promote. that is “Fastboot Flash Boot boot.img” or ”
“Fastboot Flash Reacovery recovery.img”..coz i download the kernel file and renamed it with recovery..plz elp
@syedmashrurmehdiragib:disqus recovery.img is the name of the file you are going to flash if the file is kernel.elf you should flash it as fastboot flash boot kernel.elf if the file is kernel.img you should flash it as fastboot flash boot kernel.img while the name followed by the extension may vary, for example Mashrur.img or Mashrur.elf if you renamed kernel with recovery, the command will be Fastboot flash boot recovery.elf or recovery.img | use small letters in commands.
I appear free Xperia and the screen is blue, what to do are in total shock
i also have same problem . please anyone help me i beg you 🙁
@shankarguruarumugam:disqus that’s the connection issue. Please make sure that your device is properly connected, you’ve installed fastboot drivers properly as well.
pleas say anything
i followed your instruction , but i installed twrp , it suggested that i install superuser and that will root my device, i said yes , and it powered off , now my device boot only on recovery
@disqus_Khrc0MZUdr:disqus flash stock firmware in your device and then root it properly using this guide. Good Luck.
Can this be used to root xperia zr running official kitkat os?
@krizmdy:disqus No it can’t be, Guide for latest KitKat OS will be up tonight. Stay connected.
Thank you. I’ll wait for that.
I am getting a error in fastboot remote: command not allowed
whats going wrong?
@luisazain:disqus make sure that you’ve unlocked the bootloader of your device, and make sure that it is properly booted in fastboot mode.