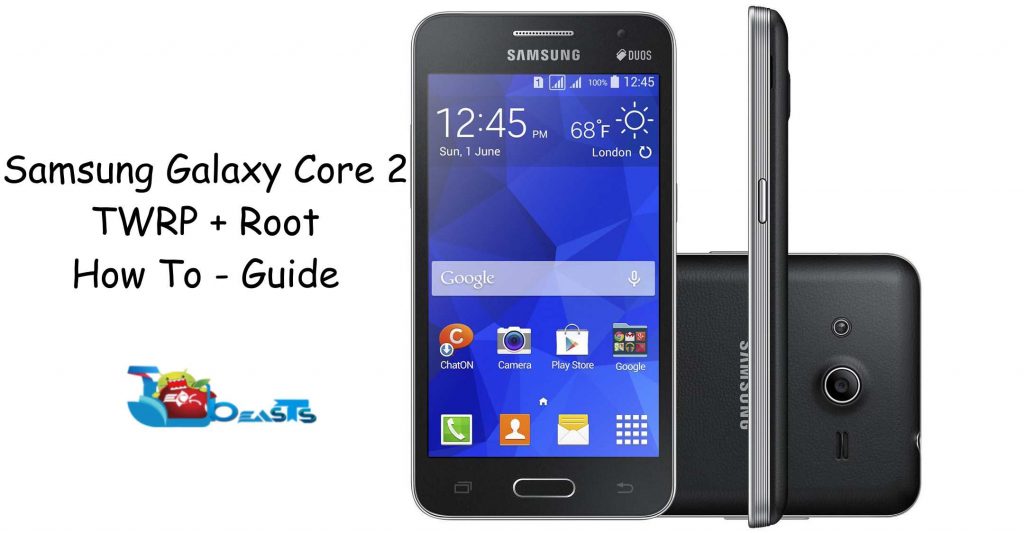
Galaxy Core 2 is Samsung’s 2014 low-end device, which is a successor of the original Galaxy Core. Samsung equipped this device with a 4.5-inch 480p display. A 5 MP shooter is planted at the back and the secondary cam is VGA. Samsung used a 768 MB RAM accompanying a Quad Core 1.2 GHz CPU. Internal storage is 4 GB with an external card slot having the support up to 64 GB. Galaxy Core 2 runs on Android 4.4.2 KitKat, Samsung hasn’t announced any plans to update this device to any higher version of Android. In case you’re a Galaxy Core 2 owner and you’re not looking forward to enhance and tweak the performance of your device by means of custom ROMs or by applying system tweaks using different root specific applications, you might be in a need to be capable of doing all this custom stuff on your Galaxy Core 2.
To begin with the custom stuff, the very first thing you need is to gain the root access on your phone. After having it rooted, you will be able to install applications like Titanium Backup, Greenify, System Tuner etc. Having the device rooted will allow you to access the core of your Android system and you will be able to make changes to improve performance and battery life of your device. The second important thing to play with custom stuff is to have a custom recovery installed on your device. There are two popular custom recoveries, CWM and TWRP. Custom recovery allows you to create and restore Nandroid backup, mount your system from recovery mode, wipe cache and dalvik cache, flash zip files of custom ROMs and Mods etc. Now that TWRP recovery is available for our beloved Galaxy Core 2, we will be installing it on this device in the succeeding guide.
We are about to show you how you can install TWRP 2.8 recovery on your Galaxy Core 2 SM-G355H and SM-G355HN. After installing TWRP, we will flash SuperSu.zip file to root this device. Let’s go ahead and get this done now.
Preparations
- This guide is only for Galaxy Core 2 SM-G355H and SM-G355HN. Do not try this on any other device.
- Charge your device up to 50%.
- Use original data cable to establish connection between your PC and your phone.
- Backup your important data as a safety measure.
- Follow this guide to the letter to avoid any mishap.
Disclaimer: Flashing custom recovery and rooting the device void its warranty. In case of a mishap, TechBeasts or Samsung may not be held responsible. Make sure that you’re doing everything at your own risk and with your full understanding.
Required Downloads:
- Download and install Samsung USB drivers.
- Download and extract Odin 3.10.6.
- Download TWRP Recovery zip file, extract this using 7zip on your desktop PC to get .tar file of TWRP recovery.
- Download SuperSu.zip file and copy it to your Galaxy Core 2
Install TWRP & Root Galaxy Core 2 SM-G355H and SM-G355HN
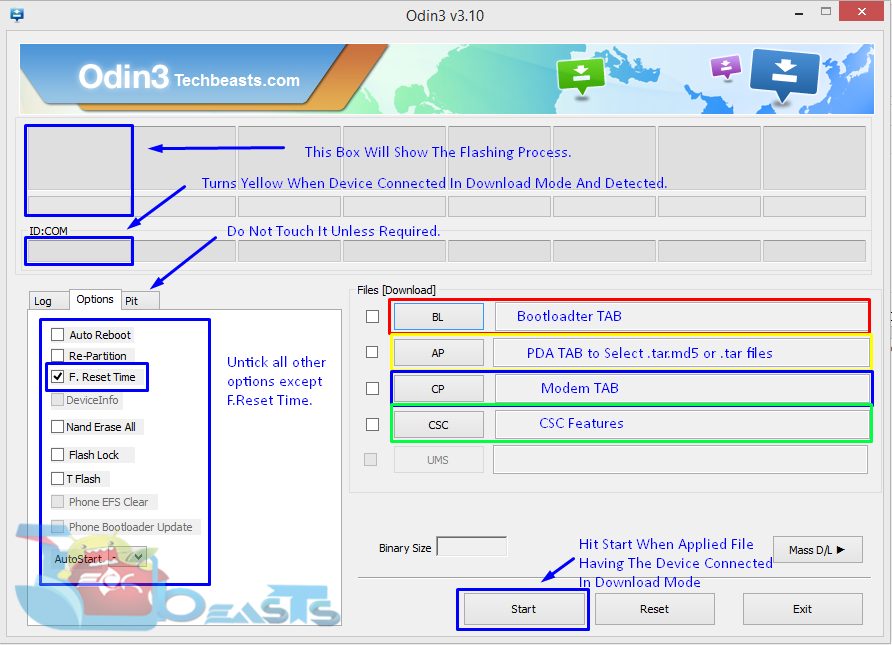
- Open Odin3 V3.10.6.exe that you extracted on your PC.
- Put your Tab S 10.5 in download mode now. To do so, turn it off completely. Now turn it on by pressing and holding Volume Down + Home + Power Key. Once your phone boots up, press the Volume Up key to continue.
- Connect your phone to your PC now. The ID:COM box in the top-left corner of Odin3 should turn blue. This indicates that your phone is connected properly.
- Now click the “AP” tab in Odin and select the TWRP Recovery.tar file that you downloaded. It will take a second or two for Odin3 to load this file.
- If the Auto-reboot option is unticked, tick it. Leave all other options in Odin3 as they are.
- Now you’re all set to flash the recovery. Just click the start button in Odin3 and sit back.
- Once the process box above ID:COM box shows green light and flashing process is finished, disconnect your device. Let it reboot
- Now turn off your device properly as we are going to boot into recovery mode.
- Now turn it on by pressing and holding Volume Up + Home + Power Key. This will boot your device in recovery mode. It should be TWRP recovery that you just installed.
- Now in TWRP recovery, select Install > locate the SuperSu.zip file and flash it.
- Once flashed, reboot your device.
- Checkout the SuperSu in application drawer. Also install BusyBox from Play Store.
- Verify root access using Root Checker.
- That’s all. You’re now set to unleash the open source nature of Android.
Stuck with anything? Reach us out through the comment box below!
Credits: Dhruvit Pokharna


i didnt understand step 10.
@disqus_vORo6Y6wrU:disqus in step 10, you have to flash SuperSU to root your phone. You will tap the Install button in the main menu of TWRP and then locate the SuperSU.zip file which you copied to your internal or external storage.
I hope this has been cleared now. Let me know if you need any further help.
i tried whole procedure but this doesnt work for me .
will you please upload a video of flash updating smsung galaxy core 2.
Thank you Bro, this is great for me 🙂
eventhough i complete the 10th step my sm-355hn is still no rooted plz help.there is not the command install though in the recovery but an other command that say’s apply update from external source and then i am finding the SuperSu i am flashing it . it say’s installation from external source completed but the root checker after made me feel sad ‘ this devise is not rooted ‘ . plz help
@vagelisdelapo:disqus it looks like TWRP wasn’t flashed on your phone. You will have to flash the TWRP properly. If flashing using the instructions above isn’t making the TWRP stick, then flash a stock fimrware on your phone and follow this process all over again to flash the TWRP and then flash SuperSU afterwards.
think you is a good solution
plz tell me is this save to over right custom recovery on stock recovery
Bro my imei is 000000000/01 after flash a custom rom on core 2 no call no sms emergency call need your help please I’m in truble. …. thanks want to repair imei number without any bullshit cost ????
Did you back up EFS after flashing a custom recovery?
if my mobile not able to swith on . can i do that ??