
Xperia Z’s Android 4.4.2 KitKat firmware is already out, a while ago we posted the guide to update your Xperia Z to the latest firmware. To unleash the power of Xperia Z running the latest 10.5.A.0.230, famous XDA Developer DooMLord, as always, has brought up CWM 6.0.4.6 recovery for the device once again. Those of you looking for the guide may end their search now and follow this guide carefully in order to install the CWM recovery and root their device successfully.
Before we head towards the installation instructions, it is important to clear any confusions that the newbies may have. Let’s have a look on a brief intro of the custom recovery and , that is ClockworkMod in our case and also go through a brief intro of the root access and then head towards the instructions to install ClockworkMod [CWM] recovery and root Sony Xperia Z C6602 and C6603 running latest Android 4.4.2 KitKat 10.5.A.0.230 Firmware.

A custom recovery allows you to install custom roms, mods etc. Along with these, you can make a Nandroid backup, this helps you a lot as you can move back to the previous working state of your phone at any time you want if you have backed up your current system. In some cases, to root the phone you need to flash SuperSu.zip file in the custom recovery, having installed the recovery might be of some help for you. You can also wipe cache and dalvik cache of your phone using a custom recovery. There is alot more you can do using a custom recovery, you mayinstall one and experience it yourself for further know-how.
Rooting your phone gives you complete access over all the data which is apparently locked by the manufacturers. This includes removal of the factory restrictions and making changes to the internal system and the operating system. Gaining the root access gives you the privileges to install various applications to enhance the performance of your device, allows you to remove the built-in applications/programs, helps you to upgrade the battery life of your device & install the apps which require the root access for the proper functionality and modify your device in so many other ways e.g using mods and flashing custom recoveries and custom ROMs. There is a laundry list of things you can do after having your device rooted and installed the custom recovery, now once you’re rooted and haveinstalled custom recovery, go ahead and enjoy it on your phone. Here’s our collection of 10 Best Root Apps.
Pre-Installation Instructions:
- The CWM recovery is only for Xperia Z C6602/C6603 running stock or stock based Android 4.4.2 KitKat [10.5.A.0.230] Firwmare. Check your firmware version in Settings > About Device and make sure that it matches the one mentioned here.
- You must have installed Android ADB & Fastboot drivers. Follow the quick guide here.
- Your device must have an unlocked bootloader. Follow our full guide here in order to unlock.
- Please make sure that your phone’s battery is charged at least over 60%. This is highly recommended in order to prevent any power issues during the recovery flashing process.
- Backup each and everything on your Android phone as follows:
- Backup all your important contacts, find the full guide here.
- Backup all your important sms messages, find the full guide here.
- Backup all your important call logs, find the full guide here.
- Backup all your important media content manually. (Copy to your PC.)
- Backup all your apps / data. If you’ve rooted your device, use Titanium Backup to do so. Follow the full guide here.
- Backup your current system using a custom recovery (CWM or TWRP) if you’ve flashed one. This is recommended in case something goes wrong with CWM installation, you can use the custom recovery and return to the old working state of your system.
- Enable USB debugging mode on your device. Get it in Settings > Developer Options > USB Debugging mode.
- Use only OEM data cable to establish connection between your PC and Phone.
- Alright! Follow this guide to the letter now.
If you want to root your device without unlocking the bootloader, check out this post.
Disclaimer: The methods involved in flashing custom roms and rooting your phone is highly custom and may result in bricking your device, and has nothing to do with Google or the device manufacturer that is SONY in our case. Also rooting your device will void its warranty and you will be no longer eligible for any kind of free device services by the manufacturers/warranty providers. In case of any mishap we may not be held responsible. Follow these instructions to the letter to avoid any mishap or bricking. Make sure that whatever you do, you are doing it at your own responsibility.
How to Install CWM 6 Recovery on Xperia Z:
- Download Doomlord’s Advanced Stock Kernel with CWM Recovery
- Copy the downloaded Advanced Stock Kernel.zip file to your phone’s SD card.
- Extract the downloaded .zip folder on your PC, you will get a Boot.img file.
- Place the extracted Boot.img file in the Minimal ADB & Fastboot folder that you created using our ADB & Fastboot Quick Setup Guide.
- If you are using Android ADB & Fastboot full package, you can place the downloaded Recovery.img file in the Fastboot folder or in the Platform-tools folder.
- Open the folder where you placed the Boot.img file. E.g Minimal ADB & Fastboot or Fastboot or Platform Tools.
- Press and hold the shift key and right click on an empty area within the folder, and click on “Open Command Window Here”.
- Turn off your Xperia Z completely.
- Now press the Volume Up Key and while keeping it pressed plug in the USB cable.
- You should see a blue light in the notification light of your phone, that means your device is now connected in Fastboot mode.
- Now type the following command: fastboot flash boot boot.img
- Hit Enter and it will quickly flash CWM 6.0.4.6 recovery in your Xperia Z.
- Once recovery is flashed, now issue this command “Fastboot reboot”
- Your device will reboot now, as soon as you see the Sony logo, and the pink LED, press Volume Up key to enter recovery.
- Once you’re in recovery, select “Install Zip > Choose Zip from SD Card > Advanced Stock Kernel with CWM.zip > Yes”. [Important]
- This will flash the Kernel in your phone now. Once flashed, reboot your device.
- Congrats! You should now see the custom recovery.

How To Root Xperia Z Running Android 4.4.2 KitKat 10.5.A.0.230 Firmware:
- Download SuperSu.zip file.
- Copy the downloaded .zip file to your phone’s sd card.
- Boot into CWM recovery now using the method explained above.
- Once in recovery, select “Install >Choose Zip from SDcard > SuperSu.zip > Yes “.
- Wait for recovery to flash the SuperSu.zip file, once finished reboot your device.
- Check SuperSu in the app drawer now.

How to install busybox now?
- Go to Google Play Store on your phone.
- Search for “Busybox Installter”.
- Once you find it, install it.
- Run the Busybox installer and proceed with the installation.
- That’s all!
How to check if the device is properly rooted or not?
- To do so, go to Google Play Store on your Xperia Z.
- Find “Root Checker” and install it.
- Open Root Checker.
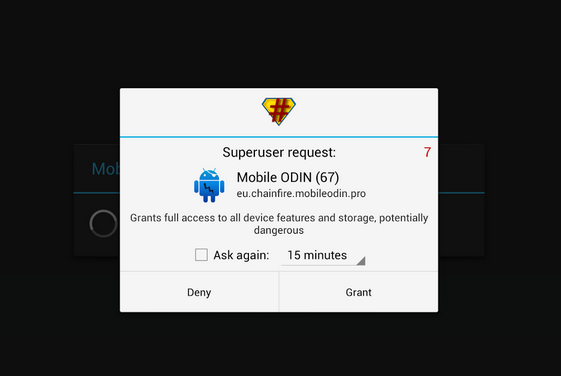
- Tap “Verify Root”.
- It will ask you for SuperSu rights, tap “Grant”.
- It should show you Root Access Verified Now!
- That’s All!

That’s All with the recovery installation. In case you got any queries or face any difficulties regarding this post, please feel free to stop by the comment box below and let us know. We will get back to you as soon as possible. Thanks all.


Please, I need some help.. After I Asked to my phone to reboot with the ADB, my phone stucks in a red light… What can I Do, or i need to wait something?
I’m trying to root my Xperia Zq with 4.4.2 Android, and after i asked my phone to reboot, it’s stuck in a black windows and appers the red light led… What can I do?
@paulorached:disqus Its probably Z1. This guide is Xperia Z not Z1. If your phone is not booting up, you may flash stock firmware to fix this problem.
You’re a star man, your page never fails me.
Advice to everyone here, just READ carefully what the instructions are.
@ryanadambutcher:disqus thank you for the complement. Stay connected with us.
Works on xperia zQ 4.4.2 – 10.5.A.0.230, or only xperia Z?
@disqus_dIjRMj4Cdy:disqus tutorial for Xperia ZQ will be up on our site tonight. Please stay connected while we make the guide.
@Usama Mujtaba, thanks 🙂
what if a newer version arrives, will i still be able to update it in sony pc companion? if i do this?
@garduniverse:disqus No, you will have to update it manually. Updating via OTA might cause some issues.
At CMW point all I get is “waiting for device”, what I’ve done wrong? C6603.
@disqus_7suyD36Zd7:disqus that means your device isn’t either booted in fastboot, or there’s some other connection problem.
Will this work on Sony ZL (C6502) running 4.4.2?
@disqus_EEZTfiy6I9:disqus try this: https://www.techbeasts.com/2014/06/22/towelroot-root-many-sony-xperia-devices-with-locked-bootloader-xperia-m2v-tx-sp-zr-more/
yes it good for
Guide it work thing you very much
I’ve done this process again because it is so easy to follow. I would like to point out that when I flashed the advanced stock kernal through the recovery, it said that it would root the system automatically. Maybe the SU fix is not needed after all.
help i have boot loop after cwm 6 recovery….any advice guys? my phone post sony logo then give pink led and wont proceed to boot and reboots indefinitely
@justinadriandelacruz:disqus boot into cwm and wipe dalvik cache and cache, if issue exists, flash stock firmware to recover your device.
i wiped out the dalvik cache…but i dont see the ‘cache’ without dalvik.
@justinadriandelacruz:disqus flash stock FTF to recover your phone.
done that, but the cwm wont be installed…once i flash the boot.img the phone behaves like a new one(like flashed from stock rom) and my apps are gone…how can i install this properly?
@justinadriandelacruz:disqus What’s your current firmware build number? and what’s your device model number? Please specify.
phone: sony xperia z with lollipop
firmware: 10.6.A.0.454
model number: c6602
sorry for the late reply dude…i hope you can still help me
@justinadriandelacruz:disqus you need to follow the method for .454 firmware. You cannot use this guide for your current firmware. Please find the guide for .454 using the search option at the top. Good Luck.
thank you bro for your time…i thought its the same although i have the same phone model