
Sony Xperia M Dual’s current firmware is based on the build number 15.5.A.1.5. The new update rolled out a few days back and fixes some minor bugs and enhances the performance of the device and its battery. If you’ve already updated your device to this latest firmware and now wondering how you can take the maximum advantage of your device, and go beyond the boundaries, you will need a custom recovery and root access on your Sony Xperia M Dual running this latest Android version.
We’ve already found the latest working CWM recovery and a method to root Sony Xperia M Dual, so that just in case you’ve been looking around for this, you may stop it right now as you’re already on the right spot. In the following post, we will install CWM [ClockworkMod] 6.0.4.9 recovery and root Sony Xperia M Dual C2004/C2005 running 15.5.A.1.5 firmware. You just need to follow this guide carefully in order to get it done successfully. Before we head towards the installation instructions, it is important to wipe any confusions that the newbies may have while flashing a recovery. To do this, let’s go through a brief introduction of the custom recovery and the root access on an Android device.
Custom Recovery:
A custom recovery allows you to install custom roms, mods etc. Along with these, you can make a Nandroid backup, this helps you a lot as you can move back to the previous working state of your phone at any time you want if you have backed up your current system. In some cases, to root the phone you need to flash SuperSu.zip file in the custom recovery, having installed the recovery may help you while in some cases to install the recovery easily,You can also wipe cache and dalvik cache of your phone using a custom recovery. There is a number of other options available in the custom recoveries that pave way for the device’s tweaking and deal with the problems efficiently.
Rooting an Android device:
Rooting your phone gives you complete access over all the data which is apparently locked by the manufacturers. This includes removal of the factory restrictions and making changes to the internal system and the operating system. Gaining the root access gives you the privileges to install various applications to enhance the performance of your device, allows you to remove the built-in applications/programs, helps you to upgrade the battery life of your device & install the apps which require the root access for the proper functionality and modify your device in so many other ways e.g using mods and flashing custom recoveries and custom ROMs. There is a laundry list of things you can do after having your device rooted and installed the custom recovery, now once you’re rooted and have installed a custom recovery, go ahead and enjoy it on your phone. Here’s our collection of 10 Best Root Apps.
If you want to root your device without unlocking the bootloader, check out this post.
Install CWM 6 Recovery And Root Sony Xperia M Dual
Pre-Installation Instructions:
- The CWM recovery is only for Xperia M C2004/C2005 running stock or stock based Android 4.3 Jelly Bean [15.5.A.1.5] Firwmare. Check your firmware version in Settings > About Device and make sure that it matches the one mentioned here.
- You must have installed Android ADB & Fastboot drivers. Follow the quick guide here.
- Your device must have an unlocked bootloader. Follow our full guide here in order to unlock.
- Please make sure that your phone’s battery is charged at least over 60%. This is highly recommended in order to prevent any power issues during the recovery flashing process.
- Backup each and everything on your Android phone as follows:
- Backup all your important contacts, find the full guide here.
- Backup all your important sms messages, find the full guide here.
- Backup all your important call logs, find the full guide here.
- Backup all your important media content manually. (Copy to your PC.)
- Backup all your apps / data. If you’ve rooted your device, use Titanium Backup to do so. Follow the full guide here.
- Backup your current system using a custom recovery (CWM or TWRP) if you’ve flashed one. This is recommended in case something goes wrong with CWM installation, you can use the custom recovery and return to the old working state of your system.
- Enable USB debugging mode on your device. Get it in Settings > Developer Options > USB Debugging mode.
- Use only OEM data cable to establish a connection between your PC and Phone.
- Alright! Follow this guide to the letter now.
Disclaimer: The methods involved in flashing custom roms and rooting your phone is highly custom and may result in bricking your device, and has nothing to do with Google or the device manufacturer that is SONY in our case. Also rooting your device will void its warranty and you will be no longer eligible for any kind of free device services by the manufacturers/warranty providers. In case of any mishap we may not be held responsible. Follow these instructions to the letter to avoid any mishap or bricking. Make sure that whatever you do, you are doing it at your own responsibility.
How to Install CWM 6.0.4.9 Recovery on Xperia M Dual C2004/C2005:
- Download XM 4.3 CWM 6.0.4.9.img file.
- Rename the downloaded file to boot.img
- Place the renamed Boot.img file in the Minimal ADB & Fastboot folder that you created using our ADB & Fastboot Quick Setup Guide.
- If you are using Android ADB & Fastboot full package, you can place the downloaded Recovery.img file in the Fastboot folder or in the Platform-tools folder.
- Open the folder where you placed the Boot.img file. E.g Minimal ADB & Fastboot or Fastboot or Platform Tools.
- Press and hold the shift key and right click on an empty area within the folder, and click on “Open Command Window Here”.
- Turn off your Xperia M Dual completely.
- Now press the Volume Up Key and while keeping it pressed plug in the USB cable.
- You should see a blue light in the notification light of your phone, that means your device is now connected in Fastboot mode.
-
Now type the following command: fastboot flash boot boot.img
- Hit Enter and it will quickly flash CWM 6.0.4.9 recovery in your Xperia M Dual.
- Once recovery is flashed, now issue this command “Fastboot reboot”
- Your device will reboot now, as soon as you see the Sony logo, and the pink LED, press Volume Up key to enter recovery.
- Congrats! You should now see the custom recovery.

How To Root Xperia M Dual Running Android 4.3 15.5.A.1.5 Firmware:
-
- Download SuperSu.zip file.
- Copy the downloaded .zip file to your phone’s sd card.
- Boot into CWM recovery now using the method explained above.
- Once in recovery, select “Install >Choose Zip from SDcard > SuperSu.zip > Yes “.
- Wait for recovery to flash the SuperSu.zip file, once finished reboot your device.
- Check SuperSu in the app drawer now.

How to install busybox now?
- Go to Google Play Store on your phone.
- Search for “Busybox Installter”.
- Once you find it, install it.
- Run the Busybox installer and proceed with the installation.
- That’s all!
How to check if the device is properly rooted or not?
- To do so, go to Google Play Store on your Xperia M Dual.
- Find “Root Checker” and install it.
- Open Root Checker.
- Tap “Verify Root”.
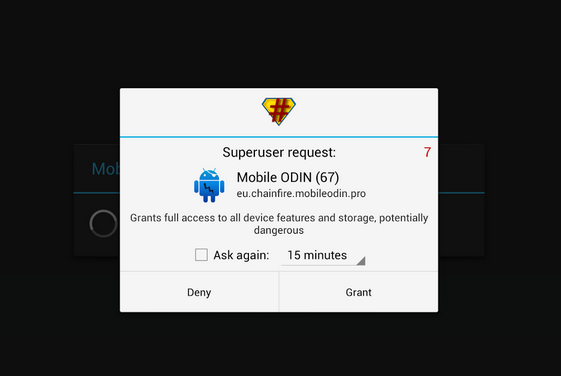
- It will ask you for SuperSu rights, tap “Grant”.
- It should show you Root Access Verified Now!
- That’s All!

That’s All with the recovery installation. In case you got any queries or face any difficulties regarding this post, please feel free to stop by the comment box below and let us know. We will get back to you as soon as possible. Thanks all.


my phone is now not booting up it got stuck on the animation wave window…
my xperia m dual c2004 is not booting up it on the animation window…plz help what to do…
@kratantjain:disqus please wipe cache and dalvik cache using cwm recovery and see if it boots up or not.
In my device (Xperia C2004) don’t have the option: Get it in Settings > Developer Options > USB Debugging mode.
It have only: Settings > Xperia connectivity > USB connectivity > USB connection mode > Media transfer mode (MTP) or Mas storage mode (MSC).
It is right?
@netbragas:disqus If you cannot find it in settings, then go to settings > about device > tap the build number for 7 times, it will enable the developer options. After that you can find developer options in settings and activate USB debugging.
Hi Usama.
I had started the process without the part of the debug mode, without activate USB debugging, it had not found the option and only after I read your answer. Even so, I installed Android ADB & Fastboot drivers and unlocked bootloader and I even succeed in installing the CVM, but when I restart, it does not leave the animated logo of Sony, even I using the option wipe cache and dalvik cache using cwm recovery. So I decided to use the flash tool and did a downgrade to version 4.2.2 (15.2.A.2.5). And now he’s usually running that version. 🙂
One question: if I use this guide here (for version 15.5.A.1.5 Firmware)
in the version I have installed on my device (version 15.2.A.2.5 Firmware) can work out root?
Sorry my English, because I speak Portuguese.
@netbragas:disqus Its okay about the English, I can understand it. You can give this recovery a shot for your device now, If it doesn’t work it will get stuck on the boot logo, you can flash stock firmware again. In case it doesn’t work, let me know I’ll find some other method and make the guide.
@netbragas:disqus That’s great. Thank you for the feedback and your welcome. Stay connected!
Hi, Usama.
Help me please!!
I’m following the whole procedure, but I’m having a problem. When I enter the command “fastboot flash boot boot.img” I get the message is .
The usb drive is usually installed on my first try, but the message displayed is as if the computer was not recognizing the device.
I get to this stage: the devixe lit with blue light and can not move phase.
What do i do?
Sorry my english.
I’m not getting! For when in the prompt screen message is “” appears. What do I do?
@joelsonisidro:disqus this is the connection issue. Make sure that you’ve installed all the drivers carefully, and your antivirus and firewall are disabled. Also make sure that your device is properly booted up in Fastboot mode.
I’m not getting. Help!
I tried on another computer and I’m still in the same situation.
The device is in the correct mode with the blue light, but when trying to make the “fastboot flash boot boot.img” command the message continues to appear . Open my Device Manager and saw that the windows S1Boot Fastboot drive is there, but with the message not installed, the windows are not automatically installing. You have a downloadable version?
@joelsonisidro:disqus what windows are you using? Let me know, I’ll try to resolve it.
Windows 8.1 Pro.
I’m grateful for helping me
Usama, I managed to force the installation of the drive, the device is now recognized, but now I encounter this error (http://www.tickimg.com.br/uploads/_erro.jpg). What should I do?
@joelsonisidro:disqus Did you unlock the bootloader of your device?
Quando você estava no processo de instalação, ocorreu alguma coisa estranha? Porque para mim, quando escrevo o comando “fastboot flash boot boot.img” aparece a mensagem . E agora não sei o que posso fazer!!
Sim Joelson, essa mensagem me apareceu também, mas foi por que os drivers não estavam instalados. Ai eu segui os passos do guia sobre a instalação do Flashtool e resolveu o problema. Faz ai e veja se consegue. Qualquer coisa post aqui. 😉
Usama, ffinally managed to install the cwm, but the device can not start, shows the logo of sony xperia and hangs showing the waves.
I have used the option wipe cache and wipe cache Dalvik using cwm recovery.
And now what do I do?
Joelson Isidro that’s probably because you unlocked bootloadr for the first time. Xperia M doesn’t boot up when unlocked for the first time. You will have to do a little hardwork. You will have to flash a stock firmware and then flash the CWM recovery again. In case you need the guide to flash stock firmware, here you go
https://techbeasts.com/2014/06/13/how-to-update-sony-xperia-m-dual-c2004c2005-to-latest-15-5-a-1-5-firmware/
Thank you!
I will do the procedure and return to say something.
Thanks for all the support, I managed successfully, perfect!
I have a question: if sony makes available new updates, I update normally and remain root? Or if update have to follow a new procedure, updating the cwm?
@joelsonisidro:disqus It is advisable not to update through OTA or PC companion, I haven’t tried that yet. However if you manage to get it updated, it will definitely wipe the root access, But you can always root it again because the methods come in quickly.
Thank you very much.
Should a future update, I use a new cwm? Or does this version even serve?
I have other small doubts. It all worked out, but I thought the slower startup, is this normal? And even with the firmware version 15.5.A.1.5 center application update sony is showing the notification to install this version, it is also normal?
Yup its normal. You don’t need to worry about anything.
usama my man .. this custom rom only for Xperia M C1904/C1905.. then why u wrote its for c 2005????
man .. after doing everything successfully .. my mobile keeps poping up the new software update and i´ve already done that.. why????
@omaratyea:disqus Just ignore that message, and force close the update checker.
@omaratyea:disqus that was a typo. I’ve fixed it. It is for C2004/C2005
every time i reboot my device in cwm it is asking me to fix root and reboot or no
is that common in all devices or any fault in my device?
@pavankothlapur:disqus did you try tapping that option? if you haven’t, go for it and let me know what happens next. I came across this issue for the first time.
Root access possibly lost.Fix?
THIS CAN NOT BE DONE
-No
-Yes – Fix root (/system/xbin/su)
if i choose no am facing root problems
if yes fix root no problems rooted as it was
That means you’re rooted now?
yes rooted but from very 1st rooting am seeing this while selecting reboot in cwm recovery
why like that ?
and is there any custom romr for c2004 with dual sim working ?
@pavankothlapur:disqus I’ll find a working ROM and make the guide very soon. Please stay connected.
and why that message on rebooting tru cwm ?
is there any way to remove cwm recovery in c2004 ?
@pavankothlapur:disqus you will have to flash stock firmware to get rid of the recovery now.
While trying to Install CWM 6.0.4.9 Recovery i encounter this error.
I am sure i unlocked boot-loader, enabled USB debugging mode on my device and i connected my xperia c2005 in fastboot mode.
” FAILED ”
i unlocked boot-loader but my phone is not formatted ??!
@disqus_ucs2tCoSN5:disqus This seems to be a connection issue, you will have to find out what’s causing this on your PC.
@disqus_ucs2tCoSN5:disqus try turning the USB debugging mode on or off.
whenever i flash the cwm kernel i receive FAILED . what’s the problem?
@geraldinelumabicenteno:disqus make sure that your bootloader is unlocked and also make sure that your device is properly connected.
@disqus_qxqTecNgKJ:disqus try clearing cache and dalvik cache. IF it doesn’t work, flash stock firmware, it will be fine.
Usama, I have a similar “waiting for device” issue with fastboot. Im running a Windowns 8.1 platform. Please help
@disqus_0zDgIr2J5p:disqus that’s a connection issue. Please see comments and find how others resolved it.
Sir,there is no download option for “XM4.3—–.img” in the link you provided,plz fix it, and thanks for this great share.
@dreaksekh:disqus the download is working fine. You’ve to click the second download button.
hi there…
I did the unlock bootloader and everything seems to be fine, no error message
Unplug the usb and when turn on the phone it got stuck in boot loop so remove the batery and enter fastboot mode again in order to flash the boot.img hoping that fix it in the end so I did that enter recovery mode and installed the SU update but when reboot the device it still stuck in the boot loop
I been trying what i have found (clean cache/data..) in others pages with no luck, i did install a recent version od the CWM but the no work out
two days now that I have a brick
please help!
@yaredi:disqus you will have to flash stock firmware on your device now. find the guide, it’s posted on our site. Use the search option at the top to locate it.
@dreaksekh:disqus you will have to flash stock firmware. Please find the guide on our site and flash it.
after completing PC steps my mobile screen switched on and i’ve installed supersu zip file. after pressing reboot my mobile doesnot show supersu dialog instead it starts and continously xperia arc coming. Please give your valuable advice. Waiting for your reply. Thanks and regards
@prabhube:disqus try clearing cache and dalvik cache. The SuperSu dialogue box will only appear when you open an application that requires root, try installing a root checker application for that. And let me know if your issue gets resolved or not.
@prabhube:disqus clear cache and dalvik cache from recovery.
@prabhube:disqus if this happened after unlocking bootloader straight away, then you need flash stock firmware first and then you will flash cwm.
After doing everything successfully…It says FAILED
Hey bro, it was a nice procedure but I was also stuck when I unlocked my boot loader for the first time; I flashed stock version 4.3 back in to it.
But again when I tried unlocked boot loader it stuck again. 😛
Its kind of a loop I’m into.
bootloader ki command run to ho jati h but phone on ni hora solution btao koi plz
loop me chla jata h phone
xperia vli theme chlti rhti h bs jo switch on hone pe chlti h
koi solution btao plz
@disqus_KdjVFMbBEP:disqus Flash a stock firmware on your phone to recovery it right away.
@usamamujtaba:disqus same problem here?? how to Flash a stock firmware on your phone to recovery it right away.? I discoonected the phone now adb not recognising it
hi usama plz sent . cmv 6recovery file direct download link. im so tired to download cmv. pplz sent worling download link my mail id
my mail id is “[email protected]”
https://techbeasts.com/how-unroot-restore-stock-firmware-sony-xperia/