Samsung recently rolled out Android 4.4.2 KitKat for it’s latest flagship Galaxy Note successor device, Galaxy Note 3. The new update packed up tons of performance enhancements, bug fixes, minor UI changes etc. The impact this update left on Android development is, it crashed the previous versions of ClockworkMod recovery and a new version was immediately needed after that. XDA senior member rolled out the new version of CWM recovery versioned as CWM 6.0.4.7 soon after the update, the new version works flawlessly with the KitKat firmware on Galaxy Note 3 variants.
So, you all probably know the worth of having a CWM or TWRP recovery installed and you would like to have to running on your Galaxy Note 3 with Android 4.4.2 KitKat atop, to overcome this need we will be going through the installation guide for the recovery. Before we head towards the installation instructions, we will first have a look on a brief intro of a custom recovery and also know why you should install it.
A custom recovery allows you to install custom roms, mods etc. Along with these, you can make a Nandroid backup, this helps you a lot as you can move back to the previous working state of your phone at any time you want if you have backed up your current system. In some cases, to root the phone you need to flash SuperSu.zip file in the custom recovery, having installed the recovery may help you while in some cases to install the recovery easily, you need to have the phone rooted. You can also wipe cache and dalvik cache of your phone using a custom recovery. One of the advantages is mounting the sdcards, this option is handy when you want to access your device’s internal memory while you’re in recovery mode.
-
- This guide is only for Samsung Galaxy Note 3, for the variants which are listed below. Before installing this, make sure that your device is listed below. Check your device’s model number in Settings > More > About Device.
- Download the file carefully for your device.
- Make sure that your device’s battery is charged over at least 60%. Highly recommended in order to prevent any mishap during the recovery installation process.
- Make sure that you backup your important media content, Contacts, Call Logs & Messages. This is highly recommended just in case something goes wrong and you need to reset your phone.
- Use only OEM data cable to establish connection between your phone and PC. Turn off your Anti Virus and Firewall to prevent any connection issues. Also enable USB debugging mode on your phone if you face connection issues.
- Make sure that your laptop has enough battery charged to perform the operations, if you’re using a PC then make sure that it has appropriate power supply.
- Recovery works well for Galaxy Note 3 running on all Android versions, no need to worry about the Android version.
- Follow the installation instructions carefully, proceed only if you’ve read properly.
Disclaimer: The methods involved in flashing custom roms and rooting your phone is highly custom and may result in bricking your device, and has nothing to do with Google or the device manufacturer that is SAMSUNG in our case. Also rooting your device will void its warranty and you will be no longer eligible for any kind of free device services by the manufacturers/warranty providers. In case of any mishap we may not be held responsible. Follow these instructions to the letter to avoid any mishap or bricking. Make sure that whatever you do, you are doing it at your own responsibility.
Pre – Requisites:
Download CWM Recovery for your device:
- Download CWM 6.0.4.7 for Galaxy Note 3 SM-900
- Download CWM 6.0.4.7 for Galaxy Note 3 SM-900S
- Download CWM 6.0.4.7 for Galaxy Note 3 SM-900W8
- Download CWM 6.0.4.7 for Galaxy Note 3 SM-9005
How to Install CWM 6.0.4.7 Recovery on Galaxy Note 3:
- Download the file for your variant carefully.
- Open Odin3.exe.
- Put your phone in download mode, to do so, turn it off completely. Now turn it on by pressing and holding Volume Down + Home Button + Power Key, you should see a warning now, press Volume Up to continue.
- In case the download mode method doesn’t work for your device, try one of the methods from this guide.
- Connect your phone to your PC.
- The ID:COM box in Odin should turn blue now, that means your phone is connected properly in download mode.
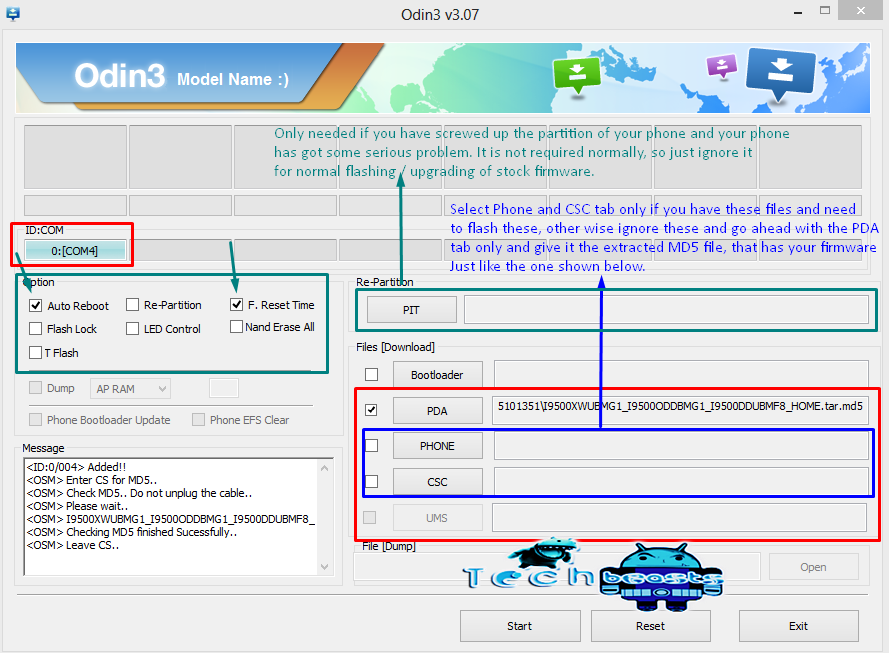
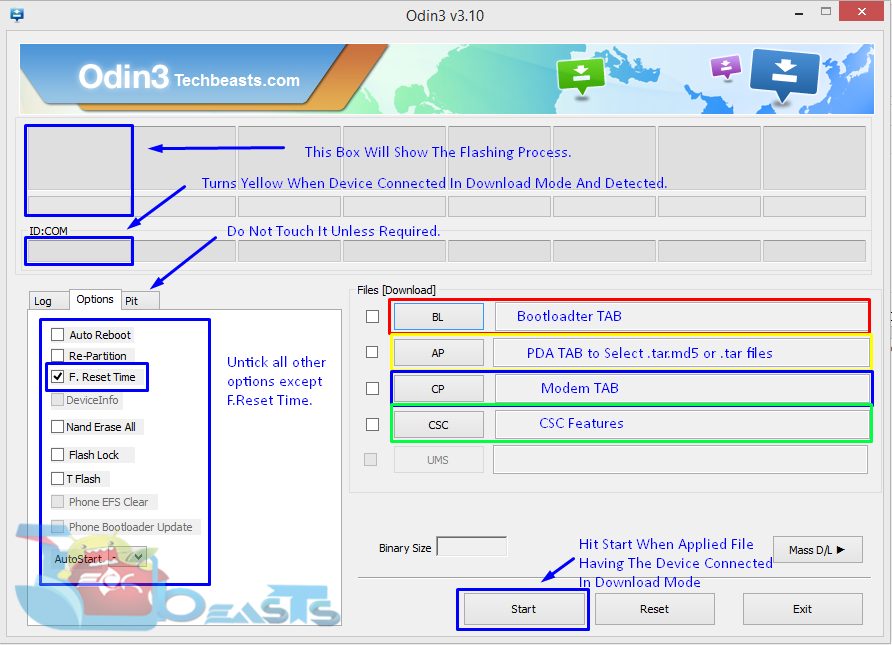
- Click the PDA tab in Odin and select the downloaded Recovery.tar file and let it load. Your Odin should look exactly as shown below, make sure that no extra options are selected.
- Hit start now and sit back, it will take a few seconds to flash the recovery and your device will reboot.
- Press and hold Volume Up + Home Button + Power Key to access the CWM 6 Recovery that you just installed.
- You can backup your current ROM and do a lot of other things using the options in CWM 6 Recovery.
- That’s All.


![Download Odin 3.13.1 for PC [Odin3 v3.13.1] Odin 3.13.1](https://techbeasts.com/wp-content/uploads/2018/03/Screenshot_11.png)


